最近一直在断断续续的搞一些简单的动画效果,感觉效果还不错,其中也有很多道友对效果的实现提出了有意义的建议(十分感谢,等抽出时间会进行全面的修改),
1.双曲线波浪动画(http://www.jianshu.com/p/7db295fd38eb)
2.环形倒计时动画(http://www.jianshu.com/p/d1d16dff33c9)
3.仪表式数字跳动动画(http://www.jianshu.com/p/0d6f50385861)
进入正题
一, 对于折线图很容易明白 那就直接上效果啦
6月-29-2016 13-56-52.gif
1.老套路 先说一下思路,看效果 就很容易知道这个里面包括的大概技能点
贝塞尔曲线 和 背景颜色填充
1.划线的方法有很多 我采用的是CGContextRef画坐标轴
2.然后CAGradientLayer 添加背景渐变颜色 和 贝塞尔画横坐标线
思路大概就这些!!!!!
二, 功能实现
创建Uiview 就不说了
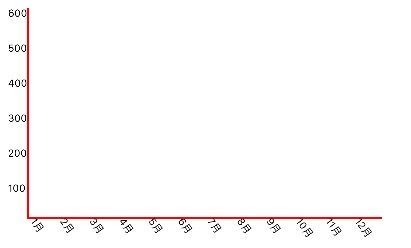
1.先话坐标轴
- (void)drawRect:(CGRect)rect{
       /*******画出坐标轴********/
    CGContextRef context = UIGraphicsGetCurrentContext();
    CGContextSetLineWidth(context, 2.0);
    CGContextSetRGBStrokeColor(context, 1, 0, 0, 1);
    CGContextMoveToPoint(context, bounceX, bounceY);
    CGContextAddLineToPoint(context, bounceX, rect.size.height - bounceY);
    CGContextAddLineToPoint(context,rect.size.width -  bounceX, rect.size.height - bounceY);
    CGContextStrokePath(context);

      }
接着在横竖坐标轴上创建数据
#pragma mark 创建x轴的数据
- (void)createLabelX{
    CGFloat  month = 12;
    for (NSInteger i = 0; i < month; i++) {
        UILabel * LabelMonth = [[UILabel alloc]initWithFrame:CGRectMake((self.frame.size.width - 2*bounceX)/month * i + bounceX, self.frame.size.height - bounceY + bounceY*0.3, (self.frame.size.width - 2*bounceX)/month- 5, bounceY/2)];
 //       LabelMonth.backgroundColor = [UIColor greenColor];
        LabelMonth.tag = 1000 + i;
        LabelMonth.text = [NSString stringWithFormat:@"%ld月",i+1];
        LabelMonth.font = [UIFont systemFontOfSize:10];
        LabelMonth.transform = CGAffineTransformMakeRotation(M_PI * 0.3);
        [self addSubview:LabelMonth];
    }

}
#pragma mark 创建y轴数据
- (void)createLabelY{
    CGFloat Ydivision = 6;
    for (NSInteger i = 0; i < Ydivision; i++) {
        UILabel * labelYdivision = [[UILabel alloc]initWithFrame:CGRectMake(0, (self.frame.size.height - 2 * bounceY)/Ydivision *i + bounceX, bounceY, bounceY/2.0)];
     //   labelYdivision.backgroundColor = [UIColor greenColor];
        labelYdivision.tag = 2000 + i;
        labelYdivision.text = [NSString stringWithFormat:@"%.0f",(Ydivision - i)*100];
         labelYdivision.font = [UIFont systemFontOfSize:10];
        [self addSubview:labelYdivision];
    }
}
/*
这两函数在 view的初始化方法里面调用
- (instancetype)initWithFrame:(CGRect)frame{
    if (self = [super initWithFrame:frame]) {
        self.backgroundColor = [UIColor whiteColor];
        [self createLabelX];
        [self createLabelY];
          }
    return self;
}

*/
看效果如下:
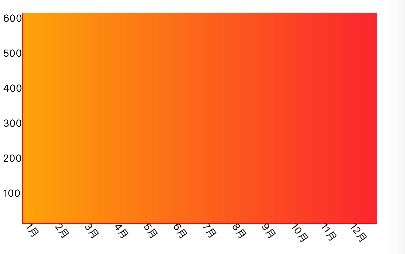
2.创建做颜色渐变背景
@interface ZXView ()
@property (nonatomic, strong) CAShapeLayer *lineChartLayer;
@property (nonatomic, strong)UIBezierPath * path1;
/** 渐变背景视图 */
@property (nonatomic, strong) UIView *gradientBackgroundView;
/** 渐变图层 */
@property (nonatomic, strong) CAGradientLayer *gradientLayer;
/** 颜色数组 */
@property (nonatomic, strong) NSMutableArray *gradientLayerColors;
@end

- (void)drawGradientBackgroundView {
    // 渐变背景视图(不包含坐标轴)
    self.gradientBackgroundView = [[UIView alloc] initWithFrame:CGRectMake(bounceX, bounceY, self.bounds.size.width - bounceX*2, self.bounds.size.height - 2*bounceY)];
    [self addSubview:self.gradientBackgroundView];
    /** 创建并设置渐变背景图层 */
    //初始化CAGradientlayer对象,使它的大小为渐变背景视图的大小
    self.gradientLayer = [CAGradientLayer layer];
    self.gradientLayer.frame = self.gradientBackgroundView.bounds;
    //设置渐变区域的起始和终止位置(范围为0-1),即渐变路径
    self.gradientLayer.startPoint = CGPointMake(0, 0.0);
    self.gradientLayer.endPoint = CGPointMake(1.0, 0.0);
    //设置颜色的渐变过程
    self.gradientLayerColors = [NSMutableArray arrayWithArray:@[(__bridge id)[UIColor colorWithRed:253 / 255.0 green:164 / 255.0 blue:8 / 255.0 alpha:1.0].CGColor, (__bridge id)[UIColor colorWithRed:251 / 255.0 green:37 / 255.0 blue:45 / 255.0 alpha:1.0].CGColor]];
    self.gradientLayer.colors = self.gradientLayerColors;
    //将CAGradientlayer对象添加在我们要设置背景色的视图的layer层
    [self.gradientBackgroundView.layer addSublayer:self.gradientLayer];
     //[self.layer addSublayer:self.gradientLayer];
}
/* 这个方法还是再初始化方法里面调用
- (instancetype)initWithFrame:(CGRect)frame{
    if (self = [super initWithFrame:frame]) {
     //   self.my
        self.backgroundColor = [UIColor whiteColor];

        [self createLabelX];
        [self createLabelY];
        [self drawGradientBackgroundView];
       // [self setLineDash];
          }
    return self;
}

*/
如果你在纠结于 渐变颜色 的实现 或者 各个图层是怎么加的 还有尺寸 怎么搞 ,我想我不会说的太多 (因为这需要亲自实践一下,原因二 我也说不太明白)
3.接下来画虚线
#pragma mark 添加虚线
- (void)setLineDash{

    for (NSInteger i = 0;i < 6; i++ ) {
        CAShapeLayer * dashLayer = [CAShapeLayer layer];
          dashLayer.strokeColor = [UIColor whiteColor].CGColor;
        dashLayer.fillColor = [[UIColor clearColor] CGColor];
        // 默认设置路径宽度为0,使其在起始状态下不显示
        dashLayer.lineWidth = 1.0;


        UILabel * label1 = (UILabel*)[self viewWithTag:2000 + i];//获取x轴数据label的位置根据其位置画横虚线

        UIBezierPath * path = [[UIBezierPath alloc]init];
        path.lineWidth = 1.0;
        UIColor * color = [UIColor blueColor];

        [color set];
 [path moveToPoint:CGPointMake( 0, label1.frame.origin.y - bounceY)];
 [path addLineToPoint:CGPointMake(self.frame.size.width - 2*bounceX,label1.frame.origin.y - bounceY)];
        CGFloat dash[] = {10,10};
        [path setLineDash:dash count:2 phase:10];
        [path stroke];
        dashLayer.path = path.CGPath;
        [self.gradientBackgroundView.layer addSublayer:dashLayer];
         }
}
/* 这个方法还是再初始化方法里面调用
- (instancetype)initWithFrame:(CGRect)frame{
    if (self = [super initWithFrame:frame]) {

        self.backgroundColor = [UIColor whiteColor];

        [self createLabelX];
        [self createLabelY];
        [self drawGradientBackgroundView];
        [self setLineDash];
          }
    return self;
}

*/
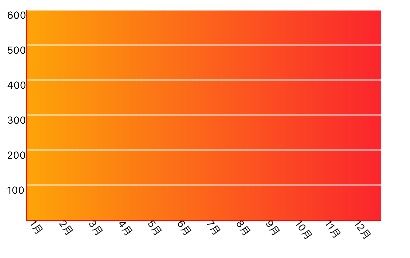
效果如下:
可以看出来 画出来的虚线 并不是虚线 在这个我也很疑问 ?是上面画虚线的地方写错啦 么? 该怎么写 希望道友告知!!!
4.接下来就是最主要的 画折线
#pragma mark 画折线图
- (void)dravLine{

    UILabel * label = (UILabel*)[self viewWithTag:1000];//根据横坐标上面的label 获取直线关键点的x 值
    UIBezierPath * path = [[UIBezierPath alloc]init];
    path.lineWidth = 1.0;
    self.path1 = path;
    UIColor * color = [UIColor greenColor];
    [color set];
    [path moveToPoint:CGPointMake( label.frame.origin.x - bounceX, (600 -arc4random()%600) /600.0 * (self.frame.size.height - bounceY*2 )  )];

    //创建折现点标记
    for (NSInteger i = 1; i< 12; i++) {
        UILabel * label1 = (UILabel*)[self viewWithTag:1000 + i];
        CGFloat  arc = arc4random()%600;  //折线点目前给的是随机数
        [path addLineToPoint:CGPointMake(label1.frame.origin.x - bounceX,  (600 -arc) /600.0 * (self.frame.size.height - bounceY*2 ) )];
        UILabel * falglabel = [[UILabel alloc]initWithFrame:CGRectMake(label1.frame.origin.x , (600 -arc) /600.0 * (self.frame.size.height - bounceY*2 )+ bounceY  , 30, 15)];
      //  falglabel.backgroundColor = [UIColor blueColor];
        falglabel.tag = 3000+ i;
        falglabel.text = [NSString stringWithFormat:@"%.1f",arc];
        falglabel.font = [UIFont systemFontOfSize:8.0];
        [self addSubview:falglabel];
    }
    // [path stroke];

    self.lineChartLayer = [CAShapeLayer layer];
    self.lineChartLayer.path = path.CGPath;
    self.lineChartLayer.strokeColor = [UIColor whiteColor].CGColor;
    self.lineChartLayer.fillColor = [[UIColor clearColor] CGColor];
    // 默认设置路径宽度为0,使其在起始状态下不显示
    self.lineChartLayer.lineWidth = 0;
    self.lineChartLayer.lineCap = kCALineCapRound;
    self.lineChartLayer.lineJoin = kCALineJoinRound;

    [self.gradientBackgroundView.layer addSublayer:self.lineChartLayer];//直接添加导视图上
 //   self.gradientBackgroundView.layer.mask = self.lineChartLayer;//添加到渐变图层

}
接下来就应该是 实现划线的动画啦啦
#pragma mark 点击重新绘制折线和背景
- (void)touchesBegan:(NSSet *)touches withEvent:(UIEvent *)event{
    countq++;
    if (countq%2 == 0) {
//点一下删除折线 和转折点数据
        [self.lineChartLayer removeFromSuperlayer];
        for (NSInteger i = 0; i < 12; i++) {
            UILabel * label = (UILabel*)[self viewWithTag:3000 + i];
            [label removeFromSuperview];
        }
    }else{

        [self dravLine];

    self.lineChartLayer.lineWidth = 2;
    CABasicAnimation *pathAnimation = [CABasicAnimation animationWithKeyPath:@"strokeEnd"];
    pathAnimation.duration = 3;
    pathAnimation.repeatCount = 1;
    pathAnimation.removedOnCompletion = YES;
    pathAnimation.fromValue = [NSNumber numberWithFloat:0.0f];
    pathAnimation.toValue = [NSNumber numberWithFloat:1.0f];
    // 设置动画代理,动画结束时添加一个标签,显示折线终点的信息
    pathAnimation.delegate = self;
    [self.lineChartLayer addAnimation:pathAnimation forKey:@"strokeEnd"];
        //[self setNeedsDisplay];
    }
}
那么好到这里就完全完毕了 ,看到这里不免感觉好简单,
画坐标轴 >>>>画背景 >>>>划线 >>>>动起来 就是四部而已.但是实现起来去会遇到很多问题(尤其是第一次搞得道友).接下来有时间会搞成可以直接调用的类 方便以后 使用.
道友多多指教!!!!!(稍后上传代码)

更新: 第二篇的地址http://www.jianshu.com/p/1c6a119149bd
本片的git地址([https://git.oschina.net/GAOZEJIAN/zhexiantu_one.git](https://git.oschina.net/GAOZEJIAN/zhexiantu_one.git))

