公司项目里需要一款柱状图,在网上找了好多版本都没有适合项目要求的,最后只能自己写一个了(还是那句话,人都是逼出来的!!)。
先看下效果吧

ZP柱状图.gif
(十分抱歉一些同学的期待,不好意思。刚把demo整理了一下 发上来了 。:https://github.com/ZPCoder/ZPBarView)
就是上的效果,其实不难,等我把原理讲清楚后,你们就可以任意设计自己需要的效果了。
简单的叙述一下我的思路和原理吧
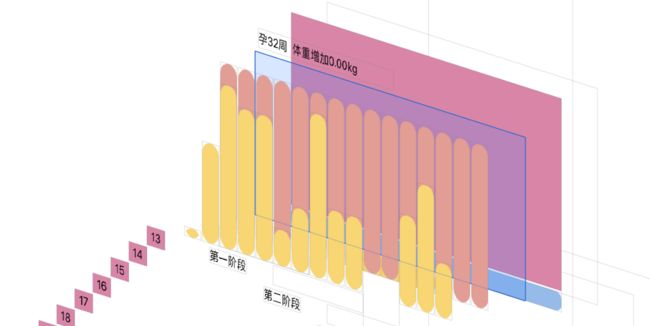
屏幕快照 2016-11-03 12.36.21.png
1、可以上面图层分解中和动图中可以看到,最底层是一个滚动视图、通过下边的选择按钮控制视图的滚动(按钮的选择效果是简单的Uiview动画效果)。
2、创建三个承载柱状图的contentView(就是淡蓝色的那个).
3、创建柱状图的背景柱(就是黄色柱状下边的那一层视图,为了使得柱状体更好看和显示最大值的作用-。-!)
4、就是创建显示柱状图(黄色柱状,其实是按钮做了个圆角处理,为了实现点击效果)
5、就是这盖面的创建了(就是上边的淡蓝色柱状,会随着点击而移动位置)
(思路就是这样,用最简单的基础控件时间太特效的柱状图)
6、最后就是大神勿喷,菜鸟的努力,求虐,求指点!
一、创建最底层滚动视图
//创建底层滚动视图
-(void)createScrollView{

    self.scrollView  =[[UIScrollView alloc]initWithFrame:CGRectMake(0, 0, kWIDTH, kHEIGHT-25)];

    self.scrollView.contentSize = CGSizeMake(kWIDTH*3, 0);
    self.scrollView.pagingEnabled =YES;
    self.scrollView.bounces = NO;
    self.scrollView.scrollEnabled = NO;
    [self addSubview:self.scrollView];
    self.scrollView.backgroundColor = [UIColor colorWithRed:0.8471 green:0.5216 blue:0.6588 alpha:1.0];
}
二、创建滚动视图下边选择条
(就是创建下边三个选择按钮,动画效果在点击事件里边实现)
// 创建选择条
-(void)createSelectView{
    //    滚动视图下边的背景条
    UIView *backView = [[UIView alloc]initWithFrame:CGRectMake(0, kHEIGHT-23, kWIDTH, 20)];
    backView.backgroundColor = [UIColor colorWithRed:0.5882 green:0.7333 blue:0.9098 alpha:1.0];
    backView.layer.cornerRadius = 8;
    backView.layer.masksToBounds =YES;
    [self addSubview:backView];

    //    创建选择动画滑条
    self.selectView = [[UIView alloc]initWithFrame:CGRectMake(0,0, kWIDTH/3, 20)];
    self.selectView.backgroundColor = [UIColor colorWithRed:0.9686 green:0.8392 blue:0.451 alpha:1.0];
    self.selectView.layer.cornerRadius =8;
    self.selectView.layer.masksToBounds = YES;

    [backView addSubview:self.selectView];


    //    创建选择按钮
    self.firtBtn = [UIButton buttonWithType:(UIButtonTypeSystem)];
    self.firtBtn.frame = CGRectMake(0, 0, kWIDTH/3, 20);
    [self.firtBtn setTitle:@"第一阶段" forState:(UIControlStateNormal)];
    [self.firtBtn setTitleColor:[UIColor blackColor] forState:(UIControlStateNormal)];
    self.firtBtn.titleLabel.font = [UIFont systemFontOfSize:autoScaleW(13)];
    [self.firtBtn addTarget:self action:@selector(selectBtnAction:) forControlEvents:(UIControlEventTouchUpInside)];
    [backView addSubview:self.firtBtn];

    self.secondBtn = [UIButton buttonWithType:(UIButtonTypeSystem)];
    self.secondBtn.frame = CGRectMake(kWIDTH/3, 0, kWIDTH/3, 20);
    [self.secondBtn setTitle:@"第二阶段" forState:(UIControlStateNormal)];
    [self.secondBtn setTitleColor:[UIColor blackColor] forState:(UIControlStateNormal)];
    self.secondBtn.titleLabel.font = [UIFont systemFontOfSize:autoScaleW(13)];
    [self.secondBtn addTarget:self action:@selector(selectBtnAction:) forControlEvents:(UIControlEventTouchUpInside)];
    [backView addSubview:self.secondBtn];

    self.thirdBtn = [UIButton buttonWithType:(UIButtonTypeSystem)];
    self.thirdBtn.frame = CGRectMake(kWIDTH/3*2, 0, kWIDTH/3, 20);
    [self.thirdBtn setTitle:@"第三阶段" forState:(UIControlStateNormal)];
    [self.thirdBtn setTitleColor:[UIColor blackColor] forState:(UIControlStateNormal)];
    self.thirdBtn.titleLabel.font = [UIFont systemFontOfSize:autoScaleW(13)];
    [self.thirdBtn addTarget:self action:@selector(selectBtnAction:) forControlEvents:(UIControlEventTouchUpInside)];
    [backView addSubview:self.thirdBtn];

}
三、就是开始创建柱状图了
(我是三个分区分开创建的,因为每个分区的数量不一样,宽度也不一样,在这里值展示一个分区的创建代码、其他两个分区都类似)
//创建第一阶段柱状图
-(void)createFirstBarView{

    self.firstView =[[UIView alloc]initWithFrame:CGRectMake(0, 30, kWIDTH, kHEIGHT-55)];
    [self.scrollView addSubview:self.firstView];

    //    创建背景柱状图
    CGFloat backView_width = (kWIDTH-2*13)/12;
    for (int i = 0 ; i< 12; i++) {
        UIView *backView = [[UIView alloc]initWithFrame:CGRectMake(2+(2+backView_width)*i, 0, backView_width, kHEIGHT-55)];
        backView.backgroundColor = [UIColor colorWithRed:0.8863 green:0.6157 blue:0.5843 alpha:1.0];
        backView.layer.cornerRadius=backView_width/2;
        backView.layer.masksToBounds = YES;
        [self.firstView addSubview:backView];

    }
    //    绘制出柱状图
    CGFloat maxValue = 0;
    CGFloat minValue = 100;

    for (int i=0; i<12; i++) {

        if (maxValue < [self.weightChangeArr[i] floatValue]) {
            maxValue = [self.weightChangeArr[i] floatValue];
        }
        if (minValue > [self.weightChangeArr[i] floatValue]) {
            minValue = [self.weightChangeArr[i] floatValue];
        }
    }

    CGFloat oneValue = (kHEIGHT -55) /maxValue;

    for (int i = 0; i<12; i++) {


        CGFloat Y_value =kHEIGHT-55 -[self.weightChangeArr[i] floatValue] *oneValue ;

        UIButton * BarButton = [UIButton buttonWithType:(UIButtonTypeSystem)];
        BarButton.frame = CGRectMake(2+(2+backView_width)*i, Y_value, backView_width, [self.weightChangeArr[i] floatValue] *oneValue);
        BarButton.layer.cornerRadius = backView_width/2;
        BarButton.layer.masksToBounds =YES;
        BarButton.tag =1500+i;
        [BarButton setTitleColor:[UIColor colorWithRed:0.9686 green:0.8392 blue:0.451 alpha:1.0] forState:(UIControlStateNormal)];
        [BarButton setBackgroundColor:[UIColor colorWithRed:0.9686 green:0.8392 blue:0.451 alpha:1.0]];
        [BarButton setTitle:self.weightChangeArr[i] forState:(UIControlStateHighlighted)];
        [BarButton addTarget:self action:@selector(barBtnAction:) forControlEvents:(UIControlEventTouchUpInside)];

        [self.firstView addSubview:BarButton];

    }
    //    创建横坐标轴
    for (int i=0; i<12; i++) {
        UILabel *weekLabel = [[UILabel alloc]initWithFrame:CGRectMake(kWIDTH/12*i, self.firstView.frame.size.height-20, kWIDTH/12, 20)];
        weekLabel.text =[NSString stringWithFormat:@"%d",i+1];
        weekLabel.backgroundColor =[UIColor colorWithRed:0.8471 green:0.5216 blue:0.6588 alpha:1.0];
        weekLabel.textAlignment =NSTextAlignmentCenter;
        weekLabel.font = [UIFont systemFontOfSize:autoScaleW(13)];
        [self.firstView addSubview:weekLabel];
    }
    //    创建渐变这盖面
    [self drawGradientBackgroundViewWithFram:CGRectMake(2, 0, backView_width, kHEIGHT-55)];

    self.showLabel.text =[NSString stringWithFormat:@"孕1周  体重增加%.2fkg",[self.weightChangeArr[0] floatValue]];


}
四、就是绘制渐变图层了,就是选中柱状图后移动过来的遮盖面
//绘画渐变图层
- (void)drawGradientBackgroundViewWithFram:(CGRect)fram {


    CGRect newFram = CGRectMake(fram.origin.x, 0, fram.size.width, kHEIGHT-45);
    // 渐变背景视图(不包含坐标轴)
    self.gradientBackgroundView = [[UIView alloc] initWithFrame:newFram];

    [self.scrollView addSubview:self.gradientBackgroundView];
    /** 创建并设置渐变背景图层 */
    //初始化CAGradientlayer对象,使它的大小为渐变背景视图的大小
    self.gradientLayer = [CAGradientLayer layer];
    self.gradientLayer.frame = self.gradientBackgroundView.bounds;
    //设置渐变区域的起始和终止位置(范围为0-1),即渐变路径
    self.gradientLayer.startPoint = CGPointMake(1.0, 0.0);
    self.gradientLayer.endPoint = CGPointMake( 1.0, 1.0);
    //设置颜色的渐变过程
    self.gradientLayer.colors = [NSMutableArray arrayWithArray:@[(__bridge id)[UIColor colorWithRed:150.0 / 255.0 green:187.0 / 255.0 blue:232.0 / 255.0 alpha:0.3].CGColor, (__bridge id)[UIColor colorWithRed:149.0 / 255.0 green:185.0 / 255.0 blue:229.0 / 255.0 alpha:1.0].CGColor]];
    //将CAGradientlayer对象添加在我们要设置背景色的视图的layer层
    [self.gradientBackgroundView.layer addSublayer:self.gradientLayer];
    //[self.layer addSublayer:self.gradientLayer];
}
五、重点就是按钮的点击事件了
//选择阶段按钮的点击事件
-(void)selectBtnAction:(UIButton *)sender{

    CGFloat offset_x = sender.frame.origin.x;
    //    小滑条动画
    [UIView animateWithDuration:0.5 animations:^{

        self.selectView.frame =CGRectMake(offset_x, 0, kWIDTH/3, 20);

    }];

    //    滚动视图变化
    if (offset_x < 10) {
        [self.scrollView setContentOffset:CGPointMake(0, 0) animated:YES];
        for (int i = 0; i<12; i++) {

            UIButton *btn = (UIButton *)[self viewWithTag:1500+i];
            CGRect fram = btn.frame;
            CGSize size = fram.size;
            CGPoint point = fram.origin;
            btn.frame = CGRectMake(point.x, kHEIGHT-55, size.width, size.height);

            [UIView animateWithDuration:1 animations:^{

                btn.frame =fram;
            }];

        }


    }else if (offset_x < kWIDTH/3+20){

        [self.scrollView setContentOffset:(CGPointMake(kWIDTH, 0)) animated:YES];
        for (int i = 12; i<27; i++) {

            UIButton *btn = (UIButton *)[self viewWithTag:1500+i];
            CGRect fram = btn.frame;
            CGSize size = fram.size;
            CGPoint point = fram.origin;
            btn.frame = CGRectMake(point.x, kHEIGHT-55, size.width, size.height);

            [UIView animateWithDuration:1 animations:^{

                btn.frame =fram;


            }];

        }

    }else if (offset_x < kWIDTH/3*2+20){

        [self.scrollView setContentOffset:(CGPointMake(kWIDTH*2, 0)) animated:YES];
        for (int i = 27; i<40; i++) {

            UIButton *btn = (UIButton *)[self viewWithTag:1500+i];
            CGRect fram = btn.frame;
            CGSize size = fram.size;
            CGPoint point = fram.origin;
            btn.frame = CGRectMake(point.x, kHEIGHT-55, size.width, size.height);

            [UIView animateWithDuration:1 animations:^{

                btn.frame =fram;
            }];

        }
    }


}


//柱状图数据柱的点击事件

-(void )barBtnAction:(UIButton *)sender{

    NSInteger i = sender.tag - 1500+1;

    CGFloat sender_wight = sender.frame.size.width;

    CGFloat weightChangeVlue = [sender.titleLabel.text floatValue];

    self.showLabel.text =[NSString stringWithFormat:@"孕%ld周  体重增加%.2fkg",i,weightChangeVlue];

    //    判断父视图是第几阶段
    UIView *view =  [ sender superview];
    //    移动遮盖面
    if (view.frame.origin.x <10) {

        [UIView animateWithDuration:0.4 animations:^{

            self.gradientBackgroundView.frame =CGRectMake(sender.frame.origin.x, 0, sender_wight, kHEIGHT-45);
            self.gradientLayer.frame = self.gradientBackgroundView.bounds;

        }];

    }else if (view.frame.origin.x
这是初步简单的的代码步骤示意,之后我会修改并跟新。
求虐、求指点、dome:https://github.com/ZPCoder/ZPBarView。