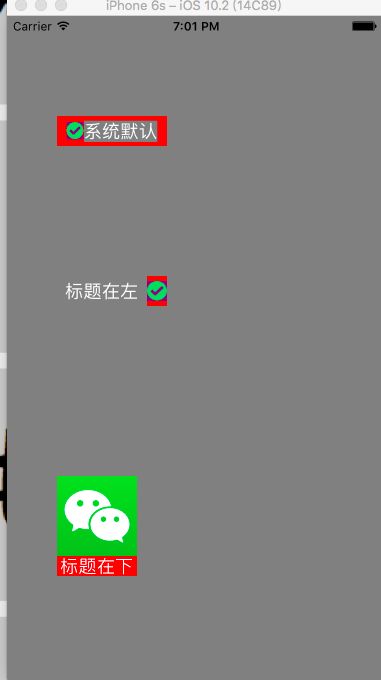
关于UIButton大家都很熟悉,系统默认的样式,是image在左,title在右的,如下图所示:
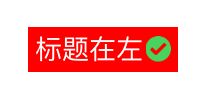
但是,很多情况下UI的设计可不是这么样的,最常用的是image在右边,title在左的button,和类似分享页面的那种上面是image,下面是title的button;如下图所示:
笔者每次需要这种需求的时候,都是查很多资料,看了一些不痛不痒的介绍,然后再很复杂的实现;效果暂且不说,耽误了大量的时间,所以,花点时间研究了一下这种效果实现,在这里总结一下:
这里,笔者介绍两种实现的方式:
一种是通过对系统的UIButton进行扩展(category)demo1
一种是通过继承自UIButtondemo2,自定义:
1.对UIButton扩展(category)
这种方式主要是用到了UIButton的下面两个属性:
@property(nonatomic) UIEdgeInsets titleEdgeInsets; // default is UIEdgeInsetsZero
@property(nonatomic) UIEdgeInsets imageEdgeInsets; // default is UIEdgeInsetsZero
下面以设置为title在左,image在右为例进行介绍:
首先来看一下这两个属性的类型:
typedef struct UIEdgeInsets {
    CGFloat top, left, bottom, right;  // specify amount to inset (positive) for each of the edges. values can be negative to 'outset'
} UIEdgeInsets;
他有四个参数: top left bottom right表示上左下右的偏移量,其含义为:
top : 为正数的时候,是往下偏移,为负数的时候往上偏移;
left : 为正数的时候往右偏移,为负数的时候往左偏移;
bottom : 为正数的时候往上偏移,为负数的时候往下偏移;
right :为正数的时候往左偏移,为负数的时候往右偏移;
回过头来看这两个属性titleEdgeInsets就是设置title的偏移量,imageEdgeInsets就是设置image的偏移量;
那么问题来了,怎样设置这个偏移量呢?很多介绍这种方式的使用的偏移量的都是固定的值(但是这些值是从哪里参考而来并没有说明),一旦你的button的frame和他介绍的不一样,就需要多次修改,以找到最合适的偏移量,看得云里雾里不说,调整偏移量也花费了很多时间;经过笔者的一些测试,发现还是有些公共的东西可以使用的:
相信大家第一个想到的就是UIButton的titleLabel和imageView的frame;所以,首先获取他们的size:
CGSize titleSize = button.titleLabel.bounds.size;
CGSize imageSize = button.imageView.bounds.size;
然后设置他们各自偏移量:
button.imageEdgeInsets = UIEdgeInsetsMake(0,titleSize.width, 0, -titleSize.width);
button.titleEdgeInsets = UIEdgeInsetsMake(0, -imageSize.width, 0, imageSize.width);
这两个属性的默认值都是0,所以,在不需要偏移的方向上,偏移量设置为0即可,那么,怎么知道哪个方向需要偏移,哪个方向不需要偏移呢?
其实,很简单,只需要仔细观察,偏移前(系统默认布局)和偏移后(你想要的布局)有哪些变化:
对于image:由左边移动到右边,可知,上下不变,左右偏移,即image的left和right变化;
对于title:由右边移动到左边,同样是上下不变,左右偏移,即title的left和right变化;
清楚了哪些方向上有变化,接下来就是变化多少的问题了:
因为要把image移动到button的右边,需要往右移动,所以imageEdgeInsets距左边界(left)的偏移量需要设置为标题的宽度,即:titleSize.width,右边的偏移量(right)同样是titleSize.width,但是应该是负的,即:titleSize.width;其他方向没有移动,直接设为默认值0;
同理,title需要往左移动,需要设置titleEdgeInsets距离左边界(left)的偏移量为负的image的宽度,即:-imageSize.width,此时title距离右边界的偏移量(right)就不是0了,而应该是image的宽度,即:imageSize.width;
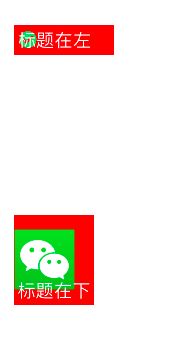
设置完后,看一下效果,似乎并不是预想的那样:
回头仔细看了下设置,逻辑上似乎并没有错误,那是哪儿出了问题呢?仔细查找后找到了问题,因为这时获取到的titleSize的值为0:
- (void)LZSetbuttonType:(LZCategoryType)lzType {

    //需要在外部修改标题背景色的时候将此代码注释,注意这行代码确保了titleLabel和imageview的偏移能够到达指定位置
//       self.titleLabel.backgroundColor = [UIColor darkGrayColor];
//       self.imageView.backgroundColor = [UIColor yellowColor];

    CGSize titleSize = self.titleLabel.bounds.size;
    NSLog(@"titleSize.height = %f,titleSize.width = %f",titleSize.height,titleSize.width);
    CGSize imageSize = self.imageView.bounds.size;
    CGFloat interval = 1.0;

    if (lzType == LZCategoryTypeLeft) {
        /*
         UIEdgeInsetsMake(CGFloat top, CGFloat left, CGFloat bottom, CGFloat right)
         top : 为正数的时候,是往下偏移,为负数的时候往上偏移;
         left : 为正数的时候往右偏移,为负数的时候往左偏移;
         bottom : 为正数的时候往上偏移,为负数的时候往下偏移;
         right :为正数的时候往左偏移,为负数的时候往右偏移;
        */
        [self setImageEdgeInsets:UIEdgeInsetsMake(0,titleSize.width + interval, 0, -(titleSize.width + interval))];

        [self setTitleEdgeInsets:UIEdgeInsetsMake(0, -(imageSize.width + interval), 0, imageSize.width + interval)];

    } else if(lzType == LZCategoryTypeBottom) {

        [self setImageEdgeInsets:UIEdgeInsetsMake(0,0, titleSize.height + interval, -(titleSize.width))];
        [self setTitleEdgeInsets:UIEdgeInsetsMake(imageSize.height + interval, -(imageSize.width), 0, 0)];
    }
}
打印结果如下:
2017-02-08 10:40:06.020 LZButtonCategory[5040:359483] titleSize.height =
 0.000000,titleSize.width = 0.000000
将代码片段中的注释内容
// 需要在外部修改标题背景色的时候将此代码注释,注意这行代码确保了titleLabel和imageview的偏移能够到达指定位置
self.titleLabel.backgroundColor = self.backgroundColor;
self.imageView.backgroundColor = self.backgroundColor;
放开后发现:
2017-02-08 10:42:29.640 LZButtonCategory[5058:361026] titleSize.height =
 21.500000,titleSize.width = 73.500000
这样设置之后,基本能够实现需求了,但是子控件之间是有间隙的,这里我设置了1像素的宽度:
CGFloat interval = 1.0;
然后设置imageEdgeinsets
button.imageEdgeInsets = UIEdgeInsetsMake(0,titleSize.width + interval, 0, -(titleSize.width + interval));
button.titleEdgeInsets = UIEdgeInsetsMake(0, -(imageSize.width + interval), 0, imageSize.width + interval);
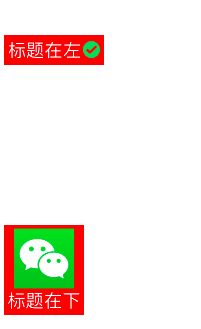
效果图如下:
在设置偏移量的时候,误差还是有的,经过测试,最好的解决方式是,button的大小设置,要恰到好处能够容下标题和图片,对于追求完美的人,可自己修改偏移参数;
针对此方法,本人写了一个UIButton的 demo地址,里面的类目可直接拿来使用,简单调用一个方法即可;
2.通过自定义Button
该方法,是通过自定义一个button,继承自UIButton,然后重写下面两个方法:
- (CGRect)titleRectForContentRect:(CGRect)contentRect;
- (CGRect)imageRectForContentRect:(CGRect)contentRect;
对于这两个方法,网上的一些介绍真是不得不吐槽了,模糊不清;后来根据笔者多次尝试,个人理解为:
方法的参数contentRect,即内容的frame,其值和button的bounds是一样的,通过这个参数可以获取到当前button的size;返回值为CGRect类型,即是title或image在button的绝对坐标值;换句话说,这里返回的是一个绝对坐标,即button的子控件在button上的绝对布局,这里可以返回一个写死的frame(查到的使用此方法的也都是写死的frame),但要注意,不要超过contentRect的范围;
有一点需要说明:
这两个方法不是只调用一次,会被多次调用,只要button的title改变,都会调用此方法,最后一次调用,返回的frame值,才是最终的布局frame,所以,在这里,可以通过获取button的标题,动态地修改其frame,使title和image显示紧凑;
明白了这两个方法,下面就开始使用它:
- (void)setLzType:(LZRelayoutButtonType)lzType {

    _lzType = lzType;
    if (lzType != LZRelayoutButtonTypeNomal) {
        self.titleLabel.textAlignment = NSTextAlignmentCenter;
    }
}

//重写父类方法,改变标题和image的坐标
- (CGRect)imageRectForContentRect:(CGRect)contentRect {

    if (self.lzType == LZRelayoutButtonTypeLeft) {

        CGFloat x = contentRect.size.width - self.offset - self.imageSize.width ;
        CGFloat y = contentRect.size.height -  self.imageSize.height;
        y = y/2;
        CGRect rect = CGRectMake(x,y,self.imageSize.width,self.imageSize.height);
        return rect;
    } else if (self.lzType == LZRelayoutButtonTypeBottom) {

        CGFloat x = contentRect.size.width -  self.imageSize.width;

        CGFloat y = self.offset   ;

        x = x / 2;

        CGRect rect = CGRectMake(x,y,self.imageSize.width,self.imageSize.height);

        return rect;

    } else {
        return [super imageRectForContentRect:contentRect];
    }

}

- (CGRect)titleRectForContentRect:(CGRect)contentRect {

    if (self.lzType == LZRelayoutButtonTypeLeft) {
        return CGRectMake(0, 0, contentRect.size.width - self.offset - self.imageSize.width , contentRect.size.height);

    } else if (self.lzType == LZRelayoutButtonTypeBottom) {

        return CGRectMake(0, self.offset + self.imageSize.height , contentRect.size.width , contentRect.size.height - self.offset - self.imageSize.height );

    } else {
        return [super titleRectForContentRect:contentRect];
    }
}
显示效果如下:
总结
以上两种方式都能实现重新布局UIButton的子控件的效果,各有优缺点:
第一种方式:需要精确的设置偏移量,但是有些量是无法获取的,只能在使用时调整,特别是设置标题在底部时,总感觉image的左右距离button的左右间隙不一致;
第二种方式:对frame的控制就比较自由了,需要注意的是对间隔的把控,使用这种方式就没有第一种的方式问题了;
不管是系统默认,还是我们修改之后的button,其frame的设置都是很重要的,不合适的frame会让button看起来很不舒服...
