前言
在学习了lvs集群后,看到lvs-dr集群能够实现vip与dip/rip不在同一网段的模式部署,为了加深对lvs的理解,因此尝试设计实现了一下。在设计配置前,我在网上找了很很多资料,也尝试过按照相应的资料来部署验证,但是最终结果还是无法验证成功。后来我参考网络上的资料,按照自己的思路调整了下拓扑,就成功把结果验证出来了。
附上参考链接:https://blog.csdn.net/brad_chen/article/details/47807505
https://www.cnblogs.com/AloneSword/p/3935462.html


工作原理
在修改后的拓扑中,lvs-dr的数据流向大致为如下:客户端请求VIP,router会将请求转发给director。为了保证第一个接受请求报文的是director,需要在Real Server上修改Arp响应的机制,确保网络中只有director会响应VIP的arp请求。随后当director检查请求报文,发现其请求的是一组集群服务的时候,其会根据ipvsadm设置的调度算法将请求转发给Real Server。此过程中,director不会更改数据报文中的IP地址信息,仅仅修改报文中的源目mac信息。当请求报文根据director修改的源目mac信息到达Real Server后,Real Server会对请求报文进行响应。此时Real Server 发送源地址为VIP,目标地址为client Ip,源mac为Real Server 的mac地址,目标地址为client或网关的mac地址的响应报文。最后路由器将接受到的响应报文转发给client终端,完成通信。
实际上中,在发起请求报文之前,还需要进行三次握手的协商,如下面抓包的前三条记录,到了第四条记录才是真正的数据传输。
[root@client ~]# tcpdump -i eno16777736 -nn -e port 80
13:22:28.360656 00:0c:29:6d:1a:7d > 00:0c:29:21:59:d7, ethertype IPv4 (0x0800), length 74: 188.88.88.10.49672 > 172.16.0.8.80: Flags [S], seq 448411585, win 29200, options [mss 1460,sackOK,TS val 22310691 ecr 0,nop,wscale 7], length 0
13:22:28.364284 00:0c:29:21:59:d7 > 00:0c:29:6d:1a:7d, ethertype IPv4 (0x0800), length 74: 172.16.0.8.80 > 188.88.88.10.49672: Flags [S.], seq 3569473399, ack 448411586, win 28960, options [mss 1460,sackOK,TS val 13371774 ecr 22310691,nop,wscale 7], length 0
13:22:28.364346 00:0c:29:6d:1a:7d > 00:0c:29:21:59:d7, ethertype IPv4 (0x0800), length 66: 188.88.88.10.49672 > 172.16.0.8.80: Flags [.], ack 1, win 229, options [nop,nop,TS val 22310696 ecr 13371774], length 0
13:22:28.365675 00:0c:29:6d:1a:7d > 00:0c:29:21:59:d7, ethertype IPv4 (0x0800), length 140: 188.88.88.10.49672 > 172.16.0.8.80: Flags [P.], seq 1:75, ack 1, win 229, options [nop,nop,TS val 22310697 ecr 13371774], length 74
13:22:28.367973 00:0c:29:21:59:d7 > 00:0c:29:6d:1a:7d, ethertype IPv4 (0x0800), length 66: 172.16.0.8.80 > 188.88.88.10.49672: Flags [.], ack 75, win 227, options [nop,nop,TS val 13371778 ecr 22310697], length 0
13:22:28.369291 00:0c:29:21:59:d7 > 00:0c:29:6d:1a:7d, ethertype IPv4 (0x0800), length 340: 172.16.0.8.80 > 188.88.88.10.49672: Flags [P.], seq 1:275, ack 75, win 227, options [nop,nop,TS val 13371780 ecr 22310697], length 274
13:22:28.369309 00:0c:29:6d:1a:7d > 00:0c:29:21:59:d7, ethertype IPv4 (0x0800), length 66: 188.88.88.10.49672 > 172.16.0.8.80: Flags [.], ack 275, win 237, options [nop,nop,TS val 22310701 ecr 13371780], length 0
13:22:28.369757 00:0c:29:6d:1a:7d > 00:0c:29:21:59:d7, ethertype IPv4 (0x0800), length 66: 188.88.88.10.49672 > 172.16.0.8.80: Flags [F.], seq 75, ack 275, win 237, options [nop,nop,TS val 22310701 ecr 13371780], length 0
13:22:28.371169 00:0c:29:21:59:d7 > 00:0c:29:6d:1a:7d, ethertype IPv4 (0x0800), length 66: 172.16.0.8.80 > 188.88.88.10.49672: Flags [F.], seq 275, ack 76, win 227, options [nop,nop,TS val 13371782 ecr 22310701], length 0
13:22:28.371185 00:0c:29:6d:1a:7d > 00:0c:29:21:59:d7, ethertype IPv4 (0x0800), length 66: 188.88.88.10.49672 > 172.16.0.8.80: Flags [.], ack 276, win 237, options [nop,nop,TS val 22310703 ecr 13371782], length 0
而在拓扑图a中,我在client抓包中发现,客户端并没有跟请求的server 三次握手协商成功,如下所示:
[root@client ~]# tcpdump -i eno16777736 -nn -e port 80
tcpdump: verbose output suppressed, use -v or -vv for full protocol decode
listening on eno16777736, link-type EN10MB (Ethernet), capture size 65535 bytes
13:32:32.392266 00:0c:29:6d:1a:7d > 00:0c:29:21:59:d7, ethertype IPv4 (0x0800), length 74: 188.88.88.10.49675 > 172.16.0.8.80: Flags [S], seq 1074120056, win 29200, options [mss 1460,sackOK,TS val 22914724 ecr 0,nop,wscale 7], length 0
13:32:34.396238 00:0c:29:6d:1a:7d > 00:0c:29:21:59:d7, ethertype IPv4 (0x0800), length 74: 188.88.88.10.49675 > 172.16.0.8.80: Flags [S], seq 1074120056, win 29200, options [mss 1460,sackOK,TS val 22916728 ecr 0,nop,wscale 7], length 0
13:32:38.404080 00:0c:29:6d:1a:7d > 00:0c:29:21:59:d7, ethertype IPv4 (0x0800), length 74: 188.88.88.10.49675 > 172.16.0.8.80: Flags [S], seq 1074120056, win 29200, options [mss 1460,sackOK,TS val 22920736 ecr 0,nop,wscale 7], length 0
13:32:46.420052 00:0c:29:6d:1a:7d > 00:0c:29:21:59:d7, ethertype IPv4 (0x0800), length 74: 188.88.88.10.49675 > 172.16.0.8.80: Flags [S], seq 1074120056, win 29200, options [mss 1460,sackOK,TS val 22928752 ecr 0,nop,wscale 7], length 0
13:33:02.436673 00:0c:29:6d:1a:7d > 00:0c:29:21:59:d7, ethertype IPv4 (0x0800), length 74: 188.88.88.10.49675 > 172.16.0.8.80: Flags [S], seq 1074120056, win 29200, options [mss 1460,sackOK,TS val 22944768 ecr 0,nop,wscale 7], length 0
13:33:34.500116 00:0c:29:6d:1a:7d > 00:0c:29:21:59:d7, ethertype IPv4 (0x0800), length 74: 188.88.88.10.49675 > 172.16.0.8.80: Flags [S], seq 1074120056, win 29200, options [mss 1460,sackOK,TS val 22976832 ecr 0,nop,wscale 7], length 0
但是我在router的Eth1上却抓包了相应的ACK报文:
[root@router ~]# tcpdump -i eno33554984 -nn -e host 172.16.0.8
tcpdump: verbose output suppressed, use -v or -vv for full protocol decode
listening on eno33554984, link-type EN10MB (Ethernet), capture size 262144 bytes
03:09:59.317554 00:0c:29:21:59:cd > 00:0c:29:26:a3:20, ethertype IPv4 (0x0800), length 74: 188.88.88.10.49675 > 172.16.0.8.80: Flags [S], seq 1074120056, win 29200, options [mss 1460,sackOK,TS val 22913721 ecr 0,nop,wscale 7], length 0
03:09:59.318328 00:0c:29:26:a3:20 > 00:0c:29:a9:56:bd, ethertype IPv4 (0x0800), length 74: 188.88.88.10.49675 > 172.16.0.8.80: Flags [S], seq 1074120056, win 29200, options [mss 1460,sackOK,TS val 22913721 ecr 0,nop,wscale 7], length 0
03:09:59.318746 00:0c:29:a9:56:bd > 00:0c:29:21:59:c3, ethertype IPv4 (0x0800), length 74: 172.16.0.8.80 > 188.88.88.10.49675: Flags [S.], seq 3017446266, ack 1074120057, win 28960, options [mss 1460,sackOK,TS val 14025057 ecr 22913721,nop,wscale 7], length 0
03:10:00.319527 00:0c:29:21:59:cd > 00:0c:29:26:a3:20, ethertype IPv4 (0x0800), length 74: 188.88.88.10.49675 > 172.16.0.8.80: Flags [S], seq 1074120056, win 29200, options [mss 1460,sackOK,TS val 22914724 ecr 0,nop,wscale 7], length 0
03:10:00.319786 00:0c:29:26:a3:20 > 00:0c:29:a9:56:bd, ethertype IPv4 (0x0800), length 74: 188.88.88.10.49675 > 172.16.0.8.80: Flags [S], seq 1074120056, win 29200, options [mss 1460,sackOK,TS val 22914724 ecr 0,nop,wscale 7], length 0
03:10:00.319789 00:0c:29:a9:56:bd > 00:0c:29:21:59:c3, ethertype IPv4 (0x0800), length 74: 172.16.0.8.80 > 188.88.88.10.49675: Flags [S.], seq 3017446266, ack 1074120057, win 28960, options [mss 1460,sackOK,TS val 14026142 ecr 22913721,nop,wscale 7], length 0
03:10:01.583522 00:0c:29:a9:56:bd > 00:0c:29:21:59:c3, ethertype IPv4 (0x0800), length 74: 172.16.0.8.80 > 188.88.88.10.49675: Flags [S.], seq 3017446266, ack 1074120057, win 28960, options [mss 1460,sackOK,TS val 14027511 ecr 22913721,nop,wscale 7], length 0
03:10:02.323965 00:0c:29:21:59:cd > 00:0c:29:26:a3:20, ethertype IPv4 (0x0800), length 74: 188.88.88.10.49675 > 172.16.0.8.80: Flags [S], seq 1074120056, win 29200, options [mss 1460,sackOK,TS val 22916728 ecr 0,nop,wscale 7], length 0
03:10:02.323979 00:0c:29:26:a3:20 > 00:0c:29:a9:56:bd, ethertype IPv4 (0x0800), length 74: 188.88.88.10.49675 > 172.16.0.8.80: Flags [S], seq 1074120056, win 29200, options [mss 1460,sackOK,TS val 22916728 ecr 0,nop,wscale 7], length 0
03:10:02.323982 00:0c:29:a9:56:bd > 00:0c:29:21:59:c3, ethertype IPv4 (0x0800), length 74: 172.16.0.8.80 > 188.88.88.10.49675: Flags [S.], seq 3017446266, ack 1074120057, win 28960, options [mss 1460,sackOK,TS val 14028313 ecr 22913721,nop,wscale 7], length 0
也就是说拓扑a中,client到VIP的三次请求都没完成,因此我在拓扑a中抓包也看不到任何的关于http或者数据传输的信息。至于为什么ack都回到了router却没有转发到client,这也是我一直百思不得其解的。如果这现象有朋友有想法或者我的做法有误的话,还望各位提点。
设计配置

此拓扑中我使用了五个虚拟机分别为Router、client、RS1、RS2和Director。Router划分三个子网,分别是外网192.167.0.0/24、测试网络188.88.88.0/24、内网10.10.10.0/24,其余Ip信息跟拓扑图中一致。
1、配置Router
首先为Router 的虚拟机添加三个虚拟网卡,其中Eth0为桥接到本地网络作为外网,其余两个虚拟网卡分别桥接到188.88.88.0/24和10.10.10.0/24的主机网络中。
使用nmtui命令工具配置接口IP和网关:
[root@router ~]# ifconfig
eno16777736: flags=4163  mtu 1500
        inet 192.168.0.81  netmask 255.255.255.0  broadcast 192.168.0.255
        inet6 fe80::20c:29ff:fe21:59b9  prefixlen 64  scopeid 0x20
        ether 00:0c:29:21:59:b9  txqueuelen 1000  (Ethernet)
        RX packets 16269  bytes 18572778 (17.7 MiB)
        RX errors 0  dropped 0  overruns 0  frame 0
        TX packets 6041  bytes 747550 (730.0 KiB)
        TX errors 0  dropped 0 overruns 0  carrier 0  collisions 0

eno33554984: flags=4163  mtu 1500
        inet 10.10.10.254  netmask 255.255.255.0  broadcast 10.10.10.255
        inet6 fe80::20c:29ff:fe21:59c3  prefixlen 64  scopeid 0x20
        ether 00:0c:29:21:59:c3  txqueuelen 1000  (Ethernet)
        RX packets 3143  bytes 270428 (264.0 KiB)
        RX errors 0  dropped 0  overruns 0  frame 0
        TX packets 7899  bytes 14591038 (13.9 MiB)
        TX errors 0  dropped 0 overruns 0  carrier 0  collisions 0
eno50332208: flags=4163  mtu 1500
        inet 188.88.88.254  netmask 255.255.255.0  broadcast 188.88.88.255
        inet6 fe80::20c:29ff:fe21:59cd  prefixlen 64  scopeid 0x20
        ether 00:0c:29:21:59:cd  txqueuelen 1000  (Ethernet)
        RX packets 61  bytes 6425 (6.2 KiB)
        RX errors 0  dropped 0  overruns 0  frame 0
        TX packets 118  bytes 9539 (9.3 KiB)
        TX errors 0  dropped 0 overruns 0  carrier 0  collisions 0
[root@router ~]# route -n
Kernel IP routing table
Destination     Gateway         Genmask         Flags Metric Ref    Use Iface
0.0.0.0         192.168.0.1     0.0.0.0         UG    100    0        0 eno16777736
10.10.10.0      0.0.0.0         255.255.255.0   U     100    0        0 eno33554984
188.88.88.0     0.0.0.0         255.255.255.0   U     100    0        0 eno50332208
192.168.0.0     0.0.0.0         255.255.255.0   U     100    0        0 eno16777736
在于director直连的eno33554984接口下配置虚拟子接口,Ip为172.16.0.1作为vip网关:
#不配置此虚拟子接口的话,请求报文无法传递给director
[root@router ~]# ifconfig eno33554984:0 172.16.0.1/24 up
配置iptables启用snat:
[root@router ~]# iptables -F
#放开内网三个网段的上网流量
[root@router ~]# iptables -t nat -I POSTROUTING -s 188.88.88.0/24 -j SNAT --to-source 192.168.0.81
[root@router ~]# iptables -t nat -I POSTROUTING -s 10.10.10.0/24 -j SNAT --to-source 192.168.0.81
[root@router ~]# iptables -t nat -I POSTROUTING -s 172.16.0.0/24 -j SNAT --to-source 192.168.0.81
开启路由转发功能:
[root@router ~]# sysctl -w net.ipv4.ip_forward=1
net.ipv4.ip_forward = 1
2、配置director
安装ipvsadm:
[root@director ~]# yum install -y ipvsadm
配置接口:
[root@director ~]# ifconfig ens33 10.10.10.8 netmask 255.255.255.0 up
创建director配置脚本:
[root@director ~]# vim vs.sh
#!/bin/bash
#
vip='172.16.0.8'
iface='ens33:0'
mask='255.255.255.0'
port='80'
rs1='10.10.10.11'
rs2='10.10.10.12'
scheduler='wrr'
type='-g'
drgw='172.16.0.1'

case $1 in
start)
        ifconfig $iface $vip netmask $mask broadcast $vip up
        route add default gw $drgw
        iptables -F

        ipvsadm -A -t ${vip}:${port} -s $scheduler
        ipvsadm -a -t ${vip}:${port} -r ${rs1} $type -w 1
        ipvsadm -a -t ${vip}:${port} -r ${rs2} $type -w 1
        ;;
stop)
        ipvsadm -C
        ifconfig $iface down
        ;;
*)
        echo "Usage $(basename $0) start|stop"
        exit 1
        ;;
esac
执行脚本:
[root@director ~]# bash -x vs.sh  start
+ vip=172.16.0.8
+ iface=ens33:0
#为了能与172.16.0.1通信,需配置director的vip掩码为255.255.255.0
+ mask=255.255.255.0
+ port=80
+ rs1=10.10.10.11
+ rs2=10.10.10.12
+ scheduler=wrr
+ type=-g
+ drgw=172.16.0.1
+ case $1 in
+ ifconfig ens33:0 172.16.0.8 netmask 255.255.255.0 broadcast 172.16.0.8 up
+ route add default gw 172.16.0.1
+ iptables -F
+ ipvsadm -A -t 172.16.0.8:80 -s wrr
+ ipvsadm -a -t 172.16.0.8:80 -r 10.10.10.11 -g -w 1
+ ipvsadm -a -t 172.16.0.8:80 -r 10.10.10.12 -g -w 1
3、配置RS1和RS2
将RS1和RS2 接入到跟10.10.10.0/24 网卡上,使用nmtui命令工具配置其IP地址信息,网关指向10.10.10.254:
[root@rs1 ~]# ifconfig
ens33: flags=4163  mtu 1500
        inet 10.10.10.11  netmask 255.255.255.0  broadcast 10.10.10.255
        inet6 fe80::c559:fd98:3450:1449  prefixlen 64  scopeid 0x20
        ether 00:0c:29:a9:56:bd  txqueuelen 1000  (Ethernet)
        RX packets 27199  bytes 34870271 (33.2 MiB)
        RX errors 0  dropped 0  overruns 0  frame 0
        TX packets 6211  bytes 647161 (631.9 KiB)
        TX errors 0  dropped 0 overruns 0  carrier 0  collisions 0
[root@rs1 ~]# route -n
Kernel IP routing table
Destination     Gateway         Genmask         Flags Metric Ref    Use Iface
0.0.0.0         10.10.10.254    0.0.0.0         UG    100    0        0 ens33
10.10.10.0      0.0.0.0         255.255.255.0   U     100    0        0 ens33
编辑生成下述脚本:
[root@rs1 ~]# vim rs1.sh
#!/bin/bash
#
vip=172.16.0.8
mask='255.255.255.255'

case $1 in
start)
        echo 1 > /proc/sys/net/ipv4/conf/all/arp_ignore
        echo 1 > /proc/sys/net/ipv4/conf/lo/arp_ignore
        echo 2 > /proc/sys/net/ipv4/conf/all/arp_announce
        echo 2 > /proc/sys/net/ipv4/conf/lo/arp_announce

        ifconfig lo:0 $vip netmask $mask broadcast $vip up
        route add -host $vip dev lo:0
        ;;
stop)
        ifconfig lo:0 down

        echo 0 > /proc/sys/net/ipv4/conf/all/arp_ignore
        echo 0 > /proc/sys/net/ipv4/conf/lo/arp_ignore
        echo 0 > /proc/sys/net/ipv4/conf/all/arp_announce
        echo 0 > /proc/sys/net/ipv4/conf/lo/arp_announce

        ;;
*)
        echo "Usage $(basename $0) start|stop"
        exit 1
        ;;
esac
执行脚本:
[root@rs1 ~]# bash -x rs1.sh
+ vip=172.16.0.8
+ mask=255.255.255.255
+ case $1 in
++ basename rs1.sh
+ echo 'Usage rs1.sh start|stop'
Usage rs1.sh start|stop
+ exit 1
[root@rs1 ~]# bash -x rs1.sh  start
+ vip=172.16.0.8
+ mask=255.255.255.255
+ case $1 in
+ echo 1
+ echo 1
+ echo 2
+ echo 2
+ ifconfig lo:0 172.16.0.8 netmask 255.255.255.255 broadcast 172.16.0.8 up
+ route add -host 172.16.0.8 dev lo:0
安装httpd服务:
[root@rs1 ~]# yum install -y httpd
编辑index页面:
[root@rs1 ~]# vim /var/www/html/index.html
This RS1 10.10.10.11
启动httpd服务和关闭防火墙:
[root@rs1 ~]# systemctl start httpd
[root@rs1 ~]# systemctl stop firewalld
重复以上步骤配置RS2。
4、配置client
将client接入到188.88.88.0/24的网卡上。使用nmtui配置其IP地址:
[root@client ~]# ifconfig
eno16777736: flags=4163  mtu 1500
        inet 188.88.88.10  netmask 255.255.255.0  broadcast 188.88.88.255
        inet6 fe80::20c:29ff:fe6d:1a7d  prefixlen 64  scopeid 0x20
        ether 00:0c:29:6d:1a:7d  txqueuelen 1000  (Ethernet)
        RX packets 4567  bytes 467167 (456.2 KiB)
        RX errors 0  dropped 0  overruns 0  frame 0
        TX packets 1581  bytes 158829 (155.1 KiB)
        TX errors 0  dropped 0 overruns 0  carrier 0  collisions 0
[root@client ~]# route -n
Kernel IP routing table
Destination     Gateway         Genmask         Flags Metric Ref    Use Iface
0.0.0.0         188.88.88.254   0.0.0.0         UG    100    0        0 eno16777736
188.88.88.0     0.0.0.0         255.255.255.0   U     100    0        0 eno16777736
5、测试验证
从client访问虚拟服务172.16.0.8:
[root@client ~]# for i in {1..10};do curl http://172.16.0.8 ;done
This RS2 10.10.10.12
This RS1 10.10.10.11
This RS2 10.10.10.12
This RS1 10.10.10.11
This RS2 10.10.10.12
This RS1 10.10.10.11
This RS2 10.10.10.12
This RS1 10.10.10.11
This RS2 10.10.10.12
This RS1 10.10.10.11
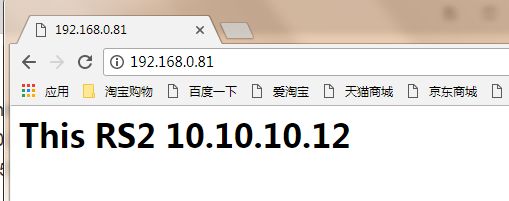
另外如果需要模拟映射到外网的场景,可在Router上做DNAT映射,然后访问192.168.0.81来实现访问lvs虚拟服务。如:
在Router上添加DNAT:
[root@router ~]# iptables -t nat -I PREROUTING -d 192.168.0.81 -p tcp --dport 80 -j DNAT --to-destination 172.16.0.8:80