Mysql+Postfix+Dovecot+Extmail
Tips: mysql(数据库),postfix(发送),dovecot(接收),extmail(web管理)
| 服务器端:【10.14.4.63】 |
| Serverd.example.com (serverd) |
本实验做的是一个类似于163的网页收发邮箱,最终是extmail提供的图形界面。然后就是postfix的发信和dovecot的收信,但这一系列都离不开数据库mysql。思路上,先装mysql,然后得需要和extmail交互的mysql账号,可以从extmail导入需要的数据。然后,就装一个发信的postfix吧,定义好postconf中相关的环境变量,确保能发信了。接下来安装dovecot吧,配置收信服务。到最后,就可以配置extmail的前台登陆和后台管理了。大概就这个吧~~
[root@serverd ~]# iptables -F
[root@serverd ~]# setenforce 0
一、Mysql(mysql,mysql-server)
[root@serverd ~]# rpm -qa | grep mysql
[root@serverd ~]# yum install mysql mysql-server -y
[root@serverd ~]# service mysqld start
[root@serverd ~]# mysql_secure_installation(设置密码westos)
[root@serverd ~]# mysql -pwestos (检查是否能成功登陆)
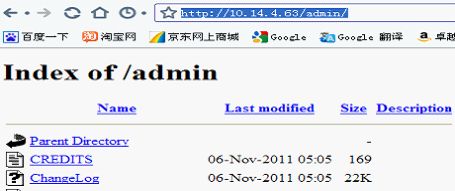
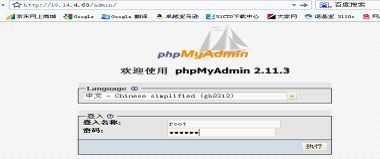
文字配置太麻烦,用图形吧~(phpMyAdmin,appache发布)
[root@serverd ~]# yum install httpd -y && service httpd start
[root@serverd ~]# tar -jxf phpMyAdmin-2.11.3-all-languages.tar.bz2
[root@serverd ~]# cp -r phpMyAdmin-2.11.3-all-languages /var/www/html/admin
[root@serverd ~]# cd /var/www/html/admin/
[root@serverd admin]# cp config.sample.inc.php config.inc.php
[root@serverd admin]# vim config.inc.php
$cfg['blowfish_secret'] = 'anywords'; /* YOU...... (加入随机变量)
没有装php php-mysql
[root@serverd admin]# yum install php php-mysql -y
[root@serverd admin]# service httpd restart
二、Extmail
先要安装postfix:
[root@serverd admin]# yum install postfix -y
[root@serverd admin]# postconf -m | grep mysql
mysql (说明支持mysql,不支持的话就源码安装加上参数)
[root@serverd rpm_requires]# tar -zxf extman-1.1.tar.gz -C
[root@serverd rpm_requires]# tar -zxf extmail-1.2.tar.gz
[root@serverd rpm_requires]# mkdir /var/www/extsuite
[root@serverd rpm_requires]# cp -r extman-1.1 /var/www/extsuite/extman
[root@serverd rpm_requires]# cp -r extmail-1.2 /var/www/extsuite/extmail
[root@serverd extsuite]# cp extmail/webmail.cf.default webmail.cf
[root@serverd extsuite]# cp extman/webmail.cf.default webmail.cf
来个明文验证吧
[root@serverd docs]# pwd
/var/www/extsuite/extman/docs
[root@serverd docs]# vim init.sql (将加密文本换成明文)
导入extmail数据,建立相关数据
[root@serverd docs]# mysql < extmail.sql -pwestos
[root@serverd docs]# mysql < init.sql -pwestos
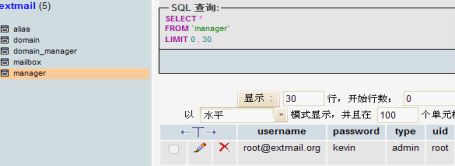
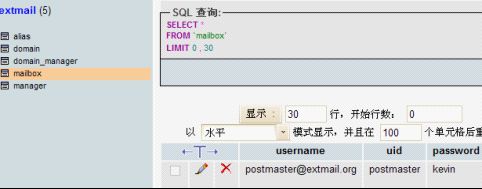
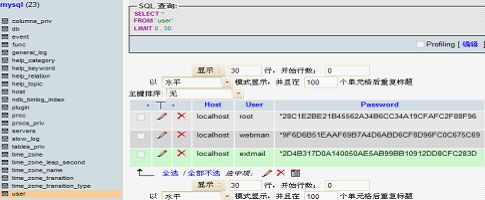
看看数据有什么变化吧~~
看,导入了mysql的root、extmail、webman
把相关文件拷到postfix目录,准备postfix的相关变量
[root@serverd docs]# cp mysql_virtual_alias_maps.cf /etc/postfix/
[root@serverd docs]# cp mysql_virtual_domains_maps.cf /etc/postfix/
[root@serverd docs]# cp mysql_virtual_mailbox_maps.cf /etc/postfix/
三、Postfix
[root@serverd admin]# postconf | grep virtual
[root@serverd admin]# useradd -s /sbin/nologin vmail
[root@serverd admin]# id vmail
uid=501(vmail) gid=501(vmail) groups=501(vmail)
[root@serverd admin]# postconf -e inet_interfaces=all
[root@serverd admin]# postconf -e virtual_mailbox_base=/home/vmail/
[root@serverd admin]# postconf -e virtual_uid_maps=static:501
[root@serverd admin]# postconf -e virtual_gid_maps=static:501
[root@serverd docs]# postconf -e virtual_alias_maps=mysql:/etc/postfix/mysql_virtual_alias_maps.cf
[root@serverd docs]# postconf -e virtual_mailbox_domains=mysql:/etc/postfix/mysql_virtual_domains_maps.cf
[root@serverd docs]# postconf -e virtual_mailbox_maps=mysql:/etc/postfix/mysql_virtual_mailbox_maps.cf
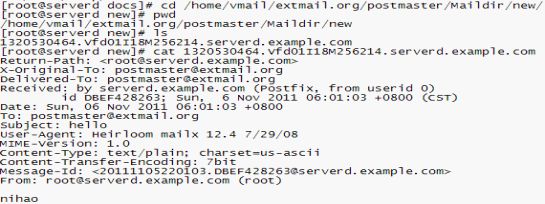
测试一下吧,看能不能让我们创建出新的域:
[root@serverd docs]# mail -s hello [email protected]
nihao
EOT
看看配置文件都对着没?
呵呵,能显示吧,对着了,重启
[root@serverd new]# postfix reload
四、Dovecot
[root@serverd admin]# yum install dovecot dovecot-mysql -y
[root@serverd conf.d]# pwd
/etc/dovecot/conf.d
[root@serverd conf.d]# vim 10-mail.conf
---->mail_location = maildir:/home/vmail/%d/%n/Maildir
---->first_valid_uid = 501
[root@serverd conf.d]# vim 10-auth.conf
---->!include auth-system.conf.ext
---->!include auth-sql.conf.ext
[root@serverd dovecot]# pwd
/etc/dovecot
[root@serverd dovecot]# cp /usr/share/doc/dovecot-2.0/example-config/dovecot-sql.conf.ext .
---->connect = host=localhost dbname=extmail user=extmail password=extmail
---->default_pass_scheme = PLAIN
---->driver = mysql
---->user_query = SELECT maildir, 501 AS uid, 501 AS gid FROM mailbox WHERE username = '%u'
---->password_query = \
SELECT username, domain, password \
FROM mailbox WHERE username = '%u'
在换一种方法测试一下:
[root@serverd dovecot]# service postfix restart
[root@serverd dovecot]# service dovecot restart
看看dovecot接收邮件的监听端口:
[root@serverd dovecot]# netstat -antlp | grep dovecot
[root@serverd dovecot]# yum install telnet -y
[root@serverd dovecot]# telnet localhost 110
Ok,成功登陆
来看看错误的配置吧,多是由于/etc/dovecot/dovecot-sql.conf.ext密码确认设置错,或是由于/etc/dovecot/conf.d/10-mail中的邮件路径错误。
收发都正常了,接下来配置我们的最后一个:extmail,用图形去管理收发邮件吧。
[root@serverd extmail]# vim webmail.cf
---->SYS_CRYPT_TYPE = plain
---->SYS_MYSQL_USER = extmail
SYS_MYSQL_PASS = extmail
---->SYS_MAILDIR_BASE = /home/vmail
[root@serverd extman]# pwd
/var/www/extsuite/extman
[root@serverd extman]# less INSTALL (多看相关安装文档介绍)
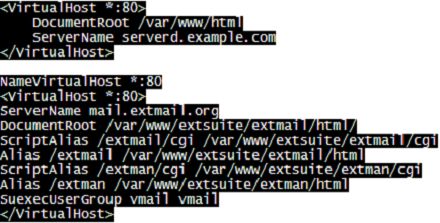
[root@serverd extman]# vim /etc/httpd/conf/httpd.conf
[root@serverd extman]# chown vmail.vmail /var/www/extsuite/extmail/cgi/ /var/www/extsuite/extman/cgi/ -R
[root@serverd extman]# echo `10.14.4.63 mail.extmail.org` >> /etc/hosts
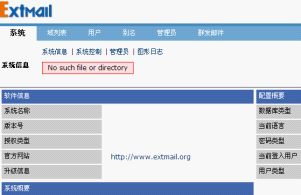
访问mail.extmail.org:
缺什么就装什么了:
[root@serverd extmail]# yum install perl-CGI -y
[root@serverd rpm_requires]# tar -zxf Unix-Syslog-1.1.tar.gz
[root@serverd rpm_requires]# cd Unix-Syslog-1.1
[root@serverd Unix-Syslog-1.1]# perl Makefile.PL
[root@serverd rpm_requires]# yum provides */MakeMaker.pm
[root@serverd rpm_requires]# yum install perl-ExtUtils-MakeMaker -y
[root@serverd rpm_requires]# cd Unix-Syslog-1.1
[root@serverd Unix-Syslog-1.1]# perl Makefile.PL
[root@serverd Unix-Syslog-1.1]# make && make install
Ok,成功了
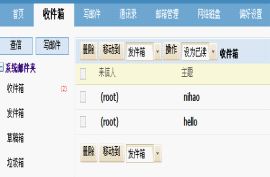
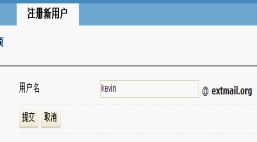
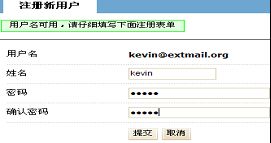
免费注册试试:
成功~~~
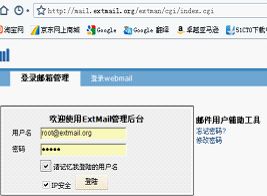
再看看后台管理配置吧!
[root@serverd extman]# vim /var/www/extsuite/extman/webman.cf
---->SYS_MAILDIR_BASE = /home/vmail
---->SYS_SESS_DIR = /tmp
---->SYS_CAPTCHA_ON = 0
---->SYS_CRYPT_TYPE = plain
后台能正常登陆!
有理解不对的地方请不吝指正~~ qq345258361
