****Quearz2D****是一个二维绘制引擎,同时支持iOS和Mac系统. Quartz 2D能完成绘制图形 : 线条\三角形\矩形\圆\弧等 绘制文字 绘制\生成图片(图像) 读取\生成PDF 截图\裁剪图片片 自定义UI控件.
===为了便于搭建美观的UI界面,iOS提供了UIKit框架,⾥⾯有各种各样的UI控件 利⽤UIKit框架提供的控件,拼拼凑凑,能搭建和现实一些简单、常见的UI界⾯. 但是,有些UI界面极其复杂、⽽且⽐较个性化,⽤普通的UI控件无法实现,这时可以利用Quartz2D技术将控件内部的结构画出来,自定义控件的样子,其实,iOS中⼤部分控件的内容都是通过Quartz2D画出来的,Quartz2D在iOS开发中很重要的⼀个价值是:自定义view(自定义UI控件) .
直线
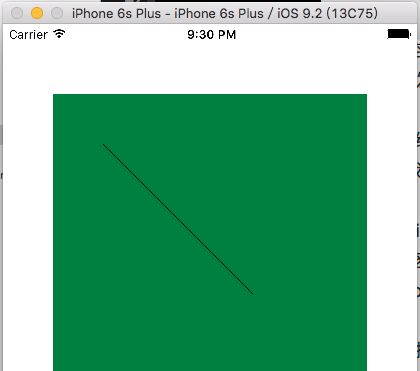
直线是我们所研究Quartz2D绘制最简单的一种图形,我们怎么实现呢? 上代码
-(void)line1{
    // 1 获取图形上下文(绘图环境,相当于一块画布)
    CGContextRef cxt = UIGraphicsGetCurrentContext();//图形上下文只能获取不能创建
    // 2 描绘路径
    CGMutablePathRef path = CGPathCreateMutable();
    //  起点
    //第一个参数是Path  第二个参数是transform 然后是横纵坐标
    //CGPathMoveToPoint(<#CGMutablePathRef  _Nullable path#>, <#const CGAffineTransform * _Nullable m#>, <#CGFloat x#>, <#CGFloat y#>)
    CGPathMoveToPoint(path, NULL, 50, 50);
    // 终点
    CGPathAddLineToPoint(path, NULL, 200, 200);
    // 3 把路径放到图形上下文
    CGContextAddPath(cxt, path);
    // 4 渲染上下文cxt
    CGContextStrokePath(cxt);
}
我们调用以上方法得到的结果是
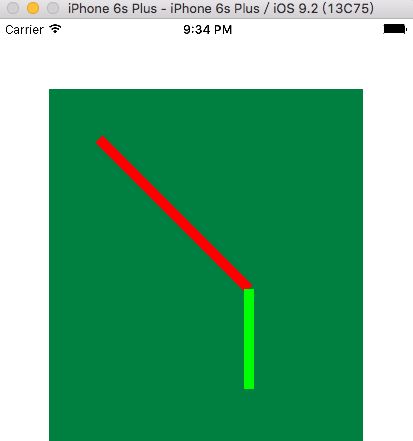
但是我们往往不只是在一个画板上画一条直线 有时候我们需要画多条直线 这个时候我们就需要创建多个路径, 我们借助于UIBezierPath,以第一条直线的终点 作为第二条曲线的起点绘制两条直线
-(void)line2{
    //BezierPath(贝瑟尔路径1)
    UIBezierPath *path = [UIBezierPath bezierPath];
    //设置起点
    [path moveToPoint:CGPointMake(50, 50)];
    //设置终点
    [path addLineToPoint:CGPointMake(200, 200)];
    //设置颜色
    [[UIColor redColor] set];
    path.lineWidth = 10;
    //渲染
    [path stroke];

    //BezierPath(贝瑟尔路径2)
    UIBezierPath *path1 = [UIBezierPath bezierPath];
    //设置起点
    [path1 moveToPoint:CGPointMake(200, 200)];
    //设置终点
    [path1 addLineToPoint:CGPointMake(200, 300)];
    //设置颜色
    [[UIColor greenColor] set];
    path1.lineWidth = 10;
    //渲染
    [path1 stroke];
}
运行结果如下
多条直线的绘制方法类似
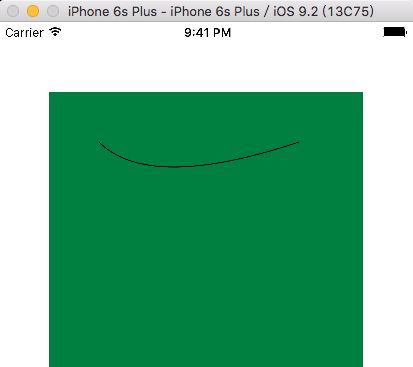
曲线
-(void)line3{
    //获取上下文
    CGContextRef cxt = UIGraphicsGetCurrentContext();
    //描述路径(起点)
    CGContextMoveToPoint(cxt, 50, 50);
    // 前一组表示控制点 后一组表示终点
    //CGContextAddQuadCurveToPoint(<#CGContextRef  _Nullable c#>, <#CGFloat cpx#>, <#CGFloat cpy#>, <#CGFloat x#>, <#CGFloat y#>)

    CGContextAddQuadCurveToPoint(cxt, 100, 100, 250, 50);
    // 渲染
    CGContextStrokePath(cxt);
}
在这里穿插一点: 我们在图形绘制的过程当中 频繁是使用CGContextRef 那么什么是图形上下文?
图形上下文(Graphics Context):是一个CGContextRef类型的数据
图形上下文的作用: (1)保存绘图信息、绘图状态(2)决定绘制的输出目标(绘制到什么地⽅去?)(输出目标可以是PDF⽂文件、Bitmap或者显示器的窗口上)
相同的⼀套绘图序列,指定不同的Graphics Context,就可将相同的图像绘制到不同的目标上 .
****要实现drawRect:⽅法才能绘图到view上, 因为在drawRect:⽅法中才能取得跟view相关联的图形上下文****: 所以我们以上方法的调用都是在drawRect:方法里面
****drawRect:⽅法被调用也是在view第一次显示在屏幕上的时候或者是调用view的setNeedsDisplay或者setNeedsDisplayInRect:时 ****:
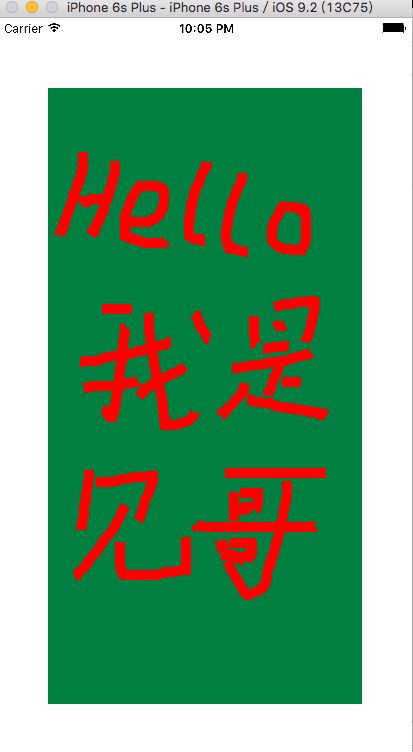
接下来我们在自定义的view视图上实现一个画板的效果
#import "DrawView.h"
@interface DrawView ()
{
    //起点和终点
    CGPoint _startPoint;
    CGPoint _endPoint;
}
//数组保留每一条线
@property(nonatomic,strong)NSMutableArray *pathArr;
@end

@implementation DrawView
-(NSMutableArray *)pathArr{
    if (!_pathArr) {
        _pathArr = [NSMutableArray array];
    }
    return _pathArr;
}
我们实现UIview的touchesBegan:(NSSet
-(void)touchesBegan:(NSSet *)touches withEvent:(UIEvent *)event{

    //获取起点
    _startPoint = [[touches anyObject]locationInView:self];

    //创建贝瑟尔路径
    UIBezierPath *path = [UIBezierPath bezierPath];

    [path moveToPoint:_startPoint];//起点

    //添加到数组
    [self.pathArr addObject:path];

}
-(void)touchesMoved:(NSSet *)touches withEvent:(UIEvent *)event{
    _endPoint = [[touches anyObject]locationInView:self];

    //数组中最后一条线
    UIBezierPath *path = [self.pathArr lastObject];

    [path addLineToPoint:_endPoint];

    //不能直接调用 这个方法
    [self setNeedsDisplay];//setNeedsDisplay会自动调用drawRect方法
}
这个时候我们运行程序 拖动鼠标在view上 可以看到没有任何的反应,因为我们没有实现drawRect:(CGRect)rect;
我们在drawRect:(CGRect)rect方法里面写一下代码
     for (UIBezierPath * path in _pathArr) {
         [[UIColor redColor]set];
         path.lineWidth = 10;
         [path stroke];
     }
效果如下:
我们如果加上橡皮擦, 撤销键等等,就可以实现真正画板功能了,这些我们不在此操作 大家可以按兴趣各自进行.
持续更新中~~~~~~~~~


