(Notes from the learning process on Cousera杜克大学:
https://www.coursera.org/learn/duke-programming-web/home/week/3)
有用的网站:
查HTML颜色的code: https://www.w3schools.com/colors/colors_names.asp
Duke大学JavaScript操作环境:http://www.dukelearntoprogram.com/course1
CodePen HTML/CSS/JAVASCRIPT免费编辑环境:https://codepen.io/
一、Event-Driven Programming
1. Introduction
筛选bar
2. Buttons with Divs


3. Try it! Buttons with Divs
Throughout this lesson on “Event-Driven Programming,” you will create and build upon a web page where you will practice adding interactive elements with JavaScript. Go to http://codepen.io/ and create a new Pen for you to work on this lesson.
Review HTML and CSS
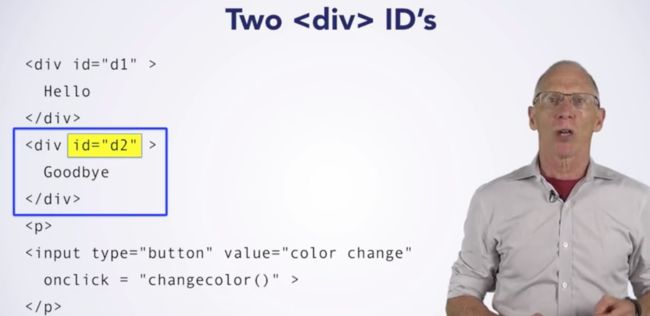
1. Add HTML elements, including at least one heading and two div elements. Add some text inside your heading and divs. Keep it simple, like in the **Buttons with Divs **video.
2. Give each div its own different ID.
3. Use CSS to style headers and divs in general. Try using a CSS property you have not used before! Consider changing:
- Color
- Background color
- Font family
- Font size
- Border
- Padding
- Margin
4. Use CSS to style the ID for each div.
Need help?
- For ideas on how to use CSS to style HTML elements here’s a summary of several CSS properties from W3 schools (http://www.w3schools.com/html/html_css.asp) and here is a list of CSS color names (http://www.w3schools.com/colors/colors_names.asp).
- Review our documentation for HTML and CSS: http://www.dukelearntoprogram.com/course1/doc/ (also linked in the Resources tab).
- See the following example of HTML and CSS with one heading and two divs.

Add interactivity with buttons
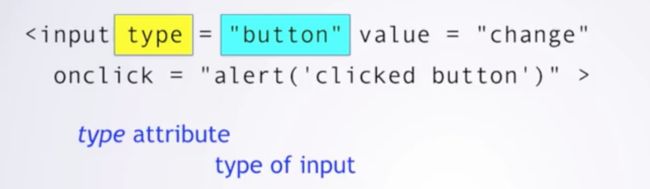
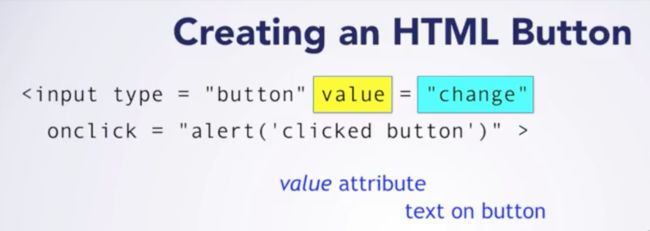
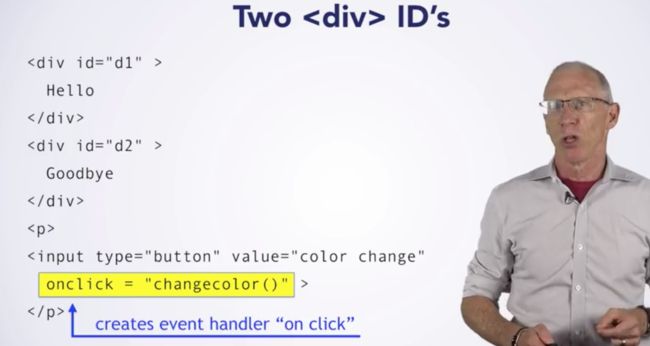
1. In the HTML panel, an input element, as shown in** Buttons with Divs** video, using the tag, setting the type to “button”, and giving the button a value and ID.
2. Now make the button do something by adding an onclick event handler.
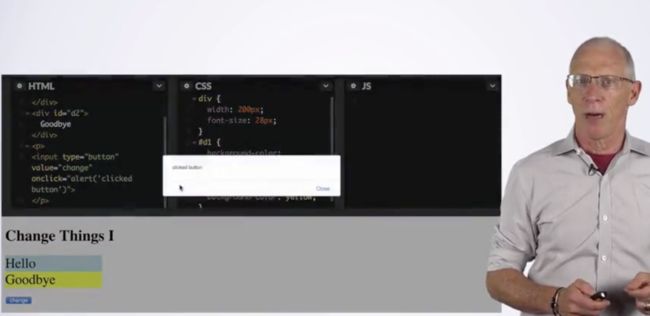
- To make the button interactive, add an alert. The alert JavaScript code follows the onclick event handler. You can have your alert say whatever you would like. Now, when the button is clicked, your alert message should pop up on your screen.
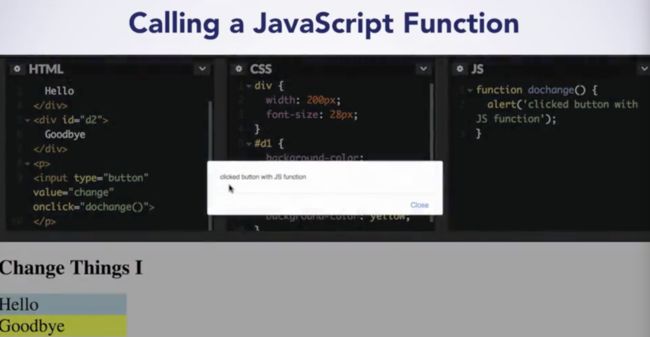
- Next, replace your alert code with a function that calls the alert. Define a function in the JS panel that creates an alert; and, in the HTML panel, change the event handler for onclick to now call your new function. Again, when the button is clicked, your alert message should pop up on your screen.
Need help? Review the Buttons with Divs video. If you’re still stuck, seek help in the forums!
Extra Challenge!
In the JS panel, create a second function that calls confirm instead of alert. Confirm is similar to the alert box, except confirm also gives the user has the option to choose OK or Cancel. Also add the following steps to your function.
1. Create a variable, choice, that gets the result of user input using the confirm method.
2. Add a condition:
- If the user chooses ‘OK,’ create a variable, message, that gets the string "You pressed OK!". Hint: If the user chose ‘OK’, this means that the output of the confirm method is equal to a Boolean value of true.
- Otherwise, create a variable, message, that gets the string "Are you sure you want to cancel?"
3. Create an alert box that displays message.
Now have your the onclick event handler in the HTML pane call your second function (with confirm) instead of your first function. Test to see if you first get the confirm box pop up when you click your button, followed by the alert box pop up.
Need help? Check out W3School’s resource on confirm: http://www.w3schools.com/jsref/met_win_confirm.asp.
You can learn more about using JavaScript to create pop up boxes at W3 Schools: http://www.w3schools.com/js/js_popup.asp.
4. Changing Pages Inteactively


5. Try it! Change Pages Interactively
For this exercise, you will be building off of your previous Pen. Open your Pen and “fork” it by clicking “Fork” at the top-bar Codepen menu. This creates an exact duplicate of your Pen which you can now edit while still keeping the original version of your Pen.
Style divs background-color using classes
From your last Pen, you should have styled your divs using IDs and CSS. If you had styled the background-color in the CSS for the IDs, remove this background coloring code.
Next, add a different class to each of your divs.
Now, style the background-color of each of your divs by styling the classes in the CSS pane.
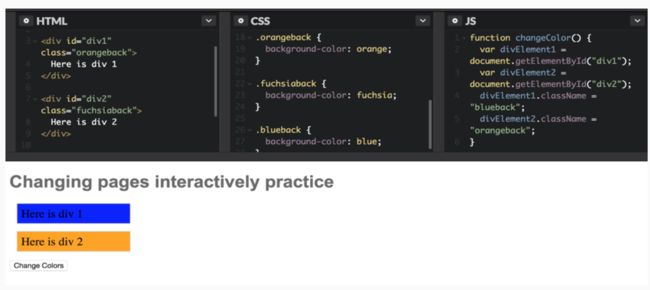
Need help? See the screenshot below of an example Pen, where classes are used to color the background of each div.

Change Div Background Color with Buttons
In the CSS pane, style an extra 1-2 new classes, giving the classes a new background-color you have not yet used in your Pen.
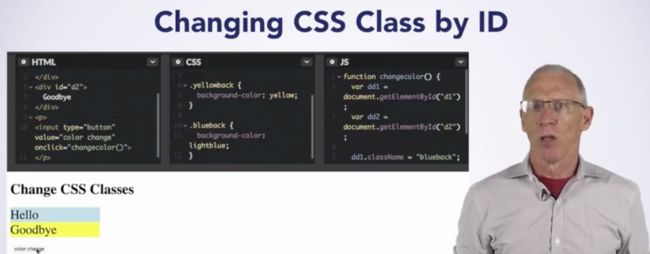
In the JS pane, create a new function, changeColor().
Have the function access each div by the div’s ID. For each div, create a variable that gets that div by using the document.getElementById(“divID”) method.
Change each div’s class. Use the .className property to change the class for each div element. Change each div’s class so that the background-color changes for each div.
- In the HTML pane, update your button. Change the value of your input element to “Change Color” and have the button call the changeColor() function when the button is clicked.
Need help? Review the Changing Pages Interactively video, which walks through the above steps. Also, see the following screenshot of an example Pen.
Change Div Text Content with Buttons
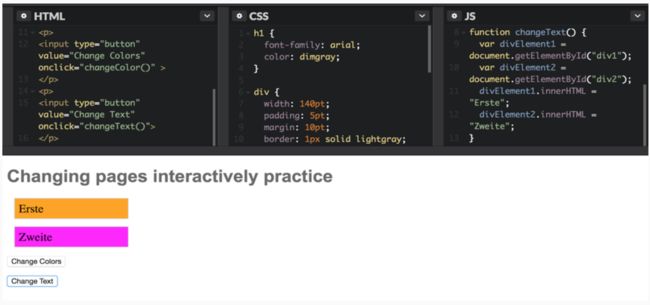
In the HTML pane, add a new button. Make the input’s value “Change Text”. Don’t worry about the event handler (e.g., onclick) yet.
In the JS pane, create a new function changeText(). This function should:
Access each div element by its ID;
Use the .innerHTML method to change the text to something new inside each div.
- In the HTML pane, have your “Change Text” button call the changeText() function.
Need help? Review the Changing Pages Interactively video and see the below example Pen. If this material is still not making sense to you, seek help from your fellow learners in the forums!
Extra Challenge!
Now try changing other aspects of the web page when a button is clicked. Consider:
Changing the div with the .style.color property
Changing the value attribute of a button
6. Using HTML5 Canvas
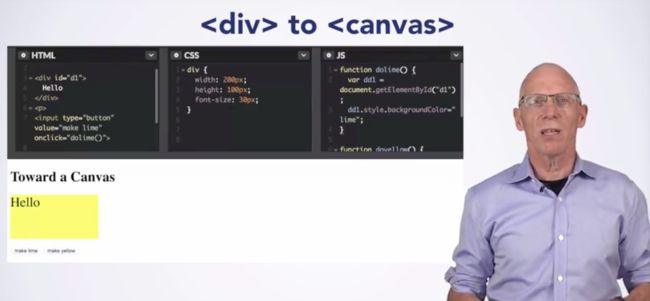

7. Try it! Canvas
Create Canvas Elements
1. Fork your previous practice pen, so that you start with two div elements and several buttons.
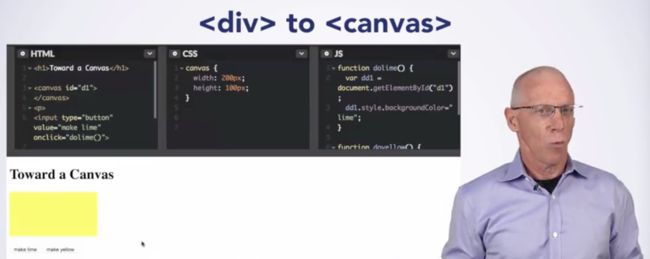
2. In the HTML pane, change each div element to a canvas element. While canvas elements have different functionality than divs, they can both appear as rectangles when a background color is set. Note that the text disappears, since text must be created differently on a canvas.
3. In the HTML and JS panes, remove all but the “Change Color” button and any related functions. You can also remove text between the canvas tags, since it will not appear.
4. Specify a width and height for canvas elements in the CSS panel.
5. Check that your “Change Color” button still works.
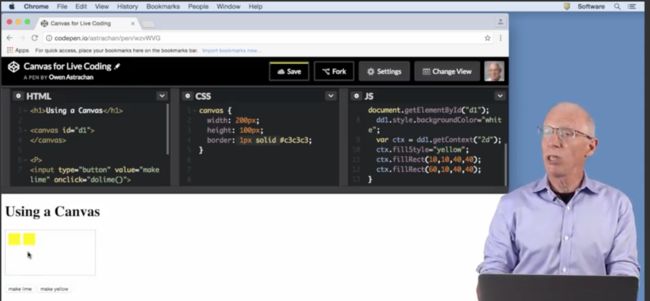
Need help? See the following example; review the **Using HTML5 Canvas **video; and ask for help in the forums.
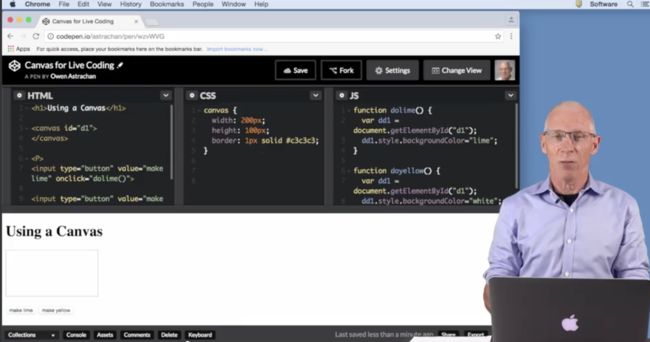
Change Canvas Colors with Buttons
1. In the HTML panel, create two buttons, one for each of two colors you choose (e.g., red and blue). Do not worry about the event handler yet.
2. In the JS panel, write two doColor() functions in the JS panel (e.g., doRed() and doBlue()). For each one:
- Get the left canvas element.
- Then use the style.backgroundColor property to change the background color. Previously you changed the color by changing the CSS class; this is an alternative way to change a color property.
3. Have your two new buttons each the appropriate doColor() functions.
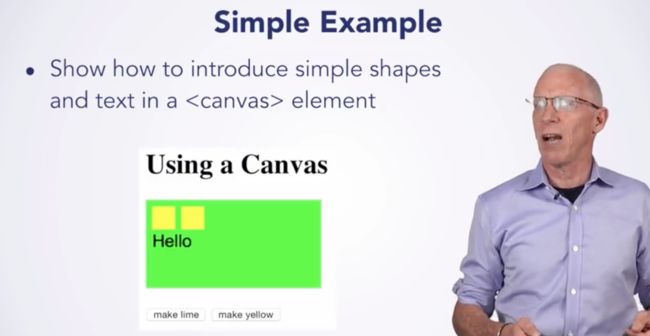
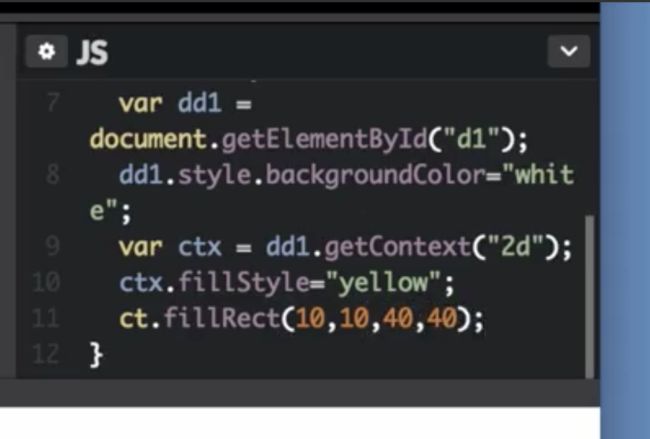
Add Shapes and Text to Canvas
In order to draw shapes or write text on a canvas, you need to get its context. In this exercise, choose one of your doColor() functions and follow these steps to add functionality.
1. Use the canvas.getContext("2d") method to get the context of the canvas.
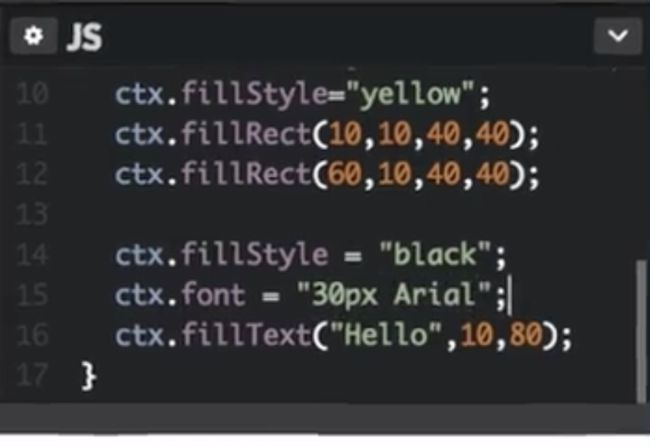
2. Draw a rectangle. Remember to use the context.fillStyle and context.fillRect methods. You can determine the color and size of your rectangles.
3. Try adding text to your canvas. You will need to use the context.fillStyle, context.font, and context.fillText methods.
**Need help? **Review the Using HTML5 Canvas video, see the below example, and go to the forums.
Extra Challenge!
1. See what happens when you use the second button to change the background color—the background color changes, but the rectangles and text remain in the canvas.
2. Add functionality to your second doColor() function so that the canvas context is cleared. Get the context, and use the context.clearRect() method to do this. See below example.
3. If you would like to experiment with other canvas drawing capabilities, here is a resource: http://www.w3schools.com/html/html5_canvas.asp.
8. Inputs and Events

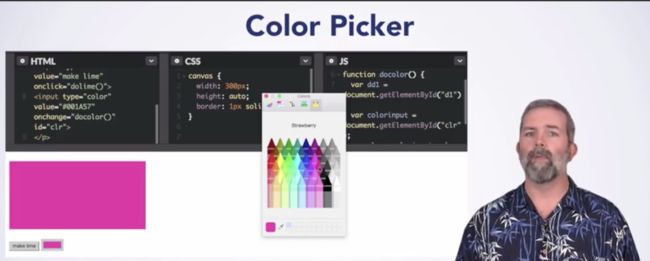


9. Try it! Inputs and Events
Create a new practice Pen.
Add a heading a canvas element to the Pen.
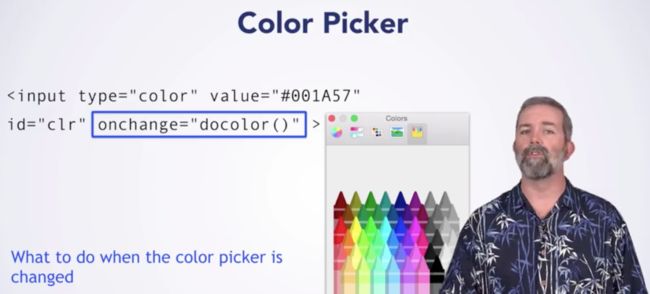
Add two input elements: a button to change the background color of the canvas “on click” and a color input element that allows the user to change the color of the canvas “on change.” Note that a color input element must have a value attribute that is the hexadecimal value for a color (e.g., #0000FF). You can find the hex values for colors using this resource: http://www.w3schools.com/colors/colors_picker.asp
Write a JavaScript function for the event handler of the color input that:
Gets the canvas element;
Gets the color input element; and
Sets the canvas background color to the value of the color input.
- Try changing the onchange attribute to onclick and see how the input behaves differently.
Need help? See this example on CodePen (http://codepen.io/duketeam/pen/amvmPK) and review the Events and Inputs video. Also ask for help from your classmates in the forums!
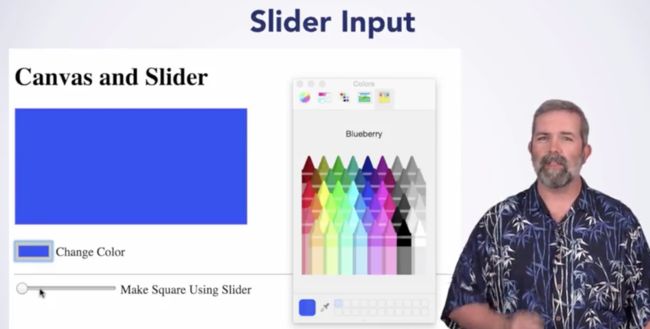
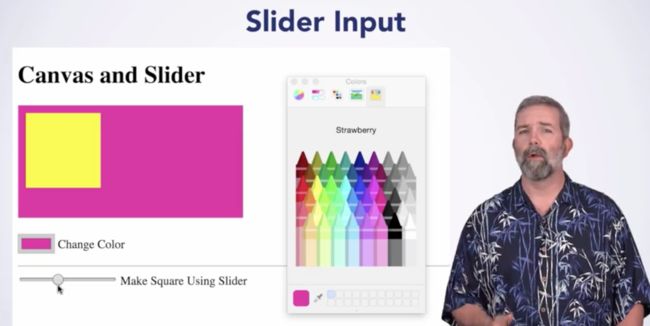
Create a Slider
Fork your color chooser practice pen, so that you start with a canvas element and a color chooser (you can delete the button).
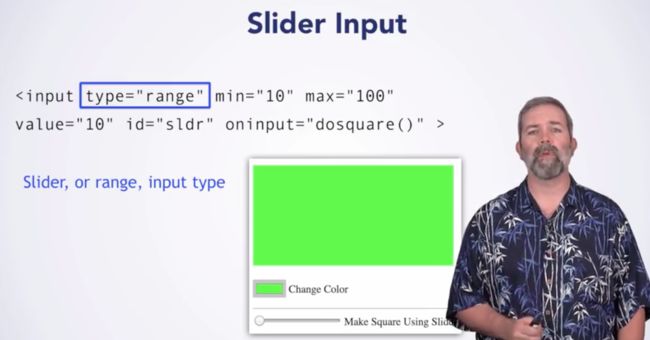
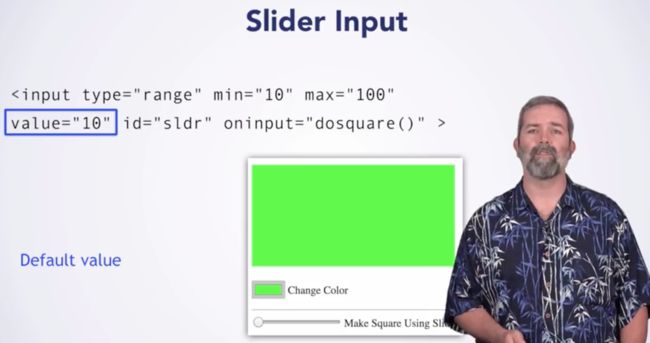
Add a slider input element by specifying the type “range.” Refer to the Inputs and Events video for more details on the min, max, value, and oninput attributes.
Write a function doSquare() for the slider event handler that draws squares on the canvas, such that their side lengths are determined by the value of the slider. Your function should:
Get the slider element, then its value.
Get the canvas element, then its context.
Use the context.fillStyle and context.fillRect methods. Try making the position of the second square dependent on the first, such as specifying that the x-coordinate be the length plus a number, or the length times a factor. (Note that if you use the ‘+’ operator with variables JavaScript has decided are strings (words or text), you need to use parseInt to convert the string to an integer.)
Need help? See this CodePen example: http://codepen.io/duketeam/pen/YGyGob.
练习测验:Event-Driven Programming