目录
- Swagger文档
- 简介
- 引入swagger组件
- 代码实战
Swagger文档
@
简介
优点
后端根据swagger语法,自动生成漂亮规范的接口文档。
做交互测试。
劣势
侵入式的,影响程序运行,尤其是传参的时候。
注意
swagger 分1.2版本和2.0版本,差异较大。swagger1.2 即 swagger-ui ; swagger2.0 即 springfox-swagger 。本文介绍的使用方式是新的版本,即 springfox-swagger 。
发布生产,关闭swagger,以防泄漏项目接口文档,被攻击
引入swagger组件
pom.xml中加入
    io.springfox
    springfox-swagger2
    2.9.2


    io.springfox
    springfox-swagger-ui
    2.9.2
代码实战
我看很多博主说swagger的配置代码要和项目启动文件在同级目录,即如下
但是,移入config目录下,经过测试,也是正常的,那这样就看个人习惯了。
DemoApplication.java
package com.example;

import org.springframework.context.annotation.Bean;
import org.springframework.context.annotation.Configuration;

import springfox.documentation.builders.ApiInfoBuilder;
import springfox.documentation.builders.PathSelectors;
import springfox.documentation.builders.RequestHandlerSelectors;
import springfox.documentation.service.ApiInfo;
import springfox.documentation.spi.DocumentationType;
import springfox.documentation.spring.web.plugins.Docket;
import springfox.documentation.swagger2.annotations.EnableSwagger2;

//通过 @Configuration 注解,让 Spring 来加载该类配置。
//再通过 @EnableSwagger2 注解来启用 Swagger2。
@Configuration
@EnableSwagger2
public class DemoSwagger {
    @Bean
    public Docket api() {
        return new Docket(DocumentationType.SWAGGER_2)
                .apiInfo(apiInfo())
                .select()
                // 指定要扫描的包路径
             .apis(RequestHandlerSelectors.basePackage("com.example.controller"))
                .paths(PathSelectors.any())
                .build();
    }

    private ApiInfo apiInfo() {
        return new ApiInfoBuilder()
                .title("项目api文档")
                .description("swagger接入教程")
                .version("1.0")
                .build();
    }
}
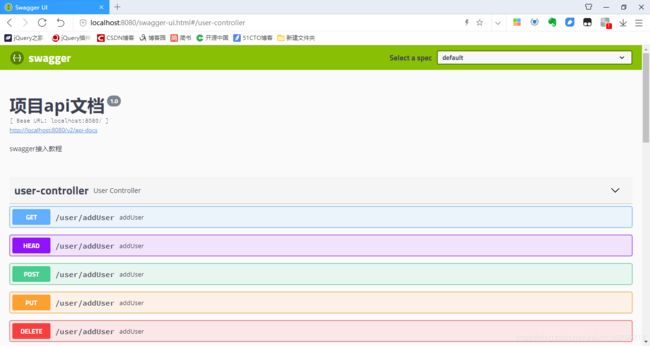
因为之前已经配置好了spring security,所以浏览器网址中输入 http://localhost:8080/swagger-ui.html 后,会被拦截住,输入之前配置好的用户密码后,效果如下所示;
因为之前测试用户登录,用户权限,所以controller里面已经有了一些接口方法,但是就让它这样默认,显然用户体验不好,所以在之前的userController里继续加上swagger的注解。
@Api:用在类上,说明该类的作用。

@ApiOperation:说明该方法的作用。
具体而更细致的注解参见官方文档 常用注解说明 。
UserController.java
package com.example.controller;

import io.swagger.annotations.Api;
import io.swagger.annotations.ApiOperation;
import org.springframework.stereotype.Controller;
import org.springframework.web.bind.annotation.RequestMapping;
import org.springframework.web.bind.annotation.RequestMethod;
import org.springframework.web.bind.annotation.ResponseBody;

@Controller
@RequestMapping("user")
@Api(value = "用户模块说明", description = "提供用户的增、删、改、查")
public class UserController {

    @RequestMapping(value = "/addUser", method = RequestMethod.GET)
    @ResponseBody
    @ApiOperation(value = "添加用户", notes = "放一些信息,供测试判断")
    String addUser() {
        return "这是添加用户!!!";
    }

    @RequestMapping(value = "/deleteUser", method = RequestMethod.POST)
    @ResponseBody
    @ApiOperation(value = "删除用户", notes = "放一些信息,供测试判断")
    String deleteUser() {
        return "这是删除用户!!!";
    }

    @RequestMapping("/updateUser")
    @ResponseBody
    @ApiOperation(value = "修改用户", notes = "放一些信息,供测试判断")
    String updateUser() {
        return "这是修改用户!!!";
    }

    @RequestMapping(value = "/findAllUsers", method = RequestMethod.PUT)
    @ResponseBody
    @ApiOperation(value = "查询用户", notes = "放一些信息,供测试判断")
    String findAllUsers() {
        return "这是查询用户!!!";
    }

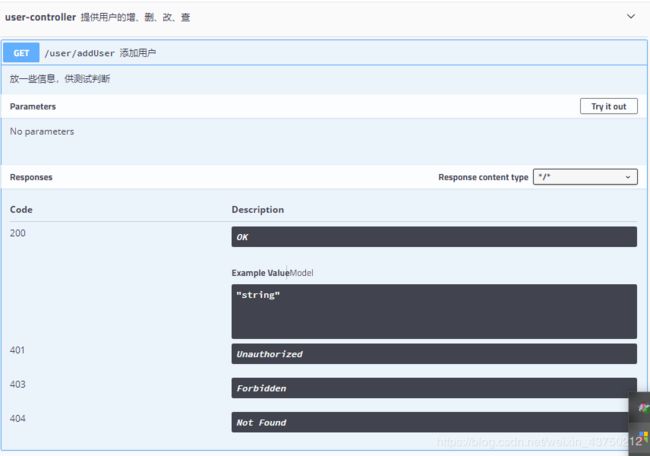
}很明显,有了中文注释,文档可读性更强。
要说明的是,平时写 @RequestMapping 注解的时候,我通常会简写,如上demo中的修改用户方法。但是swagger是侵入式的,如果未指定 RequestMethod 类型,就会把一大堆都列出来,如GET,HEAD,POST,PUT,DELETE,OPTIONS,PATCH ,而其他指定好的,则是一条。


