.Net Core跨平台应用研究-CustomSerialPort
-增强型跨平台串口类库
摘要
在使用SerialPort进行串口协议解析过程中,经常遇到接收单帧协议数据串口接收事件多次触发,协议解析麻烦的问题。针对此情况,基于开源跨平台串口类库SerialPortStrem进行了进一步封装,实现了一种接收超时响应事件机制,简化串口通讯的使用。
引言
最近,写了一篇博文《.net core跨平台应用研究-串口篇》得到了一些园友的好评,文中介绍了在跨平台应用研究过程中,在dotnet core下使用SerialPort类库在linux下不能支持的踩坑经历及解决办法。
因网上关于SerialPort类库使用的相关文章较多,在该文中,对串口类库的使用,一笔带过。但在实际使用,使用过SerialPort类库的同学,可能遇到过在数据接收时,由于数据接收事件的触发具有不确定性,很多时候,一帧通讯协议数据,会多次触发,造成程序处理协议数据较为麻烦的问题。
为简化串口通讯类库的使用,笔者结合自己的相关经验,封装了一个自定义增强型跨平台串口类库,以解决一帧协议数据,多次触发的问题。
基础类库的选择
由于考虑的是跨平台应用,SerialPort类库并不支持linux系统(在前一篇文章中已介绍过踩坑经历),笔者选用了SerialPortStream类库进行封装。
该类库支持windows系统和Linux系统,但在Linux系统下运行,需要额外编译目标平台支持库并进行相关环境配置。
相关编译配置说明在https://github.com/jcurl/SerialPortStream已有介绍,也可参考本人的拙作《.net core跨平台应用研究-串口篇》
类库的实现
创建跨平台类库
为了支持跨平台,我们使用Visual Studio 2017创建一个基于.NET Standard的类库。
NET Standard是一项API规范,每一个特定的版本,都定义了必须实现的基类库。
.NET Core是一个托管框架,针对构建控制台、云、ASP.NET Core和UWP应用程序进行了优化。
每一种托管实现(如.NET Core、.NET Framework或Xamarin)都必须遵循.NET Standard实现基类库(BCL)。
关于NET Standard和跨平台的详细说明在此:
https://zhuanlan.zhihu.com/p/30081607
笔者也不再啰嗦呵。
实现机制/条件
通常串口通讯中,发送数据后,会有一段时间用于等待接收方应答,如此一来,两次数据发送之间,必然会有一定的时间间隔。如ModbusRTU协议就规定,两次数据报文发送之间,需要等待超过发送4个字节以上的间隔时间。
笔者在单片机以及实时性较高的嵌入式系统中,为处理串口接收与协议的无关性,通常采用数据帧接收超时来处理数据帧的接收。根据串口通讯的速率计算出两次通讯之间所需要超时间隔,取两倍超时间隔时间作为超时参数,每接收到一个字节,将数据放入缓冲区并进行计时,当最后一个字节的接收时间超过超时时间,返回接收数据并清空缓存,一次完整接收完成(DMA接收方式不在此讨论)。
.net core跨平台实现
在自定义的串口类中,订阅基础串口类数据接收事件,在接收事件每次触发后,读出当前可用的缓冲数据到自定义缓冲区,同时,标记最后接收时间Tick为当前系统Tick。判断是否开启了接收超时处理线程,如未开启,则开启一个接收超时处理线程。
接收超时处理线程中,以一个较小的时间间隔进行判断,如果最后接收时间与当前时间之间的间隔小于设置值(默认128ms),休眠一段时间(默认16ms)后循环检查。如间隔时间大于设定值,触发外部接收订阅事件,传出接收到的数据,退出超时处理线程。
此处应有流程图。呵呵,懒得画了,大家自行脑补吧。 ^_^
在windows系统或linux系统中,因系统的多任务处理的特性,系统实时性较差,通常50ms以下时间间隔的定时任务,较大程度会出现不可靠的情况(任务执行时间都有可能超过调用间隔时间)。
因此,默认超时时间间隔设置为128ms。也可根据实际使用情况调整,但最小间隔不宜低于64ms。
注:此处为个人经验和理解,如不认同,请直接忽视。
主要代码
串口接收事件代码:
 1         protected void Sp_DataReceived(object sender, SerialDataReceivedEventArgs e)
 2         {
 3             int canReadBytesLen = 0;
 4             if (ReceiveTimeoutEnable)
 5             {
 6                 while (sp.BytesToRead > 0)
 7                 {
 8                     canReadBytesLen = sp.BytesToRead;
 9                     if (receiveDatalen + canReadBytesLen > BufSize)
10                     {
11                         receiveDatalen = 0;
12                         throw new Exception("Serial port receives buffer overflow!");
13                     }
14                     var receiveLen = sp.Read(recviceBuffer, receiveDatalen, canReadBytesLen);
15                     if (receiveLen != canReadBytesLen)
16                     {
17                         receiveDatalen = 0;
18                         throw new Exception("Serial port receives exception!");
19                     }
20                     //Array.Copy(recviceBuffer, 0, receivedBytes, receiveDatalen, receiveLen);
21                     receiveDatalen += receiveLen;
22                     lastReceiveTick = Environment.TickCount;
23                     if (!TimeoutCheckThreadIsWork)
24                     {
25                         TimeoutCheckThreadIsWork = true;
26                         Thread thread = new Thread(ReceiveTimeoutCheckFunc)
27                         {
28                             Name = "ComReceiveTimeoutCheckThread"
29                         };
30                         thread.Start();
31                     }
32                 }
33             }
34             else
35             {
36                 if (ReceivedEvent != null)
37                 {
38                     // 获取字节长度
39                     int bytesNum = sp.BytesToRead;
40                     if (bytesNum == 0)
41                         return;
42                     // 创建字节数组
43                     byte[] resultBuffer = new byte[bytesNum];
44
45                     int i = 0;
46                     while (i < bytesNum)
47                     {
48                         // 读取数据到缓冲区
49                         int j = sp.Read(recviceBuffer, i, bytesNum - i);
50                         i += j;
51                     }
52                     Array.Copy(recviceBuffer, 0, resultBuffer, 0, i);
53                     ReceivedEvent(this, resultBuffer);
54                     //System.Diagnostics.Debug.WriteLine("len " + i.ToString() + " " + ByteToHexStr(resultBuffer));
55                 }
56                 //Array.Clear (receivedBytes,0,receivedBytes.Length );
57                 receiveDatalen = 0;
58             }
59         }
接收超时处理线程代码:
1 ///2 /// 超时返回数据处理线程方法 3 /// 4 protected void ReceiveTimeoutCheckFunc() 5 { 6 while (TimeoutCheckThreadIsWork) 7 { 8 if (Environment.TickCount - lastReceiveTick > ReceiveTimeout) 9 { 10 if (ReceivedEvent != null) 11 { 12 byte[] returnBytes = new byte[receiveDatalen]; 13 Array.Copy(recviceBuffer, 0, returnBytes, 0, receiveDatalen); 14 ReceivedEvent(this, returnBytes); 15 } 16 //Array.Clear (receivedBytes,0,receivedBytes.Length ); 17 receiveDatalen = 0; 18 TimeoutCheckThreadIsWork = false; 19 } 20 else 21 Thread.Sleep(16); 22 } 23 }
创建.net core控制台程序
为验证我们的类库是否能够正常工作,我们创建一个使用类库的.net core控制台程序。
为啥选择dotnet core,原因很简单,跨平台。本程序分别需在windows和linux系统下进行运行测试。
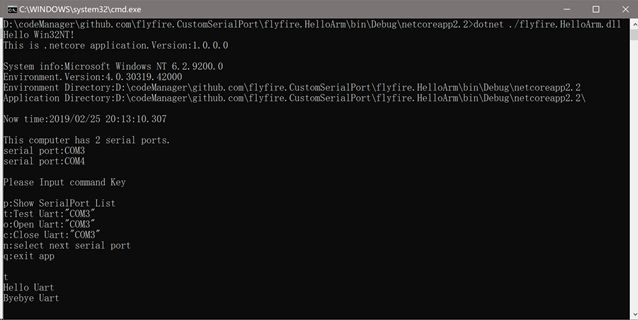
控制台程序主要实现以下功能:
- 显示系统信息(系统标识、程序标识等)
- 列举系统可用串口资源
- 选择串口
- 打开串口/关闭串口
- 串口测试(打开/发送/关闭)
 1         static void Main(string[] args)
 2         {
 3             SetLibPath();
 4             ShowWelcome();
 5
 6             GetPortNames();
 7             ShowPortNames();
 8
 9             if (serailports.Length == 0)
10             {
11                 Console.WriteLine($"Press any key to exit");
12                 Console.ReadKey();
13
14                 return;
15             }
16 #if RunIsService
17             RunService();
18 #endif
19
20             bool quit = false;
21             while (!quit)
22             {
23                 Console.WriteLine("\r\nPlease Input command Key\r\n");
24                 Console.WriteLine("p:Show SerialPort List");
25                 Console.WriteLine($"t:Test Uart:\"{selectedComPort}\"");
26                 Console.WriteLine($"o:Open Uart:\"{selectedComPort}\"");
27                 Console.WriteLine($"c:Close Uart:\"{selectedComPort}\"");
28                 Console.WriteLine("n:select next serial port");
29                 Console.WriteLine("q:exit app");
30                 Console.WriteLine();
31                 var key = Console.ReadKey().KeyChar;
32                 Console.WriteLine();
33
34                 switch (key)
35                 {
36                     case (Char)27:
37                     case 'q':
38                     case 'Q':
39                         quit = true;
40                         break;
41                     case 's':
42                         ShowWelcome();
43                         break;
44                     case 'p':
45                         ShowPortNames();
46                         break;
47                     case 'n':
48                         SelectSerialPort();
49                         break;
50                     case 't':
51                         TestUart(selectedComPort);
52                         break;
53                     case 'w':
54                         TestWinUart(selectedComPort);
55                         break;
56                     case 'o':
57                         OpenUart(selectedComPort);
58                         break;
59                     case 'c':
60                         CloseUart();
61                         break;
62                 }
63             }
64         }
笔者使用类库是直接引用类库项目,大家需要使用的话,可在解决方案资源管理器中,项目的依赖项上点击右键
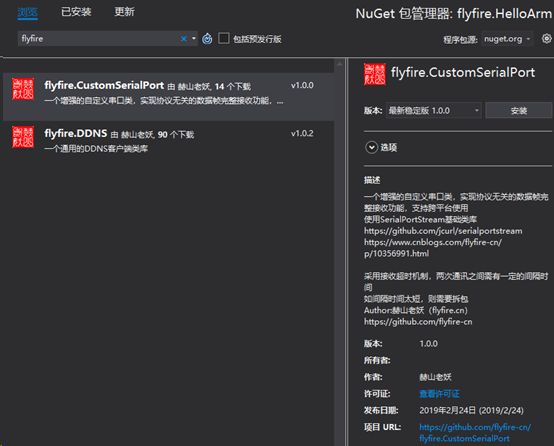
在NuGet包管理器中,搜索SerialPort或flyfire即可找到并安装本类库。
类库地址
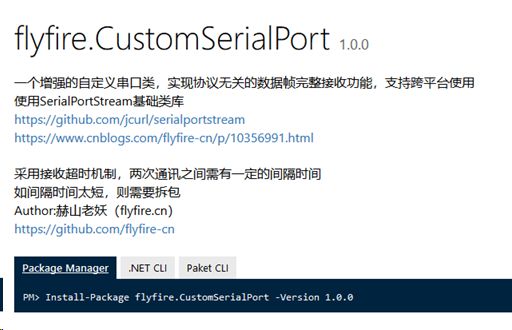
类库地址:https://www.nuget.org/packages/flyfire.CustomSerialPort
跨平台测试
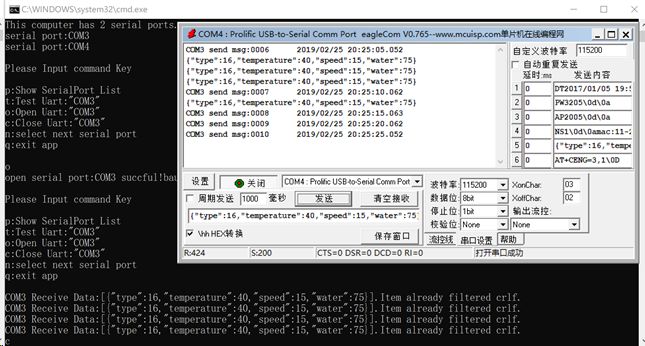
Windows测试输出界面
ubuntu测试输出界面
源码地址
类库源码与例程地址:https://github.com/flyfire-cn/flyfire.CustomSerialPort
有需要的同学,请自行获取。


