1、axios安装
1.1、 利用npm安装npm install axios --save
1.2、 利用bower安装bower install axios --save
1.3、 直接利用cdn引入
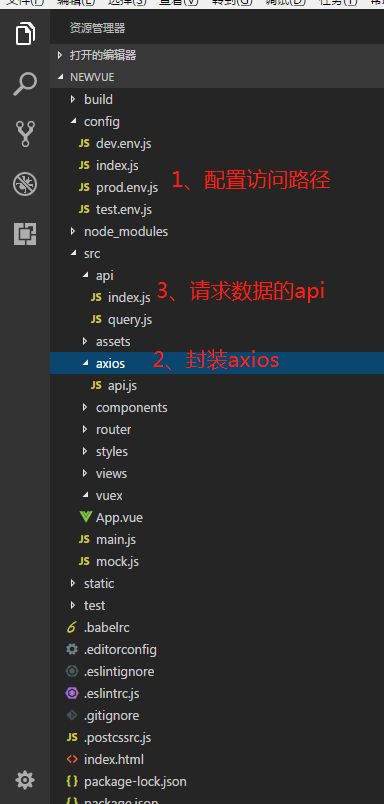
2、配置访问路径
在项目开发的时候,接口联调的时候一般都是同域名下,且不存在跨域的情况下进行接口联调,但是当我们现在使用vue-cli进行项目打包的时候,我们在本地启动服务器后,比如本地开发服务下是 http://localhost:8080 这样的访问页面,但是我们的接口地址是 http://xxxx.com/save/index 这样的接口地址,我们这样直接使用会存在跨域的请求,导致接口请求不成功,因此我们需要在打包的时候配置一下,我们进入 config/index.js 代码下如下配置即可:
3、封装axios(我们进入 axios/api.js 代码下如下配置即可)
import axios from 'axios'
import { Message, Loading } from 'element-ui'
let loadingInstance
const CancelToken = axios.CancelToken
// request拦截器
axios.interceptors.request.use(
config => {
console.log('请求开始')
// 全屏Loading开始
loadingInstance = Loading.service({ fullscreen: true })
return config
},
error => {
// Do something with request error
console.log(error) // for debug
Promise.reject(error)
}
)
// respone拦截器
axios.interceptors.response.use(
response => {
if (
typeof response.data === 'string' &&
response.data.indexOf('xmlns') > -1
) {
response.status = 302
}
// Loading关闭
loadingInstance.close()
switch (response.status) {
case 302:
// 可能登录超时
store.state.app.storeSession = true
console.log('ccc')
// window.location.href = window.location.origin + '/logout'
break
case 401:
// 可能登录超时
window.location.href = window.location.origin + '/logout'
break
case 404:
// 404
window.location.href = '../views/pages/error404.vue'
break
case 500:
// 502
window.location.href = '../views/pages/500.vue'
break
case 502:
// 502
window.location.href = '../views/pages/error.vue'
break
}
const res = response.data
// 系统级错误
if (res.status === 500) {
Message({
message: '服务器出错啦~:' + res.res.codeMsg,
type: 'error',
duration: 5 * 1000
})
return Promise.reject(res.res.codeMsg)
} else if (typeof res.status !== 'undefined' && res.status !== 200) {
console.log('系统运行错误:', res)
Message({
message: '系统运行错误:' + res.statusMsg,
type: 'error',
duration: 5 * 1000
})
return Promise.reject(res.statusMsg)
} else if (
typeof res.res !== 'undefined' &&
typeof res.res.code !== 'undefined' &&
res.res.code !== 1000
) {
Message({
message: '业务处理错误:' + res.res.codeMsg.client_error,
type: 'error',
duration: 5 * 1000
})
return Promise.reject(res.res.codeMsg)
// 业务处理
} else {
// console.log(response.data)
// 处理 lang
if (typeof res.res === 'undefined') {
// 传送2进制文件
res.blob = res
res.filename = decodeURI(
response.headers['content-disposition'].split('=')[1]
)
return res
} else {
return res.res.data
}
}
},
error => {
// Loading关闭
loadingInstance.close()
if (error.message !== 'USERCANCEL') {
Message({
message: '数据请求超时!!',
type: 'error',
duration: 5 * 1000
})
}
return Promise.reject(error)
}
)
// 自定义 处理 返回信息
export function custom(config) {
const params = {}
const d = new Date()
params.time = d.toISOString()
params.lang = navigator.language || navigator.browserLanguage
params.req = {}
params.req.source = 'pc'
params.req.data = config.params
return axios({
method: config.method,
url: config.url,
data: params,
responseType: 'arraybuffer',
baseURL: '/be/', // api的base_url //需要修改的
timeout: 30000,
headers: {
accept: 'application/json'
}
})
}
// 统一请教模版
export function fetch(config) {
if (typeof config.cancelToken === 'undefined') {
config.cancelToken = new CancelToken(function (cancel) {
console.log('取消')
})
}
const params = {}
const d = new Date()
params.time = d.toISOString()
params.lang = navigator.language || navigator.browserLanguage
params.req = {}
params.req.source = 'pc'
params.req.data = config.params
return axios({
method: config.method,
url: config.url,
data: params,
// baseURL: '/be/', // api的base_url //需要修改的
baseURL: process.env.BASE_API, // api的 base_url //需要修改的
timeout: config.timeout ? config.timeout : 30000,
headers: {
accept: 'application/json'
},
cancelToken: config.cancelToken
})
}
4、api请求配置
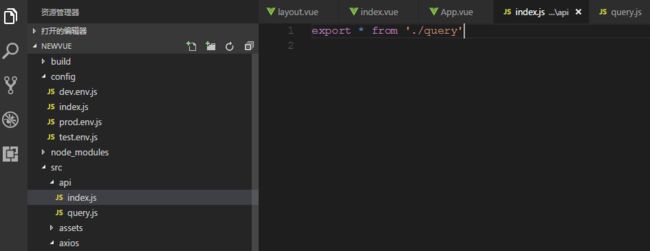
4.1、配置公共引用(api/index.js)
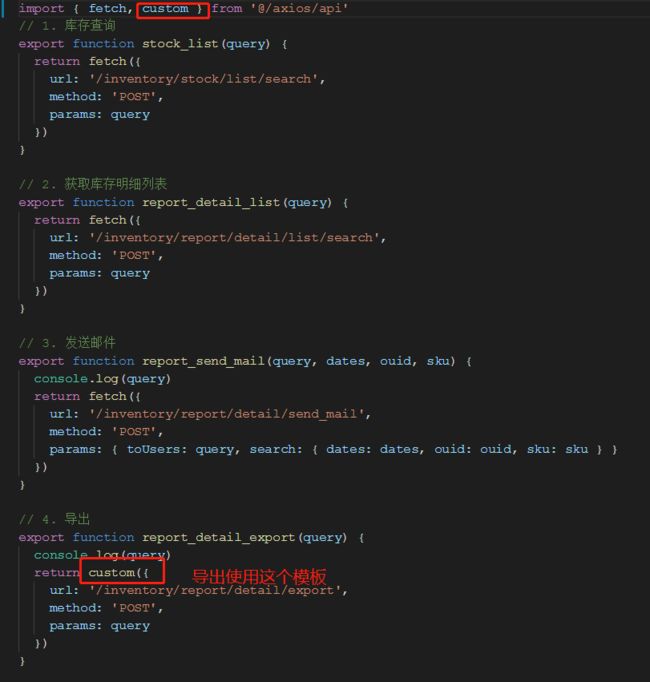
4.2编写query.js中请求接口
import { fetch,custom } from '@/axios/api'
// 1. 库存查询
export function stock_list(query) {
return fetch({
url: '/inventory/stock/list/search',
method: 'POST',
params: query
})
}
4.3在home.vue中调用
4.3.1普通接口调用
import { stock_list} from '@/api'
const _this = this
stock_list(_this.req).then(response => {
this.skuCateIdList = response
})
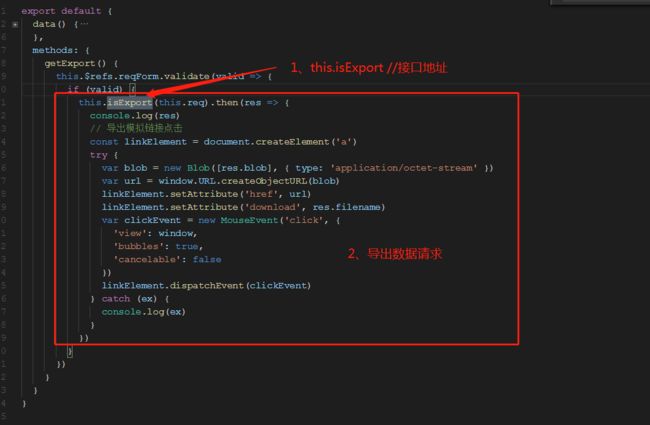
4.3.2导出数据接口调用
导出数据代码
this.isExport(this.req).then(res => {
console.log(res)
// 导出模拟链接点击
const linkElement = document.createElement('a')
try {
var blob = new Blob([res.blob], { type: 'application/octet-stream' })
var url = window.URL.createObjectURL(blob)
linkElement.setAttribute('href', url)
linkElement.setAttribute('download', res.filename)
var clickEvent = new MouseEvent('click', {
'view': window,
'bubbles': true,
'cancelable': false
})
linkElement.dispatchEvent(clickEvent)
} catch (ex) {
console.log(ex)
}
})
结束语:axios在vue中的使用方法大概就这些。


