一、简介
JDBC,Mybatis,Spring Data JPA
主要讨论SpringBoot如何与关系型数据库交互
对于数据访问层,无论是SQL还是NOSQL,Spring Boot默认采用整合 Spring Data的方式进行统一处理,添加大量自动配置,屏蔽了很多设置。引入 各种xxxTemplate,xxxRepository来简化我们对数据访问层的操作。对我们来 说只需要进行简单的设置即可。
二、JDBC
JDBC是Java提供的一个操作数据库的API;
JDBC的相关资料:https://www.cnblogs.com/xiaotiaosi/p/6394554.html
(一)相关代码
pom.xml
    org.springframework.boot
    spring-boot-starter-jdbc


    mysql
    mysql-connector-java
    runtime
application.yaml
spring:
  datasource:
    username: admin
    password: admin
    url: jdbc:mysql://localhost:3306/jdbc
    driver-class-name: com.mysql.cj.jdbc.Driver
SpringBootDemoApplicationTests .java
@RunWith(SpringRunner.class)
@SpringBootTest
public class SpringBootDemoApplicationTests {
@Autowired //自动注入
DataSource dataSource;
@Test
public void contextLoads() throws SQLException {
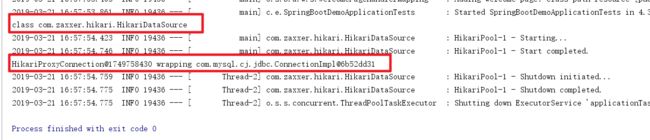
System.out.println(dataSource.getClass());//输出看一下是什么数据源
Connection connection = dataSource.getConnection();
System.out.println(connection);//查看是否获取到了连接
connection.close();
}
}
(二)遇到的错误:
mysql异常:
The server time zone value 'Öйú±ê׼ʱ¼ä' is unrecognized or represents more than one time zone

解决办法:
由于时区问题导致的, 只需要更改MySQL的时区 注意在英文状态下输入
 show variables like '%time_zone%';
 set global time_zone = '+8:00';   //修改mysql全局时区为东8区,即北京时间
 set time_zone = '+8:00'; //修改当前会话时区
flush privileges; //立即生效
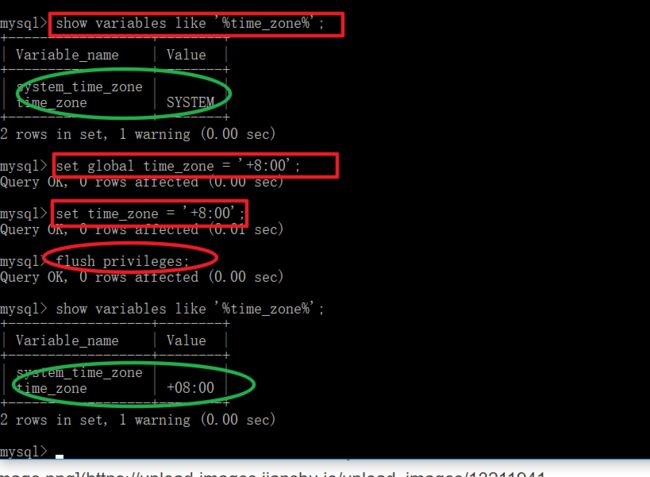
效果:
不再报错,并输出了数据源和连接
另,数据源的相关配置都在DataSourceProperties里面;
(三)自动配置原理:
org.springframework.boot.autoconfigure.jdbc:
1、参考DataSourceConfiguration,根据配置创建数据源
2、SpringBoot默认可以支持;
org.apache.tomcat.jdbc.pool.DataSource、HikariDataSource、BasicDataSource、
3、自定义数据源类型
static class Generic {
        Generic() {
        }
//使用DataSourceBuilder创建数据源,利用反射创建响应type的数据源,并且绑定相关属性
        @Bean
        public DataSource dataSource(DataSourceProperties properties) {
            return properties.initializeDataSourceBuilder().build();
        }
    }
 public DataSourceBuilder initializeDataSourceBuilder() {
        return DataSourceBuilder.create(this.getClassLoader()).type(this.getType()).driverClassName(this.determineDriverClassName()).url(this.determineUrl()).username(this.determineUsername()).password(this.determinePassword());
    }
4、DataSourceInitializer;
 public boolean createSchema() {
        List scripts = this.getScripts("spring.datasource.schema", this.properties.getSchema(), "schema");
        if (!scripts.isEmpty()) {
            if (!this.isEnabled()) {
                logger.debug("Initialization disabled (not running DDL scripts)");
                return false;
            }

            String username = this.properties.getSchemaUsername();
            String password = this.properties.getSchemaPassword();
            this.runScripts(scripts, username, password);
        }

        return !scripts.isEmpty();
    }
......
private void runScripts(List resources, String username, String password) {
        if (!resources.isEmpty()) {
            ResourceDatabasePopulator populator = new ResourceDatabasePopulator();
            populator.setContinueOnError(this.properties.isContinueOnError());
            populator.setSeparator(this.properties.getSeparator());
            if (this.properties.getSqlScriptEncoding() != null) {
                populator.setSqlScriptEncoding(this.properties.getSqlScriptEncoding().name());
            }

            Iterator var5 = resources.iterator();

            while(var5.hasNext()) {
                Resource resource = (Resource)var5.next();
                populator.addScript(resource);
            }

            DataSource dataSource = this.dataSource;
            if (StringUtils.hasText(username) && StringUtils.hasText(password)) {
                dataSource = DataSourceBuilder.create(this.properties.getClassLoader()).driverClassName(this.properties.determineDriverClassName()).url(this.properties.determineUrl()).username(username).password(password).build();
            }

            DatabasePopulatorUtils.execute(populator, dataSource);
        }
    }
默认只需要将文件命名为:
schema-*.sql、data-*.sql
默认规则:schema.sql,schema-all.sql;
可以使用
    schema:
      - classpath:department.sql
      指定位置
小例子
department.sql
SET FOREIGN_KEY_CHECKS=0;

-- ----------------------------
-- Table structure for department
-- ----------------------------
DROP TABLE IF EXISTS `department`;
CREATE TABLE `department` (
  `id` int(11) NOT NULL AUTO_INCREMENT,
  `departmentName` varchar(255) DEFAULT NULL,
  PRIMARY KEY (`id`)
) ENGINE=InnoDB AUTO_INCREMENT=1 DEFAULT CHARSET=utf8;
application.yml
spring:
  datasource:
    username: admin
    password: admin
    url: jdbc:mysql://localhost:3306/jdbc
    driver-class-name: com.mysql.cj.jdbc.Driver
    initialization-mode: always
    schema:
      - classpath:department.sql
遇到的问题:
Property spring.datasource.schema with value 'class path resource.[sql/department.sql]' is invalid: The specified resource does not exist

原因:
因为我刚开始写的是:
schema:
      - classpath:sql/department.sql
路径不匹配,所以报错说没有找到sql文件
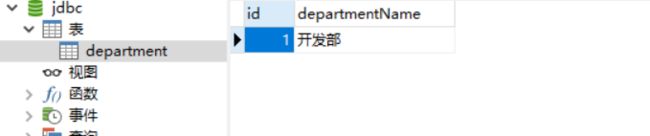
效果:

5、操作数据库:自动配置了JdbcTemplate操作数据库
如何使用?
小例子
controller
/**
* 需要注意的是,建表操作是每启动一次项目,就执行一次
*/
@Controller
public class TestController {
@Autowired
JdbcTemplate jdbcTemplate;
@ResponseBody
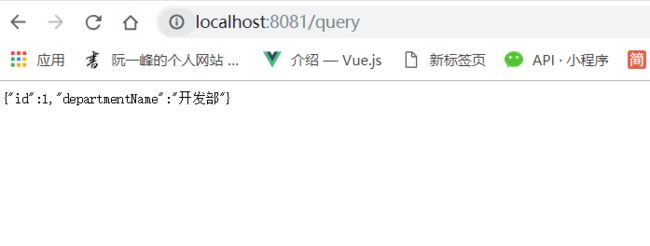
@GetMapping("/query")
public Map map(){
List> list = jdbcTemplate.queryForList("SELECT * FROM department");
System.out.println(list.get(0));
return list.get(0);
}
}
三、整合Druid数据源
在开发过程中,很少使用org.apache.tomcat.jdbc.pool.DataSource数据源,可以用:c3p0 ,Druid,HikariDataSource
Druid是一个阿里数据源产品,用的比较多,因为他有安全,监控等解决方案
数据库连接池相关资料:https://www.cnblogs.com/JavaSubin/p/5294721.html
maven仓库:https://mvnrepository.com/
到maven仓库中选择要引入的版本

application.yaml
spring:
datasource:
username: admin
password: admin
url: jdbc:mysql://localhost:3306/jdbc
driver-class-name: com.mysql.cj.jdbc.Driver
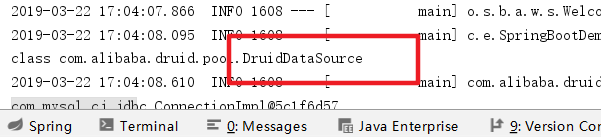
type: com.alibaba.druid.pool.DruidDataSource //用来自定义数据源
运行test,(就是测试JDBC时的test,不用做任何更改,代码见上面)
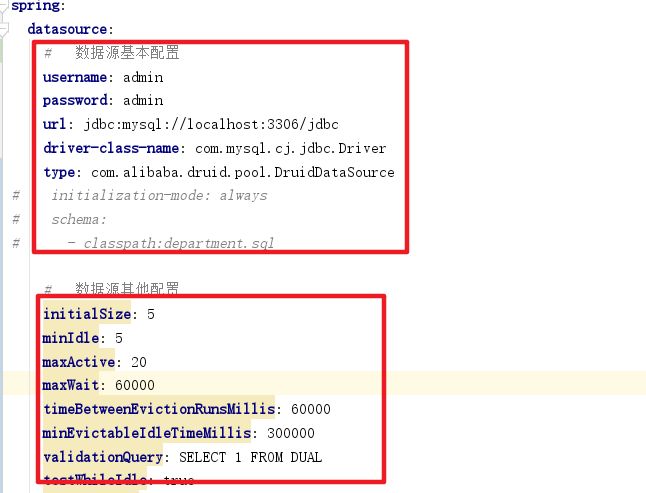
Druid需要设置监控,初始化连接池大小等等配置,配置见下:
spring:
  datasource:
    #   数据源基本配置
    username: admin
    password: admin
    url: jdbc:mysql://localhost:3306/jdbc
    driver-class-name: com.mysql.cj.jdbc.Driver
    type: com.alibaba.druid.pool.DruidDataSource
#    initialization-mode: always
#    schema:
#      - classpath:department.sql

    #   数据源其他配置
    initialSize: 5
    minIdle: 5
    maxActive: 20
    maxWait: 60000
    timeBetweenEvictionRunsMillis: 60000
    minEvictableIdleTimeMillis: 300000
    validationQuery: SELECT 1 FROM DUAL
    testWhileIdle: true
    testOnBorrow: false
    testOnReturn: false
    poolPreparedStatements: true
    #   配置监控统计拦截的filters,去掉后监控界面sql无法统计,'wall'用于防火墙
    filters: stat,wall,log
    maxPoolPreparedStatementPerConnectionSize: 20
    useGlobalDataSourceStat: true
    connectionProperties: druid.stat.mergeSql=true;druid.stat.slowSqlMillis=500
设置完后可以看到下面的配置背景填充,这是应为下边这些配置无法绑定到DataSourceProperties上,即是这些配置没有生效。
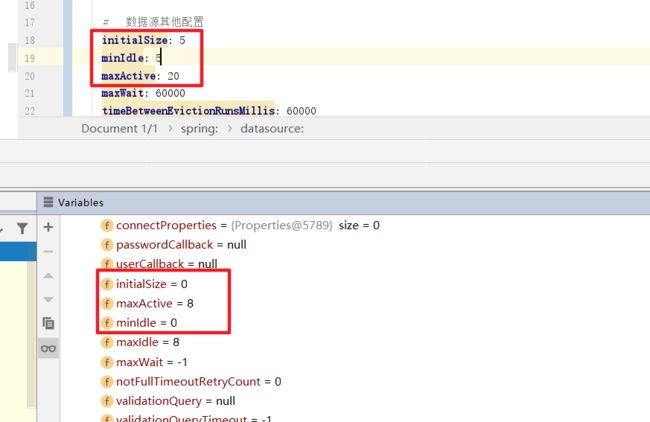
那该如何让他们生效呢?
自己配一下就可以了
自己创一个数据源,并加在容器中(@Bean),再用一个属性注解(@ConfigurationProperties)绑定配置
@Configuration
public class DruidConfig {
    @ConfigurationProperties(prefix = "spring.datasource")
    @Bean
    public DataSource druidDataSource(){
        return new DruidDataSource();
    }

    //配置Druid的监控
    //1、配置一个管理后台的Servlet
    @Bean
    public ServletRegistrationBean statViewServlet(){
        ServletRegistrationBean bean = new ServletRegistrationBean(new StatViewServlet(), "/druid/*");
        Map initParams = new HashMap<>();

        initParams.put("loginUsername","admin");
        initParams.put("loginPassword","123456");
        initParams.put("allow","");//默认就是允许所有访问
        initParams.put("deny","192.168.15.21");

        bean.setInitParameters(initParams);
        return bean;
    }


    //2、配置一个web监控的filter
    @Bean
    public FilterRegistrationBean webStatFilter(){
        FilterRegistrationBean bean = new FilterRegistrationBean();
        bean.setFilter(new WebStatFilter());

        Map initParams = new HashMap<>();
        initParams.put("exclusions","*.js,*.css,/druid/*");

        bean.setInitParameters(initParams);

        bean.setUrlPatterns(Arrays.asList("/*"));

        return  bean;
    }
}


三、MyBatis
MyBatis是一个支持普通SQL查询,存储过程和高级映射的优秀持久层框架。
pom.xml
    org.mybatis.spring.boot
    mybatis-spring-boot-starter
    1.3.1
根据命名习惯,可以看出,这不是SpringBoot官方出的,而是mybatis自己来适配SpringBoot的starter

(一)步骤
1)、配置数据源相关属性(见上一节Druid)
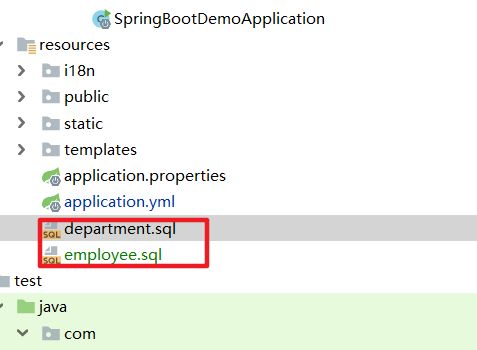
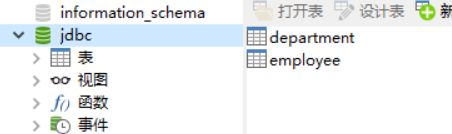
2)、给数据库建表
employee.sql
ET FOREIGN_KEY_CHECKS=0;

-- ----------------------------
-- Table structure for employee
-- ----------------------------
DROP TABLE IF EXISTS `employee`;
CREATE TABLE `employee` (
  `id` int(11) NOT NULL AUTO_INCREMENT,
  `lastName` varchar(255) DEFAULT NULL,
  `email` varchar(255) DEFAULT NULL,
  `gender` int(2) DEFAULT NULL,
  `d_id` int(11) DEFAULT NULL,
  PRIMARY KEY (`id`)
) ENGINE=InnoDB AUTO_INCREMENT=1 DEFAULT CHARSET=utf8;
department.sql
SET FOREIGN_KEY_CHECKS=0;

-- ----------------------------
-- Table structure for department
-- ----------------------------
DROP TABLE IF EXISTS `department`;
CREATE TABLE `department` (
  `id` int(11) NOT NULL AUTO_INCREMENT,
  `departmentName` varchar(255) DEFAULT NULL,
  PRIMARY KEY (`id`)
) ENGINE=InnoDB AUTO_INCREMENT=1 DEFAULT CHARSET=utf8;
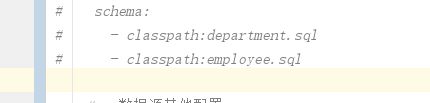
pom.xml在原来基础上加上这几句话
schema:
      - classpath:department.sql
      - classpath:employee.sql
3)、创建JavaBean
根据表格的设计,写相关的代码,再自动生成get/set方法
4)、注解版
写一个mapper操作数据库
@Mapper //指定这是一个操作数据库的mapper
public interface DepartmentMapper {
    @Select("select * from department where id = #{id}")
    public Department getDeptById(Integer id);
    @Delete("delete from department where id = #{id}")
    public int deleteDeptById(Integer id);
    @Insert("insert into department(departmentName) values (#{departmentName})")
    public int insertDept(Department department);
    @Update("update department set departmentName = #{departmentName} where id = #{id}")
    public int updateDept(Department department);
}
写一个Controller测一测
@RestController //返回json数据,不返回页面
public class DeptController {
@Autowired
DepartmentMapper departmentMapper;
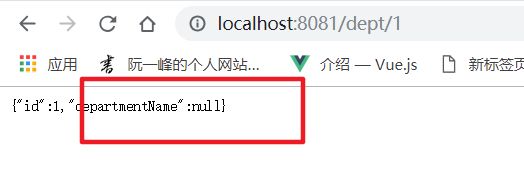
@GetMapping("/dept/{id}") //要处理的映射,以占位符的方式取出id
public Department getDepartment(@PathVariable("id") int id){
return departmentMapper.getDeptById(id);
}
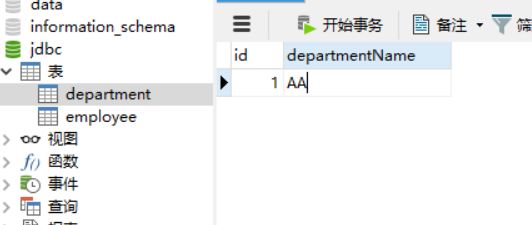
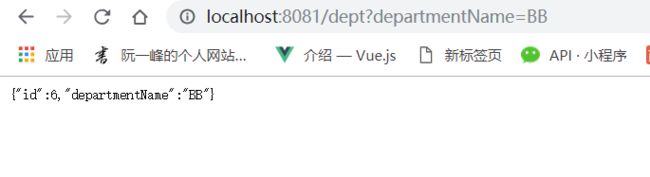
@GetMapping("/dept")
public Department insertDepartment(Department department){
departmentMapper.insertDept(department);
return department;
}
}
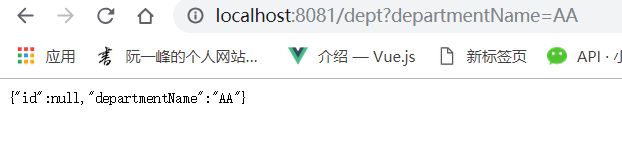

注解版我们不需要进行任何的配置,都已经自动配置好了
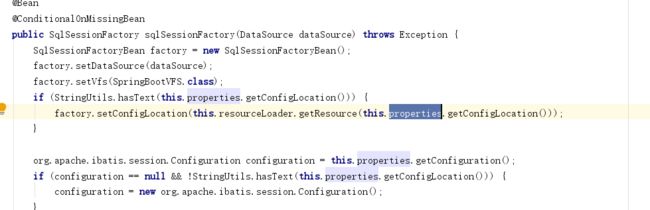
存在的问题:插入的时候,返回的数据里面id为null
解决办法:

如何进行相关的mybatis设置


解决办法:自定义MyBatis的配置规则
@Configuration
public class MyBatisConfig {
    @Bean
    public ConfigurationCustomizer configurationCustomizer (){
        return new ConfigurationCustomizer(){
            @Override
            public void customize(org.apache.ibatis.session.Configuration configuration) {
                configuration.setMapUnderscoreToCamelCase(true);//开启驼峰命名方式
            }
        };
    }
}

拓展一下,当mapper特别多的时候,不想标那么多个@mapper,可以在application或者配置类中使用 @MapperScan("mapper的路径")批量扫描
5)、配置版
自己配置好烦啦!以后再学
教程在这:https://www.bilibili.com/video/av38657363/?p=65
参考资料:
http://www.cnblogs.com/wangdianqian/p/9927406.html