原创作品,允许转载,转载时请务必以超链接形式标明文章 原始出处 、作者信息和本声明。否则将追究法律责任。 http://shubao.blog.51cto.com/401810/831299

一:安装 Windows Server 2008 R2(略)

二:安装 SQL Server 2008 R2 SP1 Management Studio Express x64 或者其它版本的 SQL 2008 数据库

安装 SQL Server 2008 R2 SP1

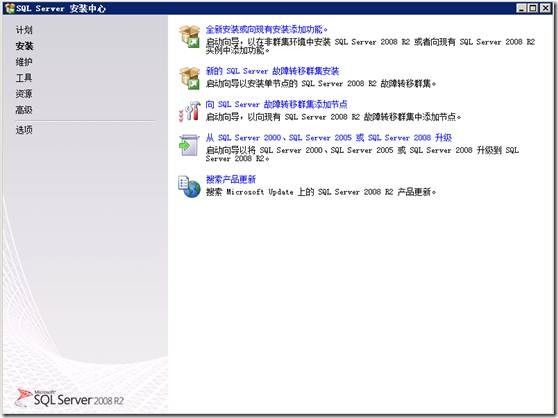
选择 --- 全新安装

Vmware vSphere 5.0安装(使用SQL2008R2Enterprise)_第1张图片

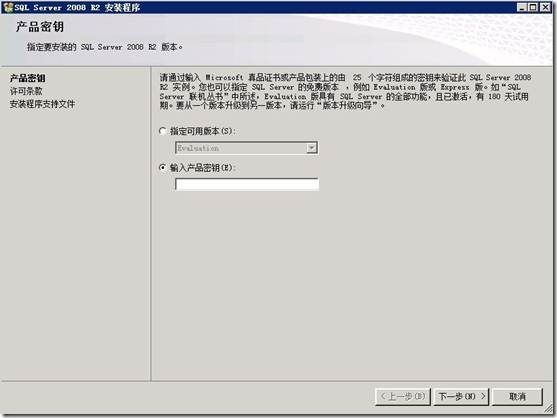
输入 产品密钥

Vmware vSphere 5.0安装(使用SQL2008R2Enterprise)_第2张图片

选择 ---我接受许可条款 ---下一步

Vmware vSphere 5.0安装(使用SQL2008R2Enterprise)_第3张图片

安装程序支持文件

Vmware vSphere 5.0安装(使用SQL2008R2Enterprise)_第4张图片

安装程序支持规则

Vmware vSphere 5.0安装(使用SQL2008R2Enterprise)_第5张图片

注:防火墙警告体内是开启相应端口

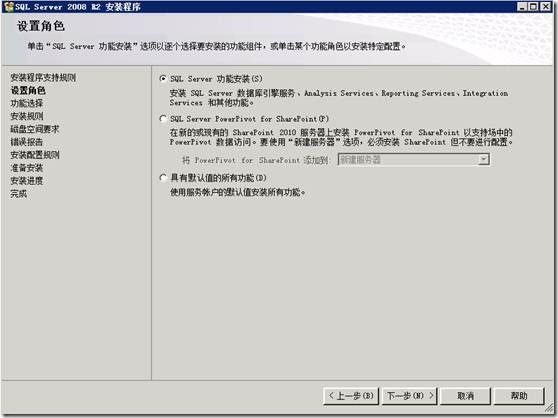
设置角色

Vmware vSphere 5.0安装(使用SQL2008R2Enterprise)_第6张图片

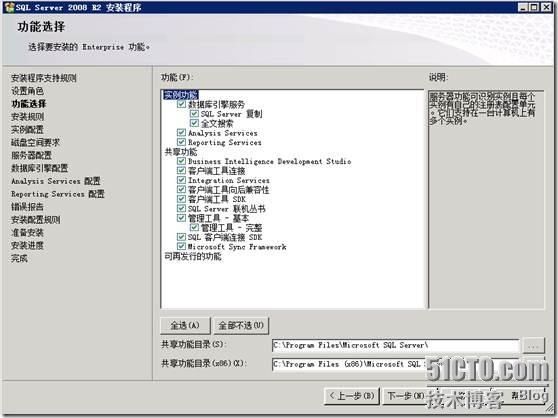
选择要安装的功能及共享功能目录路径,下一步

Vmware vSphere 5.0安装(使用SQL2008R2Enterprise)_第7张图片

相关检测,继续下一步

Vmware vSphere 5.0安装(使用SQL2008R2Enterprise)_第8张图片

命名实例:设置为 VM_SQL (自定义),数据库位置:根据实际情况修改位置

继续,下一步。(关键步骤)

Vmware vSphere 5.0安装(使用SQL2008R2Enterprise)_第9张图片

磁盘信息摘要

Vmware vSphere 5.0安装(使用SQL2008R2Enterprise)_第10张图片

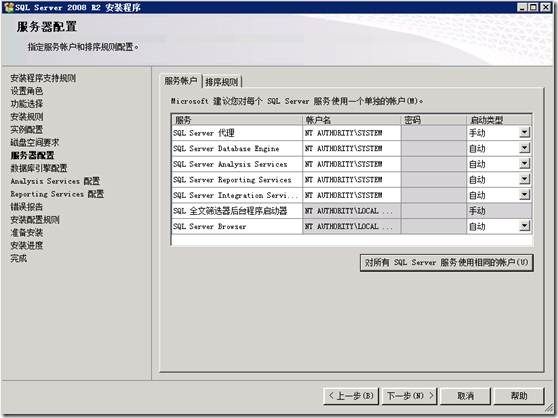
指定服务账户和排序规则配置,选择对所有 SQL SERVER 服务使用相同的帐户,下一步

Vmware vSphere 5.0安装(使用SQL2008R2Enterprise)_第11张图片

Vmware vSphere 5.0安装(使用SQL2008R2Enterprise)_第12张图片

选择 SQL SERVER 身份验证安全模式,选择Windows身份验证模式,并添加当前用户账号,下一步

Vmware vSphere 5.0安装(使用SQL2008R2Enterprise)_第13张图片

指定Analysis Services 管理员和数据文件夹,添加当前用户,下一步

Vmware vSphere 5.0安装(使用SQL2008R2Enterprise)_第14张图片

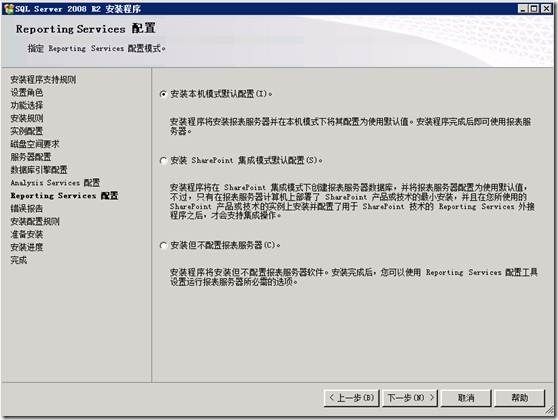
指定Reporting Services配置模式,选默认,下一步

Vmware vSphere 5.0安装(使用SQL2008R2Enterprise)_第15张图片

错误报告,继续下一步

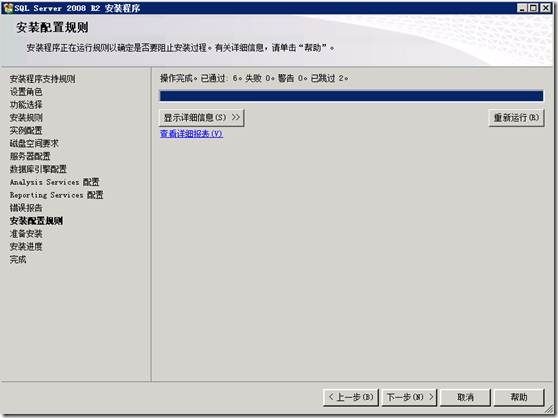
Vmware vSphere 5.0安装(使用SQL2008R2Enterprise)_第16张图片

Vmware vSphere 5.0安装(使用SQL2008R2Enterprise)_第17张图片

准备安装

Vmware vSphere 5.0安装(使用SQL2008R2Enterprise)_第18张图片

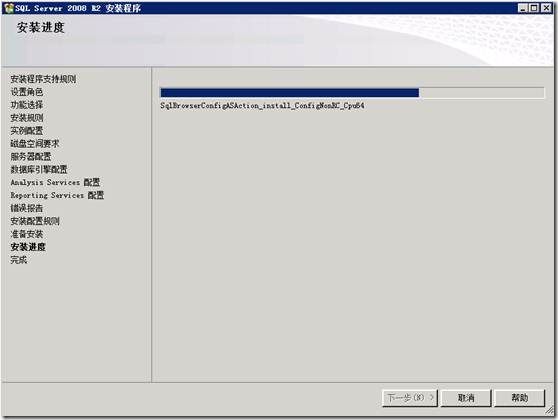
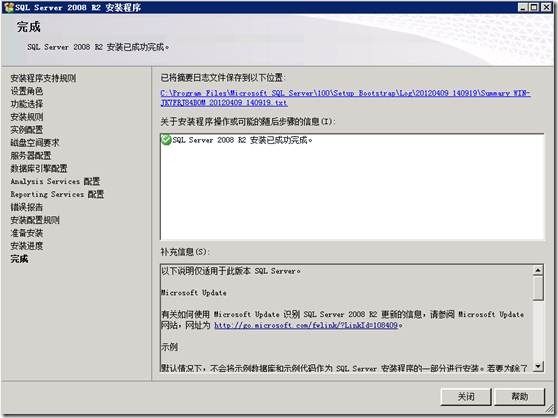
等待安装进度完成。。。。

Vmware vSphere 5.0安装(使用SQL2008R2Enterprise)_第19张图片

Vmware vSphere 5.0安装(使用SQL2008R2Enterprise)_第20张图片

Vmware vSphere 5.0安装(使用SQL2008R2Enterprise)_第21张图片


为 vCenter Server 5.0 管理服务器创建数据库


打开 SQL Server Management Studio 并登陆进入数据库管理界面

选择数据库—右键—新建数据库 名称:VM_Data (注:名称自定义)

Vmware vSphere 5.0安装(使用SQL2008R2Enterprise)_第22张图片

其它的不用更改—确定即可。重启服务器 ,这一步相当重要。。。。

三:为 vCenter Server 5.0 管理服务器 创建 ODBC 数据源管理器

选择 开始 --- 管理工具 --- 数据源(ODBC)

Vmware vSphere 5.0安装(使用SQL2008R2Enterprise)_第23张图片

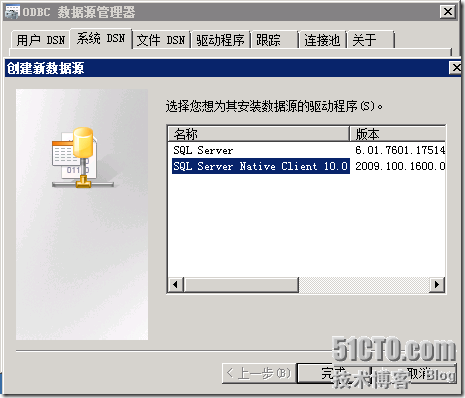
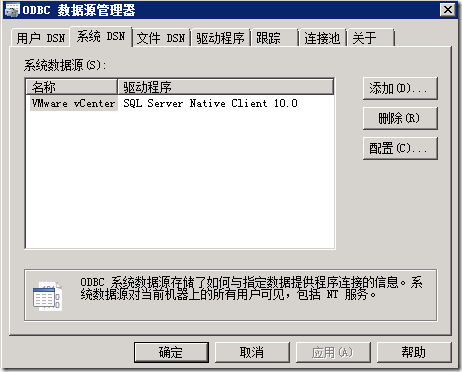
选择 --- 系统 DSN --- 添加 --- SQL Server Native Client 10.0 --- 完成

Vmware vSphere 5.0安装(使用SQL2008R2Enterprise)_第24张图片

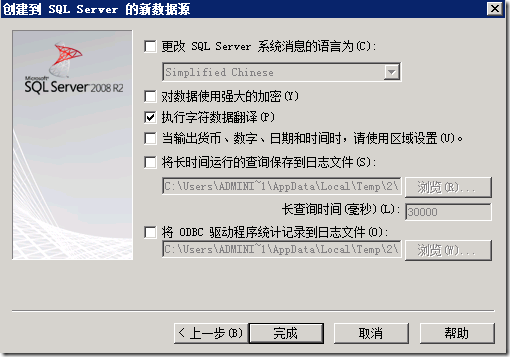
创建到 SQL Server 的新数据源

名称:VMware vCenter 注:这个名称可自定义

描述:VMware VirtualCenter Repository Data Source 注:这个名称可自定义

服务器: localhost\VM_SQL 注:即主机名+实例名称

填写完成后 --- 下一步:

Vmware vSphere 5.0安装(使用SQL2008R2Enterprise)_第25张图片

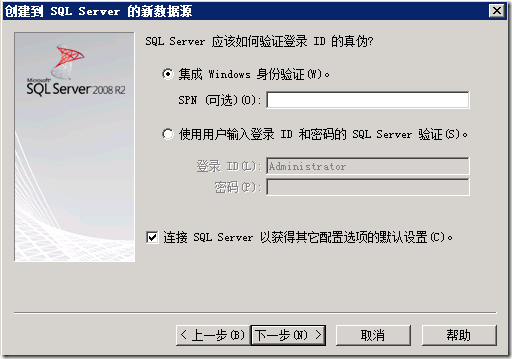
SQL Server 验证登陆ID,默认是:集成 Windows 身份验证(和安装过程中的SQL SERVER 身份验证安全模式相同)

Vmware vSphere 5.0安装(使用SQL2008R2Enterprise)_第26张图片

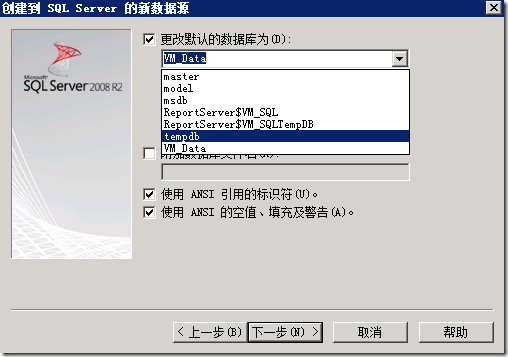
更改默认数据库为 --- 新建的数据库名称 VM_DATA

其它默认不变,下一步。很关键

Vmware vSphere 5.0安装(使用SQL2008R2Enterprise)_第27张图片

点 --- 完成

Vmware vSphere 5.0安装(使用SQL2008R2Enterprise)_第28张图片

可以 --- 点下 --- 测试数据源 --- 如果提示 --- 测试成功,说明配置正确。。。

Vmware vSphere 5.0安装(使用SQL2008R2Enterprise)_第29张图片

Vmware vSphere 5.0安装(使用SQL2008R2Enterprise)_第30张图片

最后,确定

Vmware vSphere 5.0安装(使用SQL2008R2Enterprise)_第31张图片

四:安装 vCenter Server 5.0 管理服务器

从VMware vCenter Server光盘启动安装程序界面,确保Microsoft .NET 3.5 SP1 及Windows Installer 4.5必备条件已安装。

选择vCenter Server,点击安装。

Vmware vSphere 5.0安装(使用SQL2008R2Enterprise)_第32张图片

选择安装语言,点击确定。

Vmware vSphere 5.0安装(使用SQL2008R2Enterprise)_第33张图片

点击下一步。

Vmware vSphere 5.0安装(使用SQL2008R2Enterprise)_第34张图片

点击下一步。

Vmware vSphere 5.0安装(使用SQL2008R2Enterprise)_第35张图片

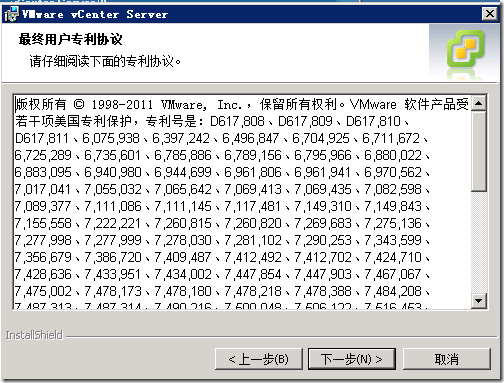
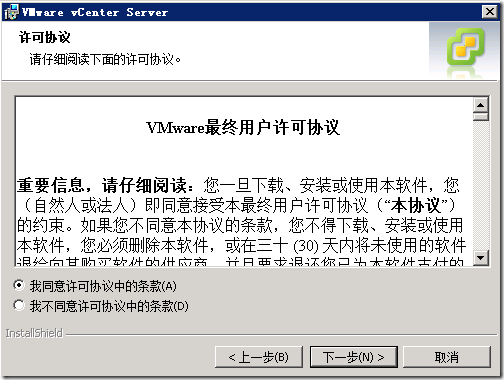
同意许可协议,点击下一步。

Vmware vSphere 5.0安装(使用SQL2008R2Enterprise)_第36张图片

输入用户信息,点击下一步。

Vmware vSphere 5.0安装(使用SQL2008R2Enterprise)_第37张图片

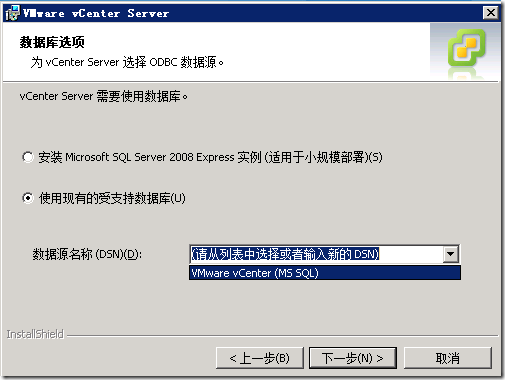
选择 --- 使用现有的受支持数据库,选择 --- 数据源名称 --- 下一步:

数据源名称: VMware vCenter

注:如果前面创建成功,在下拉框内会看到

Vmware vSphere 5.0安装(使用SQL2008R2Enterprise)_第38张图片

继续下一步,

Vmware vSphere 5.0安装(使用SQL2008R2Enterprise)_第39张图片

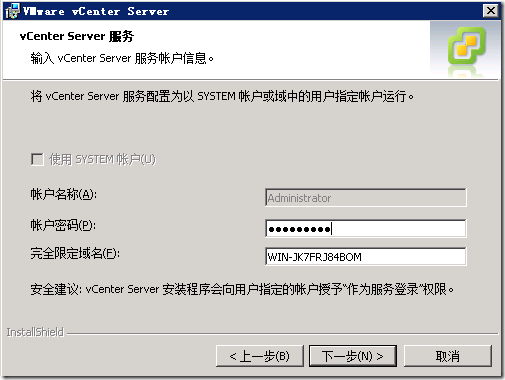
默认使用SYSTEM帐户,输入账户密码,点击下一步。

Vmware vSphere 5.0安装(使用SQL2008R2Enterprise)_第40张图片

选择安装位置,点击下一步。

Vmware vSphere 5.0安装(使用SQL2008R2Enterprise)_第41张图片

选择创建独立 VMware vCenter Server实例

Vmware vSphere 5.0安装(使用SQL2008R2Enterprise)_第42张图片

使用默认端口,点击下一步。

Vmware vSphere 5.0安装(使用SQL2008R2Enterprise)_第43张图片

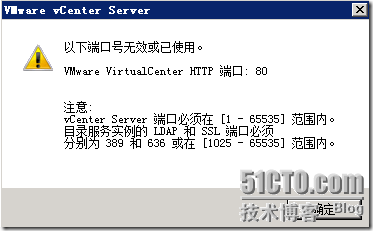
提示所需要80端口已被占用,这是因为安装了SQL 2008的Reporting Services,它会占有用80端口,我们可以修改它默认使用的80端口。

Vmware vSphere 5.0安装(使用SQL2008R2Enterprise)_第44张图片

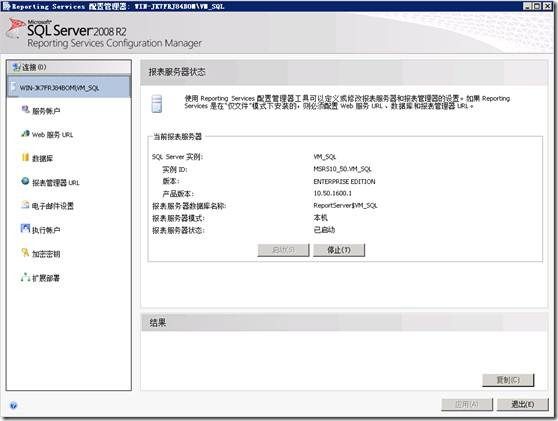
在开始菜单中,打开Reporting Services配置管理器。

连接到Reporting Services。

Vmware vSphere 5.0安装(使用SQL2008R2Enterprise)_第45张图片

Vmware vSphere 5.0安装(使用SQL2008R2Enterprise)_第46张图片

登录后,打开Web服务URL配置页,修改默认的80端口数值为8081,点击应用。

Vmware vSphere 5.0安装(使用SQL2008R2Enterprise)_第47张图片

打开报表管理器URL页,通过点击高级,修改默认的80端口数值为8080,确定。i

Vmware vSphere 5.0安装(使用SQL2008R2Enterprise)_第48张图片

修改完成后,点击退出。

点击下一步。

Vmware vSphere 5.0安装(使用SQL2008R2Enterprise)_第49张图片

点击选择清单大小 --- 下一步。

Vmware vSphere 5.0安装(使用SQL2008R2Enterprise)_第50张图片

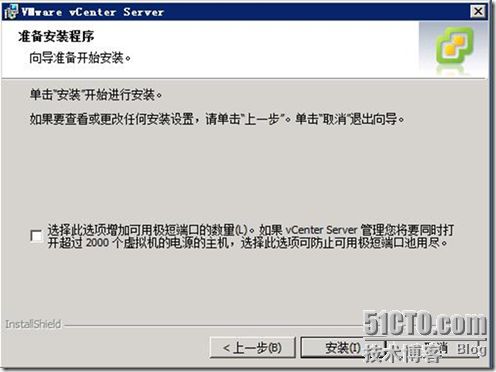
点击安装。

Vmware vSphere 5.0安装(使用SQL2008R2Enterprise)_第51张图片

安装过程,安装需要一会时间

Vmware vSphere 5.0安装(使用SQL2008R2Enterprise)_第52张图片

Vmware vSphere 5.0安装(使用SQL2008R2Enterprise)_第53张图片

Vmware vSphere 5.0安装(使用SQL2008R2Enterprise)_第54张图片

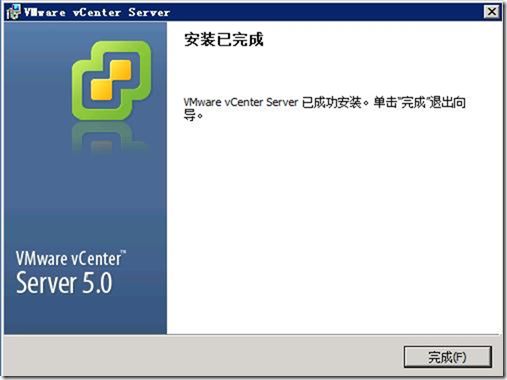
Vmware vSphere 5.0安装(使用SQL2008R2Enterprise)_第55张图片

五:安装 vSphere client (略)
六:安装 vSphere Web client server (略)