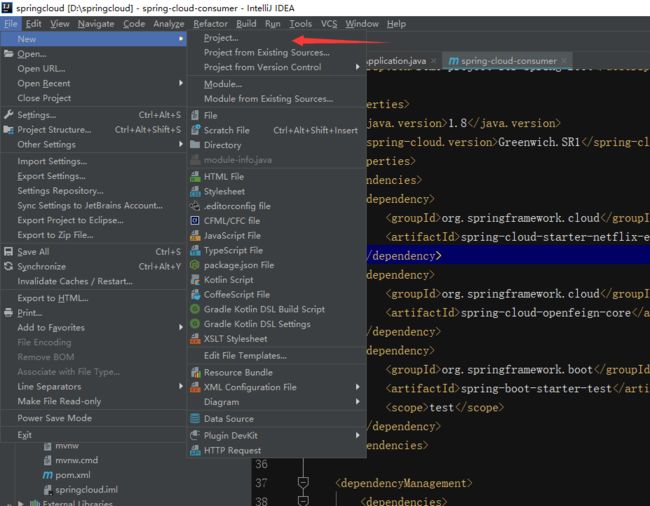
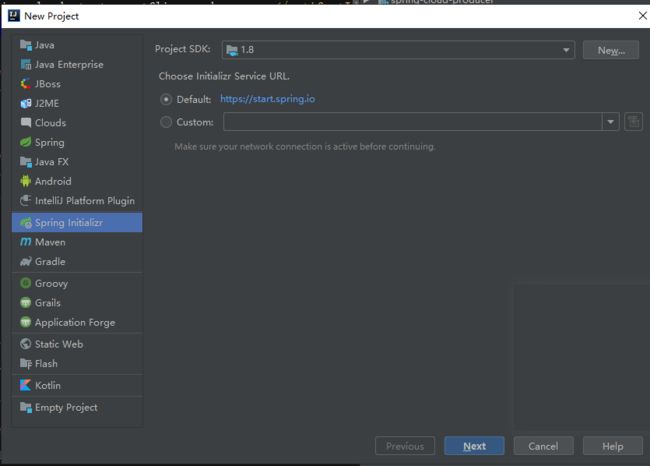
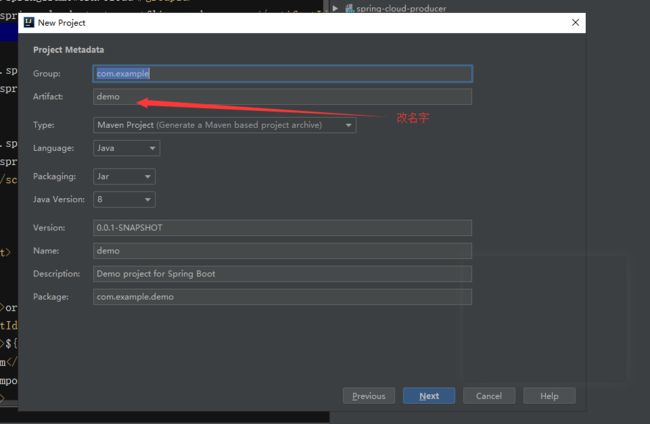
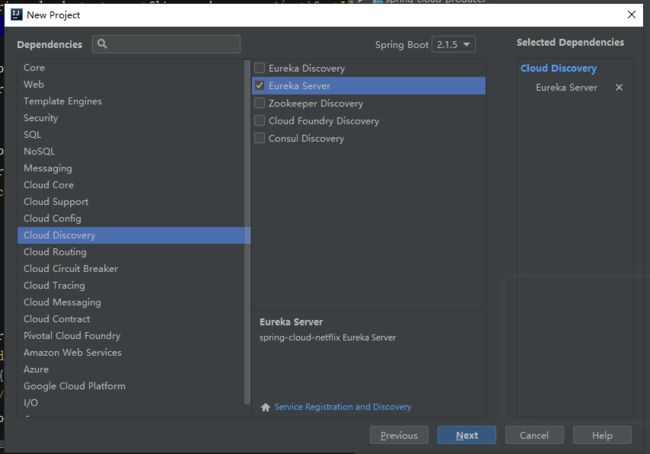
新建springcloud的项目:
先说注册中心Eureka Server
作用:不管是接口消费者还是提供者都必须到注册中心注册,好处能监听各个接口是否正常,进行负载均衡,其实负载均衡是轮训的模式
下面进行分析:1个消费者,2个提供者,2个Eureka1注册服务
看看是如何做到负载均衡
一.先说eureka1注册者,依赖
            org.springframework.cloud
            spring-cloud-starter-netflix-eureka-server


            org.springframework.boot
            spring-boot-starter-web


            org.springframework.boot
            spring-boot-starter-test
            test
2.添加启动代码中添加@EnableEurekaServer注解
import org.springframework.boot.SpringApplication;
import org.springframework.boot.autoconfigure.SpringBootApplication;
import org.springframework.cloud.netflix.eureka.server.EnableEurekaServer;


@SpringBootApplication
@EnableEurekaServer
public class Eureka1Application {
private int i=0;
    public static void main(String[] args) {
        SpringApplication.run(Eureka1Application.class, args);
    }
}
3.配置文件
spring.application.name=spring-cloud-eureka
server.port=8000
eureka.instance.hostname=localhost
#表示是否将自己注册到Eureka Server,默认为true。
eureka.client.register-with-eureka=false
#表示是否从Eureka Server获取注册信息,默认为true
eureka.client.fetch-registry=false
#设置与Eureka Server交互的地址,查询服务和注册服务都需要依赖这个地址。
# 默认是http://localhost:8761/eureka ;多个地址可使用 , 分隔。
eureka.client.serviceUrl.defaultZone=http://localhost:8000/eureka/
二、消费者spring-cloud-consumer 一般消费者只有一个,通过2个提供者进行轮训消费
先看看消费者spring-cloud-consumer依赖
            org.springframework.cloud
            spring-cloud-starter-netflix-eureka-server


            org.springframework.boot
            spring-boot-starter-web


            org.springframework.boot
            spring-boot-starter-test
            test


            org.springframework.cloud
            spring-cloud-starter-openfeign
2.配置文件
spring.application.name=spring-cloud-consumer
server.port=9001
eureka.client.serviceUrl.defaultZone=http://localhost:8000/eureka/
3.启动类
import org.springframework.boot.SpringApplication;
import org.springframework.boot.autoconfigure.SpringBootApplication;
import org.springframework.cloud.client.discovery.EnableDiscoveryClient;
import org.springframework.cloud.netflix.eureka.EnableEurekaClient;
import org.springframework.cloud.openfeign.EnableFeignClients;

@SpringBootApplication
@EnableEurekaClient
@EnableDiscoveryClient
@EnableFeignClients
/**
 * @EnableDiscoveryClient :启用服务注册与发现
 * @EnableFeignClients:启用feign进行远程调用
 */
public class SpringCloudConsumerApplication {
    public static void main(String[] args) {
        SpringApplication.run(SpringCloudConsumerApplication.class, args);
    }
}
4.控制层
import org.springframework.beans.factory.annotation.Autowired;
import org.springframework.web.bind.annotation.GetMapping;
import org.springframework.web.bind.annotation.RequestParam;
import org.springframework.web.bind.annotation.RestController;
@RestController
public class ConsumerController  {
     HelloRemote helloRemote;
    @Autowired
    public ConsumerController(HelloRemote helloRemote) {
        this.helloRemote = helloRemote;
    }
    @GetMapping("/index")
    public String index(@RequestParam("name") String name) {
        return helloRemote.hello(name);
    }
}
5.调用层:spring-cloud-producer和提供者配置文件相对应
import org.springframework.cloud.openfeign.FeignClient;
import org.springframework.web.bind.annotation.GetMapping;
import org.springframework.web.bind.annotation.RequestParam;

/**
 * Feign是一个声明式Web Service客户端。使用Feign能让编写Web Service客户端更加简单,
 * 它的使用方法是定义一个接口,然后在上面添加注解,同时也支持JAX-RS标准的注解。
 * Feign也支持可拔插式的编码器和解码器。Spring Cloud对Feign进行了封装,
 * 使其支持了Spring MVC标准注解和HttpMessageConverters。
 * Feign可以与Eureka和Ribbon组合使用以支持负载均衡。
 * ribbon + rest
 */
@FeignClient(value= "spring-cloud-producer")
public interface HelloRemote {

    @GetMapping("/hello")
    String hello(@RequestParam("name") String name);
}
三.提供者: spring-cloud-producer
依赖:
            org.springframework.cloud
            spring-cloud-starter-netflix-eureka-server


            org.springframework.boot
            spring-boot-starter-web


            org.springframework.boot
            spring-boot-starter-test
            test
2.配置类
spring.application.name=spring-cloud-producer
server.port=9000
eureka.client.serviceUrl.defaultZone=http://localhost:8000/eureka/
3.启动类
import org.springframework.boot.SpringApplication;
import org.springframework.boot.autoconfigure.SpringBootApplication;
import org.springframework.cloud.client.discovery.EnableDiscoveryClient;
import org.springframework.cloud.netflix.eureka.EnableEurekaClient;

@SpringBootApplication
@EnableEurekaClient
@EnableDiscoveryClient
/**
 * 添加@EnableDiscoveryClient注解后,
 * 项目就具有了服务注册的功能。启动工程后,
 * 就可以在注册中心的页面看到SPRING-CLOUD-PRODUCER服务。
 */
public class SpringCloudProducerApplication {
    public static void main(String[] args) {
        SpringApplication.run(SpringCloudProducerApplication.class, args);
    }
}
4.控制层
import org.springframework.web.bind.annotation.GetMapping;
import org.springframework.web.bind.annotation.RequestParam;
import org.springframework.web.bind.annotation.RestController;
@RestController
public class HelloController {
    @GetMapping(value = "/hello")
    public String index(@RequestParam("name") String name) {
        return "hello "+name+",this is first messge";
    }
}
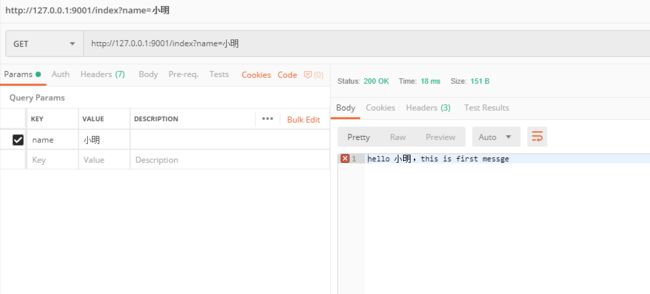
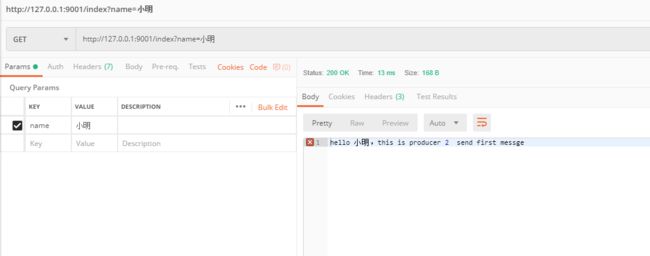
访问:http://127.0.0.1:9001/index?name=小明
我们一直请求会发现小明1,小明2,小明1,小明2....这样一直轮训下去,也就是负载均衡
demo链接:https://pan.baidu.com/s/1FVY2sY_P-H_OcG_N8pXvjw
提取码:6q9e
复制这段内容后打开百度网盘手机App,操作更方便哦测试地址:
