collectionView没有类似于tableView的Plain效果(即sectionHeader悬浮),不过可以通过自定义flowLayout实现,因此它比tableView拥有更强大的扩展性,这点是毋庸置疑的。
在项目中相关列表页的实现,我更倾向于使用UIColletionView,这个因人而异。
下面的代码是我参考XLPlainFlowLayout转换成Swift来的(就是copy+学习),在此感谢源代码的分享。
MTPlainFlowLayout.swift
import UIKit

class MTPlainFlowLayout: UICollectionViewFlowLayout {

    // 设置停留位置,默认为64(没有导航栏同样设置有效)
    var naviHeight: CGFloat = 64


    override func layoutAttributesForElementsInRect(rect: CGRect) -> [UICollectionViewLayoutAttributes]? {
        // UICollectionViewLayoutAttributes:称它为collectionView中的item(包括cell和header、footer这些)的《结构信息》
        var attributesArray: [UICollectionViewLayoutAttributes] = []
        if let superAttributesArray = super.layoutAttributesForElementsInRect(rect) {
            attributesArray = superAttributesArray
        }

        // 创建存索引的数组,无符号(正整数),无序(不能通过下标取值),不可重复(重复的话会自动过滤)
        let noneHeaderSections = NSMutableIndexSet()
        // 遍历superArray,得到一个当前屏幕中所有的section数组
        for attributes in attributesArray {
            // 如果当前的元素分类是一个cell,将cell所在的分区section加入数组,重复的话会自动过滤
            if attributes.representedElementCategory == .Cell {
                noneHeaderSections.addIndex(attributes.indexPath.section)
            }
        }

        // 遍历superArray,将当前屏幕中拥有的header的section从数组中移除,得到一个当前屏幕中没有header的section数组
        // 正常情况下,随着手指往上移,header脱离屏幕会被系统回收而cell尚在,也会触发该方法
        for attributes in attributesArray {
            if let kind = attributes.representedElementKind {
                //如果当前的元素是一个header,将header所在的section从数组中移除
                if kind == UICollectionElementKindSectionHeader {
                    noneHeaderSections.removeIndex(attributes.indexPath.section)
                }
            }
        }

        // 遍历当前屏幕中没有header的section数组
        noneHeaderSections.enumerateIndexesUsingBlock { (index, stop) in
            // 取到当前section中第一个item的indexPath
            let indexPath = NSIndexPath(forRow: 0, inSection: index)
            // 获取当前section在正常情况下已经离开屏幕的header结构信息
            if let attributes = self.layoutAttributesForSupplementaryViewOfKind(UICollectionElementKindSectionHeader, atIndexPath: indexPath) {
                // 如果当前分区确实有因为离开屏幕而被系统回收的header,将该header结构信息重新加入到superArray中去
                attributesArray.append(attributes)
            }
        }

        // 遍历superArray,改变header结构信息中的参数,使它可以在当前section还没完全离开屏幕的时候一直显示
        for attributes in attributesArray {
            if attributes.representedElementKind == UICollectionElementKindSectionHeader {
                let section = attributes.indexPath.section

                let firstItemIndexPath = NSIndexPath(forRow: 0, inSection: section)

                var numberOfItemsInSection = 0
                // 得到当前header所在分区的cell的数量
                if let number = self.collectionView?.numberOfItemsInSection(section) {
                    numberOfItemsInSection = number
                }

                // 得到最后一个item的indexPath
                let lastItemIndexPath = NSIndexPath(forRow: max(0, numberOfItemsInSection-1), inSection: section)

                // 得到第一个item和最后一个item的结构信息
                let firstItemAttributes: UICollectionViewLayoutAttributes!
                let lastItemAttributes: UICollectionViewLayoutAttributes!
                if numberOfItemsInSection > 0 {
                    // cell有值,则获取第一个cell和最后一个cell的结构信息
                    firstItemAttributes = self.layoutAttributesForItemAtIndexPath(firstItemIndexPath)
                    lastItemAttributes = self.layoutAttributesForItemAtIndexPath(lastItemIndexPath)
                } else {
                    // cell没值,就新建一个UICollectionViewLayoutAttributes
                    firstItemAttributes = UICollectionViewLayoutAttributes()
                    // 然后模拟出在当前分区中的唯一一个cell,cell在header的下面,高度为0,还与header隔着可能存在的sectionInset的top
                    let itemY = attributes.frame.maxY + self.sectionInset.top
                    firstItemAttributes.frame = CGRect(x: 0, y: itemY, width: 0, height: 0)
                    // 因为只有一个cell,所以最后一个cell等于第一个cell
                    lastItemAttributes = firstItemAttributes
                }

                // 获取当前header的frame
                var rect = attributes.frame

                // 当前的滑动距离 + 因为导航栏产生的偏移量,默认为64(如果app需求不同,需自己设置)
                var offset_Y: CGFloat = 0
                if let y = self.collectionView?.contentOffset.y {
                    offset_Y = y
                }
                offset_Y = offset_Y + naviHeight

                // 第一个cell的y值 - 当前header的高度 - 可能存在的sectionInset的top
                let headerY = firstItemAttributes.frame.origin.y - rect.size.height - self.sectionInset.top

                // 哪个大取哪个,保证header悬停
                // 针对当前header基本上都是offset更加大,针对下一个header则会是headerY大,各自处理
                let maxY = max(offset_Y, headerY)

                // 最后一个cell的y值 + 最后一个cell的高度 + 可能存在的sectionInset的bottom - 当前header的高度
                // 当当前section的footer或者下一个section的header接触到当前header的底部,计算出的headerMissingY即为有效值
                let headerMissingY = lastItemAttributes.frame.maxY + self.sectionInset.bottom - rect.size.height

                // 给rect的y赋新值,因为在最后消失的临界点要跟谁消失,所以取小
                rect.origin.y = min(maxY, headerMissingY)
                // 给header的结构信息的frame重新赋值
                attributes.frame = rect

                // 如果按照正常情况下,header离开屏幕被系统回收,而header的层次关系又与cell相等,如果不去理会,会出现cell在header上面的情况
                // 通过打印可以知道cell的层次关系zIndex数值为0,我们可以将header的zIndex设置成1,如果不放心,也可以将它设置成非常大
                attributes.zIndex = 1024
            }
        }

        return attributesArray
    }

    override func shouldInvalidateLayoutForBoundsChange(newBounds: CGRect) -> Bool {
        return true
    }

}
注意:
1.上述自定义flowLayout里存在一个bug,代码里使用的self.sectionInset是初始化UICollectionViewFlowLayout设置的sectionInset,而不会随着代理方法:func collectionView(collectionView: UICollectionView, layout collectionViewLayout: UICollectionViewLayout, insetForSectionAtIndex section: Int) -> UIEdgeInsets返回的sectionInset去更新;
2.如果初始化UICollectionViewFlowLayout并且只有一组section的时候设置sectionInset,是没有上述问题的;
3.如果有多组section,同时需要动态设置每组的sectionInset的话,那么就会sectionHeader与预期效果就会有一定的偏差,这个偏差就是因为上述1的bug所造成的。
4.OC版本也有同样上述问题
···
解决办法:
1.如果只有一组section的话可以选择在初始化flowLayout的时候设置sectionInset;
2.多组section的话就不建议使用上述1的方式,而是选择
UICollectionViewDelegateFlowLayout里的代理方法func collectionView(collectionView: UICollectionView, layout collectionViewLayout: UICollectionViewLayout, insetForSectionAtIndex section: Int) -> UIEdgeInsets去动态设置当前section的sectionInset,这样上面的bug就可以避免了;
3.以上两个方法大家因情况而选择,如果大家有更好的解决方案或者自定义flowLayout请留言或在本文底部评论;
4.OC版同样可使用上面的解决方案。
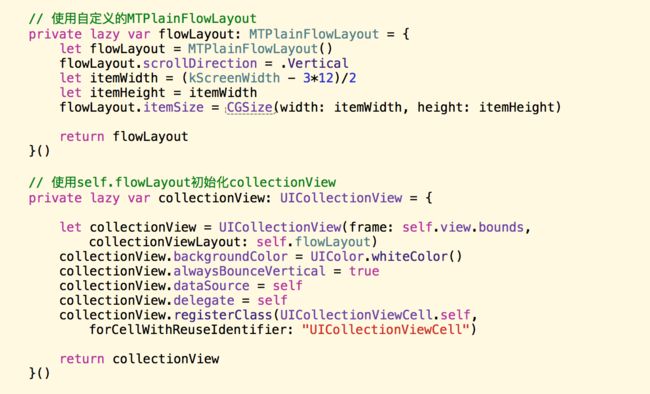
如何使用
上面贴出来的代码就是完整的Swift文件,直接使用
MTPlainFlowLayout创建UICollectionViewFlowLayout对象使用即可。
图片示例: