一 自动化打包工具-Fastlane
- Fastlane是一套使用Ruby写的自动化工具集,旨在简化Android和iOS的部署过程,自动化你的工作流。它可以简化一些乏味、单调、重复的工作,像截图、代码签名以及发布App
-
fastlane工具集
- gym 是fastlane提供的打包工具
- 在很多地方还可以看到别名build_app build_ios_app其实都是使用的是gym
- testflight 上传ipa到App store connect
- deliver 上传屏幕截图、元数据、ipa文件到App store connect
- gym 是fastlane提供的打包工具
官方文档地址 https://docs.fastlane.tools
-
使用 bundler 管理依赖
bundler用来管理fastlane版本和fastlane运行时的相关依赖版本,相当于iOS开发中的CocoaPods框架,两者命令也很相似
-
安装bundler
sudo gem install bundler -
在项目根目录输入
bundle init生成Gemfile文件,在此文件写入source "https://gems.ruby-china.com" gem "fastlane" gem "cocoapods"- 安装依赖库,生成Gemfile.lock文件,类似于Podfile.lock文件功能, 配置Jenkins脚本是第一步操作也是调用该命令
bundle install- 更新Gemfile.lock文件的版本和依赖
bundle update
-
fastlane 安装
- 安装最新的Xcode命令行工具
xcode-select --install- 使用HomeBrew
brew cask install fastlane- 使用RubyGems
sudo gem install fastlane - NV -
初始化Fastlane
- cd 工程目录执行
fastlane init- 使用swift
fastlane init swift-
出现下图 选择你所需要的功能模板
1.自动化截图 2.自动化beta分发至TestFlight 3.自动化App Store 分发 4.手动写自动化脚本
-
我选择第四个模板,将生成fastlane文件夹,下面将生成两个文件 Appfile Fastfile
-
Appfile - 用来配置app_identifier app_id team_id信息
app_identifier "xxxxxxxx" # App的bundle identifier
apple_id("[email protected]") # 你的Apple ID
itc_team_id "xxxxxxx" # App Store Connect Team ID
team_id("xxxx") # Developer Portal Team ID
Fastfile - 配置自动化脚本
default_platform(:ios) platform :ios do desc "Description of what the lane does" workspace = "xxxx.xcworkspace" scheme = "xxxx" bundleid = "xxxxxxx" currentTime = Time.new.strftime("%Y-%m-%d %H-%M-%S") ipa_name = "xxxx" output_path = "../#{ipa_name} #{currentTime}" ipa_path = "#{output_path}/#{ipa_name}.ipa" # 蒲公英 api_key user_key pgyer_api_key = "xxxxxxx" payer_user_key = "xxxxxxx" # firim api_token firim_api_token = "xxxxxxxx" # bugly app_id app_key bugly_app_id = "xxxxxxx" bugly_app_key = "xxxxxxx" # crashlytics api_token build_secret crashlytics_api_token = "xxxxxxx" crashlytics_build_secret = "xxxxxxxx" before_all do |lane, options| cocoapods end lane :dev do |options| build_ios_app( clean:true, workspace: "#{workspace}", output_directory: "#{output_path}", output_name: "#{ipa_name}", scheme: "#{scheme}", configuration: "Debug", export_method: "development", export_options: { provisioningProfiles: { "#{bundleid}" => "Provisioning Profile Name", } }, export_xcargs: "-allowProvisioningUpdates" ) pgyer(api_key: "#{pgyer_api_key}", user_key: "#{payer_user_key}") firim(firim_api_token: "#{firim_api_token}") # 上传dSYM到Bugly upload_app_to_bugly( file_path: "#{ipa_path}", app_key: "#{bugly_app_key}", app_id: "#{bugly_app_id}", pid: "2", #应用平台标识, 用于区分产品平台 android:1 iOS:2 download_limit: 999 ) #上传dSYM到crashlytics crashlytics( api_token: "069c7f2852fe97ae2b9572f799200a2ae1da3621", build_secret: "0cb5ed2e8ff4ed31a5b03093e96fcbc3b81ade7021295e2a2e0afe35661c5d3b" ) end lane :adhoc do |options| build_ios_app( clean: true, workspace: "#{workspace}", output_directory: "#{output_path}", output_name: "#{ipa_name}", scheme: "#{scheme}", configuration: "Debug", export_method: "ad-hoc", export_options: { provisioningProfiles: { "#{bundleid}" => "Provisioning Profile Name", } }, export_xcargs: "-allowProvisioningUpdates" ) pgyer(api_key: "#{pgyer_api_key}", user_key: "#{payer_user_key}") firim(firim_api_token: "#{firim_api_token}") # 上传dSYM到Bugly upload_app_to_bugl( file_path: "#{ipa_path}", app_key: "#{bugly_app_key}", app_id: "#{bugly_app_id}", pid: "2", #应用平台标识, 用于区分产品平台 android:1 iOS:2 download_limit: 999 ) #上传dSYM到crashlytics crashlytics( api_token: "#{crashlytics_api_token}", build_secret: "#{crashlytics_build_secret}" ) end lane :app_store do |options| build_ios_app( clean: true, workspace: "#{workspace}", output_directory: "#{output_path}", output_name: "#{ipa_name}", scheme: "#{scheme}", export_method: "app-store", export_options: { provisioningProfiles: { "#{bundleid}" => "Provisioning Profile Name", } }, export_xcargs: "-allowProvisioningUpdates" ) # 上传dSYM到Bugly upload_app_to_bugl( file_path: "#{ipa_path}", app_key: "#{bugly_app_key}", app_id: "#{bugly_app_id}", pid: "2", #应用平台标识, 用于区分产品平台 android:1 iOS:2 download_limit: 999 ) #上传dSYM到crashlytics crashlytics( api_token: "#{crashlytics_api_token}", build_secret: "#{crashlytics_build_secret}" ) #可以上传屏幕截图、元数据、二进制文件到App sotre Connect deliver( submit_for_review: true, automatic_release: false, force: true, skip_metadata: true, skip_screenshots: true, ) end- 下面相当于打包前执行一次pod install 命令
before_all do |lane, options| cocoapods end- build_ios_app 打包编译 下面命令是访问钥匙串 找到对应证书
export_xcargs: "-allowProvisioningUpdates-
app内侧分发平台 pgyer-蒲公英 firim-fir.im
# 安装插件
fastlane add_plugin pgyer
fastlane add_plugin firim

# 调用插件
pgyer(api_key: "#{pgyer_api_key}", user_key: "#{payer_user_key}")
firim(firim_api_token: "#{firim_api_token}")
crashlytics 崩溃日志分析
crashlytics(api_token: "#{crashlytics_api_token}", build_secret: "#{crashlytics_build_secret}")-
Bugly 腾讯-崩溃日志分析
-
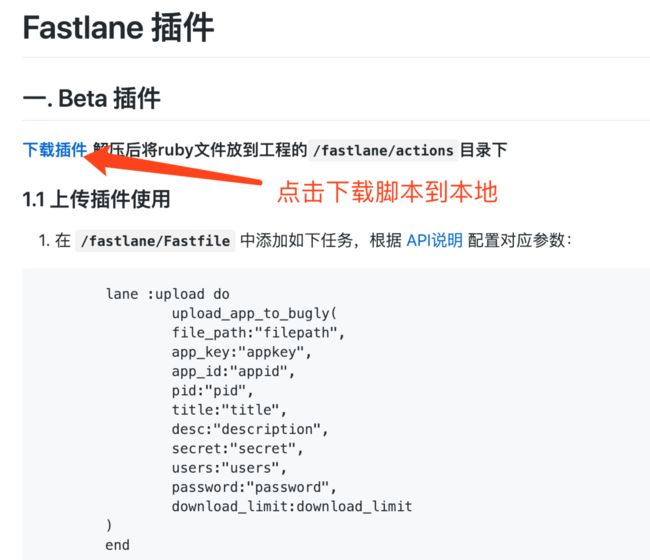
fastlane没有基于Bugly的插件或者action,需要手动创建action,之前Bugly官网有安装教程,后来不知道为什么没有了,但是在github上的我们还是可以找到此action https://github.com/BuglyDevTeam/Bugly-FastlanePlugin,
解压后看到有两个文件 update_app_to_bugly.rb upload_app_to_bugly.rb 我们要用到的就是upload_app_to_bugly.rb
-
终端输入下面命令
fastlane new_action这里action名称输入 upload_app_to_bugly 找到刚才下载的rb文件到fastlane/actions路径下替换下此文件
upload_app_to_bugly(
      file_path: "#{ipa_path}",
      app_key: "#{bugly_app_key}",
      app_id: "#{bugly_app_id}",
      pid: "2",  #应用平台标识, 用于区分产品平台 android:1 iOS:2
      download_limit: 999
    )
-
-
deliver - 将截图,元数据和二进制文件上传到App Store Connect
fastlane deliver init # deliver初始化
-
-
然后可以按照自己的需求选择是否上传截图、元数据、二进制文件上传。下面是我项目中的配置,更多详细操作- https://docs.fastlane.tools/actions/upload_to_app_store/
        ```
         deliver(
              submit_for_review: true,
              automatic_release: false,
              force: true,
              skip_metadata: true,
              skip_screenshots: true,
            )
        ```
- fastlane 基本配置完成可以完成自动化打包操作

    ```
    fastlane dev # 开发时打包
    fastlane adhoc # 内测打包
    fastlane appstore # 上线打包
    ```

    ----
二 持续化集成工具——Jenkins
- Jenkins是一个开源项目,提供了一种易于使用的持续集成系统,使开发者从繁杂的集成中解脱出来,专注于更为重要的业务逻辑实现上.
-
homebrew 是 Mac 下的一个包管理工具,可以很方便地进行安装/卸载/更新各种软件包,可以用来快速搭建各种本地环境。homebrew 安装
/usr/bin/ruby -e "$(curl -fsSL https://raw.githubusercontent.com/Homebrew/install/master/install)" -
Jenkins是基于java的开源项目,所以需要配置java环境变量
brew cask install java -
安装Jenkins推荐通过homebrew安装
brew install jenkins 建议按照上面的方式安装Jenkins,会官网下载pkg安装包安装,会创建一个Jenkins的用户
-
启动 Jenkins
jenkins -
脚本方式开始启动Jenkins
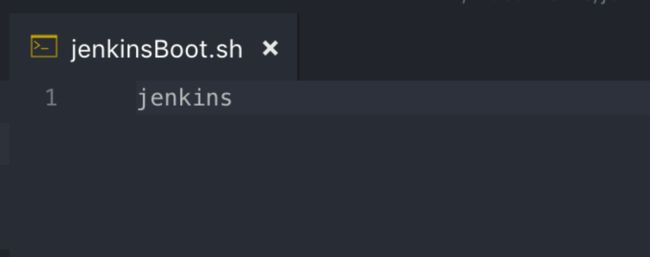
命令行安装的Jenkins每次重启后需要到终端执行上面的启动命令,使用以下步骤在重启时自动执行Jenkins启动命令系统当前用户下创建启动脚本文件 jenkinsBoot.sh
-
加入上面启动jenkins命令
-
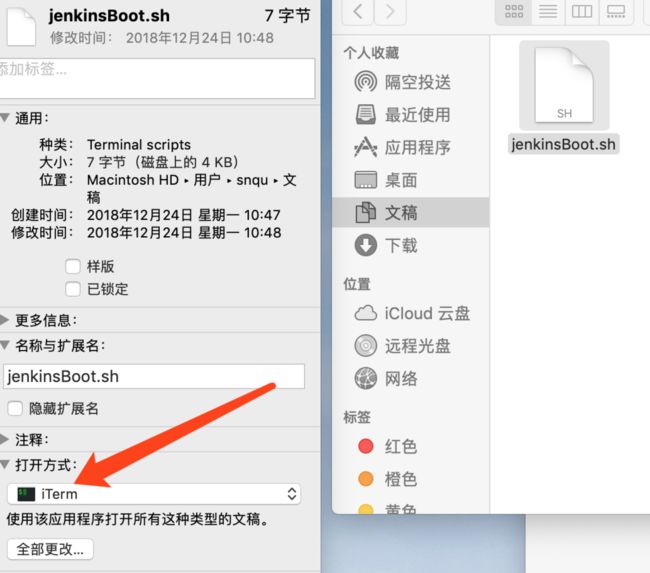
设置脚本文件打开方式——终端(iTerm)
-
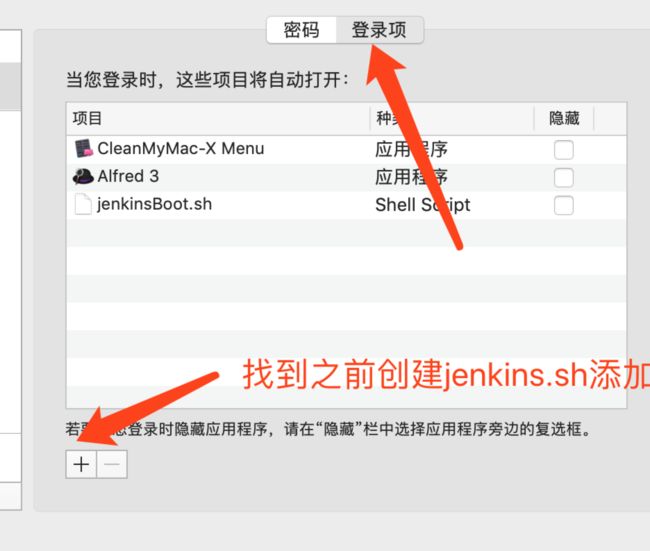
加入用户登录项
- 点击设置 -> 用户与群组 -> 找到当前用户
重启计算机,会自动执行jenkins.sh脚本
-
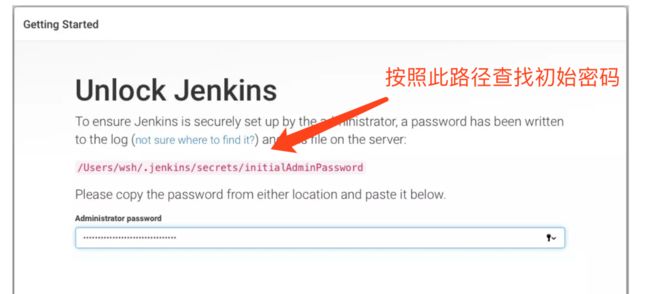
在浏览器中输入 http://localhost:8080 出现重设初始密码的界面 (默认端口8080)
-
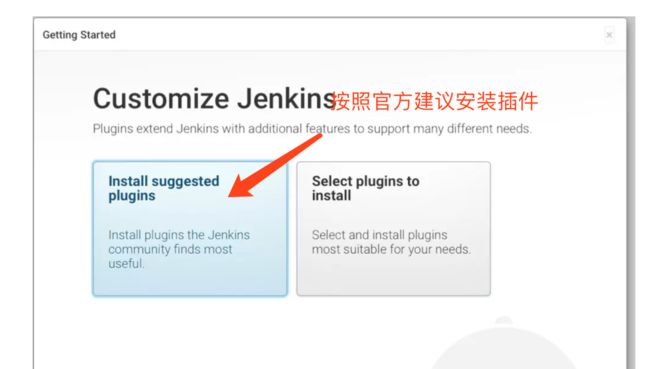
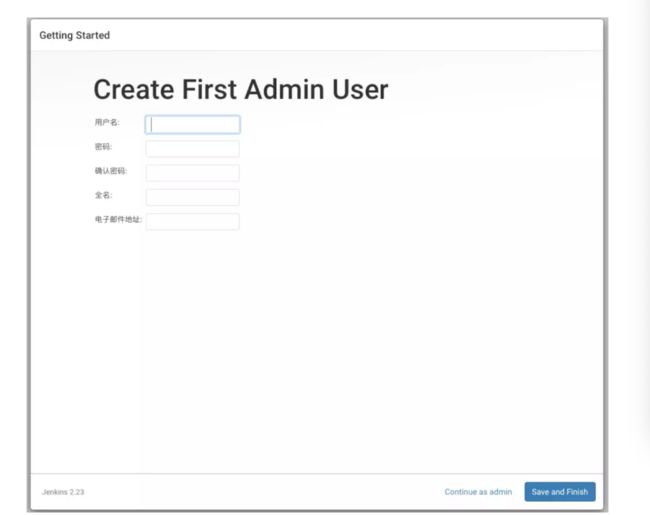
注册用户完成开始jenkins持续集成
Jenkins插件管理
点击系统管理->插件管理, 可以安装、更新、卸载jenkins插件
- Gitlab插件: GitLab Plugin
- 签名证书管理插件:Credentials Plugin 和 Keychains and Provisioning Profiles Management
- 获取仓库提交的commit log:Git Changelog Plugin
- 自定义全局变量:Environment Injector Plugin
- Jenkins内部显示生成的屏幕截图 HTML Publisher Plugin
- fastlane工具的彩色输出:AnsiColor Plugin
- 插件将为您节省大量时间: Rebuild Plugin
环境变量
点击系统管理->系统设置 找到全局属性,勾选环境变量,增加一堆键值对:
- LANG = zh_CN.UTF-8
- PATH = (终端中执行 echo $PATH 命令的输出,为一堆路径)
新建任务
点击新建任务
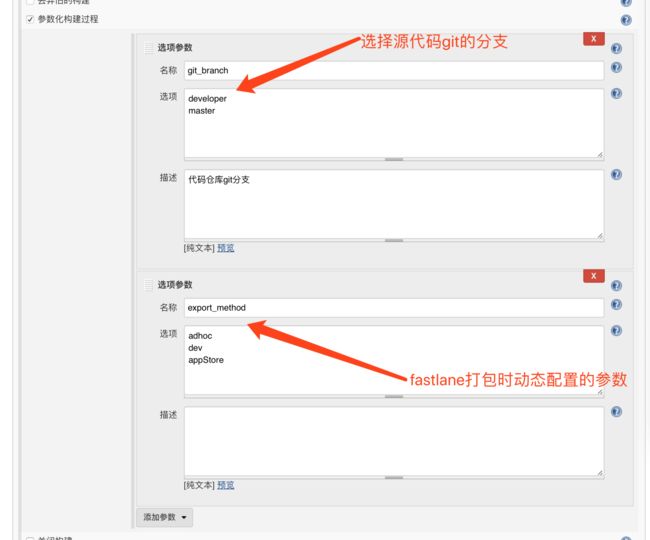
项目初始化配置,下面是我的配置
-
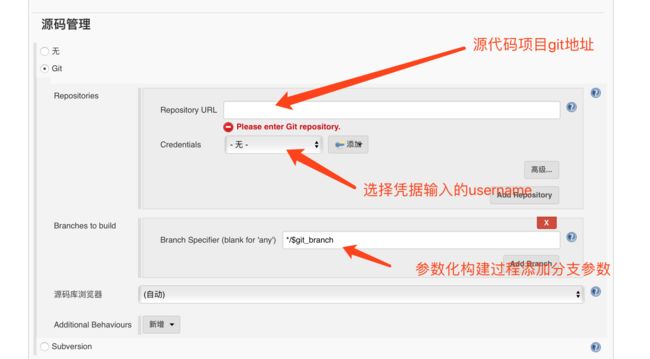
源码管理
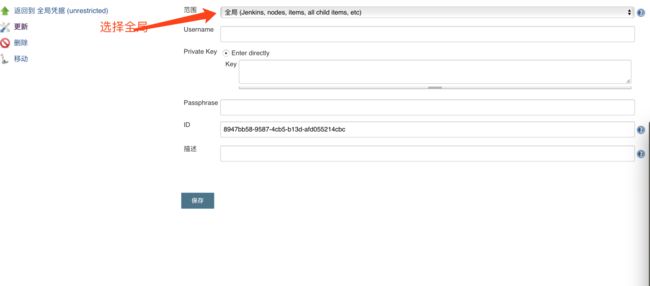
我使用的是Gitlab,需要添加Credentials 点击凭据
- Username: 自己设置,到时候配置源码时需要用到
- Private Key -> Enter ditectly -> key 输入ssh的私钥
- Passphrase: 配置ssh的时有密码就输入
构建
点击增加构建步骤,选择执行 shell,输入下面命令:
export LC_ALL=en_US.UTF-8 export LANG=en_US.UTF-8 bundle update fastlane bundle exec fastlane $export_method
上面这几行命令就是执行fastlane的自动化打包操作!!!
点击构建 ,Jenkins+Fastlane打愉快的开始!!!

