WebSocket是HTML5开始提供的一种浏览器与服务器间进行全双工通讯的网络技术。 WebSocket通信协议于2011年被IETF定为标准RFC 6455,WebSocketAPI被W3C定为标准。 在WebSocket API中,浏览器和服务器只需要要做一个握手的动作,然后,浏览器和服务器之间就形成了一条快速通道。两者之间就直接可以数据互相传送。
废话不说上代码:
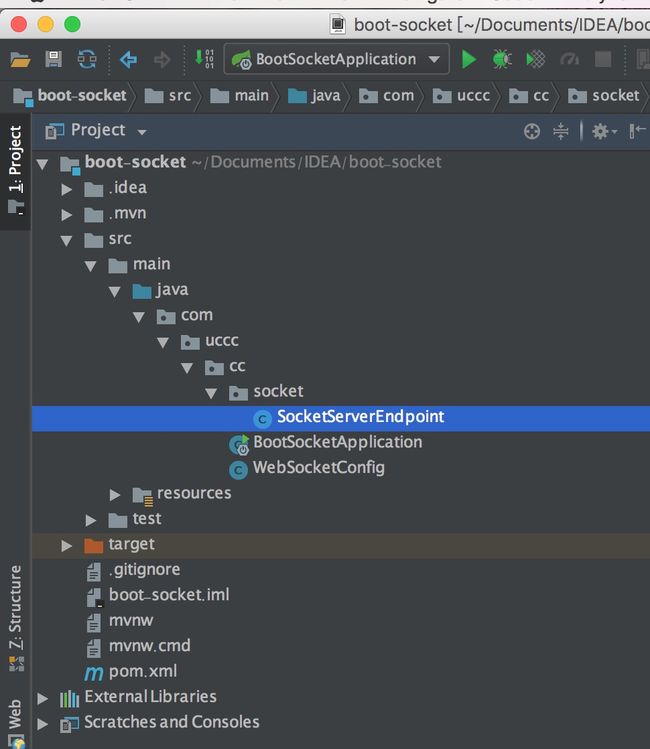
项目的架构如下图:
springboot项目我就不说了! 使用IDEL工具非常快速的就创建出来!
里面主要涉及三个类文件
===========BootSocketApplication类如下:=============
package com.uccc.cc;
import org.springframework.boot.SpringApplication;
import org.springframework.boot.autoconfigure.SpringBootApplication;
//@EnableWebSocket
@SpringBootApplication
public class BootSocketApplication {
public static void main(String[] args) {
SpringApplication.run(BootSocketApplication.class, args);
}
}
==================然后是SocketServerEndpoint类:======================
package com.uccc.cc.socket;
import org.springframework.stereotype.Component;
import javax.websocket.*;
import javax.websocket.server.PathParam;
import javax.websocket.server.ServerEndpoint;
import java.io.IOException;
/**
* ServerEndpoint
*
* 使用springboot的唯一区别是要@Component声明下,而使用独立容器是由容器自己管理websocket的,但在springboot中连容器都是spring管理的。
*
* 虽然@Component默认是单例模式的,但springboot还是会为每个websocket连接初始化一个bean,所以可以用一个静态set保存起来。
*
*/
@ServerEndpoint("/ws/chatRoom/{userName}") //WebSocket客户端建立连接的地址
@Component
public class SocketServerEndpoint {
/**
* 建立连接的回调方法
*
* @param session 与客户端的WebSocket连接会话
* @param userName 用户名,WebSocket支持路径参数
*/
@OnOpen
public void onOpen(Session session, @PathParam("userName") String userName) throws IOException {
session.getBasicRemote().sendText("你好");
}
/**
* 收到客户端消息的回调方法
*
* @param message 客户端传过来的消息
* @param session 对应的session
*/
@OnMessage
public void onMessage(String message, Session session, @PathParam("userName") String userName) throws IOException {
session.getBasicRemote().sendText(userName+"先生,轮到你发言了?");
}
/**
* 发生错误的回调方法
*
* @param session
* @param error
*/
@OnError
public void onError(Session session, Throwable error) {
System.out.println("发生错误");
error.printStackTrace();
}
/**
* 关闭连接的回调方法
*/
@OnClose
public void onClose(Session session, @PathParam("userName") String userName) {
}
}
==============接下来是配置类 WebSocketConfig======================
package com.uccc.cc;
import org.springframework.context.annotation.Bean;
import org.springframework.context.annotation.Configuration;
import org.springframework.web.socket.server.standard.ServerEndpointExporter;
@Configuration
public class WebSocketConfig {
/**
* 使用@ServerEndpoint创立websocket endpoint
*
* 首先要注入ServerEndpointExporter,这个bean会自动注册使用了@ServerEndpoint注解声明的Websocket endpoint。要注意,如果使用独立的servlet容器,而不是直接使用springboot的内置容器,就不要注入ServerEndpointExporter,因为它将由容器自己提供和管理。
* @return
*/
@Bean
public ServerEndpointExporter serverEndpointExporter() {
return new ServerEndpointExporter();
}
}
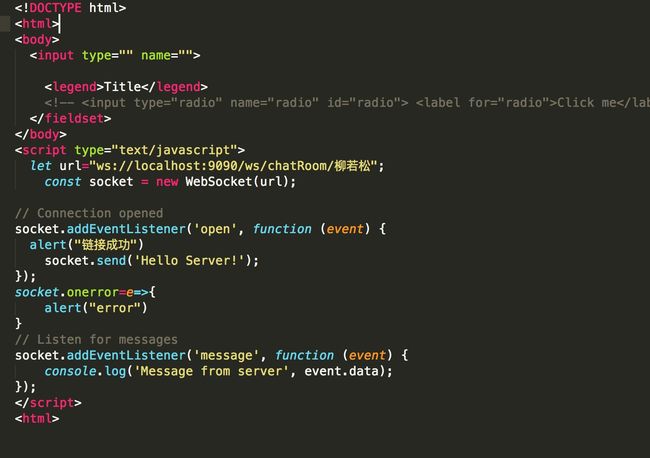
====================下面试一个html文件的前端的一段js===========
let url="ws://localhost:8080/ws/chatRoom/柳若松";
const socket = new WebSocket(url);
// Connection opened
socket.addEventListener('open', function (event) {
alert("链接成功")
socket.send('Hello Server!');
});
socket.onerror=e=>{
alert("error")
}
// Listen for messages
socket.addEventListener('message', function (event) {
console.log('Message from server', event.data);
});


