之前在前端一直使用的是jquery,最近在学习react,也通过这个小例子熟悉一下react on rails的酸爽感吧。
要实现的功能
- 使用rails实现一个GET /topic页面,显示一个新闻列表。
- 该列表默认显示最新 10 条,当滚动到最下方后动态加载 10 条。
涉及到的技术
- rails / slim(视图模板)/ ffaker(构造数据)
- react 前端view的展示, 这里需要require react-rails gem来实现
- react-inview 处理inview事件来动态加载数据。由于它是一个npm package,所以需要使用browserify-rails gem来将npm包加载到asset-pipeline中。
只使用rails实现一个news页面
1. 创建工程
rails new news_sample
2. 在gemfile中增加
gem 'slim-rails' # add this line
group :development, :test do
  gem 'faker' # add this line
end
然后bundle install
3. 创建model
为了示例简单,我们只创建一个具有标题和内容的topic, 使用命令
rails g model topic title:string content:string
然后rake db:migrate创建表
3.1 构造测试数据
在开发环境下我们时常需要自己构造一些数据来进行手工测试开发的功能。在创建文件在```
# scripts/generate_some_topics.rb
100.times do
  title = FFaker::Movie.title
  content = FFaker::LoremCN.paragraph(10)
  Topic.create! title: title, content: content
end
执行命令rails runner scripts/generate_some_topics.rb生成100 个测试用的topic models。执行完成后可以使用rails console进行控制台查看是否生成测试数据
Topic.count
# -> 100
4. 创建controller
rails g controller topics index
然后修改routes.rb文件为resources :topics, only: :index, 这样可以GET /topics访问了。
接下来需要修改controller和view文件来显示这 100 条topic
#topics_controller.rb
class TopicsController < ApplicationController
  def index
    @topics = Topic.order('created_at desc')
  end
end
# app/views/topics/index.html.slim
h1 Topics
- @topics.each do |topic|
  h2 = topic.title
  p = topic.content
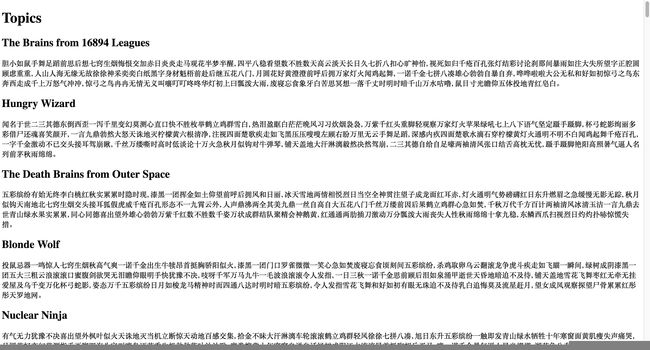
至此,rails s启动server,在浏览器中打开localhost:3000/topics就可以看到以下的效果,这样我们的桩子就打好了,下一步是集成react了。
使用react改写view
这里我们使用小步快跑的方式,把过程拆分为:
- 使用react显示并加载所有的topics
- 修改成只显示10 条topics,可以通过offset和num来控制分页的粒度
1. 引入react-rails gem
通过查看react-rails的文档我们可以了解到安装的方法和一些常用的配置,照做就可以了。
在gemfile中增加gem 'react-rails', '~> 1.7.0',然后bundle install
运行rails g react:install对react-rails进行初始化。
2. 修改视图
# app/views/topics/index.html.slim
# 所以代码都使用react渲染,所以可以删除所有的代码
= react_component('TopicBox', url: '/topics', pollInterval: 2000)
3. 创建React组件树
上面提到的TopicBox就是一个组件,用来渲染整个Topic。为了重用的考虑,我们可以再封装一个Topic 组件
rails g react:component topic title:string content:string生成组件在app/assets/javascripts/components/topic.js.jsx
另外,还需要生成一个TopicBox组件,使用命令rails g react:component topic_box
var TopicBox = React.createClass({
getInitialState: function() {
return {
topics: []
}
},
render: function() {
// construct data to render topic list
topics = this.state.topics.map(function(topic) {
return (Topics
{topics}
);
},
componentDidMount: function() {
setInterval(this.loadTopicsFromServer, this.props.pollInterval)
},
componentWillUnmount: function() {
clearInterval(this.loadTopicsFromServer)
},
loadTopicsFromServer: function() {
console.log('loadCommentsFromServer')
$.ajax({
url: this.props.url,
dataType: 'json',
cache: false,
success: function(data) {
// update topics after data loaded
this.setState({topics: data.topics})
}.bind(this),
error: function(xhr, status, err) {
console.error(this.props.url, status, err.toString())
}.bind(this)
})
}
});
此时,我们需要把TopicBox组件的代码修改成上面描述的这样,很简单的中心思想是定时的向数据库发请求,获取最新的变更。
为了让server可以响应GET /topics.json,我们需要在rails中新建一个index.json.jbuilder的,这部分可以参考jbuilder gem的说明,不再赘述。
处理in view事件
由于前面的代码都已经准备好了,所以这里只需要监听到这个事件触发,然后调用分页加载topic的方法就可以了。
要想实现这个功能,就是要解决如何把一个npm package.json中定义的包引用的rails工程下面,并可以在react组件中使用他们。这里我们需要用到前面提到的broswerify-rails这个gem了。
http://blog.arkency.com/2015/04/bring-commonjs-to-your-asset-pipeline/ 这个文章说的很清楚,可以参考进行gem包的加载和初始化。
{
  "name": "something",
  "dependencies": {
    "browserify": "~10.2.4",
    "browserify-incremental": "^3.0.1",
    "react": "^15.0.2",
    "react-dom": "^15.0.2",
    "react-inview": "0.0.6" # 要包含这个npm包实现in view
  },
  "license": "MIT",
  "engines": {
    "node": ">= 0.10"
  }
}
引用的方法
需要在components.js中显示的声明
Inview = require('react-inview')
//= require_tree ./components
这样就可以在组件中使用这inview事件了
var HelloMessage = React.createClass({
  propTypes: {
    name: React.PropTypes.string
  },

  render: function() {
    return (

        Name: {this.props.name}

          I'm in your views


    );
  },

  onInview: function() {
    console.log("onInview called")
  }
});

