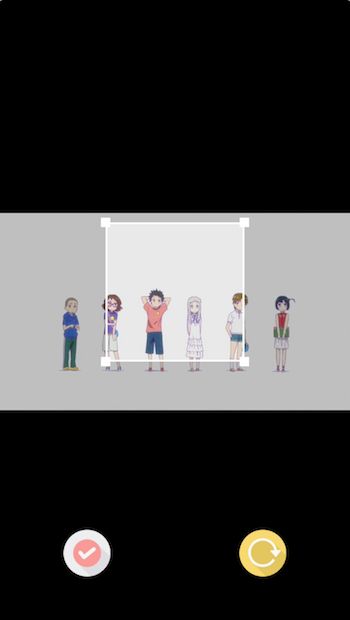
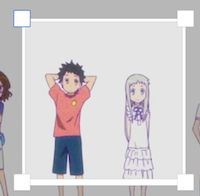
先上GitHub看一下效果:
GitHub:LyEditImageView
前言
网上有不少iOS做图片缩放平移的教程,大部分都使用了一个UIScrollView内嵌一个UIimageView完成,不容易控制图片的自由移动并以双中心缩放,我觉得不是很酷炫,本篇直接使用了UIImageView,实现的控件有如下特点:
在图片内移动的裁剪框,可以用裁剪框的四边和四角改变矩形裁剪框的形状,随着图片的旋转按比例缩放并旋转编辑框
任意移动图片,以双指为锚点实现缩放,旋转。并以图片大小,编辑框的位置实现图片的裁剪
控件没有大的技术难点,但是逻辑比较复杂,算是一个写自定义view练手的列子。
本文贴出关键的代码,首先说明了图片是如何平移,缩放和旋转的,然后在说明裁剪框的实现方式。
图片平移,缩放,旋转关键代码
1.图片的平移:使用一个panGestureRecognizer,当手指移动的时候,改变imageView.center, 并且根据图片缩放的大小,适配手指移动的速度
func panImageView(sender: UIPanGestureRecognizer) {
        var translation = sender.translation(in:sender.view)
        translation.x = translation.x * imageZoomScale
        translation.y = translation.y * imageZoomScale
        let view = sender.view
        if screenHeight - (view!.frame.origin.y + view!.frame.size.height + translation.y) >  cropBottomMargin {
            translation.y = screenHeight - (view!.frame.origin.y + view!.frame.size.height) - cropBottomMargin
        }
        if screenWidth - (view!.frame.origin.x + view!.frame.size.width + translation.x) > cropRightMargin {
            translation.x = screenWidth - (view!.frame.origin.x + view!.frame.size.width) - cropRightMargin
        }

        view?.center = CGPoint(x: (view?.center.x)! + translation.x, y: (view?.center.y)! + translation.y)
        sender.setTranslation(CGPoint.zero, in: view?.superview)
    }
2.图片的缩放
以双指开始时的位置为锚点,通过改变UIImageView的Transform缩放图片
// 设置锚点
    private func adjustAnchorPointForGesture(sender: UIGestureRecognizer) {
        if sender.state == UIGestureRecognizerState.began {
            let piceView = imageView
            let locationInView = sender.location(in: piceView)
            let locationInSuperView = sender.location(in: piceView?.superview)
            piceView?.layer.anchorPoint = CGPoint(x: locationInView.x / piceView!.bounds.size.width, y: locationInView.y / piceView!.bounds.size.height)
            piceView?.center = locationInSuperView
        }
    }
// 改变 imageView.transform 并在手势完成后,判断最大最小的放大倍数,用一个动画将image view调整到最大/最小的放大倍数
 @objc fileprivate func handlePinchGesture(sender: UIPinchGestureRecognizer)  {
        NSLog("pinch")
        adjustAnchorPointForGesture(sender: sender)
        if sender.state == UIGestureRecognizerState.changed {
            imageZoomScale = imageView.frame.size.height / originImageViewFrame.size.height
            if imageZoomScale > 0.5 {
                imageView.transform = imageView.transform.scaledBy(x: sender.scale, y: sender.scale)
                sender.scale = 1
            }
            if layoutCropView {
                updateCropViewLayout()
                adjustOverLayView()
            }
        } else if sender.state == UIGestureRecognizerState.ended
            || sender.state == UIGestureRecognizerState.cancelled {
            animationAfterZoom(zoomScale: imageZoomScale)
        }
    }
3.图片的旋转
let image = UIImage(cgImage: imageView.image!.cgImage!, scale: 1.0, orientation: .right)
// withOrientation: .right 使得图片总是向右边旋转
let newImage = rotateImage(source: image, withOrientation: .right)

func rotateImage(source: UIImage, withOrientation orientation: UIImageOrientation) -> UIImage {
        UIGraphicsBeginImageContext(source.size)
        let context = UIGraphicsGetCurrentContext()
        if orientation == .right {
            context?.ctm.rotated(by: CGFloat.pi / 2)
        } else if orientation == .left {
            context?.ctm.rotated(by: -(CGFloat.pi / 2))
        } else if orientation == .down {
            // do nothing
        } else if orientation == .up {
            context?.ctm.rotated(by: CGFloat.pi / 2)
        }
        source.draw(at: CGPoint.zero)
        let image = UIGraphicsGetImageFromCurrentImageContext()
        UIGraphicsEndImageContext()
        return image!
    }
裁剪框的实现
从图片上可以看到,首先在UIImageView上面加了一个半透明的浮层,然后在裁剪框的内部去掉浮层直接显示图片。
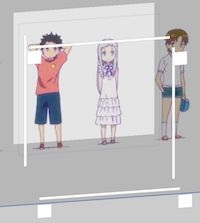
关于浮层,有些实现的方法比较复杂,及上下左右使用了4个view来做浮层,并且当调整中间的白色裁剪框时需要调整这4个浮层,示意图如下:
我的做法是,整个浮层使用一个UIView,在drawRect方法中使用quartz2d画图,首先画出灰色的浮层,然后再画一个空白透明的区域作为cropView,这样就实现了在一个view中画出了灰色浮层和透明的裁剪框。每一次更新cropView的frame就从新绘制这个view,代码如下:
override func draw(_ rect: CGRect) {
        UIColor.init(red: 0.0, green: 0.0, blue: 0.0, alpha: 0.2).set()
        UIRectFill(self.frame)
        let intersecitonRect = self.frame.intersection(self.cropRect!)
        UIColor.init(red: 0.0, green: 0.0, blue: 0.0, alpha: 0.0).set()
        UIRectFill(intersecitonRect)
    }
关于cropView,因为这个cropView需要:
- 可以平移
- 可以通过四边,四角进行大小的调整
- 图片旋转之后要保持原来框选的内容
要满足这几个要求,用frame会导致只算复杂,所以我选择了使用AutoLayout来设置了cropView的四边到屏幕上下左右的距离。
        cropRightMargin = (CGFloat)(originImageViewFrame.size.width / 2) - (CGFloat)(INIT_CROP_VIEW_SIZE / 2)
        cropLeftMargin = cropRightMargin
        cropTopMargin = (CGFloat)(originImageViewFrame.size.height / 2) - (CGFloat)(INIT_CROP_VIEW_SIZE / 2) + (CGFloat)((screenHeight - originImageViewFrame.size.height) / 2)
        cropBottomMargin = cropTopMargin

        let views = ["cropView":cropView!, "imageView":imageView!] as [String : UIView]
        let Hvfl = String(format: "H:|-%f-[cropView]-%f-|", cropLeftMargin, cropRightMargin);
        let Vvfl = String(format: "V:|-%f-[cropView]-%f-|", cropTopMargin, cropBottomMargin)
        let cropViewHorizentalConstraints = NSLayoutConstraint.constraints(withVisualFormat: Hvfl, options: [], metrics: nil, views: views)
        let cropViewVerticalConstraints = NSLayoutConstraint.constraints(withVisualFormat: Vvfl, options: [], metrics: nil, views: views)
        cropViewConstraints += cropViewHorizentalConstraints
        cropViewConstraints += cropViewVerticalConstraints
        self.addConstraints(cropViewVerticalConstraints)
        self.addConstraints(cropViewHorizentalConstraints)
        self.layoutIfNeeded()

        adjustOverLayView()
并且为CropView添加了子View来模拟四个角,四条边,并设置他们的ViewTag
注意到这四个子View是非常小的,手指很难碰到,所以要扩大他们的触摸区域,这里我通过重写PointInside方法,根据viewtag,扩大四边和四角的触摸区域:
    override func point(inside point: CGPoint, with event: UIEvent?) -> Bool {
        var pointInside = false

        if self.frame.contains(convert(point, to: self.superview)) {
            pointInside = true
            hittedViewTag = self.tag
        }

        for subview in subviews as [UIView] {
            if !subview.isHidden && subview.alpha > 0
                && subview.isUserInteractionEnabled {
                var extendFrame: CGRect
                if subview.tag == LyEditImageView.UP_LINE_TAG || subview.tag == LyEditImageView.DOWN_LINE_TAG {
                    extendFrame = CGRect(x: subview.frame.origin.x + 25, y: subview.frame.origin.y - 20, width: subview.frame.size.width - 50, height: subview.frame.size.height + 40)

                } else if subview.tag == LyEditImageView.LEFT_LINE_TAG || subview.tag == LyEditImageView.RIGHT_LINE_TAG {
                    extendFrame = CGRect(x: subview.frame.origin.x - 20, y: subview.frame.origin.y + 25, width: subview.frame.size.width + 40, height: subview.frame.size.height - 50)

                } else {
                    extendFrame = CGRect(x: subview.frame.origin.x - 20, y: subview.frame.origin.y - 20, width: subview.frame.size.width + 40, height: subview.frame.size.height + 40)
                }
                if extendFrame.contains(point) {
                    hittedViewTag = subview.tag
                    pointInside = true
                }
            }
        }

        return pointInside
    }
这样当我需要调整cropView大小的时候:
1.平移:同移动ImageView,根据UIPanGesture point translate改变cropView的四个constraints
  private func panCropView( translation: CGPoint) {
        var translation = translation

        let right = cropRightMargin
        let left = cropLeftMargin
        let top = cropTopMargin
        let bottom = cropBottomMargin
        cropRightMargin! -= translation.x
        cropLeftMargin! += translation.x
        cropBottomMargin! -= translation.y
        cropTopMargin! += translation.y

        updateCropViewLayout()
        // redraw overLayView after move cropView
        adjustOverLayView()
    }
2.通过四边缩放cropView:改变与某一边相关的Margin(constraint)
 func handleCropViewPanGesture(sender: UIPanGestureRecognizer) {
        let tag:Int = cropView.getCropViewTag()
        let view = sender.view
        var translation = sender.translation(in: view?.superview)
        switch tag {
        // 通过左边改变cropView
        case LyEditImageView.LEFT_LINE_TAG:
            cropLeftMargin! += translation.x
            break
      ... ...
}
3.通过四个角缩放cropView:改变与这个角相关的两个Margin,如通过左上角缩放的话,需要调整MarginRight和MarginTop
 func handleCropViewPanGesture(sender: UIPanGestureRecognizer) {
        let tag:Int = cropView.getCropViewTag()
        let view = sender.view
        var translation = sender.translation(in: view?.superview)
        switch tag {
        // 通过左上角改变cropView
        case LyEditImageView.LEFT_UP_TAG:
            cropTopMargin! += translation.y
            cropLeftMargin! += translation.x
            break
      ... ...
}
4.旋转图片:根据图片的zoomScale,cropView距离图片四边的值,依次交换
        cropLeftMargin = cropBottomToImage * cropViewConstraintsRatio + imageView.frame.origin.x
        cropTopMargin = cropLeftToImage * cropViewConstraintsRatio + imageView.frame.origin.y
        cropRightMargin = cropTopToImage * cropViewConstraintsRatio + screenWidth - imageView.frame.origin.x - imageView.frame.size.width
        cropBottomMargin = cropRightToImage * cropViewConstraintsRatio + screenHeight - imageView.frame.origin.y - imageView.frame.size.height
最后,点击四边的时候,给用户个提示,扩展一下被点击边的视角,例如点击了底边:
那么在touchsBegin里面:
override func touchesBegan(_ touches: Set, with event: UIEvent?) {
        print("cropview began")
        updateSubView()
        delegate?.cropRemoveBlurOverLay?()
    }

    override func touchesEnded(_ touches: Set, with event: UIEvent?) {
        print("cropview end")
        resetHightLightView()
        delegate?.cropAddBlurOverLay?(cropRect: self.frame)
    }
func updateSubView() {
        print("updateSubView")
        ... ...
        if hittedViewTag == LyEditImageView.DOWN_LINE_TAG {
            downLine.frame = CGRect(x:0, y: self.frame.size.height - LINE_WIDTH, width: self.frame.size.width, height: LINE_WIDTH * 2);
        } else {
            downLine.frame = CGRect(x:0, y: self.frame.size.height - LINE_WIDTH, width: self.frame.size.width, height: LINE_WIDTH);
        }
    }
最后
有问题可以评论文章,喜欢的话请按个赞
Have fun :)


