如果仅仅想知道如何使用TestNG,请阅读官方文档。如果想知道TestNG背后代码是如何运行的,继续往下:
我们运行TestNG从开始执行用例到最终输出报告,是通过一条命令行实现的:
$java org.testng.TestNG testng.xml
这段命令行的背后代码是如何运行的?
1.首先从github/testng下载源码
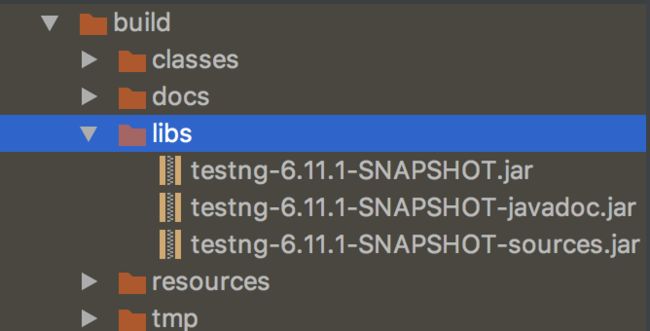
TestNG使用gradle作为构建工具,可以学习下gradle如何进行java程序编译和打包就可以编译TestNG的源码了
2.查找TestNG源码入口main函数:
java org.testng.TestNG这条命令的意思是执行TestNG的main函数,所以我们首先找到TestNG这个类的main函数定义
执行$java org.testng.TestNG testng1.xml [testng2.xml testng3.xml ...]的背后代码如下:
  /**
   * The TestNG entry point for command line execution.
   *
   * @param argv the TestNG command line parameters.
   * @throws FileNotFoundException
   */
  public static void main(String[] argv) {
    TestNG testng = privateMain(argv, null);
    System.exit(testng.getStatus());
  }
3.TestNG#privateMain核心逻辑如下
  public static TestNG privateMain(String[] argv, ITestListener listener) {
    TestNG result = new TestNG();
    result.addListener((Object)listener);

    // 1.解析参数并配置TestNG对象result
    CommandLineArgs cla = new CommandLineArgs();
    m_jCommander = new JCommander(cla, argv);
    validateCommandLineParameters(cla);
    result.configure(cla);

    // 2.执行用例
    result.run();

    return result;
  }
4.上一步中TestNG#run的代码如下:
/** Run TestNG. */
  public void run() {
    initializeEverything();
    sanityCheck();

    runExecutionListeners(true /* start */);

    runSuiteAlterationListeners();

    m_start = System.currentTimeMillis();

    // 执行用例
    List suiteRunners = runSuites();

    m_end = System.currentTimeMillis();

    // 生成用例报告
    if (null != suiteRunners) {
      generateReports(suiteRunners);
    }

    runExecutionListeners(false /* finish */);
    ......
  }
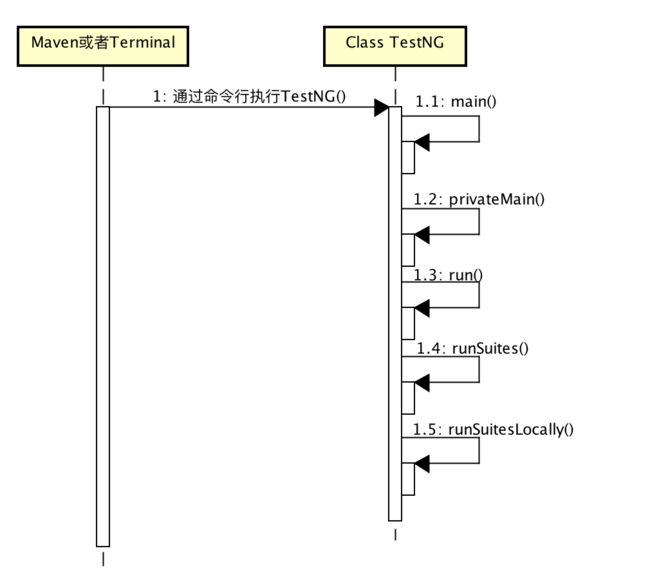
5.看看执行用例的时序图,TestNG#run()最终是调用了TestNG#runSuiteLocally()来实现核心逻辑:
TestNG#runSuiteLocally()的实现如下(去除非核心代码)
  public List runSuitesLocally() {
    SuiteRunnerMap suiteRunnerMap = new SuiteRunnerMap();
    // 判断是否有测试用例,没有报错No test suite found. Nothing to run
    if (m_suites.size() > 0) {
      // 重要:创建测试套执行器
      for (XmlSuite xmlSuite : m_suites) {
        createSuiteRunners(suiteRunnerMap, xmlSuite);
      }

      // 重要:执行测试套
      if (m_suiteThreadPoolSize == 1 && !m_randomizeSuites) {
        // 串行执行测试套
        for (XmlSuite xmlSuite : m_suites) {
          // 核心逻辑1:递归执行测试套(先执行子测试套,然后再执行父测试套)
          runSuitesSequentially(xmlSuite, suiteRunnerMap, getVerbose(xmlSuite),
              getDefaultSuiteName());
        }
      } else {
        // 多线程执行测试套
        DynamicGraph suiteGraph = new DynamicGraph<>();
        for (XmlSuite xmlSuite : m_suites) {
          populateSuiteGraph(suiteGraph, suiteRunnerMap, xmlSuite);
        }

        IThreadWorkerFactory factory = new SuiteWorkerFactory(suiteRunnerMap,
          0 /* verbose hasn't been set yet */, getDefaultSuiteName());
        GraphThreadPoolExecutor pooledExecutor =
                new GraphThreadPoolExecutor<>("suites", suiteGraph, factory, m_suiteThreadPoolSize,
                        m_suiteThreadPoolSize, Integer.MAX_VALUE, TimeUnit.MILLISECONDS,
                        new LinkedBlockingQueue());

        Utils.log("TestNG", 2, "Starting executor for all suites");

        // 核心逻辑2:并发执行测试套
        pooledExecutor.run();

        // 等待测试套执行结束
        try {
          pooledExecutor.awaitTermination(Long.MAX_VALUE, TimeUnit.MILLISECONDS);
          pooledExecutor.shutdownNow();
        }
        catch (InterruptedException handled) {
          Thread.currentThread().interrupt();
          error("Error waiting for concurrent executors to finish " + handled.getMessage());
        }
      }
    }
    else {
      setStatus(HAS_NO_TEST);
      error("No test suite found. Nothing to run");
      usage();
    }

    return Lists.newArrayList(suiteRunnerMap.values());
  }
runSuitesLocally有3个核心逻辑需要详细走读下代码(放在后续SuiteRunner代码走读里研究):
1.createSuiteRunners创建测试套执行器的实现。
2.runSuiteSequentially串行执行测试套的实现。
3.populateSuiteGraph/GraphThreadPoolExecutor等批量并行执行测试套的实现。
同时需要看下m_suites变量是如何初始化的,m_suites变量是读取自testng.xml中的suite节点
6.m_suites的初始化:
回到TestNG#privateMain()中调用的result.run()方法:
  /**
   * Run TestNG.
   */
  public void run() {
    initializeEverything();
    ......
    List suiteRunners = runSuites();
    ......
  }
initializeEverything()的实现如下,整体逻辑是:从命令行参数->jar包路径->jar包中找到配置文件并解析出测试套。
  public void initializeEverything() {
    // The Eclipse plug-in (RemoteTestNG) might have invoked this method already
    // so don't initialize suites twice.
    if (m_isInitialized) {
      return;
    }

    initializeSuitesAndJarFile();
    initializeConfiguration();
    initializeDefaultListeners();
    initializeCommandLineSuites();
    initializeCommandLineSuitesParams();
    initializeCommandLineSuitesGroups();

    m_isInitialized = true;
  }
这里调用了initializeSuitesAndJarFile()实现了m_suites的初始化,去除和m_suites初始化无关的代码后:
public void initializeSuitesAndJarFile() {
    if (m_suites.size() > 0) {
        //to parse the suite files (), if any
        for (XmlSuite s: m_suites) {
            for (String suiteFile : s.getSuiteFiles()) {
                try {
                    Collection childSuites;
                    if (s.getFileName() != null) {
                      Path rootPath = Paths.get(s.getFileName()).getParent();
                      try (InputStream is = Files.newInputStream(rootPath.resolve(suiteFile))) {
                        childSuites = getParser(is).parse();
                      }
                    } else {
                      childSuites = getParser(suiteFile).parse();
                    }
                    for (XmlSuite cSuite : childSuites){
                        cSuite.setParentSuite(s);
                        s.getChildSuites().add(cSuite);
                    }
                } catch (IOException e) {
                    e.printStackTrace(System.out);
                }
            }
        }
      return;
    }

    // m_stringSuites是在TestNG#privateMain()中调用result.configure()里进行初始化,是通过命令行传入的测试套配置xml文件路径
    for (String suitePath : m_stringSuites) {
      if(LOGGER.isDebugEnabled()) {
        LOGGER.debug("suiteXmlPath: \"" + suitePath + "\"");
      }
      try {
        // 从xml文件中解析测试套
        Collection allSuites = getParser(suitePath).parse();

        for (XmlSuite s : allSuites) {
          // 如果参数中指定了测试用例名称,只执行指定用例
          if (m_testNames != null) {
            m_suites.add(extractTestNames(s, m_testNames));
          }
          else {
            m_suites.add(s);
          }
        }
      }
      catch(IOException e) {
        e.printStackTrace(System.out);
      } catch(Exception ex) {
        // Probably a Yaml exception, unnest it
        Throwable t = ex;
        while (t.getCause() != null) t = t.getCause();
        if (t instanceof TestNGException) throw (TestNGException) t;
        else throw new TestNGException(t);
      }
    }

    // 如果测试套是通过命令行传入,优先级要高于在jar包路径下的测试套
    if (m_jarPath != null && m_stringSuites.size() > 0) {
      StringBuilder suites = new StringBuilder();
      for (String s : m_stringSuites) {
        suites.append(s);
      }
      Utils.log("TestNG", 2, "Ignoring the XML file inside " + m_jarPath + " and using "
          + suites + " instead");
      return;
    }
    if (isStringEmpty(m_jarPath)) {
      return;
    }

    // 没有指定xml文件,但是传入了一个jar包,试图从jar包中找到xml配置文件
    File jarFile = new File(m_jarPath);

    try {

      Utils.log("TestNG", 2, "Trying to open jar file:" + jarFile);

      boolean foundTestngXml = false;
      List classes = Lists.newArrayList();
      try (JarFile jf = new JarFile(jarFile)) {
        Enumeration entries = jf.entries();
        while (entries.hasMoreElements()) {
          JarEntry je = entries.nextElement();
          if (je.getName().equals(m_xmlPathInJar)) {
            Parser parser = getParser(jf.getInputStream(je));
            Collection suites = parser.parse();
            for (XmlSuite suite : suites) {
              // If test names were specified, only run these test names
              if (m_testNames != null) {
                m_suites.add(extractTestNames(suite, m_testNames));
              } else {
                m_suites.add(suite);
              }
            }

            foundTestngXml = true;
            break;
          } else if (je.getName().endsWith(".class")) {
            int n = je.getName().length() - ".class".length();
            classes.add(je.getName().replace("/", ".").substring(0, n));
          }
        }
      }
      if (! foundTestngXml) {
        Utils.log("TestNG", 1,
            "Couldn't find the " + m_xmlPathInJar + " in the jar file, running all the classes");
        XmlSuite xmlSuite = new XmlSuite();
        xmlSuite.setVerbose(0);
        xmlSuite.setName("Jar suite");
        XmlTest xmlTest = new XmlTest(xmlSuite);
        List xmlClasses = Lists.newArrayList();
        for (String cls : classes) {
          XmlClass xmlClass = new XmlClass(cls);
          xmlClasses.add(xmlClass);
        }
        xmlTest.setXmlClasses(xmlClasses);
        m_suites.add(xmlSuite);
      }
    }
    catch(IOException ex) {
      ex.printStackTrace();
    }
  }
代码中用到的2个变量m_stringSuites和m_jarPath都是通过可选命令行参数传入,它们都是在TestNG#privateMain()中调用result.configure()里进行初始化,具体实现可以看下result.configure()的源码。
命令行参数格式如下:
$java org.testng.TestNG m_stringSuites -testjar m_jarPath
例如:
$java org.testng.TestNG testng.xml
对于TestNG的入口代码的走读就到此结束,接下来会走读TestNG的核心类SuiteRunner,研究下它如何实现执行测试套/测试用例。


