原文地址: http://mxstbr.blog/2017/02/react-children-deepdive/
React的核心是组件。你可以像嵌套HTML tag一样嵌套React的组件,这使得JSX的语法十分简洁。
当我初次接触React的时候,我以为只要代码中会使用props.children就万事大吉了。伙计们,我错了。
因为当我们使用Javascript时,我们可以改变子组件。我们可以传递一些特殊的property, 决定是否render以及按照我们的想法控制它们。现在我们来深入的了解一下React子组件(React children)。
子组件
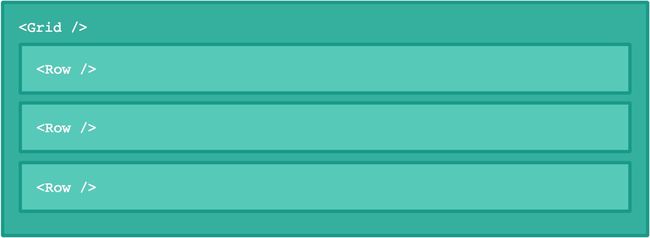
比如我们有一个
|
|
|
这三个Row组件被作为props.children传给了Grid。用括号表达式父组件即可渲染子组件。
class Grid extends React.Component {
  render() {
    return {this.props.children}
  }
}
父组件也可以决定是否渲染子组件, 以及在渲染前修改它们。比如
class Fullstop extends React.Component {
  render() {
    return Hello world!
  }
}
不管你传什么子组件给Fullstop, 它永远只会显示Hello world!
注:这里
组件还是渲染了它的children, 也就是Hello world!字符串。
任何东西都可以作为子组件
React Children也不要求一定是React组件,它可以是任何东西。比如上面的例子中,我们可以传一些文本作为children,一样没问题。
Hello world!
JSX会自动去除行首和行尾的空格,以及空白行,以及压缩字符串中间的空行为一个空格。
以下的例子渲染出来的结果是一样的:
Hello world!


  Hello world!


  Hello
  world!


  Hello world!
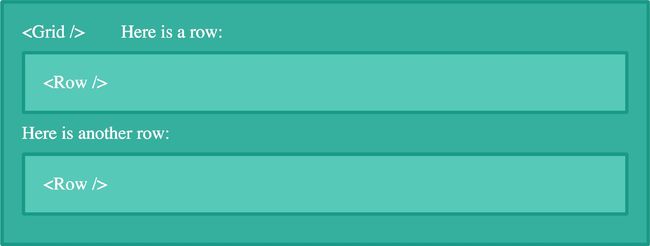
你也可以混合多种不同类型的chidren:
Here is a row:
|
Here is another row:
|
函数作为子组件
我们可以使用任何Javascript表达式作为子组件,这当然包括了函数。请看以下例子:
class Executioner extends React.Component {
  render() {
    // See how we're calling the child as a function?
    //                        ↓
    return this.props.children()
  }
}
这样使用这个组件:
{() => Hello World!
}
这个例子当然也不具有什么实际价值,但是可以说明这个用法。
设想你需要从服务器端拉取一些数据,你有很多种方法,函数子组件就是其一:
{(result) => {result}
}
修改子组件
如果你看过React官方文档,你会看到说"子组件是一种不透明的数据结构"(opaque data structure)。意思就是props.children可以是任何类型,比如array, function, object等等。因为什么都可以传,所以你也不能确定传过来了什么东西。
React提供了一些帮助函数来简化子组件的操作,它们位于React.Children下。
循环遍历子组件
最常用的帮助函数是React.Children.map和React.Children.forEach。它们和array对象的同名方法是等效的,并且当子组件是function, object时依然是有效的。
class IgnoreFirstChild extends React.Component {
  render() {
    const children = this.props.children
    return (

        {React.Children.map(children, (child, i) => {
          // Ignore the first child
          if (i < 1) return
          return child
        })}

    )
  }
}
  First
  Second // <- Only this is rendered
这个例子里,我们也可以使用this.props.children.map, 但是如果有人传了一个function进来,那么this.props.children是一个function, 我们就会得到错误:
但是如果使用React.Children.map就没有问题了:
{() => First
} // <- Ignored
子组件个数计数
同样由于this.props.children类型的不确定,我们要判断有多少个子组件就比较困难了。如果幼稚的使用this.props.children.length就很容易报错了。而且,如果传来一个子组件"Hello World!",.length会返回12!
所以我们要使用React.Children.count。
class ChildrenCounter extends React.Component {
  render() {
    return React.Children.count(this.props.children)
  }
}
// Renders "1"
Second!
// Renders "2"
First
// Renders "3"
{() => First!
}
Second!
Third!
将子组件转化成Array
如果上面的方法都不是你需要的,那么你可以使用React.Children.toArray将子组件转化为Array。当你要对子组件排序时就特别有用了。
class Sort extends React.Component {
  render() {
    const children = React.Children.toArray(this.props.children)
    // Sort and render the children
    return {children.sort().join(' ')}
  }
}
  // We use expression containers to make sure our strings
  // are passed as three children, not as one string
  {'bananas'}{'oranges'}{'apples'}
上面的例子渲染排序后的水果:
强制传入单个子组件
再回到上面
class Executioner extends React.Component {
  render() {
    return this.props.children()
  }
}
借助propTypes来实现:
Executioner.propTypes = {
  children: React.PropTypes.func.isRequired,
}
这样就会在console里打印出日志来,但是有的时候开发者很容易忽略这些消息。这个时候我们就应该在render方法里加入React.Children.only。
class Executioner extends React.Component {
  render() {
    return React.Children.only(this.props.children)()
  }
}
如果子组件多于一个会抛出一个错误,整个app会停止--绝对不会让一些偷懒的开发搞乱我们的组件。
修改子组件
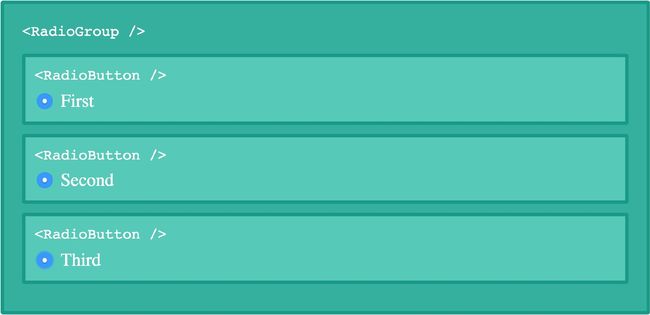
我们可以渲染任意类型的子组件,但是我们可以从它们的父组件控制它们而不仅仅是从渲染它的组件去控制。什么意思呢,比如我们有一个RadioGroup组件,该组件包含一些RadioButton子组件(最终渲染成 )。
RadioButtons不是由RadioGroup渲染的,它们作为子组件传入,这意味着我们的代码看起来像这样:
render() {
  return(

      First
      Second
      Third

  )
}
这就有点问题了。Inputs没有在同一个Group里,所以出现了:
为了将各个Inputs放于同一个group里面需要给他们设置相同的name属性。当然可以用下面这个笨方法:
  First
  Second
  Third
但是为什么不利用一下Javascript的灵活能力呢?
改变子组件属性
我们给代码做一点修改:
class RadioGroup extends React.Component {
  constructor() {
    super()
    // Bind the method to the component context
    this.renderChildren = this.renderChildren.bind(this)
  }

  renderChildren() {
  return React.Children.map(this.props.children, child => {
    // TODO: Change the name prop to this.props.name
    return child
  })
}

  render() {
    return (

        {this.renderChildren()}

    )
  }
}
问题是我们怎么修改property呢?
Immutably cloning elements
本文最后一个工具函数React.cloneElement。第一个参数是拷贝源的React element, 第二个参数是prop object,clone以后会把这个prop object设置成属性给拷贝结果。
const cloned = React.cloneElement(element, {
  new: 'yes!'
})
cloned元素将持有名为new的属性,属性值为"yes!"。
利用cloneElement函数可以完成上面的需求了:
renderChildren() {
  return React.Children.map(this.props.children, child => {
    return React.cloneElement(child, {
      name: this.props.name
    })
  })
}
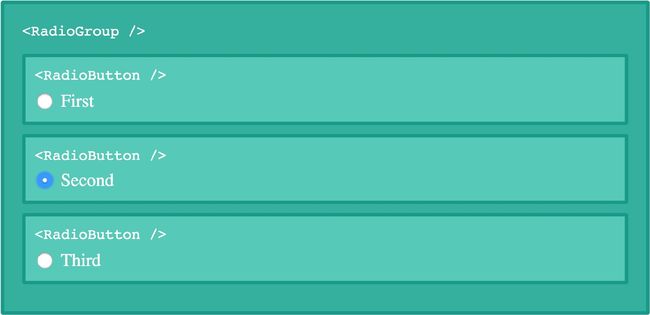
这样一来每一个子组件都可以获得父组件的name属性了。所以最后一步,我们只需要在父组件上加上name属性即可。
  First
  Second
  Third
成功了。在这里我们没有在每个子组件上设置name属性,而是告诉父组件RadioGroup属性名和属性值,然后由RadioGroup来解决问题。
结语
子组件使得React组件之间变得不那么互相隔离,借助Javascript强大的能力和React的工具函数,现在我们能够很轻松的构建声明式API了。


