版本记录
| 版本号 | 时间 |
|---|---|
| V1.0 | 2018.05.26 |
前言
Safe Area是iOS 9新出的,它的出现一定程度上解决了很多适配的问题,可以说解决了很多UI方面的问题,你再也不用担心状态栏是否被覆盖,特别是iphone X出现以后,状态栏和底部都留有和其他机型不同的高度,这给适配带来更多的麻烦,但是Safe Area预留出来安全区域,可以让你对UI的适配无后顾之忧。感兴趣的可以看我上面写的几篇文章。
Safe Area是什么?
在说Safe Area之前,我们先一起看两个东西:
@interface UIViewController (UILayoutSupport)
// These objects may be used as layout items in the NSLayoutConstraint API
@property(nonatomic,readonly,strong) id topLayoutGuide API_DEPRECATED("Use view.safeAreaLayoutGuide.topAnchor instead of topLayoutGuide.bottomAnchor", ios(7.0,11.0), tvos(7.0,11.0));
@property(nonatomic,readonly,strong) id bottomLayoutGuide API_DEPRECATED("Use view.safeAreaLayoutGuide.bottomAnchor instead of bottomLayoutGuide.topAnchor", ios(7.0,11.0), tvos(7.0,11.0));

/* Custom container UIViewController subclasses can use this property to add to the overlay
 that UIViewController calculates for the safeAreaInsets for contained view controllers.
 */
@property(nonatomic) UIEdgeInsets additionalSafeAreaInsets API_AVAILABLE(ios(11.0), tvos(11.0));

/* Minimum layoutMargins for the view determined by the view controller from context and hardware information.
 The view controller's view will respect these minimums unless viewRespectsSystemMinimumLayoutMargins
 (which defaults to YES) is set to NO.
 */
@property(nonatomic,readonly) NSDirectionalEdgeInsets systemMinimumLayoutMargins API_AVAILABLE(ios(11.0), tvos(11.0));

/* Default YES. The return value of the view's layoutMargins and directionalLayoutMargins properties will have
 values no smaller than the systemMinimumLayoutMargins. Set to NO for full customizability of the view's
 layoutMargins.
 */
@property(nonatomic) BOOL viewRespectsSystemMinimumLayoutMargins API_AVAILABLE(ios(11.0), tvos(11.0));

- (void)viewLayoutMarginsDidChange NS_REQUIRES_SUPER API_AVAILABLE(ios(11.0), tvos(11.0));
- (void)viewSafeAreaInsetsDidChange NS_REQUIRES_SUPER API_AVAILABLE(ios(11.0), tvos(11.0));

@end
上面就是UIViewController里面关于布局的一个分类,大家也看到了
// These objects may be used as layout items in the NSLayoutConstraint API
@property(nonatomic,readonly,strong) id topLayoutGuide API_DEPRECATED("Use view.safeAreaLayoutGuide.topAnchor instead of topLayoutGuide.bottomAnchor", ios(7.0,11.0), tvos(7.0,11.0));
@property(nonatomic,readonly,strong) id bottomLayoutGuide API_DEPRECATED("Use view.safeAreaLayoutGuide.bottomAnchor instead of bottomLayoutGuide.topAnchor", ios(7.0,11.0), tvos(7.0,11.0));
上面这两个是iOS 7出来的,iOS11已经被废弃了,替换他们的就是Safe Area,上面说的就是被view.safeAreaLayoutGuide.bottomAnchor替代,那个是在UIView的API中。
/* -layoutMargins returns a set of insets from the edge of the view's bounds that denote a default spacing for laying out content.
 If preservesSuperviewLayoutMargins is YES, margins cascade down the view tree, adjusting for geometry offsets, so that setting
 the left value of layoutMargins on a superview will affect the left value of layoutMargins for subviews positioned close to the
 left edge of their superview's bounds
   If your view subclass uses layoutMargins in its layout or drawing, override -layoutMarginsDidChange in order to refresh your
 view if the margins change.
   On iOS 11.0 and later, please support both user interface layout directions by setting the directionalLayoutMargins property
 instead of the layoutMargins property. After setting the directionalLayoutMargins property, the values in the left and right
 fields of the layoutMargins property will depend on the user interface layout direction.
 */
@property (nonatomic) UIEdgeInsets layoutMargins NS_AVAILABLE_IOS(8_0);

/* directionalLayoutMargins.leading is used on the left when the user interface direction is LTR and on the right for RTL.
 Vice versa for directionalLayoutMargins.trailing.
 */
@property (nonatomic) NSDirectionalEdgeInsets directionalLayoutMargins API_AVAILABLE(ios(11.0),tvos(11.0));

@property (nonatomic) BOOL preservesSuperviewLayoutMargins NS_AVAILABLE_IOS(8_0); // default is NO - set to enable pass-through or cascading behavior of margins from this view’s parent to its children
@property (nonatomic) BOOL insetsLayoutMarginsFromSafeArea API_AVAILABLE(ios(11.0),tvos(11.0));  // Default: YES

- (void)layoutMarginsDidChange NS_AVAILABLE_IOS(8_0);

@property (nonatomic,readonly) UIEdgeInsets safeAreaInsets API_AVAILABLE(ios(11.0),tvos(11.0));
- (void)safeAreaInsetsDidChange API_AVAILABLE(ios(11.0),tvos(11.0));

/* The edges of this guide are constrained to equal the edges of the view inset by the layoutMargins
 */
@property(readonly,strong) UILayoutGuide *layoutMarginsGuide NS_AVAILABLE_IOS(9_0);

/// This content guide provides a layout area that you can use to place text and related content whose width should generally be constrained to a size that is easy for the user to read. This guide provides a centered region that you can place content within to get this behavior for this view.
@property (nonatomic, readonly, strong) UILayoutGuide *readableContentGuide  NS_AVAILABLE_IOS(9_0);

/* The top of the safeAreaLayoutGuide indicates the unobscured top edge of the view (e.g, not behind
 the status bar or navigation bar, if present). Similarly for the other edges.
 */
@property(nonatomic,readonly,strong) UILayoutGuide *safeAreaLayoutGuide API_AVAILABLE(ios(11.0),tvos(11.0));
我们先说一下以前的topLayoutGuide和 bottomLayoutGuide都是干什么的。
topLayoutGuide 和 bottomLayoutGuide 两个属性来描述不希望被透明的状态栏或者导航栏遮挡的最高位置。这个属性的值是一个length属性( topLayoutGuide.length)。 这个值可能由当前的ViewController或者 NavigationController 或者TabbarController决定。
一个独立的ViewController,不包含于任何其他的ViewController。如果状态栏可见,topLayoutGuide表示状态栏的底部,否则表示这个ViewController的上边缘。包含于其他ViewController的ViewController不对这个属性起决定作用,而是由容器ViewController决定这个属性的含义。
如果导航栏
(Navigation Bar)可见,topLayoutGuide表示导航栏的底部如果状态栏可见,
topLayoutGuide表示状态栏的底部。如果都不可见,表示
ViewController的上边缘。
iOS 11以后为了获得更好的适配体验就弃用了这两个属性,更改为Safe Area相关的概念和属性。苹果建议:不要把VC放在Safe Area之外。
Safe Area简单应用
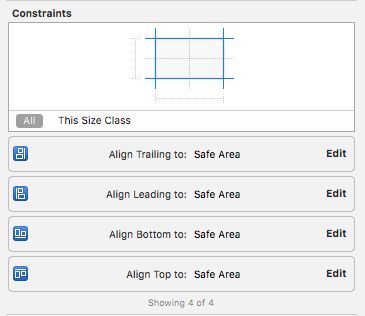
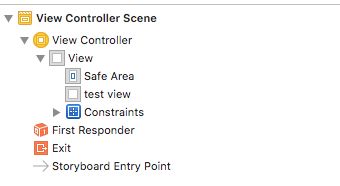
先看一个最简单的应用,在根view上脱上一个子视图,设置如下约束:
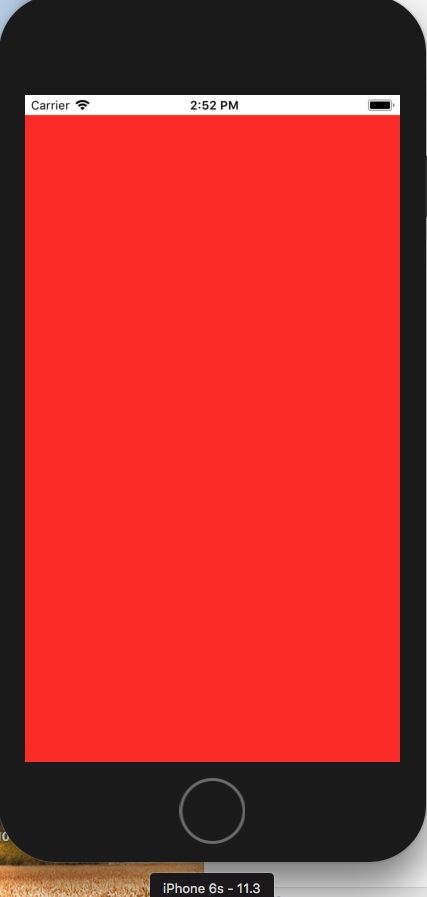
下面在6s模拟器上运行,如下所示:
NSLog(@"safeAreaInsets = %lf, %lf, %lf, %lf", self.testView.safeAreaInsets.left, self.testView.safeAreaInsets.right, self.testView.safeAreaInsets.top, self.testView.safeAreaInsets.bottom);
NSLog(@"self.testView = %@", self.testView);
看运行结果
2018-05-26 14:50:56.158103+0800 JJWebImage[64139:1049305] safeAreaInsets = 0.000000, 0.000000, 0.000000, 0.000000
2018-05-26 14:50:56.158496+0800 JJWebImage[64139:1049305] self.testView = >
可见safeAreaInsets上左下右的间距均为0,并且预留出来上边20状态栏的高度。
具体效果如下所示:
下面换成iPhone X看一下输出和实际效果
先看输出
2018-05-26 15:07:33.072648+0800 JJWebImage[64417:1065730] safeAreaInsets = 0.000000, 0.000000, 0.000000, 0.000000
2018-05-26 15:07:33.072999+0800 JJWebImage[64417:1065730] self.testView = >
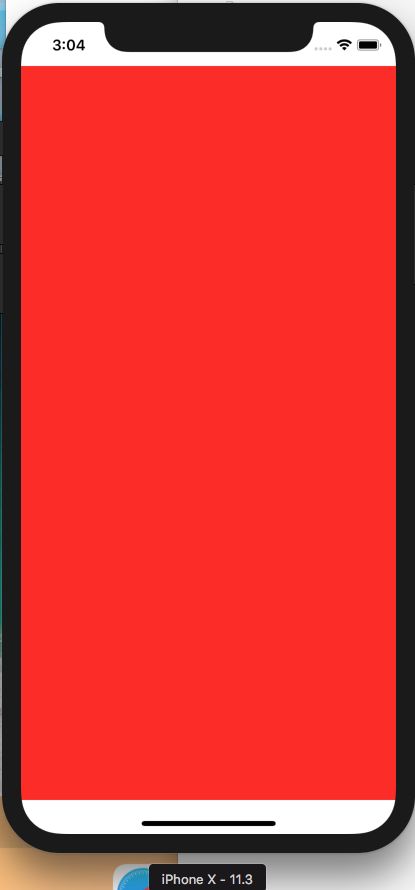
再看实际效果
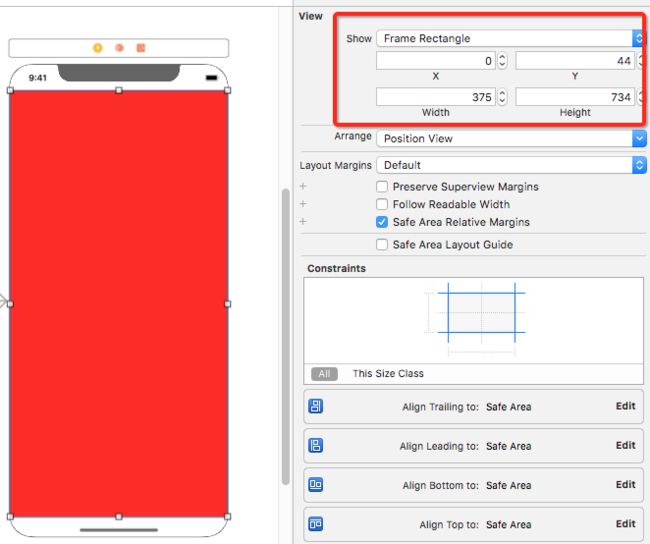
点击testView可见其frame及在父视图中的位置。
可见其顶部预留大小为44个点,底部预留大小为34个点。扩展下:iPhone X竖屏时占满整个屏幕的控制器的view的safeAreaInsets是(44,0,34,0),横屏是(0,44,21,44),inset后的区域正好是safeAreaLayoutGuide区域。
总结
Xcode9 用 IB 可以看得出来, safe area 到处都是了。理解起来很简单。就是系统对每个 View 都添加了 safe area, 这个区域的大小,是否跟 view 的大小相同是系统来决定的。在这个 View 上的布局只需要相对于 safe area 就可以了。每个 View 的 safe area 都可以通过 iOS 11 新增的 API
safeAreaInsets或者safeAreaLayoutGuide获取。对与 UIViewController 来说新增了
additionalSafeAreaInsets这个属性, 用来管理有 tabbar 或者 navigation bar 的情况下额外的情况。scrollView 只需要设置
contentInsetAdjustmentBehavior就可以很容易的适配iPhoneX。tableView 只需要在
cell header footer等设置约束的时候相对于 safe area 来做。对
collection view来说修改sectionInsetReference为.safeArea就可以做大多数的事情了。
参考文章
1. 最近很火的 Safe Area 到底是什么
后记
本篇主要介绍了Safe Area的由来以及其简单的使用,可以说是很基础的东西,感兴趣的给个赞或者关注,谢谢~~~
