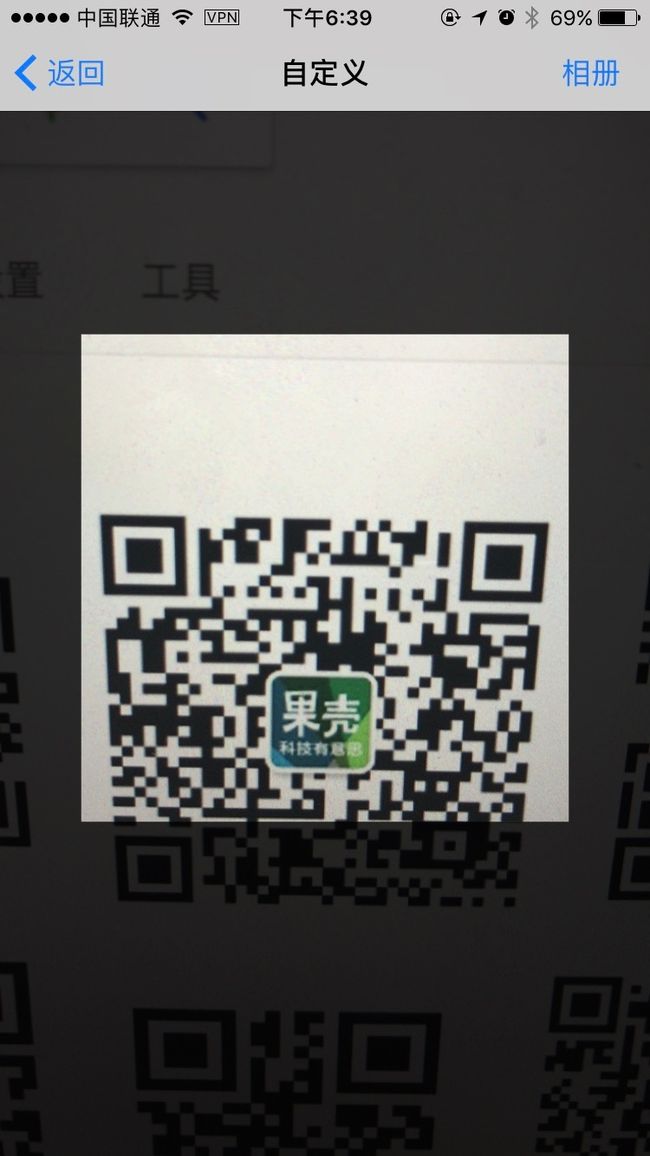
二维码扫描是很多应用都会实现的功能,比较著名的第三方开源库是Google出品的ZXing,其的OC的移植版本是ZXingObjc。但是从iOS7开始,苹果就加入了原生Api的相机二维码扫描功能,而在iOS8中也加入了原生的从图片中识别二维码的功能,最近刚好接到一个需求开发一个二维码扫描的界面,把过程记录下来。
相机扫描二维码部分
要调用系统的摄像头识别二维码,首先需要导入系统的AVFoundation库。其中我们用到最关键到类是AVCaptureSession。流程如下:
- 初始化一个AVCaptureSession
- 设置其输入对象(从哪去捕获),设为设备输入
- 设置其输出对象(捕获哪些类型输出),设置输出类型的代理
- 设置相机图像层
- 调用Session的StartRuning方法开始捕获
- 在输出对象的代理方法里处理捕获的数据
- 调用Session的StopRuning方法停止捕获
所以,新建一个ViewController,并加入以下属性。
@property (nonatomic, strong) AVCaptureDeviceInput *deviceInput;//设备输入
@property (nonatomic, strong) AVCaptureMetadataOutput *dataOutput;//数据输出
@property (nonatomic, strong) AVCaptureSession *session;//捕获会话任务
@property (nonatomic, strong) AVCaptureVideoPreviewLayer *previewLayer;//相机图像层
用懒加载分别初始化这些属性。输入很简单,代码如下。
- (AVCaptureDeviceInput *)deviceInput{
    if (!_deviceInput) {
        NSError *error;
        AVCaptureDevice *device = [AVCaptureDevice defaultDeviceWithMediaType:AVMediaTypeVideo];
        _deviceInput = [AVCaptureDeviceInput deviceInputWithDevice:device error:&error];
        if (error) {
            NSLog(@"%@",error);
        }
    }
    return _deviceInput;
}
输出方面,遵守AVCaptureMetadataOutputObjectsDelegate,并Delegate设置自己,回调线程设置为主线程就好。关于这个-(void)setMetadataObjectsDelegate(id方法,苹果的文档是这么解释的“客户端需要减少输出的元数据落下的可能性所以需要一个具体的队列来执行少量的加工和接收元数据的过程”,所以给一个串行队列就好了了,比如主队列。
- (AVCaptureMetadataOutput *)dataOutput{
    if (!_dataOutput) {
        _dataOutput = [[AVCaptureMetadataOutput alloc]init];
        [_dataOutput setMetadataObjectsDelegate:self queue:dispatch_get_main_queue()];
        _dataOutput.rectOfInterest = [self scanRectOfInterest];
    }
    return _dataOutput;
}
rectOfInterest属性是指扫描到区域。它是一个CGRect,但他是相对于相机的画面的大小的比例,有两个特殊之处:
- 他的结构体4个值的范围都为0~1,也就是按照实际需要的x/相机画面宽度,y/相机画面高度,width/相机画面宽度,height/相机画面高度去赋值
- 他默认是横屏的,也就是结构体数值和平常用的Rect是xy相反的
相机画面的大小由谁决定呢,由session的sessionPreset决定和previewLayer的videoGravity共同决定,sessionPreset值有很多种,高中低,还有下面这些等等
- AVCaptureSessionPreset320x240
- AVCaptureSessionPreset352x288
- AVCaptureSessionPreset640x480
- AVCaptureSessionPreset960x540
- AVCaptureSessionPreset1280x720
- AVCaptureSessionPreset1920x1080
这个就类似于image的大小,而videoGravity有这么几种
- AVCoreAnimationBeginTimeAtZero
- AVLayerVideoGravityResizeAspect
- AVLayerVideoGravityResizeAspectFill
- AVLayerVideoGravityResize
这个就类似于imageView的拉伸方式,而对于相机,我们当然不希望画面被拉伸压缩,也不希望上下有黑边,那么我们一般选AspectFill,也就是布满短边,而长边多的部分则取决于图片的长宽比。而相机画面大小就好比imageView的大小,那为了让这个可扫描的区域的rect和屏幕正常的Rect联系起来(方便对区域进行高亮之类的),我们当然希望这个image的长宽比和屏幕的长宽比一致咯,所以,对于4s一下的机型,因为屏幕是4:3的,我们采用AVCaptureSessionPreset640x480,而之后的,采用AVCaptureSessionPreset1920x1080。这样,既让画面没有拉伸,又把insertedRect和屏幕长宽正常的Rect对应了起来。
所以他的值时这样的
- (CGRect)scanRectOfInterest{
    CGRect scanRect = [self scanRect];
    scanRect = CGRectMake(scanRect.origin.y/SCREEN_HEIGHT, scanRect.origin.x/SCREEN_WIDTH, scanRect.size.height/SCREEN_HEIGHT,scanRect.size.width/SCREEN_WIDTH);
    return scanRect;
}
然后就是Session,注意的地方是,dataoutput的metadataObjectTypes属性,也就是识别类型的设置,一定要在addOutput之后以及保证此时相机正常运行,权限不受限制的情况下设置,不然都会导致崩溃。
- (AVCaptureSession *)session{
    if (!_session) {
        _session = [[AVCaptureSession alloc]init];
        [_session setSessionPreset:(SCREEN_HEIGHT < 500) ? AVCaptureSessionPreset640x480:AVCaptureSessionPreset1920x1080];
        if ([_session canAddInput:self.deviceInput]) {
            [_session addInput:self.deviceInput];
        }

        if ([_session canAddOutput:self.dataOutput]){
            [_session addOutput:self.dataOutput];
            self.dataOutput.metadataObjectTypes = @[AVMetadataObjectTypeQRCode];
        }
    }
    return _session;
}
然后就是previewLayer
- (AVCaptureVideoPreviewLayer *)previewLayer{
    if (!_previewLayer) {
        _previewLayer = [AVCaptureVideoPreviewLayer layerWithSession:self.session];
        _previewLayer.videoGravity = AVLayerVideoGravityResizeAspectFill;
        _previewLayer.frame = [UIScreen mainScreen].bounds;
    }
    return _previewLayer;
}
最后就是把图层加在view上并运行session,并在回调里处理扫描得到的元数据
- (void)startScan{
    [self.view.layer insertSublayer:self.previewLayer atIndex:0];
    [self.session startRunning];
}
- (void)captureOutput:(AVCaptureOutput *)captureOutput didOutputMetadataObjects:(NSArray *)metadataObjects fromConnection:(AVCaptureConnection *)connection{
    if (metadataObjects.count == 0) {
        return;
    }
    [self.session stopRunning];
    NSString *result = [metadataObjects.firstObject stringValue];
    //信息处理
}
识别相册图片中二维码
识别图片中的二维码就调用打开相册的接口,然后调用Core Image框架里的CIDetector类进行识别。CIDetector只能处理CIImage类,所以我们要对UIImage进行转换。
- (NSString *)messageFromQRCodeImage:(UIImage *)image{
    if (!image) {
        return nil;
    }
    //创建上下文
    CIContext *context = [CIContext contextWithOptions:nil];
    //识别类型设置为二维码,精度设为高
    CIDetector *detector = [CIDetector detectorOfType:CIDetectorTypeQRCode context:context options:@{CIDetectorAccuracy:CIDetectorAccuracyHigh}];
    //转换image
    CIImage *ciImage = [CIImage imageWithCGImage:image.CGImage];
    //获取识别结果
    NSArray *features = [detector featuresInImage:ciImage];

    if (features.count == 0) {
        return nil;
    }

    CIQRCodeFeature *feature = features.firstObject;
    return feature.messageString;
}
而ImagePicker就是设置deleagate,并在回调里获取照片并调用上述方法处理了。
- (UIImagePickerController *)imagePicker{
    if (!_imagePicker) {
        _imagePicker = [[UIImagePickerController alloc]init];
        _imagePicker.delegate = self;
        _imagePicker.sourceType = UIImagePickerControllerSourceTypePhotoLibrary;
    }
    return _imagePicker;
}
- (void)imagePickerController:(UIImagePickerController *)picker didFinishPickingMediaWithInfo:(nonnull NSDictionary *)info{
    [picker dismissViewControllerAnimated:YES completion:nil];
    UIImage *image = info[UIImagePickerControllerOriginalImage];
    NSString *result = [self messageFromQRCodeImage:image];
    //信息处理
}
当然我们可以加一个导航栏上的按钮来调起相册。
UIBarButtonItem *libaryItem = [[UIBarButtonItem alloc]initWithTitle:@"相册" style:UIBarButtonItemStylePlain target:self action:@selector(openLibary)];
self.navigationItem.rightBarButtonItem = libaryItem;
self.navigationItem.title = self.navigationTitle;
增加非相机识别区域的压暗层
像微信一样,很多应用的二维码视图都有把除了扫描区域的外部区域的压暗层。这个压暗层就像一个镂空的图层一样,中间区域是没有的。我们可以用贝塞尔曲线绘制两个矩形路径,大矩形就是视图大小的矩形路径,小的就是扫描区域的路径。然后大路径去掉小路径,剩下部分就是一个镂空的视图区域的路径。并创建对应的layer。
- (UIView *)maskView{
    if (!_maskView) {
        _maskView = [[UIView alloc]initWithFrame:self.view.bounds];
        _maskView.backgroundColor = [UIColor blackColor];
        _maskView.alpha = 0.8;
        UIBezierPath *bpath = [UIBezierPath bezierPathWithRect:CGRectMake(0, 0, SCREEN_WIDTH, SCREEN_HEIGHT) ];
        [bpath appendPath:[[UIBezierPath bezierPathWithRect:[self scanRect]] bezierPathByReversingPath]];
        CAShapeLayer *shapeLayer = [CAShapeLayer layer];
        shapeLayer.path = bpath.CGPath;
        _maskView.layer.mask = shapeLayer;
    }
    return _maskView;
}
权限检查管理
基本功能实现后,可以考虑一下整个ViewController有没有会崩溃或者需要弹窗提示的地方。大概有以下这些情况
- 相机是否存在
- 相机是否正常
- 相机权限
- 相册权限
- 图片中无二维码
//相机是否存在,比如早期iPad,模拟器,itouch
- (BOOL)isCameraAvailable{
    return [UIImagePickerController isSourceTypeAvailable:UIImagePickerControllerSourceTypeCamera];
}
//前置摄像头是否正常
- (BOOL)isFrontCameraAvailable{
    return [UIImagePickerController isCameraDeviceAvailable:UIImagePickerControllerCameraDeviceFront];
}
//后置摄像头是否正常
- (BOOL)isRearCameraAvailable{
    return [UIImagePickerController isCameraDeviceAvailable:UIImagePickerControllerCameraDeviceRear];
}
//相机权限是否正常
- (BOOL)isCameraAuthStatusCorrect{
    AVAuthorizationStatus authStatus = [AVCaptureDevice authorizationStatusForMediaType:AVMediaTypeVideo];
    if (authStatus == AVAuthorizationStatusAuthorized || authStatus == AVAuthorizationStatusNotDetermined) {
        return YES;
    }
    return NO;
}
//相册权限是否正常,需要导入Photos框架
- (BOOL)isLibaryAuthStatusCorrect{
    PHAuthorizationStatus authStatus = [PHPhotoLibrary authorizationStatus];
    if (authStatus == PHAuthorizationStatusNotDetermined || authStatus == PHAuthorizationStatusAuthorized) {
        return YES;
    }
    return NO;
}
当然在iOS10上,相机和相册权限还需要在infoPlist里添加对应的key值。
然后加上AlertViewController的弹窗。
- (void)showPermissionAlert{
    UIAlertController *alert = [UIAlertController alertControllerWithTitle:nil message:@"需要相机/相册的权限" preferredStyle:UIAlertControllerStyleAlert];
    UIAlertAction *cancelAction = [UIAlertAction actionWithTitle:@"取消" style:UIAlertActionStyleCancel handler:^(UIAlertAction *action){
        [self.navigationController popViewControllerAnimated:YES];
    }];
    UIAlertAction *requestAction = [UIAlertAction actionWithTitle:@"同意" style:UIAlertActionStyleDefault handler:^(UIAlertAction *action) {
        NSURL *url = [NSURL URLWithString:UIApplicationOpenSettingsURLString];
        if ([[UIApplication sharedApplication]canOpenURL:url]) {
            [[UIApplication sharedApplication]openURL:url];
        }
    }];
    [alert addAction:cancelAction];
    [alert addAction:requestAction];
    [self presentViewController:alert animated:YES completion:nil];
}

- (void)showWarn:(NSString *)message shouldPop:(BOOL)pop{
    UIAlertController *alert = [UIAlertController alertControllerWithTitle:nil message:message preferredStyle:UIAlertControllerStyleAlert];
    UIAlertAction *cancelAction = [UIAlertAction actionWithTitle:@"好的" style:UIAlertActionStyleCancel handler:^(UIAlertAction *action){
        if (!pop) {
            return;
        }
        [self.navigationController popViewControllerAnimated:YES];
    }];
    [alert addAction:cancelAction];
    [self presentViewController:alert animated:YES completion:nil];
}
并加上权限检查
- (BOOL)statusCheck{
    if (![self isCameraAvailable]){
        [self showWarn:@"设备无相机" shouldPop:YES];
        return NO;
    }

    if (![self isRearCameraAvailable] && ![self isFrontCameraAvailable]) {
        [self showWarn:@"设备相机错误" shouldPop:YES];
        return NO;
    }

    if (![self isCameraAuthStatusCorrect]) {
        [self showPermissionAlert];
        return NO;
    }

    return YES;
}

- (void)openLibary{
    if (![self isLibaryAuthStatusCorrect]) {
        [self showPermissionAlert];
        return;
    }
    [self presentViewController:self.imagePicker animated:YES completion:nil];
}
封装接口
最后一步了,对于这个ViewController我们需要开放什么接口对外呢,怎么把值传出去呢?外界可以改变的是扫描区域,标题,以及亚暗层的View(往上面加字等等),外界得到的结果应该是一个字符串。这里可以用Deleagte,头文件代码如下。
@protocol CDZQRCodeDelegate
@required
- (void)pickUpMessage:(NSString *)message;

@optional
- (CGRect)interestedRect;

@end
@interface CDZQRCodeViewController : UIViewController

@property (nonatomic, weak) id  delegate;
@property (nonatomic, copy) NSString *navigationTitle;
@property (nonatomic, strong) UIView *maskView;

@end
默认实现一个可扫描范围
- (CGRect)scanRect{
    if ([self.delegate respondsToSelector:@selector(interestedRect)]) {
        return [self.delegate interestedRect];
    }
    CGSize scanSize = CGSizeMake(SCREEN_WIDTH * 3/4, SCREEN_WIDTH * 3/4);
    CGRect scanRect = CGRectMake((SCREEN_WIDTH - scanSize.width)/2, (SCREEN_HEIGHT - scanSize.height)/2, scanSize.width, scanSize.height);
    return scanRect;
}
并在相机和相册的回调里把结果通过回调传到外面
if ([self.delegate respondsToSelector:@selector(pickUpMessage:)]) {
    [self.delegate pickUpMessage:result];
}
而别的VC调用就只需要遵守Delegateb并
- (IBAction)selectScan:(UIButton *)sender {
    CDZQRCodeViewController *vc = [[CDZQRCodeViewController alloc]init];
    vc.delegate = self;
    vc.navigationTitle = @"自定义";
    [self.navigationController pushViewController:vc animated:YES];
}

- (void)pickUpMessage:(NSString *)message{
    self.resultLabel.text = message;
}
最后
所有源码和Demo
使用时可以把VC两个文件拖进项目里就可。
如果您觉得有帮助,不妨给个star鼓励一下,欢迎关注&交流
有任何问题欢迎评论私信或者提issue
QQ:757765420
Email:[email protected]
Github:Nemocdz
微博:@Nemocdz

