前言
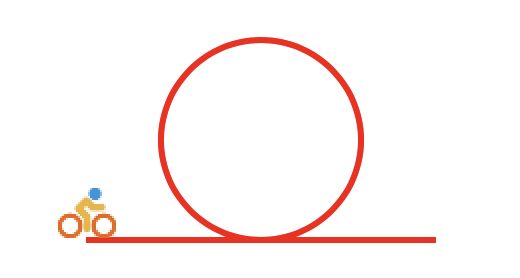
起因呢,是在X论坛看到一个动画,感了兴趣,大概讲的是一个自行车沿着路移动,路径大概是下图。
我下载了作者开源的代码来看,居然不是路径动画,路径动画的好处是,如果第二天不让你这样骑自行车了呢?如果像过山车一样绕来绕去怎么办?用路径动画,想怎么跑就怎么跑。
OK,写个路径动画版本
开始动手
先把路径画出来。涉及到曲线,我们要用贝塞尔曲线画。
1 声明变量
@property(nonatomic,strong)UIBezierPath* bezierPath;
@property(nonatomic,strong)CALayer* shipLayer;
2 声明圆的圆心和半径
CGPoint centerPoint = CGPointMake(self.view.frame.size.width/2,100);
CGFloat radius = 50;
CGFloat roundV_4 = M_PI*2* radius /4;//四分之一圆周长,由于路径关键帧之间时间应该是一致的,所以为了匀速运动,要让每个关键帧之间的路径长度一致
3 画贝塞尔曲线
self.bezierPath = [[UIBezierPath alloc] init];
[self.bezierPath moveToPoint:CGPointMake(centerPoint.x - roundV_4, centerPoint.y + radius)];
//画线
[self.bezierPath addLineToPoint:CGPointMake(centerPoint.x, centerPoint.y + radius)];
//画圆方式1
//[self.bezierPath addArcWithCenter:CGPointMake(self.view.frame.size.width / 2, 100) radius:50 startAngle:M_PI_2 endAngle:-M_PI_2 clockwise:NO];
//[self.bezierPath addArcWithCenter:CGPointMake(self.view.frame.size.width / 2, 100) radius:50 startAngle:-M_PI_2 endAngle:M_PI_2 clockwise:NO];
//画圆方式2
[self.bezierPath addCurveToPoint:CGPointMake(centerPoint.x+ radius, centerPoint.y) controlPoint1:CGPointMake(centerPoint.x+ radius *tan(M_PI*0.16), centerPoint.y+ radius) controlPoint2:CGPointMake(centerPoint.x+ radius, centerPoint.y+ radius *tan(M_PI*0.16))];
[self.bezierPatha ddCurveToPoint:CGPointMake(centerPoint.x, centerPoint.y- radius) controlPoint1:CGPointMake(centerPoint.x+ radius , centerPoint.y- radius *tan(M_PI*0.16)) controlPoint2:CGPointMake(centerPoint.x+ radius *tan(M_PI*0.16), centerPoint.y- radius)];
[self.bezierPath addCurveToPoint:CGPointMake(centerPoint.x- radius, centerPoint.y) controlPoint1:CGPointMake(centerPoint.x- radius *tan(M_PI*0.16), centerPoint.y- radius) controlPoint2:CGPointMake(centerPoint.x- radius, centerPoint.y- radius *tan(M_PI*0.16))];
[self.bezierPath addCurveToPoint:CGPointMake(centerPoint.x, centerPoint.y+ radius) controlPoint1:CGPointMake(centerPoint.x- radius, centerPoint.y+ radius *tan(M_PI*0.16)) controlPoint2:CGPointMake(centerPoint.x- radius *tan(M_PI*0.16), centerPoint.y+ radius)];
//画线
[self.bezierPath addLineToPoint:CGPointMake(centerPoint.x+ roundV_4, centerPoint.y+ radius)];
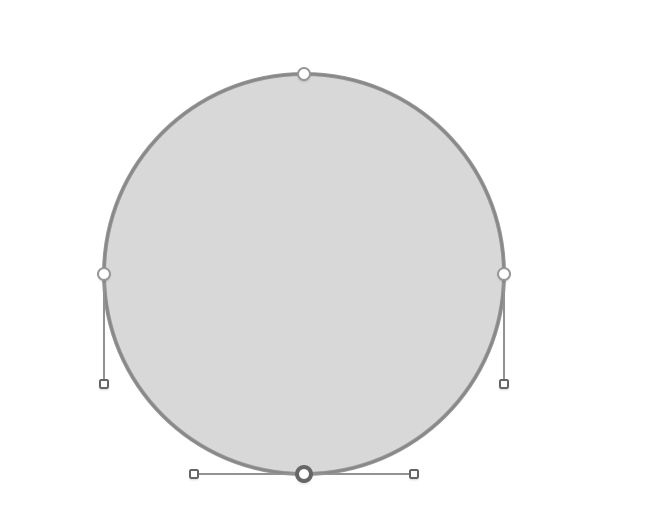
画圆有两种方式,第一种是直接用UIBezierPath的-addArcWithCenter:radius:startAngle:endAngle:clockwise:方法,这种方法不能直接画一个圆,但是可以半个圆半个圆的画。
这种方式画出来的路径有个缺点,大家可以打开注释,并注释下面的几行代码来试一下。
第二种方式是用曲线的方式画完整圆弧。这个要一次画四分之一个圆。
接下来把路径添加到layer上,并把自行车添加上去
CAShapeLayer*pathLayer = [CAShapeLayer layer];
pathLayer.path = self.bezierPath.CGPath;
pathLayer.fillColor = [UIColor clearColor].CGColor;
pathLayer.strokeColor = [UIColor redColor].CGColor;
pathLayer.lineWidth = 3.0f;
[self.view.layer addSublayer:pathLayer];
self.shipLayer = [CALayer layer];
self.shipLayer.frame = CGRectMake(0,0,56,56);//图片尺寸
self.shipLayer.position = CGPointMake(centerPoint.x- roundV_4, centerPoint.y+ radius);
self.shipLayer.contents = (__bridge id)[UIImage imageNamed:@"cycle"].CGImage;
[self.view.layer addSublayer:self.shipLayer];
绘制部分完成了,以上内容在-viewDidLoad里做就好啦
下面是动画,我在controller里添加点击事件来控制动画开始
-(void)touchesBegan:(NSSet *)touches withEvent:(UIEvent*)event{
[super touchesBegan:toucheswithEvent:event];
CAKeyframeAnimation*animation = [CAKeyframeAnimation animation];
animation.keyPath = @"position";
animation.duration = 4.0;
animation.path = self.bezierPath.CGPath;
animation.rotationMode = kCAAnimationRotateAuto;
[self.shipLayer addAnimation:animation forKey:nil];
}
这里我用的图有点要求,正常情况图片会被路径穿过的,所以要将图片做成自行车在上半部分
自行车图片下载地址:http://upload-images.jianshu.io/upload_images/6559029-1ef55263c9dc9513.png
自行改名为cycle.png放到Assets.xcassets里
enjoy!


