前言
EventBus使用很简单,遵循着注册--发送--接收的一个步骤。EventBus 在3.0版本以后完全摒弃了以前固定接收方法,采用注解的形式来接收消息,注解的方法名可自定义,这样也更能明确的表现出方法的作用,不用再跟以前一样,所有的接收方法都一样的惨剧。当然官方给出了注解解析器,便于提高效率,做到编译时注解。Android Studio上有一个插件,eventbus3-intellij-plugin,可以为3.0及以后的版本提供快速跳转,不封装也可以愉快的使用。当然封装了就破坏了原有的结构,这个插件也没有效果了。一个是快速方便跳转,查找容易,一个是为了代码的统一性牺牲便利性,如何抉择,自己决定吧!
使用
使用方式及其简单,完全傻瓜教程只需三步:
注册:在需要接收EventBus传递消息的类注册EventBus。
EventBus.getDefault().register(object);
regist的参数是Object,也就说明在任何类中都可以注册EventBus。
发送:在任意类中,发送EventBus消息。
//发送即时事件
EventBus.getDefault().post(bean);
//发送粘性事件
EventBus.getDefault().postSticky(bean);
简单说下即时事件和粘性事件的区别:
即时事件:先注册接收,再发送事件。事件发出后即时传递下去,不考虑是否有注册这个事件的方法。
粘性事件:先发送,后注册接收事件。事件先发出,再检测是否有注册此事件的方法,若有就传递下去,若没有就停止传递,直到有此事件的方法注册了,才会传递。此事件EventBus会一直缓存,直到移除为止。
后续解析源码的时候再细说使用场景。
接收:在当前注册的类中,使用注解标记接收EventBus的发送来的数据
EventBus 3.0及后续的方法不再局限方法名,可使用任意方法的方面,只需要在方法前加注解@Subscribe即可
@Subscribe(threadMode = ThreadMode.MAIN)
    public void Demo(Demo3Bean bean) {
        //处理事件
    }
threadMode标记此方法的线程:
- POSTING:与发送事件的线程保持一致,减少内存开销。如果不需要切换线程,可以直接使用此值。
- MAIN:切换线程到主线程。由于是主线程操作,避免耗时操作。
- MAIN_ORDERED:同MAIN线程切换到主线程,与MAIN不同的是,如果MAIN线程发送事件的线程也是主线程,那么不进入队列,直接调用该接受方法;而MAIN_ORDERED是先进入队列后再发送给接受方法。因为也是主线程,所以避免耗时操作。
- BACKGROUND:后台线程。注意此线程是EventBus的唯一的后台线程,并保证所有事件按顺序交付,如果是比较耗时的后台操作,为了保证其他后台事件的正常运行,请使用ASYNC。
- ASYNC:后台线程,并且是一个单独的后台线程。若有网络请求等一类的耗时操作,请使用此线程。
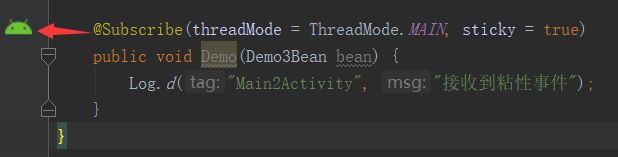
如果发送的是粘性事件的话,需要再加一个参数:
@Subscribe(threadMode = ThreadMode.MAIN, sticky = true)
    public void Demo(Demo3Bean bean) {
         //接收到粘性事件
    }
sticky = true表示这是一个粘性事件,如果不移除此事件,EventBus会一直缓存此粘性事件,但凡注册了此事件的粘性接收事件都会接收到这个事件,所以使用完要及时移除。
// 移除指定的粘性事件
EventBus.getDefault().removeStickyEvent(Object event);

// 移除指定类型的粘性事件
EventBus.getDefault().removeStickyEvent(Class eventType);

// 移除所有的粘性事件
EventBus.getDefault().removeAllStickyEvents();
当然也可以指定事件的优先级:
@Subscribe(threadMode = ThreadMode.POSTING, priority = 0)
    public void Demo(Demo3Bean bean) {
         //TODO
    }
priority = 0是默认优先级,不设置的话priority的值就是0,可以在高优先级的订阅者方法接收到事件之后取消事件的传递。此时,低优先级的订阅者方法将不会接收到该事件。注意: 订阅者方法只有在线程模式为ThreadMode.POSTING时,才可以取消一个事件的传递。或者也可以理解为相同的线程模式下,才能取消下一事件的传递。能保证相同线程的模式也只有ThreadMode.POSTING。
掌握以上这些,你就可以愉快的使用了。

源码解析
先看注册:
EventBus.getDefault().register(object);
 /** Convenience singleton for apps using a process-wide EventBus instance. */
    public static EventBus getDefault() {
        if (defaultInstance == null) {
            synchronized (EventBus.class) {
                if (defaultInstance == null) {
                    defaultInstance = new EventBus();
                }
            }
        }
        return defaultInstance;
    }
单例创建EventBus对象
public EventBus() {
        this(DEFAULT_BUILDER);
    }

EventBus(EventBusBuilder builder) {
        logger = builder.getLogger();
        subscriptionsByEventType = new HashMap<>();
        typesBySubscriber = new HashMap<>();
        stickyEvents = new ConcurrentHashMap<>();
        mainThreadSupport = builder.getMainThreadSupport();
        mainThreadPoster = mainThreadSupport != null ? mainThreadSupport.createPoster(this) : null;
        backgroundPoster = new BackgroundPoster(this);
        asyncPoster = new AsyncPoster(this);
        indexCount = builder.subscriberInfoIndexes != null ? builder.subscriberInfoIndexes.size() : 0;
        subscriberMethodFinder = new SubscriberMethodFinder(builder.subscriberInfoIndexes,
                builder.strictMethodVerification, builder.ignoreGeneratedIndex);//注解@Subscriber的方法寻找器
        logSubscriberExceptions = builder.logSubscriberExceptions;//是否通过log输出异常日志,默认输出
        logNoSubscriberMessages = builder.logNoSubscriberMessages;//是否通过log输出没有订阅者的消息,默认输出
        sendSubscriberExceptionEvent = builder.sendSubscriberExceptionEvent;//是否发生异常到SubscriberExceptionEvent,默认发生
        sendNoSubscriberEvent = builder.sendNoSubscriberEvent;//是否将没有订阅的消息通过NoSubscriberEvent发送出去
        throwSubscriberException = builder.throwSubscriberException;//是否抛出SubscriberException,默认抛出
        eventInheritance = builder.eventInheritance;
        executorService = builder.executorService;
    }
创建过程也是大家常见的建造者模式,如果想定义其中某些属性也可以自己创建build,来修改内部属性;
EventBus.builder()
                .throwSubscriberException(false)
                .eventInheritance(false)
                ...
                .installDefaultEventBus();
最后执行installDefaultEventBus(),将修改后的EventBus对象赋值给默认的对象,使用方法依然是EventBus.getDefault().post(bean);而EventBus.getDefault()获取的默认对象就是已经自定义过的EventBus对象。
继续看register:
public void register(Object subscriber) {
        Class subscriberClass = subscriber.getClass();
        List subscriberMethods = subscriberMethodFinder.findSubscriberMethods(subscriberClass);//检索当前注册EventBus类使用@Subscriber的方法
        synchronized (this) {
            for (SubscriberMethod subscriberMethod : subscriberMethods) {
                subscribe(subscriber, subscriberMethod);
            }
        }
    }
简单看下findSubscriberMethods方法:
List findSubscriberMethods(Class subscriberClass) {
        ...
        if (subscriberMethods.isEmpty()) {
            throw new EventBusException("Subscriber " + subscriberClass
                    + " and its super classes have no public methods with the @Subscribe annotation");
        } else {
            METHOD_CACHE.put(subscriberClass, subscriberMethods);
            return subscriberMethods;
        }
    }
到这可以看到,如果当前类注册了EventBus而没有任何方法使用@Subscribe接收方法,就会抛出异常。所以EventBus要按需使用,当需要使用的时候再去注册,不能再在基类中无脑注册反注册了。
再看下subscribe方法:
// Must be called in synchronized block
    private void subscribe(Object subscriber, SubscriberMethod subscriberMethod) {
        ···
        //多次注册也会抛异常
        if (subscriptions.contains(newSubscription)) {
             throw new EventBusException("Subscriber " + subscriber.getClass() + " already registered to event "
                    + eventType);
        }


        int size = subscriptions.size();
        //根据优先级来排队
        for (int i = 0; i <= size; i++) {
            if (i == size || subscriberMethod.priority > subscriptions.get(i).subscriberMethod.priority) {
                subscriptions.add(i, newSubscription);
                break;
            }
        }

        List> subscribedEvents = typesBySubscriber.get(subscriber);
        if (subscribedEvents == null) {
            subscribedEvents = new ArrayList<>();
            typesBySubscriber.put(subscriber, subscribedEvents);
        }
        subscribedEvents.add(eventType);
        //粘性事件处理
        if (subscriberMethod.sticky) {
            if (eventInheritance) {
                Set, Object>> entries = stickyEvents.entrySet();
                for (Map.Entry, Object> entry : entries) {
                    Class candidateEventType = entry.getKey();
                    if (eventType.isAssignableFrom(candidateEventType)) {
                        Object stickyEvent = entry.getValue();
                        checkPostStickyEventToSubscription(newSubscription, stickyEvent);
                    }
                }
            } else {
                Object stickyEvent = stickyEvents.get(eventType);
                checkPostStickyEventToSubscription(newSubscription, stickyEvent);
            }
        }
    }
注册的逻辑大致如此,喜欢钻研的小伙伴们可以深入代码去了解。
接下来发送事件:
EventBus.getDefault().post(bean);
即时事件post():
/** Posts the given event to the event bus. */
public void post(Object event) {
PostingThreadState postingState = currentPostingThreadState.get();
List再看看关键方法postSingleEvent():
private void postSingleEvent(Object event, PostingThreadState postingState) throws Error {
        Class eventClass = event.getClass();
        boolean subscriptionFound = false;
        //EventBus支持继承和接口,发送事件会考虑事件的继承树
        if (eventInheritance) {
            List> eventTypes = lookupAllEventTypes(eventClass);
            int countTypes = eventTypes.size();
            for (int h = 0; h < countTypes; h++) {
                Class clazz = eventTypes.get(h);
                subscriptionFound |= postSingleEventForEventType(event, postingState, clazz);
            }
        } else {
            subscriptionFound = postSingleEventForEventType(event, postingState, eventClass);
        }
        //如果没有找到订阅该事件的订阅者
        if (!subscriptionFound) {
            if (logNoSubscriberMessages) {
                logger.log(Level.FINE, "No subscribers registered for event " + eventClass);
            }
            if (sendNoSubscriberEvent && eventClass != NoSubscriberEvent.class &&
                    eventClass != SubscriberExceptionEvent.class) {
                post(new NoSubscriberEvent(this, event));
            }
        }
    }
从源码中可以看出,对于同一个事件,EventBus会自己检索出注册事件类的父类,并把事件发到其父类中,然后调用postSingleEventForEventType()处理事件。
接下来看下这个方法postSingleEventForEventType():
private boolean postSingleEventForEventType(Object event, PostingThreadState postingState, Class eventClass) {
        CopyOnWriteArrayList subscriptions;
        synchronized (this) {
            subscriptions = subscriptionsByEventType.get(eventClass);
        }
        if (subscriptions != null && !subscriptions.isEmpty()) {
            for (Subscription subscription : subscriptions) {
                postingState.event = event;
                postingState.subscription = subscription;
                boolean aborted = false;
                try {
                    postToSubscription(subscription, event, postingState.isMainThread);
                    aborted = postingState.canceled;
                } finally {
                    postingState.event = null;
                    postingState.subscription = null;
                    postingState.canceled = false;
                }
                if (aborted) {
                    break;
                }
            }
            return true;
        }
        return false;
    }
这个方法也比较简单,取出事件类型的集合,遍历该集合,调用postToSubscription()方法,统一处理事件,处理完在finally中初始化各种参数。
最终调用方法postToSubscription():
private void postToSubscription(Subscription subscription, Object event, boolean isMainThread) {
        switch (subscription.subscriberMethod.threadMode) {
            case POSTING:
                invokeSubscriber(subscription, event);
                break;
            case MAIN:
                if (isMainThread) {
                    invokeSubscriber(subscription, event);
                } else {
                    mainThreadPoster.enqueue(subscription, event);
                }
                break;
            case MAIN_ORDERED:
                if (mainThreadPoster != null) {
                    mainThreadPoster.enqueue(subscription, event);
                } else {
                    // temporary: technically not correct as poster not decoupled from subscriber
                    invokeSubscriber(subscription, event);
                }
                break;
            case BACKGROUND:
                if (isMainThread) {
                    backgroundPoster.enqueue(subscription, event);
                } else {
                    invokeSubscriber(subscription, event);
                }
                break;
            case ASYNC:
                asyncPoster.enqueue(subscription, event);
                break;
            default:
                throw new IllegalStateException("Unknown thread mode: " + subscription.subscriberMethod.threadMode);
        }
    }
首先获取threadMode,此threadMode就是我们在注解里写的那个线程。如果是POSTING,那么直接调用invokeSubscriber();如果是MAIN,先判断当前发送事件线程是不是主线程,如果是直接调用invokeSubscriber(),否则使用mainThreadPoster处理此事件……
这里出现几个Poster:mainThreadPoster,backgroundPoster,asyncPoster,分别介绍下:
- mainThreadPoster:顾名思义就是主线程处理器,无论哪个线程的数据通过此处理器处理后事件都在主线程执行。
- backgroundPoster:统一后台线程处理器,无论哪个线程的数据通过此处理器处理后事件都在后台线程中执行,此线程执行先进先出的策略,保证数据的顺序性。
- asyncPoster:单独后台处理器,作用同上,唯一的区别就是每一个事件都是单独的后台线程,没有先后顺序。
无论哪种线程,最终都调用invokeSubscriber()方法处理数据:
void invokeSubscriber(Subscription subscription, Object event) {
        try {
            subscription.subscriberMethod.method.invoke(subscription.subscriber, event);
        } catch (InvocationTargetException e) {
            handleSubscriberException(subscription, event, e.getCause());
        } catch (IllegalAccessException e) {
            throw new IllegalStateException("Unexpected exception", e);
        }
    }
使用反射来调用订阅方法,这样就实现了将事件发送给订阅者,订阅者调用了订阅方法的过程。因为最终是使用了反射调用方法,所以肯定是影响执行效率,官方也给出了提高效率的办法,稍后会介绍。

其实发送粘性事件的流程也大致如此:
EventBus.getDefault().postSticky(bean);
看下postSticky():
public void postSticky(Object event) {
        synchronized (stickyEvents) {
            stickyEvents.put(event.getClass(), event);
        }
        // Should be posted after it is putted, in case the subscriber wants to remove immediately
        post(event);
    }
将粘性事件添加到stickyEvents集合中,之后调用post()方法,后续调用流程跟普通事件一样,只不过是找不到订阅该方法的订阅者罢了。那为什么当有订阅者订阅了该方法后会立马收到该粘性事件呢?

在
subscribe方法中有专门处理粘性事件的代码:
// Must be called in synchronized block
    private void subscribe(Object subscriber, SubscriberMethod subscriberMethod) {
        ···
        //粘性事件处理
        if (subscriberMethod.sticky) {
            //检索父类,默认为true
            if (eventInheritance) {
                Set, Object>> entries = stickyEvents.entrySet();
                for (Map.Entry, Object> entry : entries) {
                    Class candidateEventType = entry.getKey();
                    //如果订阅者订阅的事件类型与当前的粘性事件类型相同,那么把该事件分发给这个订阅者
                    if (eventType.isAssignableFrom(candidateEventType)) {
                        Object stickyEvent = entry.getValue();
                        checkPostStickyEventToSubscription(newSubscription, stickyEvent);
                    }
                }
            } else {
                Object stickyEvent = stickyEvents.get(eventType);
                checkPostStickyEventToSubscription(newSubscription, stickyEvent);
            }
        }
    }
EventBus并不知道当前的订阅者对应了哪个粘性事件,因此需要全部遍历一次,找到匹配的粘性事件后,最终都调用了checkPostStickyEventToSubscription():
private void checkPostStickyEventToSubscription(Subscription newSubscription, Object stickyEvent) {
        if (stickyEvent != null) {
            // If the subscriber is trying to abort the event, it will fail (event is not tracked in posting state)
            // --> Strange corner case, which we don't take care of here.
            postToSubscription(newSubscription, stickyEvent, isMainThread());
        }
    }
又回到postToSubscription()方法,无论是粘性事件还是普通事件,最终都会通过调用postToSubscription()方法,区分threadMode,使用不同的调度处理器来处理不同线程的事件。
最后看下反注册反复unregister():
public synchronized void unregister(Object subscriber) {
        List> subscribedTypes = typesBySubscriber.get(subscriber);
        if (subscribedTypes != null) {
            for (Class eventType : subscribedTypes) {
                //解除订阅
                unsubscribeByEventType(subscriber, eventType);
            }
            typesBySubscriber.remove(subscriber);
        } else {
            logger.log(Level.WARNING, "Subscriber to unregister was not registered before: " + subscriber.getClass());
        }
    }
在for循环中调用unsubscribeByEventType()方法,将订阅者及事件作为参数传递过去,解除两者的订阅关系。
看下unsubscribeByEventType():
private void unsubscribeByEventType(Object subscriber, Class eventType) {
        List subscriptions = subscriptionsByEventType.get(eventType);
        if (subscriptions != null) {
            int size = subscriptions.size();
            for (int i = 0; i < size; i++) {
                Subscription subscription = subscriptions.get(i);
                if (subscription.subscriber == subscriber) {
                    subscription.active = false;
                    subscriptions.remove(i);
                    i--;
                    size--;
                }
            }
        }
    }
这就比较容易理解了,在subscriptions和typesBySubscriber中移除相应的订阅信息。
以上就是EventBus 3.X的源码简单解析,EventBus的体量小,功能大,解读也容易,推荐大家看看源码了解运转原理。

简单封装
前面也说过,如果使用AS提供的插件eventbus3-intellij-plugin,在订阅者和被订阅者直接可以提供绿色通道
装上插件后,左边箭头指示的android小图标,点击下就能跳转到被订阅者处,如果有多个被订阅者也会弹出弹窗让你去选目标,同理在被订阅者处也有对应小图标,点击效果同上。
言归正传,因为EventBus可以跨Module进行数据传递,所以我们先建一个lib,封装代码都写里面,不同的Module去依赖我们的这个lib,就可以实现不同Module互发消息了。
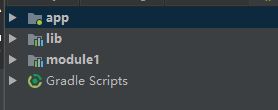
app依赖lib,module依赖lib,这样app和module1之间可以相互发送接收事件,当然你再多建几个Module也是一样的,比如建module2库,module2依赖lib,那么module1和module2之间也能互相发送接收事件了,很方便。
封装EventBus就比较简单了,毕竟就那几个方法,创建一个
EventBusUtils类:
public class EventBusUtils {

    public static void init(SubscriberInfoIndex subscriberInfoIndex) {
        EventBus.builder().addIndex(subscriberInfoIndex).installDefaultEventBus();
    }

    /**
     * 注册方法
     * 若注册的act没有@Subscribe注解,会抛异常
     */
    public static void register(Object subscriber) {
        if (!EventBus.getDefault().isRegistered(subscriber)) {
            try {
                EventBus.getDefault().register(subscriber);
            } catch (Exception e) {
                e.printStackTrace();
            }
        }
    }

    /**
     * 接触注册
     */
    public static void unregister(Object subscriber) {
        if (EventBus.getDefault().isRegistered(subscriber)) {
            try {
                EventBus.getDefault().unregister(subscriber);
            } catch (Exception e) {
                e.printStackTrace();
            }
        }
    }

    /**
     * 发送即时事件
     */
    public static void event(BaseEventBusBean bean) {
        EventBus.getDefault().post(bean);
    }

    /**
     * 发送粘性事件
     */
    public static void eventSticky(BaseEventBusBean bean) {
        EventBus.getDefault().postSticky(bean);
    }

    /**
     * 移除所以粘性事件
     */
    public static void removeAllStickyEvent() {
        EventBus.getDefault().removeAllStickyEvents();
    }

    /**
     * 移除一个粘性事件
     */
    public static boolean removeStickyEvent(BaseEventBusBean bean) {
        return EventBus.getDefault().removeStickyEvent(bean);
    }

    /**
     * 移除一个指定类型的粘性事件
     */
    public static  T removeClassStickyEvent(Class clazz) {
        return EventBus.getDefault().removeStickyEvent(clazz);
    }

    /**
     * 优先级高的订阅者可以终止事件往下传递
     */
    public static void cancelEventDelivery(BaseEventBusBean bean) {
        try {
            EventBus.getDefault().cancelEventDelivery(bean);
        } catch (Exception e) {
            e.printStackTrace();
        }
    }

    /**
     * 清空缓存
     */
    public static void clearCache() {
        EventBus.clearCaches();

    }
}
每个方法我都做了注释,简单一目了然。
EventBus发送接收的事件是一个对象,如果要做到在不同Module下传递数据,就要保证被订阅者和订阅者发送/接收的对象是同一个对象。那么我们就建一个基类BaseEventBusBean:
public class BaseEventBusBean {

}
不需要实现什么方法。然后再建一个bean包,里面存储全部的事件类,其父类就是BaseEventBusBean:
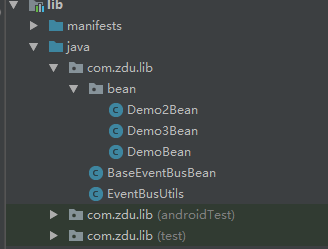
每个事件单独自己去实现想要实现的方法,便于管理。
鉴于EventBus没有@Subscribe接收方法却注册会崩溃的话,建议在各位的Activity和Fragment的基类中添加类似的方法:
@Override
protected void onCreate(Bundle savedInstanceState) {
    super.onCreate(savedInstanceState);
    if (isRegisterEventBus()) {
        EventBusUtils.register(this);
    }
}

protected boolean isRegisterEventBus() {
    return false;
}


@Override
public void onDestroy() {
    super.onDestroy();
    if (isRegisterEventBus()) {
        EventBusUtils.unregister(this);
    }
}
子类需要注册EventBus的话,重写isRegisterEventBus()方法,返回true就好了。
以上就是EventBus的简单封装,真的是很简单哦。
索引
最后再来说说索引的问题,由于EventBus 3.0以后使用运行时注解的形式接收方法,在执行效率上肯定会有影响。那么对于一个严格的程序来说,这是不能容忍的。所幸官方给出了注解解析器,将运行时注解变成了编译时注解,大大提高了执行的效率。官方文档:Subscriber Index
首先区分AS的版本,3.0以上和3.0以下的集成方式不同,我的AS版本是3.1.4,所以按照3.0以上的方式简单的介绍下:
在lib库下的build.gradle添加以下代码:
android {
        javaCompileOptions {
            annotationProcessorOptions {
                arguments = [ eventBusIndex : 'com.zdu.evenbusdemo.MyEventBusIndex' ]
            }
        }
    }

dependencies {
    api 'org.greenrobot:eventbus:3.1.1'
    annotationProcessor 'org.greenrobot:eventbus-annotation-processor:3.1.1'
}
com.zdu.evenbusdemo.MyEventBusIndex:这个路径自定义,设置完重新编译后会在build/generated/source/apt/debug/com.zdu.evenbusdemo包中生成MyEventBusIndex类,这个类就是索引类。之后在EventBusUtils的init()初始化方法中将这个类传递过去就行了,建议在Application中初始化。
EventBusUtils.init(new MyEventBusIndex());
AS3.0以下需要以apt的形式加载,这里就不多做介绍了,大家去官方文档上看吧。
结语
EventBus作为一个事件总线,有很多优秀的地方,可以在任意位置注册接收发送事件,不受Activity的影响,使用起来非常方便。但也正是这样的优点,使得EventBus容易被滥用。你可以使用EventBus在某些特定的场景使用,比如跨Module,跨了N个Activity等,这将大量的减少代码量,但如果你用EventBus来控制整个app的流程,那么导致碎片化更严重,不易维护。所以工具谁都可以有,怎么让工具的作用最大化,就看各位使用者了。
最后附上封装Github地址:EventBusDemo