1.制作本地库
CocoaPods提供了创建库的指令和模板,只需要几个指令就可以打造自己的代码库。
打开终端,CD到指定目录,输入指令创建库。“libraryName”是库的名字。
pod lib create libraryName
输入后会提示正在下载模板,并添加到指定的位置。
Cloning `https://github.com/CocoaPods/pod-template.git` into `CFALibrary`.
模板下载好以后,需要你回答几个问题:
1.你要使用哪种语言?
2.库中是否包含一个实例程序?(个人觉得有个示例程序会好点)
3.你要使用哪个测试框架?(没有的话老老实实写None)
4.是否要UI测试?(我一直都是NO,没有测试过)
5.类名前缀是什么?
Configuring CFALibrary template.

------------------------------

To get you started we need to ask a few questions, this should only take a minute.

If this is your first time we recommend running through with the guide:
 - http://guides.cocoapods.org/making/using-pod-lib-create.html
 ( hold cmd and click links to open in a browser. )


What language do you want to use?? [ Swift / ObjC ]
 > ObjC

Would you like to include a demo application with your library? [ Yes / No ]
 > Yes

Which testing frameworks will you use? [ Specta / Kiwi / None ]
 > None

Would you like to do view based testing? [ Yes / No ]
 > No

What is your class prefix?
 > CFA

Running pod install on your new library.
问答完后,就会自动执行pod install。
2.可能遇到的一些问题
在制作本地库过程中可能会遇到一些问题,这里列举两个常见的。
问题1: Unsupported options {:exclusive=>true} for target
[!] Invalid `Podfile` file: [!] Unsupported options `{:exclusive=>true}` for target `CFALibrary_Example`..

 #  from /Users/dengjack/Desktop/Library/CFALibrary/Example/Podfile:4
 #  -------------------------------------------
 #
 >  target 'CFALibrary_Example', :exclusive => true do
 #    pod 'CFALibrary', :path => '../'
 #  -------------------------------------------

 Ace! you're ready to go!
 We will start you off by opening your project in Xcode
  open 'CFALibrary/Example/CFALibrary.xcworkspace'
The file /Users/dengjack/Desktop/Library/CFALibrary/Example/CFALibrary.xcworkspace does not exist.

To learn more about the template see `https://github.com/CocoaPods/pod-template.git`.
To learn more about creating a new pod, see `http://guides.cocoapods.org/making/making-a-cocoapod`.
大概的意思就是不支持{:exclusive=>true},在cocoaPods 1.0之后exclusive已经被移除了,但是模板还是旧的,真是醉了。
点击这里找到答案
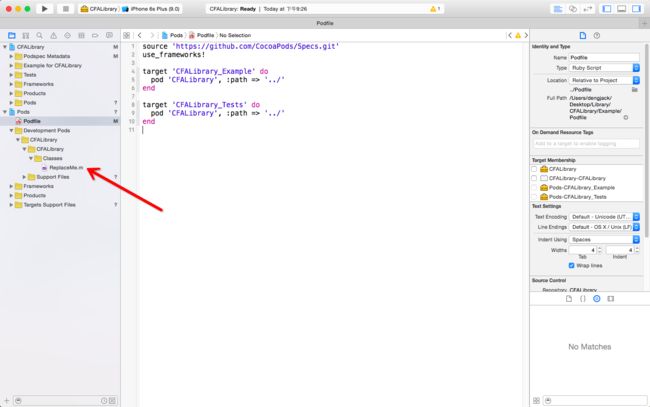
打开podfile将{:exclusive=>true}相关的部分删掉。有兴趣了解具体语法可以参考官方说明文档
source 'https://github.com/CocoaPods/Specs.git'
use_frameworks!

target 'CFALibrary_Example' do
  pod 'CFALibrary', :path => '../'
end

target 'CFALibrary_Tests' do
  pod 'CFALibrary', :path => '../'
end
问题2: 未设置summary和description
修改完podfile,重新pod install,又遇到以下错误:
Analyzing dependencies
Fetching podspec for `CFALibrary` from `../`
[!] The `CFALibrary` pod failed to validate due to 1 error:
    - WARN  | summary: The summary is not meaningful.
    - ERROR | description: The description is empty.
这是因为podspec中没有设置summary和description,打开项目,找到.podspec文件。随便修改一下summary和description就可以了。在两个DESC之间添加你的描述内容。
Pod::Spec.new do |s|
  s.name             = "CFALibrary"
  s.version          = "0.1.0"
  s.summary          = "My CFALibrary."

  s.description      = <<-DESC
                        here is description.
                       DESC

  s.homepage         = "https://github.com//CFALibrary"
  # s.screenshots     = "www.example.com/screenshots_1", "www.example.com/screenshots_2"
  s.license          = 'MIT'
  s.author           = { "code4ape" => "[email protected]" }
  s.source           = { :git => "https://github.com//CFALibrary.git", :tag => s.version.to_s }
  # s.social_media_url = 'https://twitter.com/'

  s.ios.deployment_target = '8.0'

  s.source_files = 'CFALibrary/Classes/**/*'
  s.resource_bundles = {
    'CFALibrary' => ['CFALibrary/Assets/*.png']
  }

  # s.public_header_files = 'Pod/Classes/**/*.h'
  # s.frameworks = 'UIKit', 'MapKit'
  # s.dependency 'AFNetworking', '~> 2.3'
end
保存修改之后,再pod install一下就可以了,结果如下:
Analyzing dependencies
Fetching podspec for `CFALibrary` from `../`
Downloading dependencies
Installing CFALibrary (0.1.0)
Generating Pods project
Integrating client project

[!] Please close any current Xcode sessions and use `CFALibrary.xcworkspace` for this project from now on.
Sending stats
Pod installation complete! There is 1 dependency from the Podfile and 1 total
pod installed.
3.添加代码
现在可以通过.xcworkspace文件打开项目了。CocoaPods默认生成了一个ReplaceMe.m文件,提醒用户把你的源文件放到这里来。
添加自己的代码,这里添加一个分类,添加获取随机颜色的类方法。
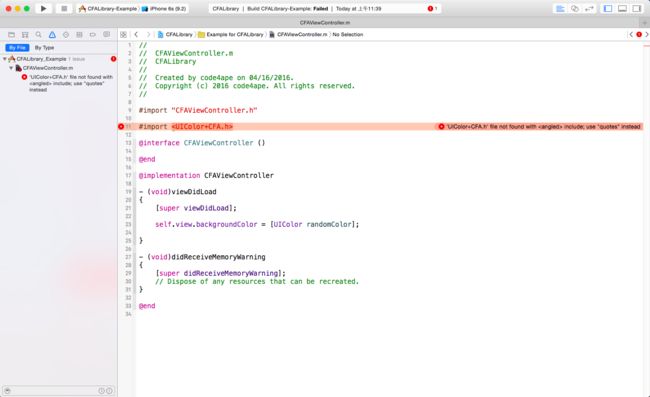
这里遇到个问题,找不到库!
打开podfile,把use_frameworks!去掉就可以了。use_frameworks!表示用frameworks代替静态库,至于为什么用frameworks不行,我们回头再深究。
点击查看官方说明
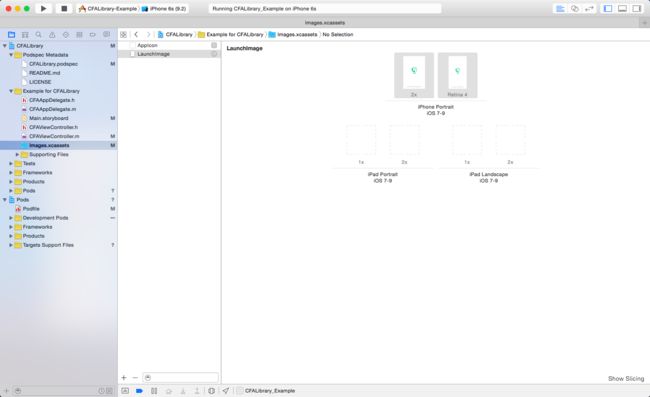
终于可以运行了,并且可以产生随机色,但是屏幕上下留了黑色边距。原因是CocoaPods提供的模板默认使用launchImage作为启动图片,把launchScreen.storyboard删掉了,所以没有launchImage时屏幕尺寸会显示不正确。
添加合适的启动图片即可。
到这里,已经可以在Demo里正常使用自己的代码库。
4.在项目中使用本地库
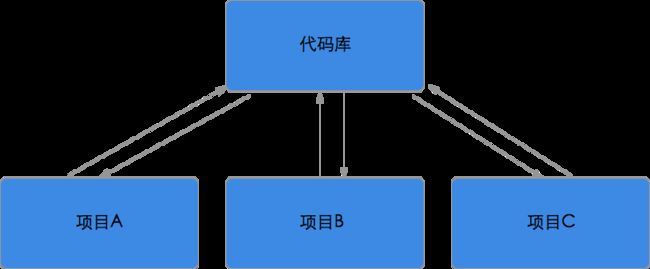
制作本地代码库的最终目的,是为了将常用的代码抽取出来独立维护,逐渐形成自己的或者团队的SDK,方便在多个项目中使用。
我的想法是,不同的项目引用同一个代码库,但有时候在项目中可能要给库添加一些方法,这时候可以直接添加,并且同样作用到其他的项目中。
这里我们以CFATest项目为例,介绍如何使用和维护本地库。
新建项目CFATest,添加podfile,执行pod install,这里的:path =>是指定本地库所在的位置。
target 'CFATest' do
  pod 'CFALibrary', :path => '/Users/dengjack/Desktop/Library/CFALibrary’
end
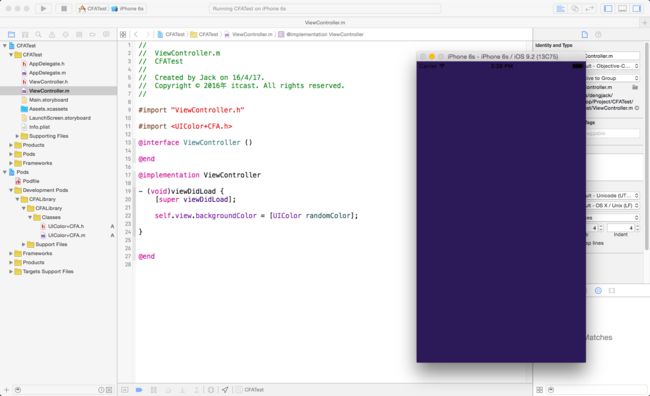
将ViewController的背景颜色修改成随机颜色,运行成功,说明项目中引用本地库没有问题。
接着在CFATest项目中修改UIColor+CFA.h文件,其效果马上在CFALibrary中体现。(因为CocoaPods引用的就是本地文件嘛,而不是副本,它们修改的是同一个文件)
至此,我们可以制作本地库供不同项目使用,只需要在podfile中指定库的路径即可;也可以在项目中直接修改库文件,达到便于维护本地库的目的。
下一篇我们将介绍如何将本地库提交到CocoaPods,让其他开发者使用自己的库,还有如何对库进行版本管理。
