有几天没写东西了,新的一年新气象,希望大家新的一年好运连连、钞票多多。好了废话不多说,今天来说下swift实现扫一扫功能,希望能对大家有些帮助:
1.添加必要的视图创建UI
(1).全局视图变量
/// 扫描容器
var customContainerView: UIView!
/// 底部工具条
var customTabbar: UITabBar!
/// 结果文本
var customLabel: UILabel!
/// 冲击波视图
var scanLineView: UIImageView!
///框
var borderIV: UIImageView!
(2)加载UI
private func setUpUI() {
let rightItem: UIBarButtonItem = UIBarButtonItem(title: "相册", style: .plain, target: self, action: #selector(choosePicFromPhotoLib(sender:)))
navigationItem.rightBarButtonItem = rightItem
customContainerView = UIView(frame: CGRect(x: 0, y: 0, width: kScreenWidth-100, height: kScreenWidth-100))
customContainerView.center = self.view.center;
customContainerView.backgroundColor = UIColor.yellow
customContainerView.clipsToBounds = true
view.addSubview(customContainerView)
customLabel = UILabel(frame: CGRect(x: 0, y: kNavbarHeight+20, width: kScreenWidth, height: 40))
customLabel.textColor = UIColor.white
customLabel.textAlignment = NSTextAlignment.center
view.addSubview(customLabel)
borderIV = UIImageView(frame: customContainerView.frame)
borderIV.image = UIImage(named: "codeframe")
borderIV.clipsToBounds = true
view.addSubview(borderIV)
scanLineView = UIImageView(frame: CGRect(x: 0, y: 0-customContainerView.frame.size
.height, width: customContainerView.frame.size.width, height: customContainerView.frame.size.height))
scanLineView.image = UIImage(named: "qrcode_scanline_qrcode")
borderIV.addSubview(scanLineView)
customTabbar = UITabBar(frame: CGRect(x: 0, y: (kScreenHeight-kTabBarHeight), width: kScreenWidth, height: 49))
customTabbar.delegate = self
customTabbar.backgroundColor = UIColor.red
customTabbar.barTintColor = UIColor.red
view.addSubview(customTabbar)
let leftBarItem: UITabBarItem = UITabBarItem(title: "", image: UIImage(named: "qrcode_tabbar_icon_qrcode"), selectedImage: UIImage(named: "qrcode_tabbar_icon_qrcode_highlighted"));
let rightBarItem: UITabBarItem = UITabBarItem(title: "", image: UIImage(named: "qrcode_tabbar_icon_barcode"), selectedImage: UIImage(named: "qrcode_tabbar_icon_barcode_highlighted"));
customTabbar.setItems([leftBarItem,rightBarItem], animated: true)
customTabbar.selectedItem = customTabbar.items?.first
scanQRCode()
}
2.创建使用相机等所必需的方法 AVCaptureSession相关
流程:1 建立Session 2 添加 input 3 添加output 4 开始捕捉 5 录制、照相 6 捕捉 7 结束捕捉 8 参考
// MARK: -懒加载
//设备输入
private lazy var input: AVCaptureDeviceInput? = {
let device = AVCaptureDevice.defaultDevice(withMediaType: AVMediaTypeVideo)
return try? AVCaptureDeviceInput(device: device)
}()
//创建Session
private lazy var session:AVCaptureSession = AVCaptureSession()
//设备输出
private lazy var output: AVCaptureMetadataOutput = {
let out = AVCaptureMetadataOutput()
let viewRect = self.view.frame
let containerRect = customContainerView.frame;
let x = containerRect.origin.y / viewRect.height;
let y = containerRect.origin.x / viewRect.width;
let width = containerRect.height / viewRect.height;
let height = containerRect.width / viewRect.width;
out.rectOfInterest = CGRect(x: x, y: y, width: width, height: height)
return out
}()
lazy var containerLayer:CALayer = CALayer()
/// 预览图层
lazy var previewLayer: AVCaptureVideoPreviewLayer = AVCaptureVideoPreviewLayer(session: self.session)
3.扫描准备scanQRCode
// MARK: - 内部控制方法
private func scanQRCode()
{
// 1.判断输入能否添加到会话中
if !session.canAddInput(input)
{
return
}
// 2.判断输出能够添加到会话中
if !session.canAddOutput(output)
{
return
}
// 3.添加输入和输出到会话中
session.addInput(input)
session.addOutput(output)
// 4.设置输出能够解析的数据类型
// 注意点: 设置数据类型一定要在输出对象添加到会话之后才能设置
output.metadataObjectTypes = output.availableMetadataObjectTypes
// 5.设置监听监听输出解析到的数据
output.setMetadataObjectsDelegate(self, queue: DispatchQueue.main)
// 6.添加预览图层
view.layer.insertSublayer(previewLayer, at: 0)
previewLayer.frame = view.bounds
// 7.添加容器图层
view.layer.addSublayer(containerLayer)
containerLayer.frame = view.bounds
// 8.开始扫描
session.startRunning()
}
4.开始扫描动画
func startAnimation()
{
//2.执行扫描动画
UIView.animate(withDuration: 1.5) { () -> Void in
UIView.setAnimationRepeatCount(MAXFLOAT)
if (customTabbar.selectedItem == customTabbar.items?.first){
scanLineView.frame = CGRect(x: scanLineView.frame.origin.x, y: scanLineView.frame.origin.y+customContainerView.frame.size.height+100, width: scanLineView.frame.size.width, height: scanLineView.frame.size.height)
}else {
scanLineView.frame = CGRect(x:scanLineView.frame.origin.x, y:borderIV.frame.origin.y+borderIV.frame.size.height, width:borderIV.frame.size.width, height:borderIV.frame.size.height)
}
}
}
5.扩展实现UITabBarDelegate
extension QRCodeScanViewController: UITabBarDelegate {
func tabBar(_ tabBar: UITabBar, didSelect item: UITabBarItem) {
// 根据当前选中的按钮重新设置二维码容器高度
if (tabBar.selectedItem == customTabbar.items?.first){
UIView.animate(withDuration: 0.5) { () -> Void in
borderIV.frame = customContainerView.frame
borderIV.center = self.view.center;
scanLineView.image = UIImage(named: "qrcode_scanline_qrcode")
}
}else{
UIView.animate(withDuration: 0.5) { () -> Void in
borderIV.frame = CGRect(x:borderIV.frame.origin.x, y:borderIV.frame.origin.y, width:borderIV.frame.size.width, height:borderIV.frame.size.width/2)
borderIV.center = self.view.center;
scanLineView.image = UIImage(named: "qrcode_scanline_barcode")
}
}
}
}
6.扩展实现UINavigationControllerDelegate, UIImagePickerControllerDelegate
extension QRCodeScanViewController: UINavigationControllerDelegate, UIImagePickerControllerDelegate {
private func imagePickerController(picker: UIImagePickerController, didFinishPickingMediaWithInfo info: [String : AnyObject]) {
// 1.取出选中的图片
guard let image = info[UIImagePickerControllerOriginalImage] as? UIImage else
{
return
}
guard let ciImage = CIImage(image: image) else
{
return
}
// 2.从选中的图片中读取二维码数据
// 2.1创建一个探测器
if #available(iOS 8.0, *) {
let detector = CIDetector(ofType: CIDetectorTypeQRCode, context: nil, options: [CIDetectorAccuracy: CIDetectorAccuracyLow])
// 2.2利用探测器探测数据
let results = detector?.features(in: ciImage)
// 2.3取出探测到的数据
for result in results!
{
print((result as! CIQRCodeFeature).messageString)
customLabel.text = (result as! CIQRCodeFeature).messageString
}
} else {
// Fallback on earlier versions
}
picker.dismiss(animated: true) { () -> Void in
self.startAnimation()
}
}
}
7.扩展AVCaptureMetadataOutputObjectsDelegate
extension QRCodeScanViewController: AVCaptureMetadataOutputObjectsDelegate
{
/// 只要扫描到结果就会调用
private func captureOutput(captureOutput: AVCaptureOutput!, didOutputMetadataObjects metadataObjects: [AnyObject]!, fromConnection connection: AVCaptureConnection!)
{
// 1.显示结果
print(metadataObjects.last?.stringValue)
customLabel.text = metadataObjects.last?.stringValue
clearLayers()
// 2.拿到扫描到的数据
guard let metadata = metadataObjects.last as? AVMetadataObject else
{
return
}
// 通过预览图层将corners值转换为我们能识别的类型
let objc = previewLayer.transformedMetadataObject(for: metadata)
// 2.对扫描到的二维码进行描边
drawLines(objc: objc as! AVMetadataMachineReadableCodeObject)
}
// 绘制描边
private func drawLines(objc: AVMetadataMachineReadableCodeObject)
{
// 0.安全校验
guard let array = objc.corners else
{
return
}
// 1.创建图层, 用于保存绘制的矩形
let layer = CAShapeLayer()
layer.lineWidth = 2
layer.strokeColor = UIColor.green.cgColor
layer.fillColor = UIColor.clear.cgColor
// 2.创建UIBezierPath, 绘制矩形
let path = UIBezierPath()
let point = CGPoint(x: 0, y: 0)
var index = 0
index+=1
CGPoint(dictionaryRepresentation: (array[index] as! CFDictionary))
// CGPointWithDictionaryRepresentation((array[index++] as! CFDictionary), &point)
// 2.1将起点移动到某一个点
path.move(to: point)
// 2.2连接其它线段
while index < array.count
{
index+=1
CGPoint(dictionaryRepresentation: (array[index] as! CFDictionary))
path.addLine(to: point)
}
// 2.3关闭路径
path.close()
layer.path = path.cgPath
// 3.将用于保存矩形的图层添加到界面上
containerLayer.addSublayer(layer)
}
/// 清空描边
private func clearLayers()
{
guard let subLayers = containerLayer.sublayers else
{
return
}
for layer in subLayers
{
layer.removeFromSuperlayer()
}
}
}
8.viewDidLoad
override func viewDidLoad() {
super.viewDidLoad()
title = "扫一扫"
setUpUI()
startAnimation()
}
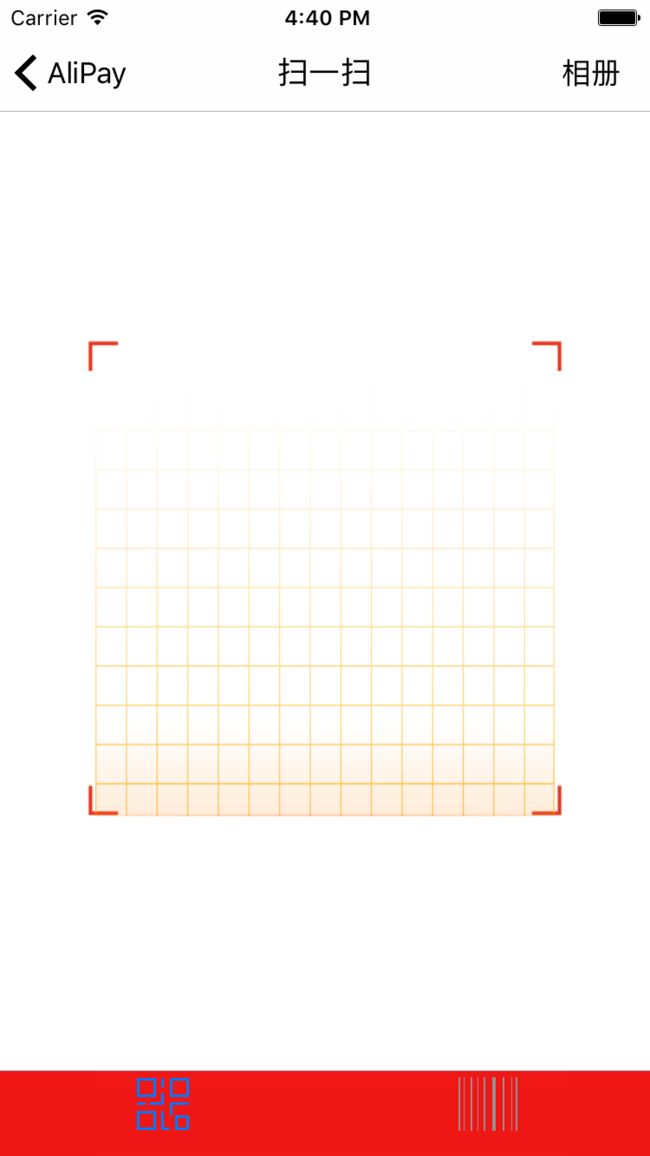
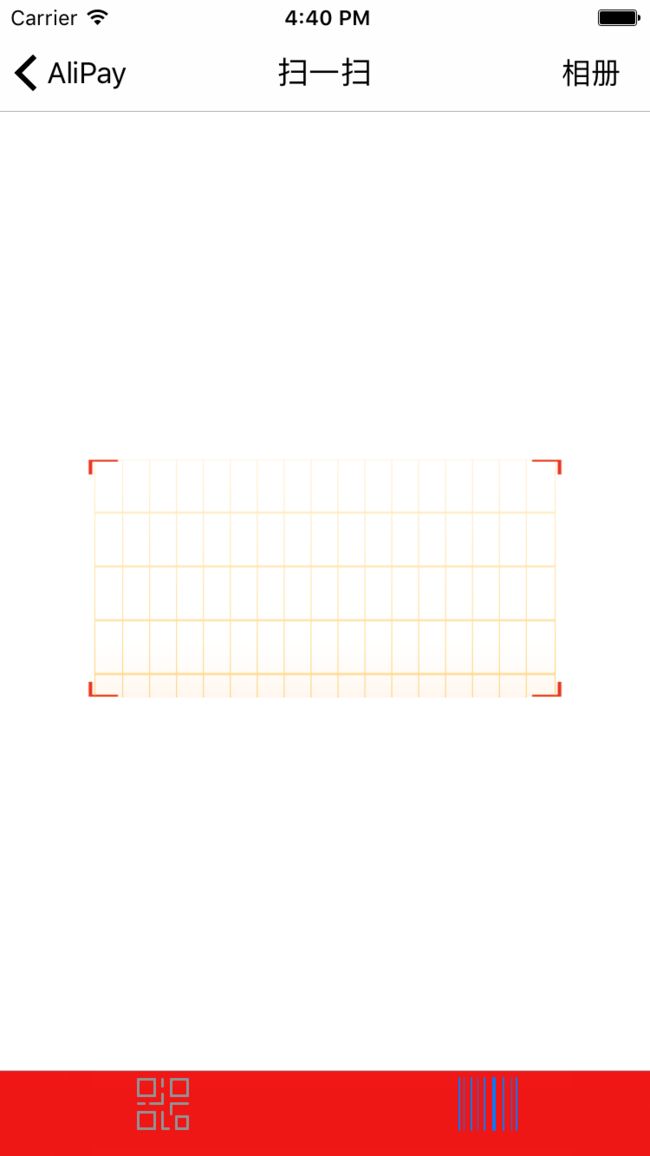
到这里已经实现了扫一扫的功能。图片附上:
大家有什么问题可以给我回复。
完整demo戳这里https://github.com/miaozhang9/Swift3.0Test_ImitateAliPay


