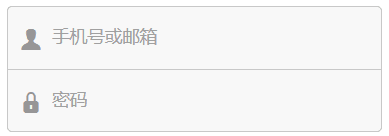
需求
在Android开发时,系统自带的控件往往不能满足我们的需求,而且经常在一个软件设计中,有功能相貌相类似但显示的内容、完成的功能不一样,在这个时候,我们一般都会把一个或者若干个控件封装成一个自定义控件,以方便以后使用。比如下面几个控件:
下拉搜索控件
这些都是一个项目中可能会用到多次,甚至多个项目中都需要用到的,这样的,就可以把它封装起来,成为一个单独的控件,下次拿来就可以直接用了
那么,要怎样封装自定义控件呢?从网上借用一个现成的:(如有冒犯作者请联系我)
1.控件布局:以Linearlayout为根布局,一个TextView,一个ImageButton。
2.自定义控件代码,从LinearLayout继承:
public class ImageBtnWithText extends LinearLayout {
       public ImageBtnWithText (Context context ) {
               this(context , null);
       }
       public ImageBtnWithText (Context context , AttributeSet attrs) {
               super(context , attrs );
               // 在构造函数中将Xml中定义的布局解析出来。
               LayoutInflater.from (context ).inflate(R.layout.imagebtn_with_text, this, true );
       }
}
3.在主界面布局xml中使用自定义控件:
即,使用完整的自定义控件类路径:com.demo.widget2.ImageBtnWithText定义一个元素。 运行可以看到控件已经能够被加载到界面上。
后续省略一些增加和设置attr步骤,感兴趣的可以自行google
至此,一个自定义控件就可以使用了,但是,人永远是不满足的:
- 使用LayoutInflater.from (context ).inflate(...)这句话比较长,且如果忘了inflate的话,编译不会错但实际上是有问题的
- 每次都要去修改构造函数很麻烦
- 如果需要用到类似ButterKnife的注释性语句每次都要初始化
- 每个自定义控件的格式都是类似的
于是,针对这几点,我们只需要构造自定义View的基类即可,以上述自定义控件的方法为例,构造一个BaseLinearLayout类
public abstract class BaseLinearLayout extends LinearLayout {
    private static final String TAG = BaseLinearLayout.class.getSimpleName();
    protected Context mContext;

    public BaseLinearLayout(Context context) {
        super(context);
        onInitLayout(context, null);
    }

    public BaseLinearLayout(Context context, AttributeSet attrs) {
        super(context, attrs);
        onInitLayout(context, attrs);
    }

    public BaseLinearLayout(Context context, AttributeSet attrs, int defStyleAttr) {
        super(context, attrs, defStyleAttr);
        onInitLayout(context, attrs);
    }

    protected void onInitLayout(Context context) {
        mContext = context;
        inflate(mContext, getLayoutId(), this);
        ButterKnife.bind(this);
    }

    protected void onInitLayout(Context context, AttributeSet attrs){
        onInitLayout(context);
    }

    protected abstract int getLayoutId();
}
- 代码onInitLayout中的
inflate(mContext, getLayoutId(), this);这句话,就是加载自定义控件的布局 -
ButterKnife.bind(this);这句话是使用ButterKnife注解 - 预留了getLayoutId这样的abstract方法,就是为了让子类传入布局的id
这样写,就解决了上述提到的4个问题:
- 不用每次inflate,且不会忘,因为子类必须实现getLayoutId方法,而基类中会inflate
- 不需要修改构造方法,默认的就可以
- ButterKnife不需要再初始化了
- 减少了重复劳动
可能下面的函数会有人觉得,为什么它没用上,因为基类完全不需要在这个类里做什么。而当子类需要有自定义属性的时候,这个函数就派上用途了
protected void onInitLayout(Context context, AttributeSet attrs){
    onInitLayout(context);
}
同样的,RelativeLayout也可以这样封装:
public abstract class BaseRelativeLayout extends RelativeLayout {
    private static final String TAG = BaseRelativeLayout.class.getSimpleName();
    protected Context mContext;

    public BaseRelativeLayout(Context context) {
        super(context);
        onInitLayout(context);
    }

    public BaseRelativeLayout(Context context, AttributeSet attrs) {
        super(context, attrs);
        onInitLayout(context);
    }

    public BaseRelativeLayout(Context context, AttributeSet attrs, int defStyleAttr) {
        super(context, attrs, defStyleAttr);
        onInitLayout(context);
    }
    protected void onInitLayout(Context context) {
        mContext = context;
        inflate(mContext, getLayoutId(), this);
        ButterKnife.bind(this);
    }

    protected void onInitLayout(Context context, AttributeSet attrs){
        onInitLayout(context);
    }

    protected abstract int getLayoutId();
}
还有FrameLayout就不再贴代码了,都是一样的。但是这里本人也有个问题,为什么自己封装的3个基类样式都是一样的,却没法封装成一个呢?请明白人回复
