前言:
UIVIew Animation 是 iOS 提供的最基础的一组用于实现 UIView 动画的类库。在 UIView Animation 中,可以改变的属性有:
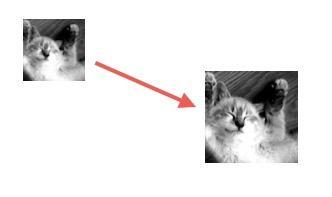
frame
bounds
center
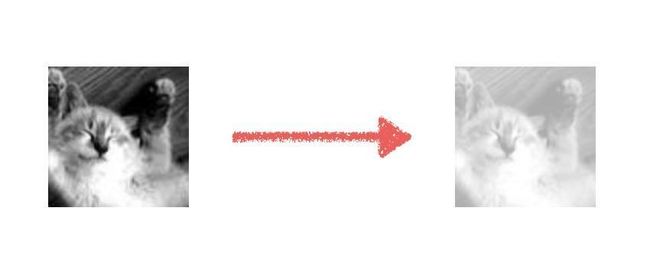
alpha
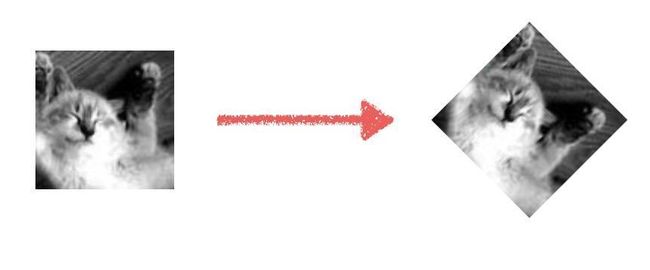
transform
…
一: 可实现动画的属性
现在你已经可以制作简单的动画了,但要记住:不是所有修改属性的操作放到animations代码块中都是变成动画实现的 —— 不管你怎么修改一个视图的tag,或者是delegate。因此,可实现动画的属性必定会导致视图的重新渲染。这些可以生成动画的属性大致可以分成这么三类:坐标尺寸、视图显示、形态变化。
- 坐标尺寸类
bounds:修改这个属性会结合center属性重新计算frame。建议通过这个属性修改尺寸。
frame:修改这个属性通常会导致视图形变的同时也发生移动,然后会重新设置center跟bounds属性
center: 设置后视图会移动到一个新位置,修改后会结合bounds重新计算frame。
- 视图显示类
backgroundColor: 修改这个属性会产生颜色渐变过渡的效果,本质上是系统不断修改了tintColor来实现的。
alpha:修改这个属性会产生淡入淡出的效果。
hidden:修改这个属性可以制作翻页隐藏的效果。
- 形态变化类
transform:修改这个属性可以实现旋转、形变、移动、翻转等动画效果,其通过矩阵运算的方式来实现,因此更加强大。
二: 动画种类
UIView 类提供了大量的动画 API ,这些 API 集中在三个 Category 里,分别是:
UIView (UIViewAnimation) - basic animation 基础动画
UIView (UIViewAnimationWithBlocks) - basic animation 基础动画
UIView (UIViewKeyframeAnimations) - keyframe animation 关键帧动画
1. UIViewAnimation
UIViewAnimation 诞生时间最早,功能上完全可以使用其余两个 Cagetory 替代,其中方法包含:
+ (void)beginAnimations:(nullable NSString )animationID context:(nullable void )context;
+ (void)commitAnimations; + (void)setAnimationDelegate:(nullable id)delegate; + (void)setAnimationWillStartSelector:(nullable SEL)selector;
+ (void)setAnimationDidStopSelector:(nullable SEL)selector;
+ (void)setAnimationDuration:(NSTimeInterval)duration;
+ (void)setAnimationDelay:(NSTimeInterval)delay;
+ (void)setAnimationStartDate:(NSDate )startDate;
+ (void)setAnimationCurve:(UIViewAnimationCurve)curve;
+ (void)setAnimationRepeatCount:( float)repeatCount;
+ (void)setAnimationRepeatAutoreverses:(BOOL)repeatAutoreverses;
+ (void)setAnimationBeginsFromCurrentState:(BOOL)fromCurrentState;
+ (void)setAnimationTransition:(UIViewAnimationTransition)transition forView:(UIView )view cache:(BOOL)cache;
+ (void)setAnimationsEnabled:(BOOL)enabled;
+ (BOOL)areAnimationsEnabled; //阻塞动画,iOS 7 添加的新方法[UIView performWithoutAnimation:]。它是一个简单的封装,先检查动画当前是否启用,然后禁止动画,执行块语句,最后重新启用动画。需要说明的地方是,它并不会阻塞基于CoreAnimation的动画。
 + (void)performWithoutAnimation:(void (^)(void))actionsWithoutAnimation + (NSTimeInterval)inheritedAnimationDuration

//方法比较简单,使用时先 beginAnimations(传入的 animationID 作为该动画的标识,可以在 delegate 中清楚的识别到该动画, 然后设置动画的各项属性,如 duration, delegate等,设置完成后 **commitAnimations。
- (void) startAnimation {
[UIView beginAnimations:@"UIViewAnimation" context:(__bridge void *)(self)]; [UIView setAnimationDuration:1.0]; [UIView setAnimationDelay:0.0];
 [UIView setAnimationRepeatCount:2];
[UIView setAnimationRepeatAutoreverses:YES];
[UIView setAnimationCurve:UIViewAnimationCurveEaseInOut]; [UIView setAnimationDelegate:self];
[UIView setAnimationDidStopSelector:@selector(animationDidStop:finished:context:)]; _animationView.center = CGPointMake(CGRectGetMaxX(self.view.bounds) - 25, CGRectGetMidY(self.view.bounds));
 [UIView commitAnimations];
}
需要说明的是,UIViewAnimationCurve 表示动画的变化规律:
UIViewAnimationCurveEaseInOut: 开始和结束时较慢
UIViewAnimationCurveEase: 开始时较慢
UIViewAnimationCurveEaseOut: 结束时较慢
UIViewAnimationCurveLinear: 整个过程匀速进行
具体效果可参考下图:
2. UIViewAnimationWithBlocks
UIViewAnimationWithBlocks 是在 iOS 4.0 时推出的基于 block 的 Animation Category,较 UIViewAnimation 来说,使用起来更加便捷。
+ (void)animateWithDuration:(NSTimeInterval)duration delay:(NSTimeInterval)delay options:(UIViewAnimationOptions)options animations:(void (^)(void))animations completion:(void (^ nullable)(BOOL finished))completion ;
+ (void)animateWithDuration:(NSTimeInterval)duration animations:(void (^)(void))animations completion:(void (^ nullable)(BOOL finished))completion ;
+ (void)animateWithDuration:(NSTimeInterval)duration animations:(void (^)(void))animations ;
+ (void)performSystemAnimation:(UISystemAnimation)animation onViews:(NSArray )views options:(UIViewAnimationOptions)options animations:(void (^ nullable)(void))parallelAnimations completion:(void (^ nullable)(BOOL finished))completion ;
这是 UIViewAnimationWithBlocks 中最常用的三种方法,使用 block 方式实现基本动画。
可以设置 duration
持续时间,delay
延迟时间,UIViewAnimationOptions
枚举项和completion
动画结束的回调。
时间函数
动画的速度曲线是由时间函数( timing function )控制的。
- 简单动画代码示例
先放上本文demo:点这
在用户打开app要进行登录的时候,账户和密码输入框从屏幕的左边进入,接着登录按钮出现。
界面动画
在这段动画之中发生的最为明显的事情就是两个文本框的位置变化,在动画开始之前,两个文本框的位置应该是在屏幕的左边,而下方的按钮现在是隐藏状态(设置alpha)
动画开始前
因此,这个动画之中发生的事情,我们可以用概括为下面的代码:
self.userName.center.x += offset; //userName进入
self.password.center.x += offset; //password进入
self.login.alpha = 1; //显示登录按钮
既然已经知道了我们的动画发生了什么,接着就可以使用UIKit
的动画API让我们的动画活起来了
//设置文本框初始位置为屏幕左侧
CGPoint accountCenter = self.userName.center;
CGPoint psdCenter = self.password.center;
accountCenter.x -= 200;
pasCenter.x -= 200;
self.userName.center = accountCenter;
self.password.center = psdCenter;//还原中心坐标
accountCenter.x += 200;
psdCenter.x += 200;
[UIView animateWithDuration: 0.5 animations: ^{ self.userName.center = accountCenter; self.password.center = passwordCenter; self.login.alpha = 1;} completion: nil];
在UIKit中,系统提供了animate标题打头的属于UIView的类方法让我们可以轻松的制作动画效果,每一个这样的类方法提供了名为animations的block
代码块,这些代码会在方法调用后立刻或者延迟一段时间以动画的方式执行。此外,所有这些API的第一个参数都是用来设置动画时长的。
在viewDidAppear:中运行这段代码,你会看到文本框从左侧滑动,按钮也渐变显示出来的,但是跟我们要的结果不太一样 —— 三个动画没有错开,效果并不那么的好看。我们希望密码框能在账户文本框滑动后的一段时间后再出现,按钮同样也需要晚一些显示。所以,我们需要使用下面的方法来实现这个效果:
- 更新约束
  leftContrain.constant = 100
 UIView.animateWithDuration(0.8, delay: 0, usingSpringWithDamping: 0.5, initialSpringVelocity: 0.5, options: UIViewAnimationOptions.AllowAnimatedContent, animations: {
                self.view.layoutIfNeeded() //立即实现布局
            }, completion: nil)
- Repeating
 [UIView animateWithDuration: 0.5 delay: 0.35 options: UIViewAnimationOptionAutoreverse | UIViewAnimationOptionRepeat animations: ^{
   self.password.center = passwordCenter;
 } completion: ^(BOOL finished) {
   [UIView animateWithDuration: 0.2 animations: ^{
     self.login.alpha = 1;
   }];
 }];
**
UIViewAnimationOptionRepeat //动画循环执行
UIViewAnimationOptionAutoreverse //动画在执行完毕后会反方向再执行一次
我们将这两个参数传入到上面密码框出现动画中,看看会有什么效果(不同的参数使用|操作符一起传入)
**
- Transitioning
除了上面提到的这些效果,在视图、图片切换的时候,我们还能通过传入下面的这些参数来实现一些特殊的动画效果。
UIViewAnimationOptionTransitionNone //没有效果,默认 UIViewAnimationOptionTransitionFlipFromLeft //从左翻转效果 UIViewAnimationOptionTransitionFlipFromRight //从右翻转效果 UIViewAnimationOptionTransitionCurlUp //从上往下翻页 UIViewAnimationOptionTransitionCurlDown //从下往上翻页 UIViewAnimationOptionTransitionCrossDissolve //旧视图溶解过渡到下一个视图
UIViewAnimationOptionTransitionFlipFromTop //从上翻转效果 UIViewAnimationOptionTransitionFlipFromBottom //从上翻转效果
那么这些参数使用的时机是什么时候呢?我们来看看这么一段代码:
[UIView transitionWithView: firstPV duration: 0.5 options: UIViewAnimationOptionTransitionFlipFromLeft animations: ^{
 [firstPV flipCard];
} completion: ^(BOOL finished) {
 isAnimating = NO;
}];

- (void)flipCard{
 if (isfliped) {
self.image = [UIImage imageNamed: @"flipPicBG.png"];
 isfliped = NO;
} else {
self.image = [UIImage imageNamed: [NSString stringWithFormat: @"flipPic%d.png", type]];
 isfliped = YES;
}
}
这段代码中我改变了一个UIImageView的图片显示,同样用了一个动画的方式表现。这里用到了一个新的动画API方法:transitionWithView: duration: options: animations: completion:。这个方法跟上面的animateWithDuration系列方法相比多了一个UIView类型的参数,这个参数接收的对象作为动画的作用者。这段代码是我以前做的一个翻卡匹配的小游戏,点击之后的动画效果如下:
在模拟器下使用command+T
放慢了动画的速度之后,我截取了翻转的四张图片:
慢动作翻转
在我们切换图片的时候,原有的图片会基于视图中心位置进行x轴上的翻转,为了达到更逼真的效果,系统还为我们在切换中加上了阴影效果(ps: 再次要说明的是,transition的动画你应该只用在视图的切换当中 —— 你不会在移动中产生任何transition效果的)。
** 这是一个便捷的视图过渡 API,在动画过程中,首先将 fromView 从父视图中删除,然后将 toView 添加,就是做了一个替换操作。**
在需要视图更改时,这个将变得特别有用。
+ (void)transitionWithView:(UIView )view duration:(NSTimeInterval)duration options:(UIViewAnimationOptions)options animations:(void (^ nullable)(void))animations completion:(void (^ nullable)(BOOL finished))completion ;
+ (void)transitionFromView:(UIView )fromView toView:(UIView )toView duration:(NSTimeInterval)duration options:(UIViewAnimationOptions)options completion:(void (^ nullable)(BOOL finished))completion ;
- transform动画
是一个非常重要的属性,它在矩阵变换的层面上改变视图的显示效果,完成旋转、形变、平移等等操作。在它被修改的同时,视图的frame也会被真实改变。有两个数据类型用来表示transform,分别是CGAffineTransform和CATransform3D。前者作用于UIView,后者为layer层次的变换类型。基于后者可以实现更加强大的功能,但我们需要先掌握CGAffineTransform类型的使用。同时,本文讲解也是这个变换类型。
对于想要了解矩阵变换是如何作用实现的,可以参考这篇博客:CGAffineTransform 放射变换
在开始使用transform
实现你的动画之前,我先介绍几个常用的函数:
创建一个仿射矩阵
CGAffineTransformMake 直接赋值来创建
CGAffineTransformMakeRotation 设置角度来生成矩阵
结果就是
CGAffineTransformMakeScale 设置缩放,及改变a、d的值
CGAffineTransformMakeTranslation 设置偏移
改变已经存在的放射矩阵
CGAffineTransformTranslate 原始的基础上加上偏移
CGAffineTransformScale加上缩放
CGAffineTransformRotate加上旋转
CGAffineTransformInvert 反向的仿射矩阵比如(x,y)通过矩阵t得到了(x',y')那么通过这个函数生成的t'作用与(x',y')就能得到原始的(x,y)
CGAffineTransformConcat 通过两个已经存在的放射矩阵生成一个新的矩阵t' = t1 * t2
应用仿射矩阵
CGPointApplyAffineTransform 得到新的点
CGSizeApplyAffineTransform 得到新的size
CGRectApplyAffineTransform 得到新的rect
评测矩阵
CGAffineTransformIsIdentity 是否是CGAffineTransformIsIdentity
CGAffineTransformEqualToTransform 看两个矩阵是否相等
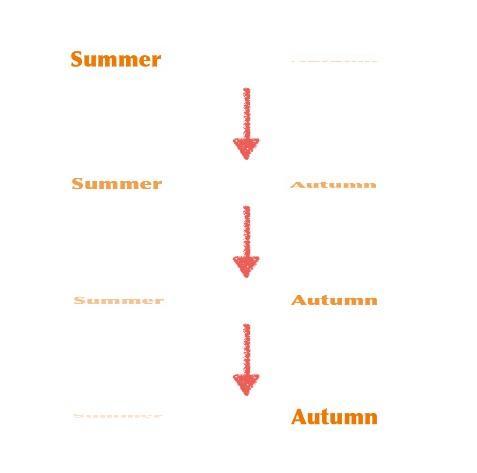
我把demo左下角文字的变形过程记录下来。这里推荐mac上面的一款截取动图的程序licecap,非常简单好用。博主用它来分解动画步骤,然后进行重现。
不难看出在文字的动画中做了两个处理:y轴上的形变缩小、透明度的渐变过程。首先在项目中新增两个UILabel,分别命名为label1、label2.然后在viewDidAppear中加入这么一段代码:
- (void)viewDidAppear: (BOOL)animated {
 label1.transform = CGAffineTransformMakeScale(1, 0);
 label1.alpha = 0;
[UIView animateWithDuration: 3. animations: ^ { label1.transform = CGAffineTransformMakeScale(1, 1);
 label2.transform = CGAffineTransformMakeScale(1, 0.1);
 label1.alpha = 1; label2.alpha = 0; }];
}
这里解释一下为什么label2为什么在动画中y轴逐渐缩小为0.1而不是0。如果我们设为0的话,那么在动画提交之后,label2会直接保持动画结束的状态(这是出于性能优化自动完成的),因此在使用任何缩小的形变时,你可以将缩小值设置的很小,只要不是0。
运行你的代码,文字的形变过程你已经做出来了,但是demo中的动画不仅仅是形变,还包括位移的过程。很显然,我们可以通过改变center
的位置来实现这个效果,但这显然不是我们今天想要的结果,实现新的动画方式来实现更有意义。
动画开始时形变出现的label高度为0,然后逐渐的的变高变为height
,而label从头到尾基于顶部的位置不发生改变。因此动画开始前这个label在y轴上的位置是0,在完成显示之后的y轴中心点为height / 2
(基于label自身的坐标系而言),那么动画的代码就可以写成这样:
- (void)viewDidAppear: (BOOL)animated {
// 初始化动画开始前label的位置 CGFloat offset = label1.frame.size.height * 0.5;
 label1.transform = CGAffineTransformConcat( CGAffineTransformMakeScale(0, 0), CGAffineTransformTranslate(0, -offset) );
label1.alpha = 0;
[UIView animateWithDuration: 3. animations: ^ {
 // 还原label1的变换状态并形变和偏移label2
 label1.transform = CGAffineTransformIdentifier;
label1.transform = CGAffineTransformConcat( CGAffineTransformMakeScale(0, 0), CGAffineTransformTranslate(0, offset) );
label1.alpha = 1;
 label2.alpha = 0; }];}
调整两个label的位置,并且设置其中一个透明显示。然后运行这段代码,你会发现文字转变过程的动画完成了。
- 弹簧动画
+ (void)animateWithDuration:(NSTimeInterval)duration delay:(NSTimeInterval)delay usingSpringWithDamping:(CGFloat)dampingRatio initialSpringVelocity:(CGFloat)velocity options:(UIViewAnimationOptions)options animations:(void (^)(void))animations completion:(void (^ nullable)(BOOL finished))completion
iOS 7.0 增加的方法,新添了两个参数,springDamping
和initialSpringVelocity。
springDamping:弹性阻尼,取值范围时 0 到 1,越接近 0 ,动画的弹性效果就越明显;如果设置为 1,则动画不会有弹性效果。
initialSpringVelocity:视图在动画开始时的速度,>= 0。初始化速度,值越高则物品的速度越快
在 initialSpringVelocity 为 0 ,damping 分别为 0.4,0.6,0.8 的情况下效果如上图,可见阻尼越小,弹簧效果越明显。
在 damping 为 1 ,initialSpringVelocity 分别为 0,5,30 的情况下效果如上图,可见初始速度越大弹簧效果越明显,弹动的幅度越大。
3. UIViewKeyframeAnimations
- 简介
UIViewAnimationWithBlocks 推出于 iOS 7.0,用来实现帧动画 。基础动画只能将 UIView的属性从一个值变化到另一个值,而关键帧动画可以包含任意一个关键帧,使 UIView在多个值之间进行变化。关键帧动画可以看成是若干个连续执行的基础动画。
+ (void)animateKeyframesWithDuration:(NSTimeInterval)duration delay:(NSTimeInterval)delay options:(UIViewKeyframeAnimationOptions)options animations:(void (^)(void))animations completion:(void (^ nullable)(BOOL finished))completion ;
+ (void)addKeyframeWithRelativeStartTime:(double)frameStartTime relativeDuration:(double)frameDuration animations:(void (^)(void))animations ;
其中animateKeyframesWithDuration:delay:options:animations:completion:
参数的使用方法与基础动画大致相同,只是基础动画的 options 是UIViewAnimationOptions 类型,而关键帧动画的 options 是UIViewKeyAnimationOptions 类型。另外,关键帧动画的持续时间( duration )是整个动画的持续时间,也就是所有关键帧持续时间的总和。addKeyframeWithRelativeStartTime:relativeDuration:animations:
中的第一个参数( relativeStartTime )是相对起始时间,表示该关键帧开始执行的时刻在整个动画持续时间中的百分比,取值范围是[0-1]。第二个参数( relativeDuration )是相对持续时间,表示该关键帧占整个动画持续时间的百分比,取值范围也是[0-1]。
- 代码示例
我们demo链接中的落叶动画来,我总共对叶子的center进行过五次修改,我将落叶平移的线性路径绘制出来并且标注关键的转折点:
上面这个平移用UIView动画代码要如何实现呢?毫无疑问,我们需要不断的嵌套UIView动画的使用来实现,具体代码如下:
[self moveLeafWithOffset: (CGPoint){ 15, 80 } completion: ^(BOOL finished) {
 [self moveLeafWithOffset: (CGPoint){ 30, 105 } completion: ^(BOOL finished) {
[self moveLeafWithOffset: (CGPoint){ 40, 110 } completion: ^(BOOL finished) {
 [self moveLeafWithOffset: (CGPoint){ 90, 80 } completion: ^(BOOL finished) {
 [self moveLeafWithOffset: (CGPoint){ 80, 60 } completion: nil duration: 0.6];
} duration: 1.2];
} duration: 1.2];
} duration: 0.6];
} duration: 0.4];

- (void)moveLeafWithOffset: (CGPoint)offset completion: (void(^)(BOOL finished))completion duration: (NSTimeInterval)duration{
 [UIView animateWithDuration: duration delay: 0 options: UIViewAnimationOptionCurveLinear animations: ^{
 CGPoint center = _leaf.center;
 center.x += offset.x;
center.y += offset.y;
 _leaf.center = center;
} completion:
 completion];
}
看起来还蛮容易的,上面的代码只是移动叶子,在gif图中我们的叶子还有旋转,因此我们还需要加上这么一段代码:
[UIView animateWithDuration: 4 animations: ^{ _leaf.transform = CGAffineTransformMakeRotation(M_PI);}];
那么ok,运行这段代码看看,落叶的移动非常的生硬,我们可以明显的看到拐角。其次,这段代码中的duration传入是没有任何意义的(传入一个固定的动画时长无法体现出在落叶飘下这一过程中的层次步骤)对于这两个问题,UIView也提供了另一种动画方式来帮助我们解决这两个问题 —— keyframe动画:
+ (void)animateKeyframesWithDuration:(NSTimeInterval)duration delay:(NSTimeInterval)delay options:(UIViewKeyframeAnimationOptions)options animations:(void (^)(void))animations completion:(void (^ __nullable)(BOOL finished))completion;
+ (void)addKeyframeWithRelativeStartTime:(double)frameStartTime relativeDuration:(double)frameDuration animations:(void (^)(void))animations
第一个方法是创建一个关键帧动画,第二个方法用于在动画的代码块中插入关键帧动画信息,两个参数的意义表示如下:
frameStartTime 表示关键帧动画开始的时刻在整个动画中的百分比
frameDuration 表示这个关键帧动画占用整个动画时长的百分比。
我做了一张图片来表示参数含义:
添加关键帧方法参数说明
对比UIView动画跟关键帧动画,关键帧动画引入了动画占比时长的概念,这让我们能控制每个关键帧动画的占用比例而不是传入一个无意义的动画时长 —— 这让我们的代码更加难以理解。当然,除了动画占比之外,关键帧动画的options
参数也让动画变得更加平滑,下面是关键帧特有的配置参数:
// 连续运算模式,线性
UIViewKeyframeAnimationOptionCalculationModeLinear
// 离散运算模式,只显示关键帧
UIViewKeyframeAnimationOptionCalculationModeDiscrete
// 均匀执行运算模式,线性
UIViewKeyframeAnimationOptionCalculationModePaced
// 平滑运算模式
UIViewKeyframeAnimationOptionCalculationModeCubic
// 平滑均匀运算模式
UIViewKeyframeAnimationOptionCalculationModeCubicPaced
在Demo中我使用的是UIViewKeyframeAnimationOptionCalculationModeCubic
,这个参数使用了贝塞尔曲线让落叶的下落动画变得更加平滑。效果可见最开始的gif动画,你可以修改demo传入的不同参数来查看效果。接下来我们就根据新的方法把上面的UIView动画转换成关键帧动画代码,具体代码如下:
[UIView animateKeyframesWithDuration: 4 delay: 0 options: UIViewKeyframeAnimationOptionCalculationModeLinear animations:
^{
 __block CGPoint center = _leaf.center;
 [UIView addKeyframeWithRelativeStartTime: 0 relativeDuration: 0.1 animations: ^{ _leaf.center = (CGPoint){ center.x + 15, center.y + 80 };
}];
 [UIView addKeyframeWithRelativeStartTime: 0.1 relativeDuration: 0.15 animations: ^{
_leaf.center = (CGPoint){ center.x + 45, center.y + 185 };
}];
 [UIView addKeyframeWithRelativeStartTime: 0.25 relativeDuration: 0.3 animations: ^{
 _leaf.center = (CGPoint){ center.x + 90, center.y + 295 };
}];
 [UIView addKeyframeWithRelativeStartTime: 0.55 relativeDuration: 0.3 animations: ^{ _leaf.center = (CGPoint){ center.x + 180, center.y + 375 };
}];
 [UIView addKeyframeWithRelativeStartTime: 0.85 relativeDuration: 0.15 animations: ^{
 _leaf.center = (CGPoint){ center.x + 260, center.y + 435 };
 }];
[UIView addKeyframeWithRelativeStartTime: 0 relativeDuration: 1 animations: ^{ _leaf.transform = CGAffineTransformMakeRotation(M_PI);
}];
} completion: nil];
可以看到相比UIView的动画,关键帧动画更加直观的让我们明白每一次平移动画的时间占比,代码也相对的更加简洁。


