Arduino UNO之ssd1306显示二维码
开发环境:
Arduino 1.8.12
QRCode
U8g2
使用说明:
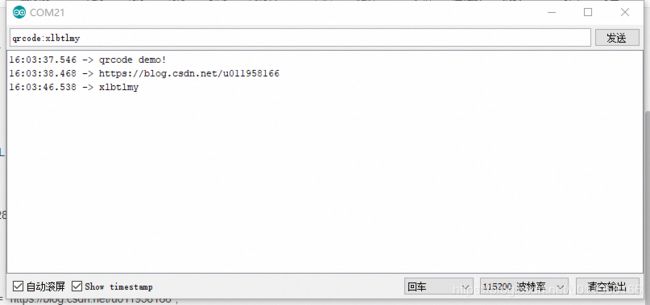
串口接收qrcode:xxxxxxxx格式数据后,会将xxxxxxxx内容生成二维码显示
以Version 3,ECC LOW生成大小为29×29像素的二维码,放大一倍显示

注意事项:
Arduino UNO最多能生成Version 8的二维码,再大动态内存就不够用了,会重启
arduino_qrcode.ino:
#include
#include

#include

#define SIZE  3

/**
   D/C RST SDA SCL
    8   9   10  11
*/
U8G2_SSD1306_128X64_NONAME_1_4W_SW_SPI u8g2(U8G2_R2, /* clock=*/ 11, /* data=*/ 10, /* cs=*/ 13, /* dc=*/ 8, /* reset=*/ 9);

QRCode qrcode;

char *csdn_xlbtlmy = "https://blog.csdn.net/u011958166";

void setup() {
  // put your setup code here, to run once:
  u8g2.begin();

  Serial.begin(115200);
  Serial.println("qrcode demo!");

  show_qrcode(csdn_xlbtlmy);
}

void loop() {
  String rx_buf;
  rx_buf = Serial.readString();

  if (0 == memcmp(rx_buf.c_str(), "qrcode:", 7)) {
    show_qrcode(&rx_buf.c_str()[7]);
  }
}

void show_qrcode(char *str_qrcode)
{
  uint8_t qrcodeData[qrcode_getBufferSize(SIZE)];
  qrcode_initText(&qrcode, qrcodeData, SIZE , ECC_LOW, str_qrcode);

  Serial.println(str_qrcode);

  // start draw
  u8g2.firstPage();
  do {
    // get the draw starting point,128 and 64 is screen size
    uint8_t x0 = 3;
    uint8_t y0 = 3;

    // get QR code pixels in a loop
    for (uint8_t y = 0; y < qrcode.size; y ++) {
      for (uint8_t x = 0; x < qrcode.size; x ++) {
        // Check this point is black or white
        if (qrcode_getModule(&qrcode, x, y)) {
          u8g2.setColorIndex(1);
        } else {
          u8g2.setColorIndex(0);
        }
        // draw the QR code pixels, double it
        u8g2.drawPixel(x0 + x * 2    , y0 + y * 2);
        u8g2.drawPixel(x0 + x * 2 + 1, y0 + y * 2);
        u8g2.drawPixel(x0 + x * 2    , y0 + y * 2 + 1);
        u8g2.drawPixel(x0 + x * 2 + 1, y0 + y * 2 + 1);
      }
    }
  } while (u8g2.nextPage());
}
参考:[教程] Arduino 输出二维码到显示屏上
后续准备使用rotary push旋钮按键结合OLED做一个简单的设置界面:
arduino_gui.ino:
/**
 * 英文
 * x:16 字
 * y:8  字
 * 中文
 * x:8  字
 * y:4  字
 * 建议使用中文
 * 固定中文建议自行获取汉字编码,通过drawXBM方法去显示
 */

#include
#include

#include

#define SIZE  3

/**
   D/C RST SDA SCL
    8   9   10  11
*/
U8G2_SSD1306_128X64_NONAME_1_4W_SW_SPI u8g2(U8G2_R2, /* clock=*/ 11, /* data=*/ 10, /* cs=*/ 13, /* dc=*/ 8, /* reset=*/ 9);

QRCode qrcode;

char *csdn_xlbtlmy = "https://blog.csdn.net/u011958166";

void setup() {
  // put your setup code here, to run once:
  u8g2.begin();

  show_qrcode(csdn_xlbtlmy);
}

void loop() {
  // put your main code here, to run repeatedly:

}

void show_qrcode(char *str_qrcode)
{
  uint8_t qrcodeData[qrcode_getBufferSize(SIZE)];
  qrcode_initText(&qrcode, qrcodeData, SIZE , ECC_LOW, str_qrcode);

  Serial.println(str_qrcode);

  // start draw
  u8g2.firstPage();
  do {
    u8g2.enableUTF8Print();
    //u8g2_font_ncenB08_tr        45%
    //u8g2_font_unifont_t_symbols 69%
    //u8g2_font_unifont_tf        53%
    //u8g2_font_unifont_h_symbols 76%
    //u8g2_font_t0_16_tf          49%
    //u8g2_font_unifont_t_chinese185%
    u8g2.setFont(u8g2_font_t0_16_tf);
    u8g2.setFontDirection(0);

    u8g2.setColorIndex(1);

    //u8g2.drawCircle(7, 7, 7, U8G2_DRAW_ALL);
    u8g2.setCursor(0, 16 - 1);
    u8g2.print(">");

    uint8_t offset_menu = 8;

    u8g2.setCursor(offset_menu - 1, 16 - 1);
    u8g2.print("blog");
    u8g2.setCursor(offset_menu - 1, 32 - 1);
    u8g2.print("logo");
    u8g2.setCursor(offset_menu - 1, 48 - 1);
    u8g2.print("setting");
    u8g2.setCursor(offset_menu - 1, 64 - 1);
    u8g2.print("about");

    // get the draw starting point,128 and 64 is screen size
    uint8_t offset_x = 64 + 3;
    uint8_t offset_y =  0 + 3;

    // get QR code pixels in a loop
    for (uint8_t y = 0; y < qrcode.size; y ++) {
      for (uint8_t x = 0; x < qrcode.size; x ++) {
        // Check this point is black or white
        if (qrcode_getModule(&qrcode, x, y)) {
          u8g2.setColorIndex(1);
        } else {
          u8g2.setColorIndex(0);
        }
        // draw the QR code pixels, double it
        u8g2.drawPixel(offset_x + x * 2    , offset_y + y * 2);
        u8g2.drawPixel(offset_x + x * 2 + 1, offset_y + y * 2);
        u8g2.drawPixel(offset_x + x * 2    , offset_y + y * 2 + 1);
        u8g2.drawPixel(offset_x + x * 2 + 1, offset_y + y * 2 + 1);
      }
    }
  } while (u8g2.nextPage());
}
