(tensorflow学习) Deep Dream原理及实现
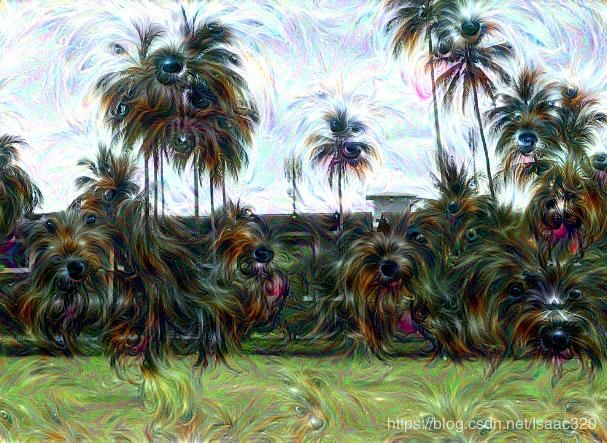
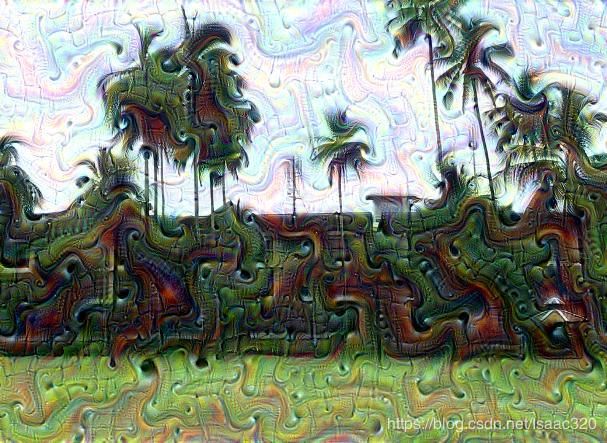
Deep Dream生成的图像
算法原理
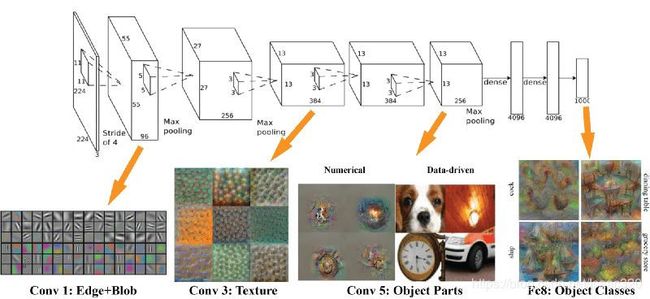
卷积神经网络,我们输入一张图像后经过各种卷积池化等操作,最后分类出图片属于哪个类别。
可见卷积网络能提取图像中的相应特征。如图各个卷积层,如Conv1提取edge和blob,Conv3提取纹理,后面的提取Object Parts了
当然,这是已经训练好的网络,参数已经固定了才能做到以上分类。给一张图像,能计算属于哪一类。如果将图像本身看作可以训练的参数,目的是为了将输出的某一种类别的分数提高,反过来不断迭代改变图像本身,就能将图像往那个类别特征不断变化靠近,就会形成这种deepdream梦幻般的图片。
如何操作呢? 我们需要下载一个已经训练好的网络,然后输入图像,提取某一类别卷积层的值(即相当于是属于这一类别的概率),计算此值与输入图像的梯度关系,将图像按梯度向上变换,迭代多次,得到deepdream图像
谷歌训练好的inception网络 tensorflow_inception_graph.pb文件
链接:https://pan.baidu.com/s/1Fr2SniaTMm_dz9HTjxkPOQ 提取码:gzsd
具体源码
import numpy as np
import tensorflow as tf
from skimage import io,transform

graph = tf.Graph()
model_fn = 'tensorflow_inception_graph.pb'

sess = tf.InteractiveSession(graph=graph)
with tf.gfile.FastGFile(model_fn, 'rb') as f:
    graph_def = tf.GraphDef()
    graph_def.ParseFromString(f.read())
t_input = tf.placeholder(np.float32, name='input')  # define the input tensor
imagenet_mean = 117.0
t_preprocessed = tf.expand_dims(t_input - imagenet_mean, 0)
tf.import_graph_def(graph_def, {'input': t_preprocessed})

def savearray(img_array, img_name):
    io.imsave(img_name,img_array)
    print('img saved: %s' % img_name)
    # io.imshow(io.imread(img_name))
    # io.show()

def resize(img, hw):
    img=transform.resize(img,hw)
    return img

def calc_grad_tiled(img, t_grad, tile_size=512):
    sz = tile_size
    h, w = img.shape[:2]
    sx, sy = np.random.randint(sz, size=2)
    img_shift = np.roll(np.roll(img, sx, 1), sy, 0)  # 先在行上做整体移动,再在列上做整体移动
    grad = np.zeros_like(img)
    for y in range(0, max(h - sz // 2, sz), sz):
        for x in range(0, max(w - sz // 2, sz), sz):
            sub = img_shift[y:y + sz, x:x + sz]
            g = sess.run(t_grad, {t_input: sub})
            grad[y:y + sz, x:x + sz] = g
    return np.roll(np.roll(grad, -sx, 1), -sy, 0)

def render_deepdream(t_obj, img0,
                     iter_n=10, step=1.5, octave_n=4, octave_scale=1.4):
    t_score = tf.reduce_mean(t_obj)
    t_grad = tf.gradients(t_score, t_input)[0]

    img = img0
    # 同样将图像进行金字塔分解
    # 此时提取高频、低频的方法比较简单。直接缩放就可以
    octaves = []
    for i in range(octave_n - 1):
        hw = img.shape[:2]
        lo = resize(img, np.int32(np.float32(hw) / octave_scale))
        hi = img - resize(lo, hw)
        img = lo
        octaves.append(hi)

    # 先生成低频的图像,再依次放大并加上高频
    for octave in range(octave_n):
        if octave > 0:
            hi = octaves[-octave]
            img = resize(img, hi.shape[:2]) + hi
        for i in range(iter_n):
            g = calc_grad_tiled(img, t_grad)
            img += g * (step / (np.abs(g).mean() + 1e-7))
            print('.', end=' ')
    img = img.clip(0, 255)
    savearray(img, 'deepdream.jpg')


if __name__ == '__main__':
    img0=io.imread('t2.png')
    img0 = np.float32(img0)
    name = 'mixed4d_3x3_bottleneck_pre_relu'
    channel = 139
    layer_output = graph.get_tensor_by_name("import/%s:0" % name)
    render_deepdream(layer_output[:, :, :, channel], img0,iter_n=20)
其中
savearray函数为保存图像,
resize是缩放图像,
calc_grad_titled是将图像做随机平移算梯度然后在平移回来,防止出现边缘效应。
OK


