- GitHub地址:mamaral/Onboard
- star: 6.5k
Onboard
仅需添加几行代码,即可轻松创建一个美丽和吸引人的载入体验。
Click Here For More Examples
用法
Adding the following to your Podfile and running pod install should do the trick:
pod 'Onboard'
If you don't want to use CocoaPods, you can use Carthage or grab the files located in the Source folder and pull them into your project manually.
Each onboarding experience is comprised of two primary components - the background and the content pages. The background includes the static background image/video, the page control, and the skip button. The content pages are made up of four pieces, an image/icon, title, body, and action button.
Create individual pages by creating instances of OnboardingContentViewController. Provide a title, body, image, text for an action button, and within the action block handle whatever you want to do when the users press the button. If you don't want a button, you can leave both the button text and action handler nil.
每个载入体验包括两个主要组件 - 背景和内容页面。 背景包括静态背景图像/视频,页面控制和跳过按钮。 内容页由四个部分组成,一个图像/图标,标题,正文和动作按钮。
通过创建 OnboardingContentViewController 的实例来创建单个页面。 为操作按钮提供标题,正文,图像,文字,以及在用户按下按钮时您希望做什么的动作块句柄。 如果你不想要一个按钮,你可以保留按钮文本和动作处理程序为 nil。
Objective-C
// 创建单个页面视图控制器:OnboardingContentViewController
OnboardingContentViewController *firstPage = [OnboardingContentViewController contentWithTitle:@"Page Title" body:@"Page body goes here." image:[UIImage imageNamed:@"icon"] buttonText:@"Text For Button" action:^{
    // do something here when users press the button, like ask for location services permissions, register for push notifications, connect to social media, or finish the onboarding process
    // 当用户按下按钮时,执行某些操作,例如要求位置服务权限,注册推送通知,连接到社交媒体或完成载入进程。
}];
Swift
let firstPage = OnboardingContentViewController(title: "Page Title", body: "Page body goes here.", image: UIImage(named: "icon"), buttonText: "Text For Button") { () -> Void in
    // do something here when users press the button, like ask for location services permissions, register for push notifications, connect to social media, or finish the onboarding process
    }
Then create the OnboardingViewController by providing either a background image or a URL to a local video file in your project, and an array of content view controllers you just created. You can then present the view modally and get the onboarding process started!
然后在项目中 【通过提供背景图片或本地视频文件的URL,以及刚创建的一系列内容视图控制器】来创建 OnboardingViewController。 然后,您可以以模态方式呈现视图,并启动载入过程!
Objective-C
// 创建启动引导主页: OnboardingViewController

// Image
OnboardingViewController *onboardingVC = [OnboardingViewController onboardWithBackgroundImage:[UIImage imageNamed:@"background"] contents:@[firstPage, secondPage, thirdPage]];

// Video
NSBundle *bundle = [NSBundle mainBundle];
NSString *moviePath = [bundle pathForResource:@"yourVid" ofType:@"mp4"];
NSURL *movieURL = [NSURL fileURLWithPath:moviePath];

OnboardingViewController *onboardingVC = [OnboardingViewController onboardWithBackgroundVideoURL:movieURL contents:@[firstPage, secondPage, thirdPage]];
Swift
// Image
let onboardingVC = OnboardingViewController(backgroundImage: UIImage(named: "background"), contents: [firstPage, secondPage, thirdPage])

// Video
let bundle = NSBundle.mainBundle()
let moviePath = bundle.pathForResource("yourVid", ofType: "mp4")
let movieURL = NSURL(fileURLWithPath: moviePath!)

let onboardingVC = OnboardingViewController(backgroundVideoURL: movieUrl, contents: [firstPage, secondPage, thirdPage])
With only a few lines of code you have a beautiful, end-to-end onboarding process that will get your users excited to use your awesome application.
Customization 定制
The iconImageView, titleLabel, bodyLabel, and actionButton properties are exposed for customizing fonts, sizing, etc., and the spacing between elements on the content pages can be customized as well:
onboardingVC.topPadding = 20;
onboardingVC.underIconPadding = 10;
onboardingVC.underTitlePadding = 15;
onboardingVC.bottomPadding = 20;
Blurring, Masking, and Fading 模糊,遮罩和褪色
By default, the image you use for the background will have a mask applied over it, darkening it a bit. This is to add a little bit of contrast so the text can more easily be seen. This can easily be disabled if your image is already edited or looks fine as-is:
默认情况下,背景图片上会有一层遮罩,使其变暗。 这会增加一点点的对比度,使得文本可以更容易被看到。 如果你的图片已经被编辑过了或者它本身看起来就很好,你可以很容易禁用遮罩层:
onboardingVC.shouldMaskBackground = NO; // defaults to YES
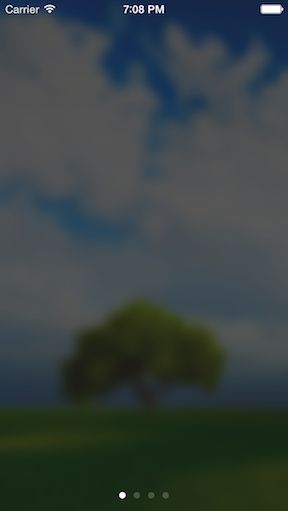
We can also apply a blur to your background image:
onboardingVC.shouldBlurBackground = YES; // defaults to NO
Apply a fade effect to the icons, text, and buttons, while transitioning between pages. Contents fade out as you scroll away, and the contents for the next page fade in as they scroll in.
在页面之间转换时,对图标,文本和按钮应用淡入淡出效果。 当你滚动时,内容淡出,下一页的内容会在滚动时淡入淡出。
onboardingVC.shouldFadeTransitions = YES; // defaults to NO
Note: Ensure you do not cause the onboard view controller's view to be loaded prior to setting these properties, as these values only take effect when the view controller's viewDidLoad is called, so doing something like setting your onboardingVC.view.backgroundColor = [UIColor whiteColor]; before setting this values would lead to the setting of these to not take effect.
确保不要在设置这些属性之前加载 OnboardingViewController 的视图,因为这些值仅在调用视图控制器的 viewDidLoad 时生效,因此可以像设置 onboardingVC.view.backgroundColor = [UIColor whiteColor]; 时那样做;在设置这个值之前会导致这些设置不生效。
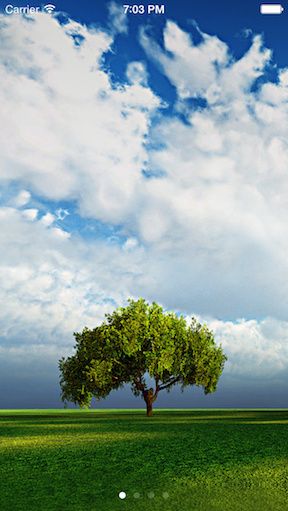
You can tweak these settings in a few different combinations to get your desired effect:
normal
dark
lightblur
darkblur
Auto-Navigation 自动导航
If you want to automatically move users to the next page in the onboarding process when they press the action button simply set the movesToNextViewController property to YES on any OnboardingContentViewController that isn’t the last view controller in the onboarding process. Coupled with this, you can disable the ability to swipe between contents by setting the swipingEnabled property on the OnboardingViewController to NO. This allows you to have greater control over the onboarding process if you desire. Finally, if your design lends itself to not having a page control, or if it is only one page, you can set the hidePageControl property to YES and the page control dots will not appear.
contentVC.movesToNextViewController = YES; // Button 按下时自动滑动到下一页
onboardingVC.swipingEnabled = NO;          // 禁用手势滑动
onboardingVC.hidePageControl = YES;        // 隐藏页面小圆点
Skipping 跳过
If you want to allow users to skip the onboarding process, enable skipping on the onboarding view controller and set a block to be executed when the skip button is pressed.
onboardingVC.allowSkipping = YES;
onboardingVC.skipHandler = ^{
    // Dismiss, fade out, etc...
};
Blocks 块
There may be cases in which you want to do something when the content pages are about to appear, and when they did appear. In this case, you can set the viewWillAppearBlock and viewDidAppearBlock properties on any or all of the content pages to handle whatever you’d like.
contentVC.viewWillAppearBlock = ^{
    // do something when the view will appear here…
}

contentVC.viewDidAppearBlock = ^{
    // do something when the view appears here…
}
Notes
I'm not currently supporting landscape at the moment, so I would recommend either using this in an application that only supports portrait, or wrapping it in a subclassed UINavigationController that only supports portrait.
目前不支持横屏模式,所以我建议在只支持竖屏的应用程序中使用,或者将其包装在仅支持竖屏的子类UINavigationController 中。
Community
Questions, comments, issues, and pull requests welcomed!!
License
This project is made available under the MIT license. See LICENSE.txt for details.
Demo 用法:
//
//  AppDelegate.m
//  Onboard
//
//  Created by Mike on 8/17/14.
//  Copyright (c) 2014 Mike Amaral. All rights reserved.
//

#import "AppDelegate.h"
#import "OnboardingViewController.h"
#import "OnboardingContentViewController.h"

static NSString * const kUserHasOnboardedKey = @"user_has_onboarded";

@implementation AppDelegate

- (BOOL)application:(UIApplication *)application didFinishLaunchingWithOptions:(NSDictionary *)launchOptions {
    self.window = [[UIWindow alloc] initWithFrame:[[UIScreen mainScreen] bounds]];
    self.window.backgroundColor = [UIColor whiteColor];

    // 确定用户是否已经加载过了 onboard
    BOOL userHasOnboarded = [[NSUserDefaults standardUserDefaults] boolForKey:kUserHasOnboardedKey];

    // 如果用户已经加载过了 onboard,只需为应用程序设置正常的根视图控制器
    if (userHasOnboarded) {
        [self setupNormalRootViewController];
    }

    // 否则将根视图控制器设置为 OnboardingViewController
    else {
        // 样式一:标准样式
        self.window.rootViewController = [self generateStandardOnboardingVC];

        // 样式二:动画模式
//        self.window.rootViewController = [self generateMovieOnboardingVC];

        // 样式三:内容视频
//        self.window.rootViewController = [self generateContentVideoOnboardingVC];


//        __weak typeof(self) weakSelf = self;
//
//        self.window.rootViewController = [[MyOnboardingViewController alloc] initWithCompletionHandler:^{
//            [weakSelf setupNormalRootViewController];
//        }];
    }

    // UIStatusBarStyleDefault       默认,黑色状态栏,用于浅色背景
    // UIStatusBarStyleLightContent  浅色状态栏,用于黑色背景
    application.statusBarStyle = UIStatusBarStyleLightContent;

    [self.window makeKeyAndVisible];

    return YES;
}

#pragma mark - 设置正常的根视图控制器
- (void)setupNormalRootViewController {
    // create whatever your root view controller is going to be, in this case just a simple view controller
    // wrapped in a navigation controller
    UIViewController *mainVC = [UIViewController new];
    mainVC.title = @"Main Application";

    self.window.rootViewController = [[UINavigationController alloc] initWithRootViewController:mainVC];
}

#pragma mark 处理 onboard 加载完成后的情况
- (void)handleOnboardingCompletion {
    // set that we have completed onboarding so we only do it once... for demo
    // purposes we don't want to have to set this every time so I'll just leave
    // this here...
    // 设置我们已经完成 onboard 载入,所以我们只做一次...为了演示目的,我们不想每次都设置这个,所以我只要离开这里...
//    [[NSUserDefaults standardUserDefaults] setBool:YES forKey:kUserHasOnboardedKey];

    // transition to the main application
    [self setupNormalRootViewController];
}

#pragma mark -
#pragma mark 样式一:标准样式
- (OnboardingViewController *)generateStandardOnboardingVC {
    // 第一页
    OnboardingContentViewController *firstPage = [OnboardingContentViewController contentWithTitle:@"What A Beautiful Photo" body:@"This city background image is so beautiful." image:[UIImage imageNamed:@"blue"] buttonText:@"Enable Location Services" action:^{
        [[[UIAlertView alloc] initWithTitle:nil message:@"在这里,您可以提示用户开启各种应用程序权限,为他们提供有关您希望这些权限增强其体验的有用信息,增加您将获得这些权限的机会" delegate:nil cancelButtonTitle:@"OK" otherButtonTitles:nil] show];
    }];

    // 第二页
    OnboardingContentViewController *secondPage = [OnboardingContentViewController contentWithTitle:@"I'm so sorry" body:@"I can't get over the nice blurry background photo." image:[UIImage imageNamed:@"red"] buttonText:@"Connect With Facebook" action:^{
        [[[UIAlertView alloc] initWithTitle:nil message:@"提示用户在启动时做其他很酷的事情。 正如你看到的那样,点击前一页按钮会自动导航到下一页。 很酷是不是?" delegate:nil cancelButtonTitle:@"OK" otherButtonTitles:nil] show];
    }];
    secondPage.movesToNextViewController = YES; //第二页按钮按下后自动导航到第三页
    secondPage.viewDidAppearBlock = ^{
        [[[UIAlertView alloc] initWithTitle:@"Welcome!" message:@"您已到达第二页,此弹出警告在页面的 viewDidAppearBlock 中显示。" delegate:nil cancelButtonTitle:@"OK" otherButtonTitles:nil] show];
    };

    // 第三页
    OnboardingContentViewController *thirdPage = [OnboardingContentViewController contentWithTitle:@"Seriously Though" body:@"Kudos to the photographer." image:[UIImage imageNamed:@"yellow"] buttonText:@"Get Started" action:^{
        [self handleOnboardingCompletion];
    }];

    // 容器视图控制器
    OnboardingViewController *onboardingVC = [OnboardingViewController onboardWithBackgroundImage:[UIImage imageNamed:@"street"] contents:@[firstPage, secondPage, thirdPage]];
    onboardingVC.shouldFadeTransitions = YES; // 设置每一页内容淡入淡出过渡
    onboardingVC.fadePageControlOnLastPage = YES;
    onboardingVC.fadeSkipButtonOnLastPage = YES;

    // 如果你想要允许用户跳过启动引导页,则启用 allowSkipping 并设置用户点击跳过按钮时执行的 Block块
    onboardingVC.allowSkipping = YES;
    onboardingVC.skipHandler = ^{
        [self handleOnboardingCompletion];
    };

    return onboardingVC;
}

#pragma mark 样式二:动画模式
- (OnboardingViewController *)generateMovieOnboardingVC {
    // 第一页
    OnboardingContentViewController *firstPage = [[OnboardingContentViewController alloc] initWithTitle:@"Everything Under The Sun" body:@"The temperature of the photosphere is over 10,000°F." image:nil buttonText:nil action:nil];
    firstPage.topPadding = -15;
    firstPage.underTitlePadding = 160;
    firstPage.titleLabel.textColor = [UIColor colorWithRed:239/255.0 green:88/255.0 blue:35/255.0 alpha:1.0];
    // 标题和正文的字体都是自定义的
    firstPage.titleLabel.font = [UIFont fontWithName:@"SFOuterLimitsUpright" size:38.0];
    firstPage.bodyLabel.textColor = [UIColor colorWithRed:239/255.0 green:88/255.0 blue:35/255.0 alpha:1.0];
    firstPage.bodyLabel.font = [UIFont fontWithName:@"NasalizationRg-Regular" size:18.0];

    // 第二页
    OnboardingContentViewController *secondPage = [[OnboardingContentViewController alloc] initWithTitle:@"Every Second" body:@"600 million tons of protons are converted into helium atoms." image:nil buttonText:nil action:nil];
    secondPage.titleLabel.font = [UIFont fontWithName:@"SFOuterLimitsUpright" size:38.0];
    secondPage.underTitlePadding = 170;
    secondPage.topPadding = 0;
    secondPage.titleLabel.textColor = [UIColor colorWithRed:251/255.0 green:176/255.0 blue:59/255.0 alpha:1.0];
    secondPage.bodyLabel.textColor = [UIColor colorWithRed:251/255.0 green:176/255.0 blue:59/255.0 alpha:1.0];
    secondPage.bodyLabel.font = [UIFont fontWithName:@"NasalizationRg-Regular" size:18.0];

    // 第三页
    OnboardingContentViewController *thirdPage = [[OnboardingContentViewController alloc] initWithTitle:@"We're All Star Stuff" body:@"Our very bodies consist of the same chemical elements found in the most distant nebulae, and our activities are guided by the same universal rules." image:nil buttonText:@"Explore the universe" action:^{
        [self handleOnboardingCompletion];
    }];
    thirdPage.topPadding = 10;
    thirdPage.underTitlePadding = 160;
    thirdPage.bottomPadding = -10;
    thirdPage.titleLabel.font = [UIFont fontWithName:@"SFOuterLimitsUpright" size:38.0];
    thirdPage.titleLabel.textColor = [UIColor colorWithRed:58/255.0 green:105/255.0 blue:136/255.0 alpha:1.0];
    thirdPage.bodyLabel.textColor = [UIColor colorWithRed:58/255.0 green:105/255.0 blue:136/255.0 alpha:1.0];
    thirdPage.bodyLabel.font = [UIFont fontWithName:@"NasalizationRg-Regular" size:15.0];
    [thirdPage.actionButton setTitleColor:[UIColor colorWithRed:239/255.0 green:88/255.0 blue:35/255.0 alpha:1.0] forState:UIControlStateNormal];
    thirdPage.actionButton.titleLabel.font = [UIFont fontWithName:@"SpaceAge" size:17.0];

    // 容器视图的背景图是一个 mp4 视频文件
    NSBundle *bundle = [NSBundle mainBundle];
    NSString *moviePath = [bundle pathForResource:@"sun" ofType:@"mp4"];
    NSURL *movieURL = [NSURL fileURLWithPath:moviePath];

    OnboardingViewController *onboardingVC = [[OnboardingViewController alloc] initWithBackgroundVideoURL:movieURL contents:@[firstPage, secondPage, thirdPage]];
    onboardingVC.shouldFadeTransitions = YES;
    onboardingVC.shouldMaskBackground = NO;
    // 设置当前 pageControl 的颜色:橙色
    onboardingVC.pageControl.currentPageIndicatorTintColor = [UIColor colorWithRed:239/255.0 green:88/255.0 blue:35/255.0 alpha:1.0];
    // 设置默认 pageControl 的颜色:白色
    onboardingVC.pageControl.pageIndicatorTintColor = [UIColor whiteColor];
    return onboardingVC;
}

#pragma mark 样式三:内容视频
- (OnboardingViewController *)generateContentVideoOnboardingVC {
    // 每一页的 video 是视频
    NSBundle *bundle = [NSBundle mainBundle];
    NSString *moviePath = [bundle pathForResource:@"sun" ofType:@"mp4"];
    NSURL *movieURL = [NSURL fileURLWithPath:moviePath];

    // 第一页
    OnboardingContentViewController *firstPage = [OnboardingContentViewController contentWithTitle:@"Everything Under The Sun" body:@"The temperature of the photosphere is over 10,000°F." videoURL:movieURL buttonText:nil action:nil];
    firstPage.topPadding = -15;
    firstPage.underTitlePadding = 160;
    firstPage.titleLabel.textColor = [UIColor colorWithRed:239/255.0 green:88/255.0 blue:35/255.0 alpha:1.0];
    firstPage.titleLabel.font = [UIFont fontWithName:@"SFOuterLimitsUpright" size:38.0];
    firstPage.bodyLabel.textColor = [UIColor colorWithRed:239/255.0 green:88/255.0 blue:35/255.0 alpha:1.0];
    firstPage.bodyLabel.font = [UIFont fontWithName:@"NasalizationRg-Regular" size:18.0];

    // 第二页
    OnboardingContentViewController *secondPage = [OnboardingContentViewController contentWithTitle:@"Every Second" body:@"600 million tons of protons are converted into helium atoms." videoURL:movieURL buttonText:nil action:nil];
    secondPage.titleLabel.font = [UIFont fontWithName:@"SFOuterLimitsUpright" size:38.0];
    secondPage.underTitlePadding = 170;
    secondPage.topPadding = 0;
    secondPage.titleLabel.textColor = [UIColor colorWithRed:251/255.0 green:176/255.0 blue:59/255.0 alpha:1.0];
    secondPage.bodyLabel.textColor = [UIColor colorWithRed:251/255.0 green:176/255.0 blue:59/255.0 alpha:1.0];
    secondPage.bodyLabel.font = [UIFont fontWithName:@"NasalizationRg-Regular" size:18.0];

    // 第三页
    OnboardingContentViewController *thirdPage = [OnboardingContentViewController contentWithTitle:@"We're All Star Stuff" body:@"Our very bodies consist of the same chemical elements found in the most distant nebulae, and our activities are guided by the same universal rules." videoURL:movieURL buttonText:nil action:^{
        [self handleOnboardingCompletion];
    }];
    thirdPage.topPadding = 10;
    thirdPage.underTitlePadding = 160;
    thirdPage.bottomPadding = -10;
    thirdPage.titleLabel.font = [UIFont fontWithName:@"SFOuterLimitsUpright" size:38.0];
    thirdPage.titleLabel.textColor = [UIColor colorWithRed:58/255.0 green:105/255.0 blue:136/255.0 alpha:1.0];
    thirdPage.bodyLabel.textColor = [UIColor colorWithRed:58/255.0 green:105/255.0 blue:136/255.0 alpha:1.0];
    thirdPage.bodyLabel.font = [UIFont fontWithName:@"NasalizationRg-Regular" size:15.0];
    [thirdPage.actionButton setTitleColor:[UIColor colorWithRed:239/255.0 green:88/255.0 blue:35/255.0 alpha:1.0] forState:UIControlStateNormal];
    thirdPage.actionButton.titleLabel.font = [UIFont fontWithName:@"SpaceAge" size:17.0];

    // 容器视图控制器
    OnboardingViewController *onboardingVC = [[OnboardingViewController alloc] initWithBackgroundImage:nil contents:@[firstPage, secondPage, thirdPage]];
    onboardingVC.view.backgroundColor = [UIColor blackColor];
    onboardingVC.shouldFadeTransitions = YES;
    onboardingVC.shouldMaskBackground = NO;
    onboardingVC.pageControl.currentPageIndicatorTintColor = [UIColor colorWithRed:239/255.0 green:88/255.0 blue:35/255.0 alpha:1.0];
    onboardingVC.pageControl.pageIndicatorTintColor = [UIColor whiteColor];
    return onboardingVC;
}

@end


