Spring Cloud入门-Bus消息总线(Hoxton版本)
文章目录
- Spring Cloud入门系列汇总
- 摘要
- Spring Cloud Bus 简介
- RabbitMQ的安装
- 动态刷新配置
- 给config-server添加消息总线支持
- 给config-client添加消息总线支持
- 动态刷新配置演示
- 配合WebHooks使用
- 使用到的模块
- 项目源码地址
项目使用的Spring Cloud为Hoxton版本,Spring Boot为2.2.2.RELEASE版本
Spring Cloud入门系列汇总
| 序号 | 内容 | 链接地址 |
|---|---|---|
| 1 | Spring Cloud入门-十分钟了解Spring Cloud | https://blog.csdn.net/ThinkWon/article/details/103715146 |
| 2 | Spring Cloud入门-Eureka服务注册与发现(Hoxton版本) | https://blog.csdn.net/ThinkWon/article/details/103726655 |
| 3 | Spring Cloud入门-Ribbon服务消费者(Hoxton版本) | https://blog.csdn.net/ThinkWon/article/details/103729080 |
| 4 | Spring Cloud入门-Hystrix断路器(Hoxton版本) | https://blog.csdn.net/ThinkWon/article/details/103732497 |
| 5 | Spring Cloud入门-Hystrix Dashboard与Turbine断路器监控(Hoxton版本) | https://blog.csdn.net/ThinkWon/article/details/103734664 |
| 6 | Spring Cloud入门-OpenFeign服务消费者(Hoxton版本) | https://blog.csdn.net/ThinkWon/article/details/103735751 |
| 7 | Spring Cloud入门-Zuul服务网关(Hoxton版本) | https://blog.csdn.net/ThinkWon/article/details/103738851 |
| 8 | Spring Cloud入门-Config分布式配置中心(Hoxton版本) | https://blog.csdn.net/ThinkWon/article/details/103739628 |
| 9 | Spring Cloud入门-Bus消息总线(Hoxton版本) | https://blog.csdn.net/ThinkWon/article/details/103753372 |
| 10 | Spring Cloud入门-Sleuth服务链路跟踪(Hoxton版本) | https://blog.csdn.net/ThinkWon/article/details/103753896 |
| 11 | Spring Cloud入门-Consul服务注册发现与配置中心(Hoxton版本) | https://blog.csdn.net/ThinkWon/article/details/103756139 |
| 12 | Spring Cloud入门-Gateway服务网关(Hoxton版本) | https://blog.csdn.net/ThinkWon/article/details/103757927 |
| 13 | Spring Cloud入门-Admin服务监控中心(Hoxton版本) | https://blog.csdn.net/ThinkWon/article/details/103758697 |
| 14 | Spring Cloud入门-Oauth2授权的使用(Hoxton版本) | https://blog.csdn.net/ThinkWon/article/details/103761687 |
| 15 | Spring Cloud入门-Oauth2授权之JWT集成(Hoxton版本) | https://blog.csdn.net/ThinkWon/article/details/103763364 |
| 16 | Spring Cloud入门-Oauth2授权之基于JWT完成单点登录(Hoxton版本) | https://blog.csdn.net/ThinkWon/article/details/103766368 |
| 17 | Spring Cloud入门-Nacos实现注册和配置中心(Hoxton版本) | https://blog.csdn.net/ThinkWon/article/details/103769680 |
| 18 | Spring Cloud入门-Sentinel实现服务限流、熔断与降级(Hoxton版本) | https://blog.csdn.net/ThinkWon/article/details/103770879 |
| 19 | Spring Cloud入门-Seata处理分布式事务问题(Hoxton版本) | https://blog.csdn.net/ThinkWon/article/details/103786102 |
| 20 | Spring Cloud入门-汇总篇(Hoxton版本) | https://blog.csdn.net/ThinkWon/article/details/103786588 |
摘要
Spring Cloud Bus 使用轻量级的消息代理来连接微服务架构中的各个服务,可以将其用于广播状态更改(例如配置中心配置更改)或其他管理指令,本文将对其用法进行详细介绍。
Spring Cloud Bus 简介
我们通常会使用消息代理来构建一个主题,然后把微服务架构中的所有服务都连接到这个主题上去,当我们向该主题发送消息时,所有订阅该主题的服务都会收到消息并进行消费。使用 Spring Cloud Bus 可以方便地构建起这套机制,所以 Spring Cloud Bus 又被称为消息总线。Spring Cloud Bus 配合 Spring Cloud Config 使用可以实现配置的动态刷新。目前 Spring Cloud Bus 支持两种消息代理:RabbitMQ 和 Kafka,下面以 RabbitMQ 为例来演示下使用Spring Cloud Bus 动态刷新配置的功能。
RabbitMQ的安装
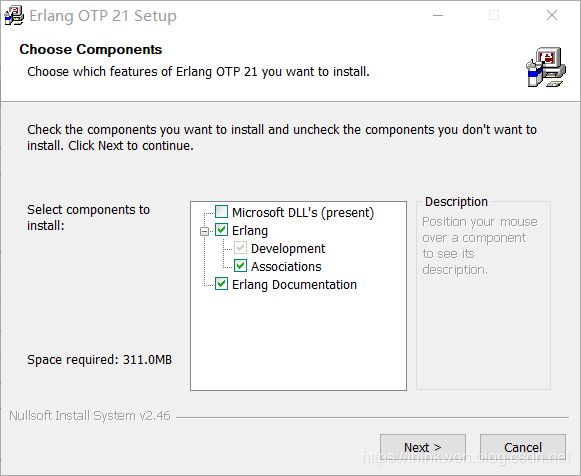
安装Erlang,下载地址:http://erlang.org/download…
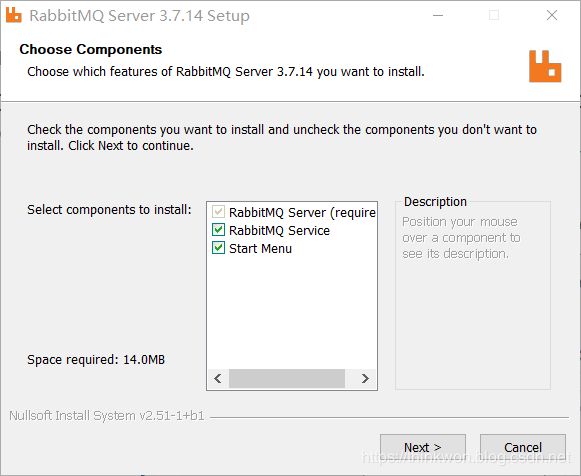
安装RabbitMQ,下载地址:https://dl.bintray.com/rabbitmq…
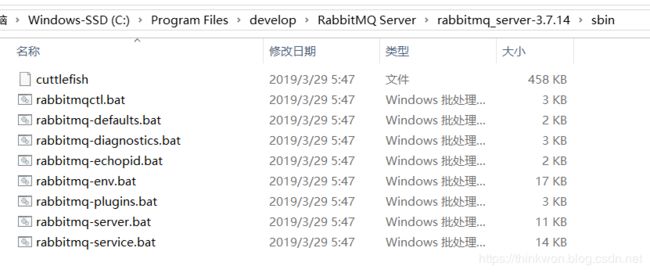
安装完成后,进入RabbitMQ安装目录下的sbin目录:
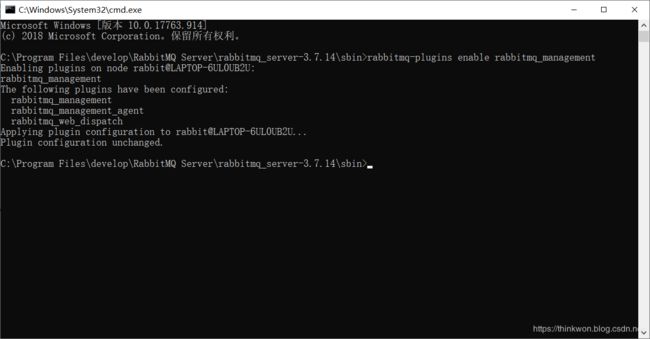
在RabbitMQ安装目录下的sbin目录的地址栏输入cmd并回车启动命令行,然后输入以下命令启动管理功能:
rabbitmq-plugins enable rabbitmq_management
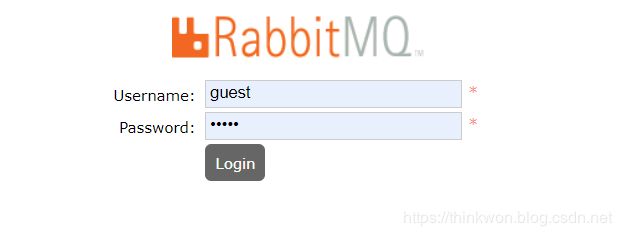
访问地址查看是否安装成功:http://localhost:15672/
输入账号密码并登录:guest guest
动态刷新配置
使用 Spring Cloud Bus 动态刷新配置需要配合 Spring Cloud Config 一起使用,我们使用上一节中的config-server、config-client模块来演示下该功能。
给config-server添加消息总线支持
在pom.xml中添加相关依赖:
<dependency>
    <groupId>org.springframework.cloudgroupId>
    <artifactId>spring-cloud-starter-bus-amqpartifactId>
dependency>
<dependency>
    <groupId>org.springframework.bootgroupId>
    <artifactId>spring-boot-starter-actuatorartifactId>
dependency>
添加配置文件application-amqp.yml,主要是添加了RabbitMQ的配置及暴露了刷新配置的Actuator端点;
server:
  port: 8904

spring:
  application:
    name: config-server
  cloud:
    config:
      server:
        git:
          # 配置存储配置信息的Git仓库
          uri: https://gitee.com/JourWon/springcloud-config.git
          username: JourWon
          password: 123456
          # 开启启动时直接从git获取配置
          clone-on-start: true
          # 获取子目录下的配置
    #          search-paths: '{application}'
  # rabbitmq相干配置
  rabbitmq:
    host: localhost
    port: 5672
    username: guest
    password: guest

eureka:
  client:
    register-with-eureka: true
    fetch-registry: true
    service-url:
      defaultZone: http://localhost:8001/eureka/

# 暴露bus刷新配置的端点
management:
  endpoints:
    web:
      exposure:
        include: 'bus-refresh'
给config-client添加消息总线支持
在pom.xml中添加相关依赖:
<dependency>
    <groupId>org.springframework.cloudgroupId>
    <artifactId>spring-cloud-starter-bus-amqpartifactId>
dependency>
添加配置文件bootstrap-amqp1.yml及bootstrap-amqp2.yml用于启动两个不同的config-client,两个配置文件只有端口号不同;
server:
  port: 9004

spring:
  application:
    name: config-client
  cloud:
    # config客户端配置
    config:
      # 分支名称
      label: master
      # 启用配置后缀名称
      profile: dev
      # 配置文件名称
      name: config
      discovery:
        enabled: true
        service-id: config-server
  # rabbitmq配置
  rabbitmq:
    host: localhost
    port: 5672
    username: guest
    password: guest

eureka:
  client:
    register-with-eureka: true
    fetch-registry: true
    service-url:
      defaultZone: http://localhost:8001/eureka/

management:
  endpoints:
    web:
      exposure:
        include: 'refresh'
动态刷新配置演示
我们先启动相关服务,启动eureka-server,以application-amqp.yml为配置启动config-server,以bootstrap-amqp1.yml为配置启动config-client,以bootstrap-amqp2.yml为配置再启动一个config-client,启动后注册中心显示如下:
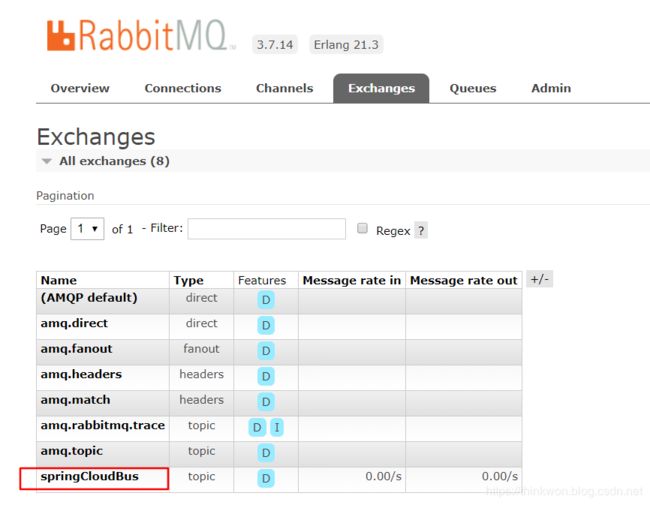
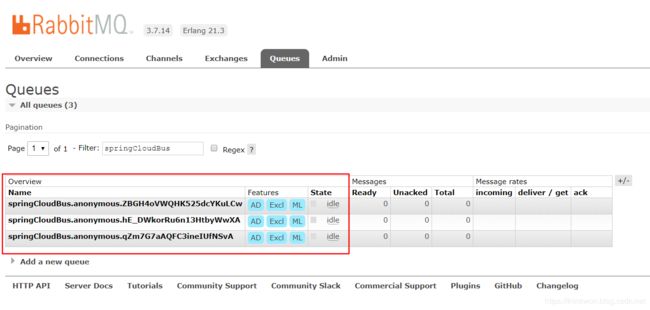
启动所有服务后,我们登录RabbitMQ的控制台可以发现 Spring Cloud Bus 创建了一个叫springCloudBus的交换机及三个以 springCloudBus.anonymous开头的队列:
调用http://localhost:9004/configInfo,结果如下
config info for dev(master)
我们先修改Git仓库中master分支下的config-dev.yml配置文件:
\调用注册中心的接口刷新所有配置.png)# 修改前信息
config:
info: "config info for dev(master)"
# 修改后信息
config:
info: "update config info for dev(master)"
调用注册中心的接口刷新所有配置:http://localhost:8904/actuator/bus-refresh
刷新后再分别调用 http://localhost:9004/configInfo 和 http://localhost:9005/configInfo 获取配置信息,发现都已经刷新了;
update config info for dev(master)
如果只需要刷新指定实例的配置可以使用以下格式进行刷新:http://localhost:8904/actuator/bus-refresh/{destination} ,我们这里以刷新运行在9004端口上的config-client为例http://localhost:8904/actuator/bus-refresh/config-client:9004。
配合WebHooks使用
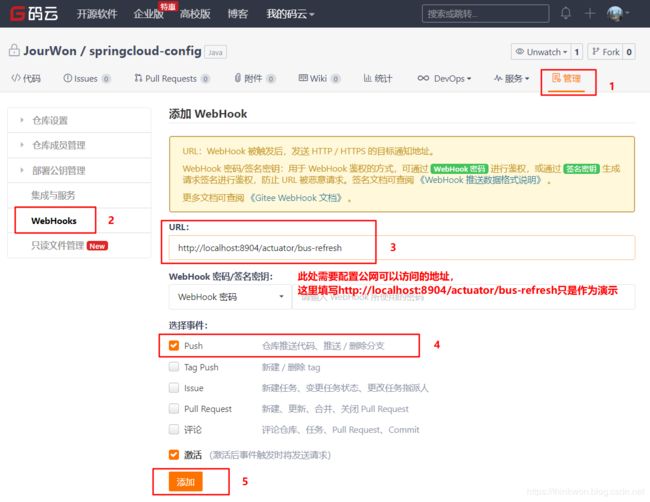
WebHooks相当于是一个钩子函数,我们可以配置当向Git仓库push代码时触发这个钩子函数,这里以Gitee为例来介绍下其使用方式,这里当我们向配置仓库push代码时就会自动刷新服务配置了。
使用到的模块
springcloud-learning
├── eureka-server -- eureka注册中心
├── config-server -- 配置中心服务
└── config-client -- 获取配置的客户端服务
项目源码地址
GitHub项目源码地址
