1 Cocoapods的机制详解 (重点)
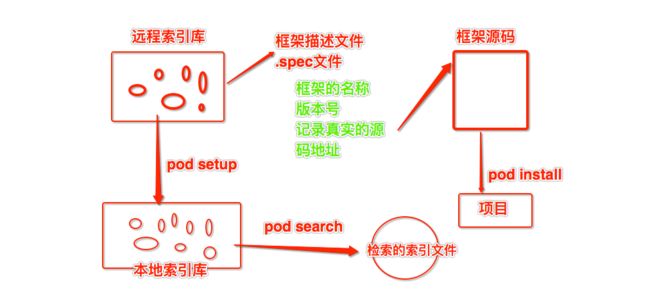
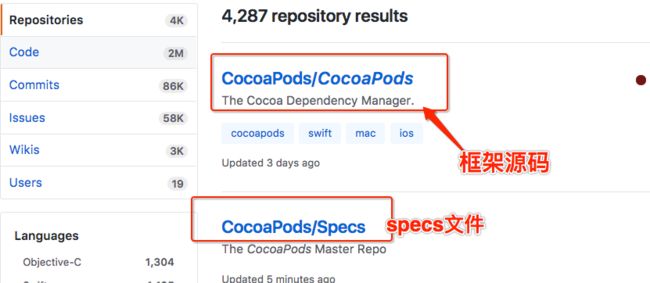
远程索引库里面全是描述文件,也包含框架的描述文件.spec文件
.spec文件里面有框架的名称、版本、真实的源码地址...
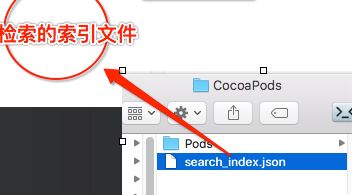
通过pod step下载远程索引库到本地成本地索引库,其中本地索引库会生成检索的检索文件
我们使用的pod search就是在本地索引库检索的。
注意:本地索引库生成以后,如果远程索引库有更新新内容,这个新内容通过pod search是搜索不到的。这时只能重新下载本地索引库(pod setup)
远程索引库:
本地索引库目录/Users/用户名/.cocoapods/repos/master 把用户名改成自己的就OK
检索的索引文件目录/Users/用户名/Library/Caches/CocoaPods 把用户名改成自己的就OK
删除索引文件后,pod search会先从远程下载,然后在在本地搜索
2 创建一个自己的框架并上传到github
如果git的使用还不太熟悉,可以参考git的基本使用
2.1 编写自己的源码并上传到github
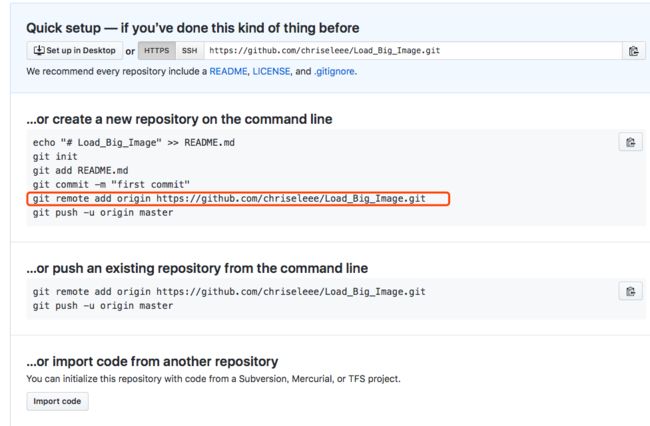
2.1.1.创建远程仓库
复制:git remote add origin https://github.com/chriseleee/Load_Big_Image.git
2.1.2.编写我的代码库,并上传到github
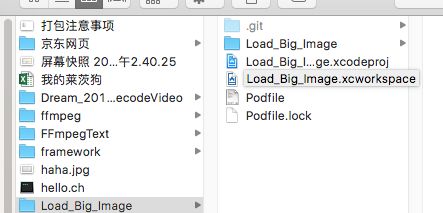
以我的Load_Big_Image为例:
cd 指定目录
git init
git add .
git commit -m '标记信息'
git remote add origin https://github.com/chriseleee/MyKu.git
git remote
git push origin master
创建版本号
git tag '0.0.1'
git push --tags
3 编写版本对应的描述文件podspec
pod spec create Load_Big_Image
Load_Big_Image为描述文件的名称,可以自己定,最好与库的名称一致
如果创建不成功,请看后面的问题详情
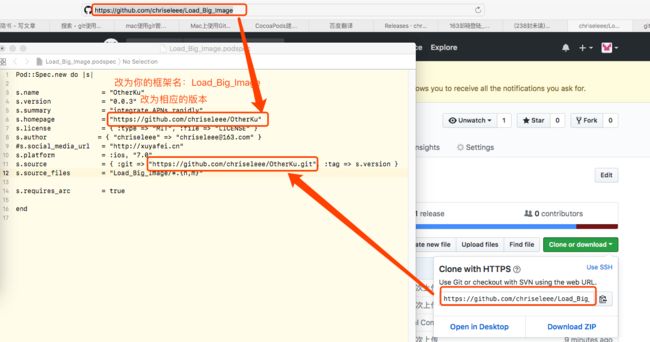
打开描述文件,修改如下内容:
最终代码
Pod::Spec.new do |s|

s.name                = "Load_Big_Image"
s.version             = "0.0.1"
s.summary             = "integrate APNs rapidly"
s.homepage            = "https://github.com/chriseleee/Load_Big_Image"
s.license             = { :type => "MIT", :file => "LICENSE" }
s.author             = { "chriseleee" => "[email protected]" }
#s.social_media_url   = "http://xuyafei.cn"
s.platform            = :ios, "7.0"
s.source              = { :git => "https://github.com/chriseleee/Load_Big_Image.git", :tag => s.version }
s.source_files        = "Load_Big_Image/*.{h,m}"

s.requires_arc        = true

end
s.name:名称,pod search 搜索的关键词
s.version:版本
s.summary:简介,pod search 搜索的关键词
s.homepage:主页地址,例如Github地址
s.license:许可证
s.author:作者
s.social_media_url:社交网址
s.platform:平台
s.source:Git仓库地址,例如在Github地址后边加上 .git 就是Git仓库地址,常见写法如下
s.source_files:需要包含的源文件,常见的写法如下
s.resources:需要包含的图片等资源文件
s.dependency:依赖库,不能依赖未发布的库
s.dependency:依赖库,如有多个可以这样写
s.requires_arc:是否要求ARC
s.source_files 常见写法
"Directory1/*"
"Directory1/Directory2/*.{h,m}"
"Directory1/**/*.h"

“*” 表示匹配所有文件
“*.{h,m}” 表示匹配所有以.h和.m结尾的文件
“**” 表示匹配所有子目录
s.source 常见写法
s.source = { :git => "https://github.com/xiaofei86/LPPushService.git", :commit => "68defea" }
s.source = { :git => "https://github.com/xiaofei86/LPPushService.git", :tag => 1.0.0 }
s.source = { :git => "https://github.com/xiaofei86/LPPushService.git", :tag => s.version }
commit => "68defea" 表示将这个Pod版本与Git仓库中某个commit绑定
tag => 1.0.0 表示将这个Pod版本与Git仓库中某个版本的comit绑定
tag => s.version 表示将这个Pod版本与Git仓库中相同版本的comit绑定
按照上述规则编辑完成就制作好了 .podspec
3.1 邮箱验证
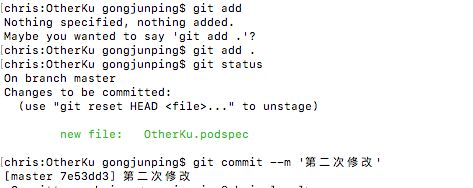
邮箱验证之前把更改的代码上传到github
git add .
git commit --m '第二次修改'
git push -u origin master
邮箱验证
pod trunk register [email protected] 'chriseleee' --verbose
[email protected] 为自己可用的邮箱
'chriseleee' 为自己的名字
提示去邮箱验证,验证完后如下提示:
3.2 上传描述文件到远程索引库
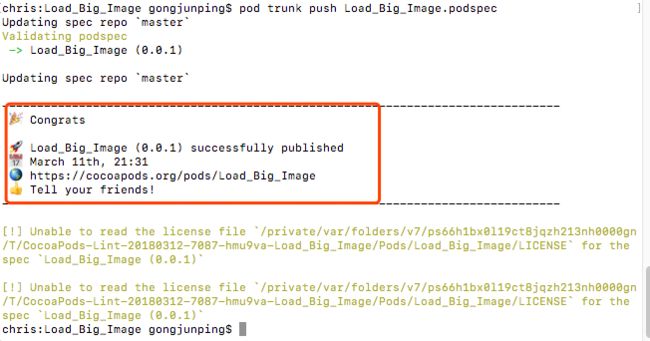
开始上传
pod trunk push podspec.podspec文件
podspec.podspec文件为自己的.podspec文件名
4 小试牛刀(重点)
pod search Load_Big_Image
现在搜索库是收不到的。
还记得前面说到 pod search 是搜索的本地索引文件还记得么?
对的,要删除本地索引文件、更新本地索引库
检索的索引文件目录/Users/用户名/Library/Caches/CocoaPods
删掉.json文件
然后更新本地索引库
pod setup
pod search Load_Big_Image
成功
5 使用中遇到的问题详解
问题1 pod --version
遇到了这样的版本问题, 升级gem
问题2 创建spec文件
创建spec文件的时候,如果遇到这样的问题, 解决方式:
sudo pod
install cocoapods
问题3
Failed to connect to GitHub to update the CocoaPods/Specs specs repo - Please check if you are offline, or that GitHub is down
这个问题困扰了我几个小时,在网上找了很多没解决。最后重装 CocoaPods解决了问题
问题4
Unable to interpret the specified path .podspec as a podspec (Pod::DSLError).
最后也是查了半天
有个中文的引号
这里一定要注意,最好用Xcode打开,别用文本编辑打开
问题4
-
ERROR | file patterns:
说明.podspec的source_files有问题,继续修改

