Android View绘制及事件(四)自定义组合控件+约束布局ConstraintLayout+自定义控件属性
前言
上一章《Android View绘制及事件(三)自定义View及View绘制流程》介绍了自定义View的实现方式大致有三种:自定义组合控件、继承系统控件(如TextView、ImageView等)、继承View或ViewGroup。这章专门学习自定义组合控件实现方式,将多个控件组合成为一个新的控件,能够解决多次重复使用同一类型的布局的问题。
另外介绍一下,本章将使用主流的约束布局ConstraintLayout来实现。关于约束布局我们要知道,从 Android Studio 2.3 起,官方的模板默认使用 ConstraintLayout,可以在Api9以上的Android系统使用它。由于布局嵌套过多的问题会给导致系统绘制视图所需的时间和计算功耗加重,所以它的出现主要作用是为了解决布局嵌套过多的问题。同时它可以进行灵活的方式定位和调整控件,因为它结合了RelativeLayout和LinearLayout两者的优点,即设置控件的相对位置并按照比例约束控件位置和尺寸,能够更好地适配屏幕大小不同的机型。
废话少说,上车!
提示:记得在Gradle中添加约束布局ConstraintLayout依赖:
implementation 'com.android.support.constraint:constraint-layout:1.1.3'
一、编写ConstraintLayout布局文件
1、TextView居中显示
一般使用RelativeLayout会这样写,如下所示:
而,使用ConstraintLayout会这样写,如下所示:
*约束布局的相对位置常用属性:
- layout_constraintLeft_toLeftOf
- layout_constraintLeft_toRightOf
- layout_constraintRight_toLeftOf
- layout_constraintRight_toRightOf
- layout_constraintTop_toTopOf
- layout_constraintTop_toBottomOf
- layout_constraintBottom_toTopOf
- layout_constraintBottom_toBottomOf
- layout_constraintBaseline_toBaselineOf
- layout_constraintStart_toEndOf
- layout_constraintStart_toStartOf
- layout_constraintEnd_toStartOf
- layout_constraintEnd_toEndOf
*上面属性中有一个比较有趣的layout_constraintBaseline_toBaselineOf ,它是横向与其他布局或控件平衡。
*如果居中了,再想向左右偏移该怎么办?一般使用 layout_marginLeft="100dp" 就可以向右偏移了100dp。另一个方法是水平、垂直偏移属性是:layout_constraintHorizontal_bias 、layout_constraintVertical_bias。
假如现在要实现水平偏移,给TextView1的layout_constraintHorizontal_bias赋一个范围为 0-1 的值,假如赋值为0,则TextView1在布局的最左侧,假如赋值为1,则TextView1在布局的最右侧,假如假如赋值为0.5,则水平居中,假如假如赋值为0.3,则更倾向于左侧。垂直偏移同理。
2、链式纵横
如果两个或以上控件成横向或竖向约束在一起,就可以认为是他们是一条链。一条链的第一个控件是这条链的链头,我们可以在链头中设置 layout_constraintHorizontal_chainStyle、layout_constraintVertical_chainStyle来改变整条链的样式。
chains提供了三种样式值:
CHAIN_SPREAD :展开元素 (默认);
CHAIN_SPREAD_INSIDE : 两端贴近parent;
CHAIN_PACKED :链的元素将被打包在一起。
然后,将控件首尾链接起来:
链头链尾:
app:layout_constraintStart_toStartOf="parent"

app:layout_constraintTop_toTopOf="parent"
链中:
app:layout_constraintEnd_toStartOf="@+id/textView3"

app:layout_constraintStart_toEndOf="@+id/textView"
代码如下:
3、权重
除了样式链外,还可以创建一个权重链。可以留意到上面所用到的TextView宽度都为wrap_content,如果我们把宽度都设为0dp,这个时候可以在每个TextView中设置横向权重layout_constraintHorizontal_weight、layout_constraintVertical_weight为来创建一个权重链,作用于LinearLayout的 android:layout_weight="1" 效果一样。
4、边距
在其他布局中的写法一般都是直接 android:layout_margin="dp" ;但是如果没有约束该控件在ConstraintLayout布局里的位置那就会失效。
边距常用属性如下:
android:layout_marginStart
android:layout_marginEnd
android:layout_marginLeft
android:layout_marginTop
android:layout_marginRight
android:layout_marginBottom
二、构造函数
public class CombineTextReveal extends ConstraintLayout {
    TextView mTextLeft;
    TextView mTextRight;
    ImageView mImgIcon;
    public CombineTextReveal(Context context) {
        super(context);
        initView(context);
    }

    public CombineTextReveal(Context context, AttributeSet attrs) {
        super(context, attrs);
        initView(context);
    }

    public CombineTextReveal(Context context, AttributeSet attrs, int defStyleAttr) {
        super(context, attrs, defStyleAttr);
        initView(context);
    }

    //初始化UI,可根据业务需求设置默认值。
    private void initView(Context context) {
        LayoutInflater.from(context).inflate(R.layout.view_view_order, this, true);
        mTextLeft = (TextView) findViewById(R.id.view_order_item_left);
        mTextRight = (TextView) findViewById(R.id.view_order_item_right);
        mImgIcon = (ImageView) findViewById(R.id.go_in_img);
    }

    //设置标题文字的方法
    private void setmTextLeft(String str) {
        if (!TextUtils.isEmpty(str)) {
            mTextLeft.setText(str);
        }
    }

    private void setmTextRight(String title) {
        if (!TextUtils.isEmpty(title)) {
            mTextRight.setText(title);
        }
    }
    //对左边按钮设置事件的方法
    private void setLeftListener(OnClickListener onClickListener) {
        mImgIcon.setOnClickListener(onClickListener);
    }
}
接下来,就可以在其他布局当中引用该控件了,然后通过id可以拿到组合控件的实例调用内部的方法。
到这里组合控件基本就算完成了。除了这些基础功能外,我们还可以做一些功能扩展,比如可以在布局时设置View显示或隐藏,因为可能有某些元素不需要进行显示,那么这时候就需要用到自定义属性来解决了。
三、自定义属性控件
1、属性值的类型format
(1). reference:资源ID
属性定义:
属性使用:
(2). color:颜色值
属性定义:
属性使用:
(3). boolean:布尔值
属性定义:
属性使用:
(4). dimension:尺寸值
属性定义:
属性使用:
(5). float:浮点值
属性定义:
属性使用:
(6). integer:整型值
属性定义:
属性使用:
(7). string:字符串
属性定义:
属性使用:
(8). fraction:百分数
属性定义:
属性使用:
(9). enum:枚举值
属性定义:
属性使用:
注意:枚举类型的属性在使用的过程中只能同时使用其中一个,不能 android:orientation = “horizontal|vertical"
(10). flag:位或运算
属性定义:
属性使用:
注意:位运算类型的属性在使用的过程中可以使用多个值
(11). 混合类型:属性定义时可以指定多种类型值
属性定义:
属性使用:
四、实例
Android自定义属性可分为以下几步:
- 创建自定义View
- 在values/attrs.xml文件中声明自定义属性
- 在要调用自定义view的布局文件中设置它的自定义属性值
- 在自定义View的构造方法中通过TypedArray获取
-
创建自定义View
-
自定义属性的声明(declare)
-
自定义View类
 public CombineTextReveal(Context context, AttributeSet attrs) {
        super(context, attrs);
        initView(context);
        initAttrs(context,attrs);
    }
    public CombineTextReveal(Context context, AttributeSet attrs, int defStyleAttr) {
        super(context, attrs, defStyleAttr);
        initView(context);
        initAttrs(context,attrs);
    }
    //在View的构造方法中通过TypedArray获取
    private void initAttrs(Context context, AttributeSet attrs) {
        TypedArray mTypedArray = context.obtainStyledAttributes(attrs, R.styleable.CombineTextReveal);
        String leftStr = mTypedArray.getString(R.styleable.CombineTextReveal_setLeftText);
        if (!TextUtils.isEmpty(leftStr)) {
            mTextLeft.setText(leftStr);
        }
        String rightStr = mTypedArray.getString(R.styleable.CombineTextReveal_setRighText);
        if (!TextUtils.isEmpty(rightStr)) {
            mTextRight.setText(rightStr);
        }
        boolean isVisible =mTypedArray.getBoolean(R.styleable.CombineTextReveal_setVisible,true);
        if (isVisible){
            mImgIcon.setVisibility(VISIBLE);
        }else{
            mImgIcon.setVisibility(GONE);
        }
        mTypedArray.recycle();
}-
布局文件中使用
-
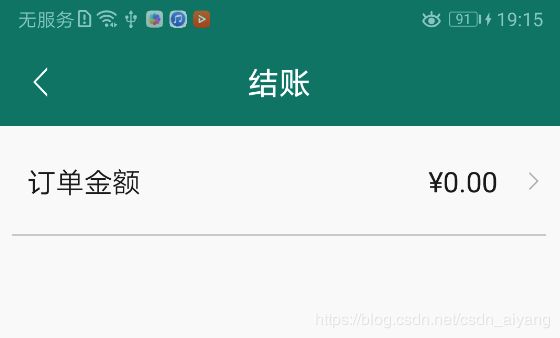
效果图
Android 自定义View前世今生,View绘制流程
参考链接:https://www.jianshu.com/p/17ec9bd6ca8a