关于安装oracleDB环境官网说明地址:
https://oracle.github.io/node-oracledb/INSTALL.html
环境搭建所需软件和文档的压缩包
链接: https://pan.baidu.com/s/1OGo9t72E1i2SBTnzYhr26A 提取码: zcwm
一、安装Pyhton2.7
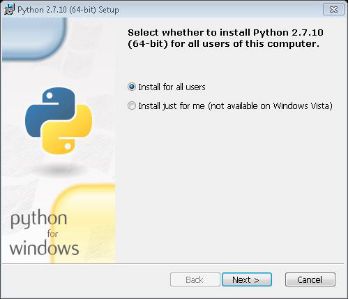
1.默认选择“Install for all users”。
2.选择安装目录,建议选择默认的安装位置。
3.功能选择安装,拉到最下面的“Add python.exe to Path”这个必须安装的,选择第一个安装方式就行。
二、安装nodejs
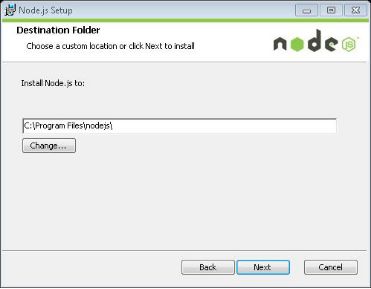
1.选择安装位置。
2.在自定义设置页面中,确保选中“Add to Path”,然后单击“下一步”。然后点击“安装”。
三、安装oracle组件工具。
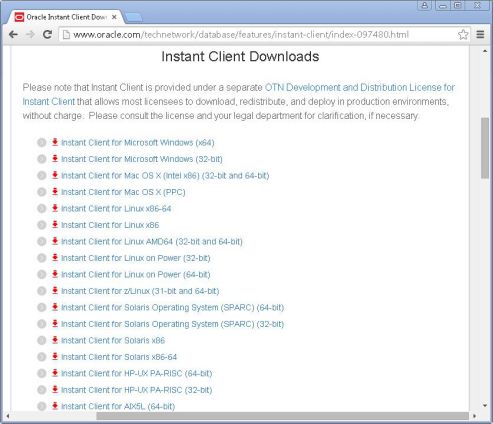
1.下载链接:http://www.oracle.com/technetwork/database/features/instant-client/index-097480.html
2.根据系统选择32位或64进行下载。
2.下载两个安装包
Instant Client Package – Basic
Instant Client Package – SDK
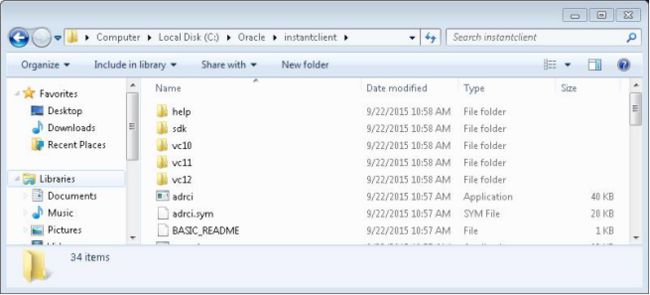
3.下载完成后将两个压缩包的文件放到同一个文件夹下。(结果如下图)
4.添加系统变量。
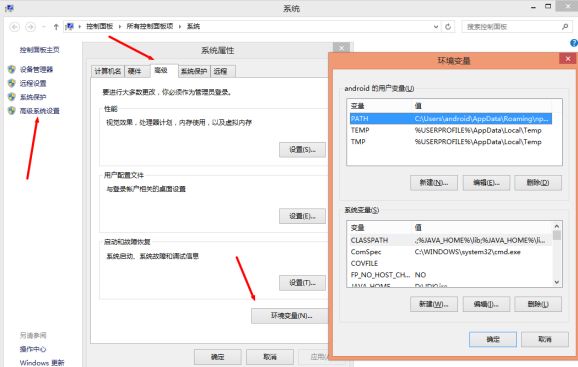
右键我的电脑——属性——高级系统设置——高级——选择系统变量
5.添加和修改系统变量。
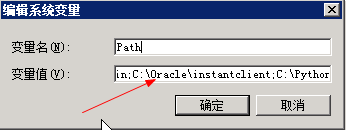
(1)在系统变量的“path”中添加两个压缩包解压出来的文件的根目录路径。
如我解压到c盘的所以输入C:\Oracle\instantclient中。
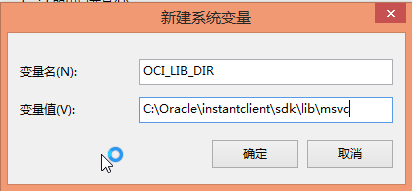
(2)新建系统变量“OCI_LIB_DIR”
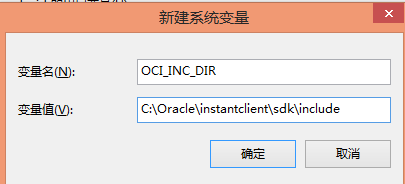
(3)新建系统变量“OCI_INC_DIR”
四、Visual Studio Redistributables
当前Oracle客户端版本为12.1所以安装
其他Oracle客户端版本安装说明:
安装Visual Studio Redistributables需要根据Oracle客户端版本安装对应的Visual Studio Redistributables版本,否则无法正常调用OracleDB访问
1.Oracle客户端各版本的对应关系如下:
- Oracle客户端18和12.2需要Visual Studio 2013 Redistributable。
- Oracle客户端12.1需要Visual Studio 2010 Redistributable。
- Oracle客户端11.2需要Visual Studio 2005 Redistributable。
2.Visual Studio Redistributables各个版本的下载地址:
https://support.microsoft.com/zh-cn/help/2977003/the-latest-supported-visual-c-downloads
3.Node调用oracleDB与你配置Oracle客户端版本的Path有关系,与电脑本机安装什么Oracle版本无关系。
4.其他Visual Studio Redistributables版本的安装,
不同的window系统可能有些系统无法正常安装。
解决无法正常安装的参考方案地址:https://www.cnblogs.com/caiyt/p/10122571.html
五、安装oracledb模块。
1.安装指令: npm install oracledb
2.如果被墙下载不了可设置代理:
npm config set https-proxy http://www.example.com:80/
3.安装流程。
- 创建一个新文件夹
- 打开命令提示符窗口,进入到新创建的文件夹。
- 执行安装指令
六、测试文件,相关参数根据数据库进行修改
测试前,最好重启一下电脑,有些配置需要重启电脑才能生效。
var oracledb = require('oracledb');

oracledb.getConnection({
     user: "hr",
     password: "welcome",
     connectString: "localhost/xe"
}, function(err, connection) {
     if (err) {
          console.error(err.message);
          return;
     }
     connection.execute( "SELECT department_id, department_name FROM departments WHERE department_id = ",
     [],
     function(err, result) {
          if (err) {
               console.error(err.message);
               doRelease(connection);
               return;
          }
          console.log(result.metaData);
          console.log(result.rows);
          doRelease(connection);
     });
});

function doRelease(connection) {
     connection.release(
          function(err) {
               if (err) {console.error(err.message);}
          }
     );
}
安装过程遇过的问题:
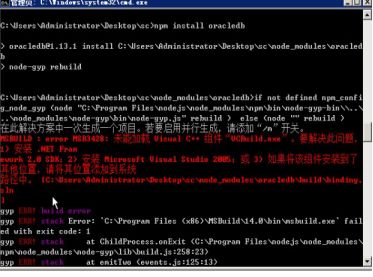
1.下载oracledb模块失败,主要是因为系统的原因导致vs安装是相关的环境没有搭建好。可重装vs解决相关问题。
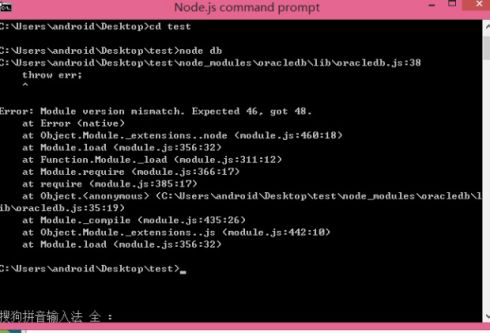
2.oracledb模块使用时,调用模块失败。这是因为加载模块的nodejs版本与调用模块的nodejs版本不同。
3.oracle组件或者没有安装好vs会报模块没有找到的错误。
