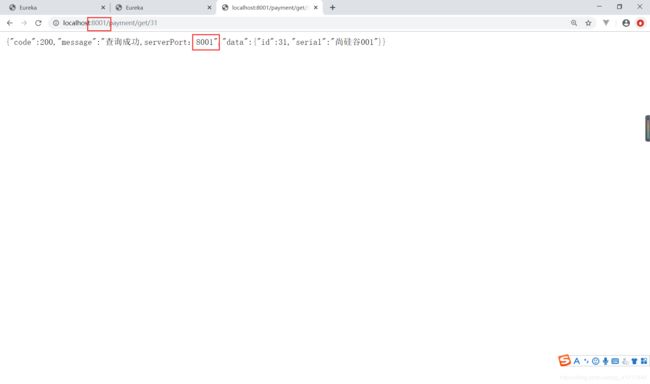
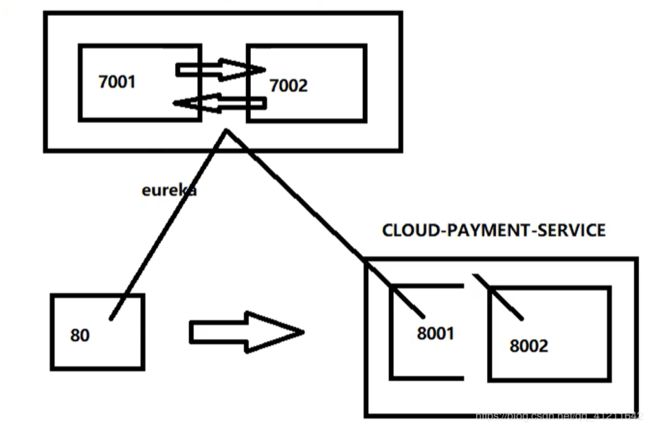
1. 新建Maven父工程 cloud2020
maven架构选择org.apache.maven.archetypes:maven-archetype-site
pom.xml代码如下
  xsi:schemaLocation="http://maven.apache.org/POM/4.0.0 http://maven.apache.org/xsd/maven-4.0.0.xsd">
  4.0.0

  com.atguigu.springcloud
  cloud2020
  1.0-SNAPSHOT
  pom

  Maven

  http://maven.apache.org/
  2001


      website
      scp://webhost.company.com/www/website


    UTF-8
    1.8
    1.8
    4.12
    1.2.17
    1.16.18
    5.1.47
    1.1.16
    1.3.0


        org.springframework.boot
        spring-boot-dependencies
        2.2.2.RELEASE
        pom
        import


        org.springframework.cloud
        spring-cloud-dependencies
        Hoxton.SR1
        pom
        import


        com.alibaba.cloud
        spring-cloud-alibaba-dependencies
        2.1.0.RELEASE
        pom
        import


        mysql
        mysql-connector-java
        ${mysql.version}


        com.alibaba
        druid
        ${druid.version}


        org.mybatis.spring.boot
        mybatis-spring-boot-starter
        ${mybatis.spring.boot.version}


        junit
        junit
        ${junit.version}


        org.projectlombok
        lombok
        ${lombok.version}
        true


        org.springframework.boot
        spring-boot-maven-plugin

          true
          true
2. 建立支付module: cloud-provider-payment8001
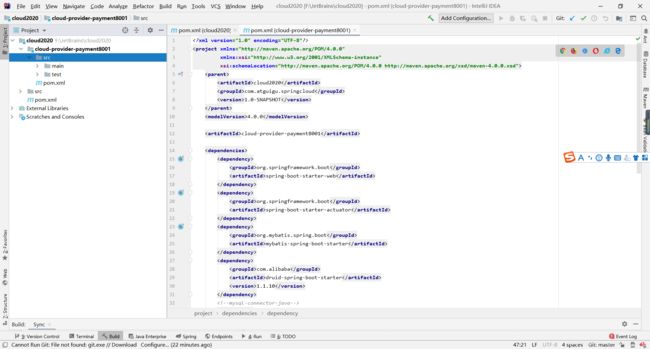
项目结构:
2.1 pom.xml如下:
         xmlns:xsi="http://www.w3.org/2001/XMLSchema-instance"
         xsi:schemaLocation="http://maven.apache.org/POM/4.0.0 http://maven.apache.org/xsd/maven-4.0.0.xsd">

        cloud2020
        com.atguigu.springcloud
        1.0-SNAPSHOT

    4.0.0

    cloud-provider-payment8001


            org.springframework.boot
            spring-boot-starter-web


            org.springframework.boot
            spring-boot-starter-actuator


            org.mybatis.spring.boot
            mybatis-spring-boot-starter


            com.alibaba
            druid-spring-boot-starter
            1.1.10


            mysql
            mysql-connector-java


            org.springframework.boot
            spring-boot-starter-jdbc


            org.springframework.boot
            spring-boot-devtools
            runtime
            true


            org.projectlombok
            lombok
            true


            org.springframework.boot
            spring-boot-starter-test
            test
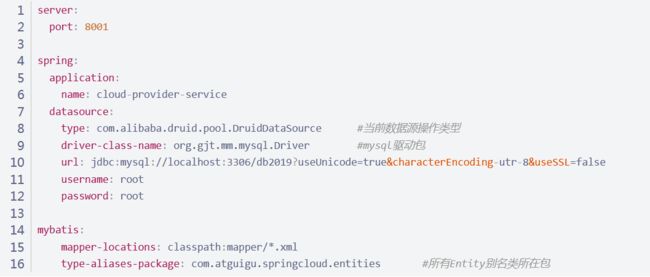
2.2 application.yml
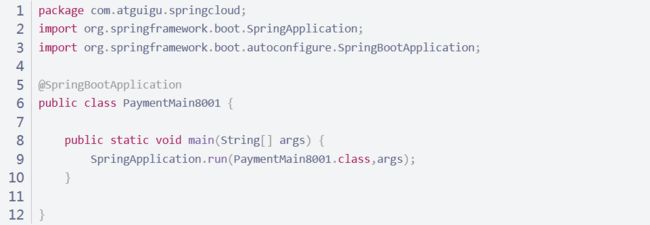
2.3 主启动类 PaymentMain8001
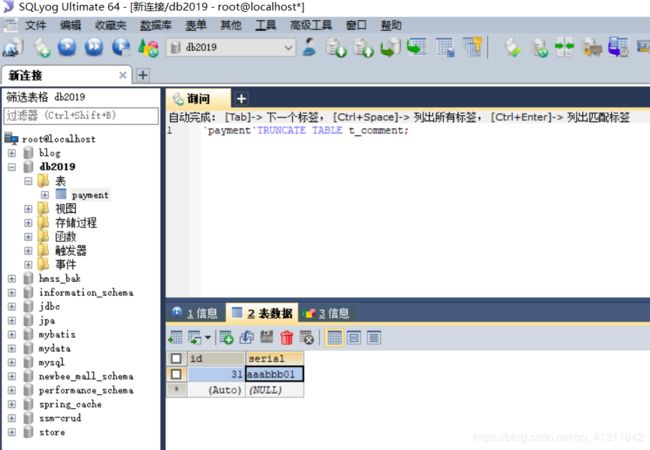
2.4 数据库
建库:
CREATE TABLE `payment`(
`id` bigint(20) NOT NULL AUTO_INCREMENT COMMENT 'ID',
`serial` varchar(200) DEFAULT '',
PRIMARY KEY (`id`)
) ENGING=InnoDB AUTO_INCREMENT=1 DEFAULT CHARSET=utf8
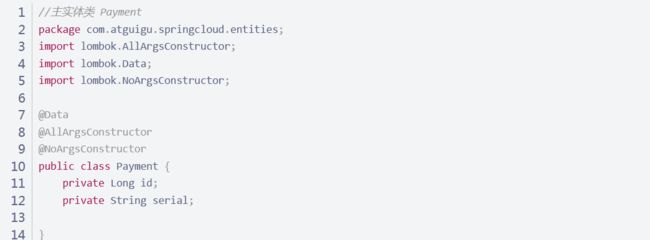
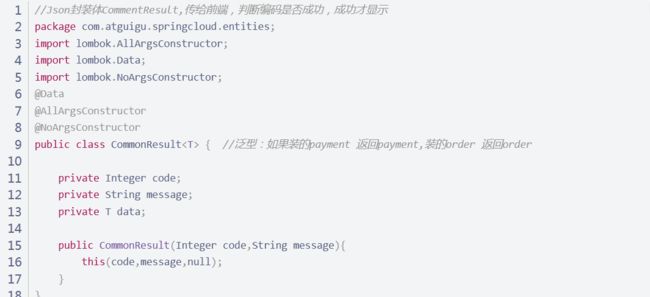
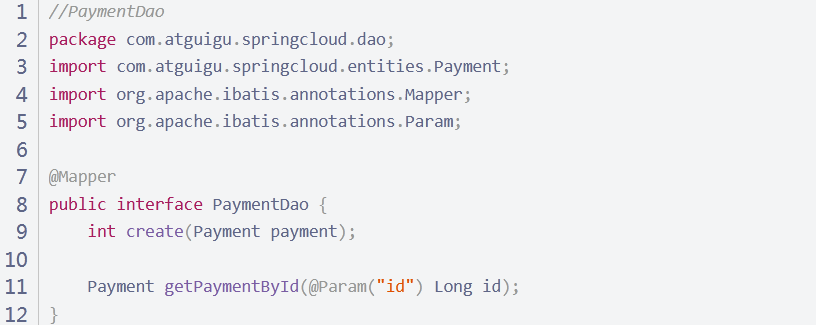
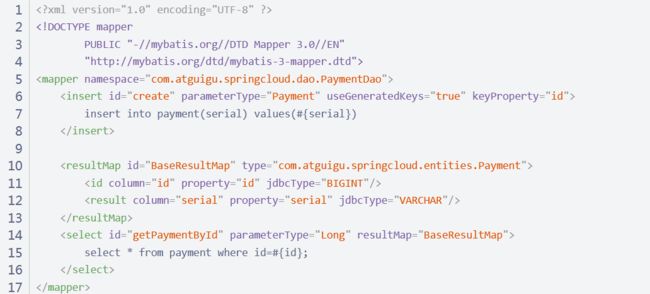
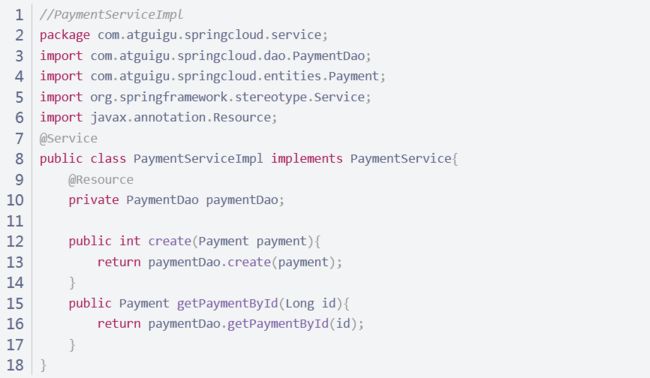
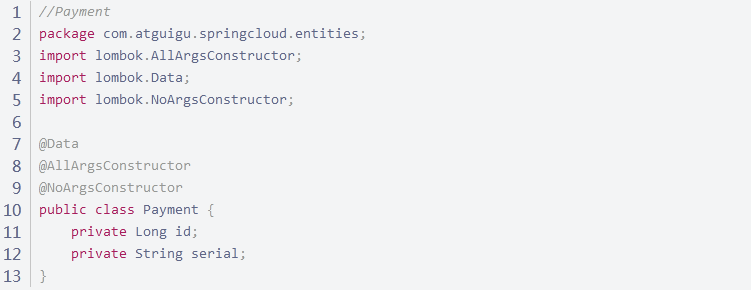
2.5 业务类
package com.atguigu.springcloud.controller;

import com.atguigu.springcloud.entities.CommonResult;
import com.atguigu.springcloud.entities.Payment;
import com.atguigu.springcloud.service.PaymentService;
import lombok.extern.slf4j.Slf4j;
import org.springframework.web.bind.annotation.GetMapping;
import org.springframework.web.bind.annotation.PathVariable;
import org.springframework.web.bind.annotation.PostMapping;
import org.springframework.web.bind.annotation.RestController;
import javax.annotation.Resource;
@RestController
@Slf4j
public class PaymentController {
    @Resource
    private PaymentService paymentService;

    //只传给前端CommonResult,不需要前端了解其他的组件
    @PostMapping(value = "/payment/create")
    public CommonResult create(Payment payment){
        int result = paymentService.create(payment);
        log.info("*****插入结果:"+result);
        if(result > 0){
            return new CommonResult(200,"插入数据成功",result);
        }else{
            return new CommonResult(444,"插入数据失败",null);
        }
    }
    @GetMapping(value = "/payment/get/{id}")
    public CommonResult getPaymentById(@PathVariable("id") Long id){
        Payment payment = paymentService.getPaymentById(id);
        log.info("*****插入结果:"+payment);
        if(payment != null){
            return new CommonResult(200,"查询成功",payment);
        }else{
            return new CommonResult(444,"没有对应记录,查询ID:"+id,null);
        }
    }
}
2.6测试
Chrom浏览器可能不支持Post请求,可以使用PostMan工具测试
总结: 1. 建module 2. 改pom 3. 写yml 4. 主启动 5. 业务类
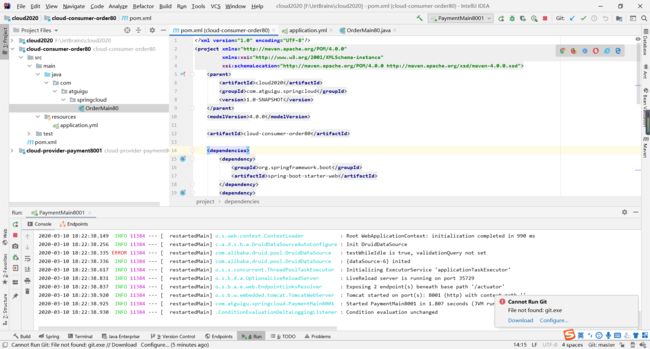
3. 建立消费者订单module:
3.1 pom.xml
         xmlns:xsi="http://www.w3.org/2001/XMLSchema-instance"
         xsi:schemaLocation="http://maven.apache.org/POM/4.0.0 http://maven.apache.org/xsd/maven-4.0.0.xsd">

        cloud2020
        com.atguigu.springcloud
        1.0-SNAPSHOT

    4.0.0

    cloud-consumer-order80


            org.springframework.boot
            spring-boot-starter-web


            org.springframework.boot
            spring-boot-starter-actuator


            org.springframework.boot
            spring-boot-devtools
            runtime
            true


            org.projectlombok
            lombok
            true


            org.springframework.boot
            spring-boot-starter-test
            test
3.4业务类
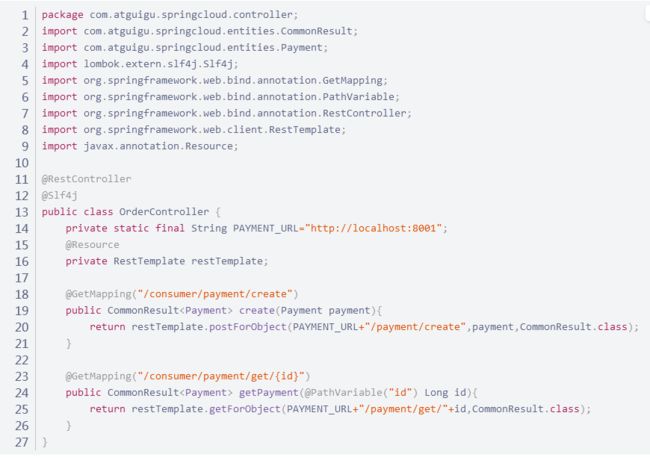
订单也需要Payment、CommonResult实体类,但是不需要操作数据库,没有Service、Dao,只需添加Controller即可。
3.4业务类
订单也需要Payment、CommonResult实体类,但是不需要操作数据库,没有Service、Dao,只需添加Controller即可。
首说RestTemplate: RestTemplate提供了多种便捷访问远程Http服务的方法,是一种简单便捷的访问restful服务模板类,是Spring提供的用于访问Rest服务的客户端模板工具集,实现80到8001的远程调用。
官网地址:
https://docs.spring.io/spring-framework/docs/5.2.2.RELEASE/javadoc-api/org/springframework/web/client/RestTemplate.html
使用:
使用restTemplate访问restful接口非常的简单粗暴,(url、requestMap、ResponseBean.class)这三个参数分别代表REST请求地址、请求参数、HTTP响应转换被转换成的对象类型。
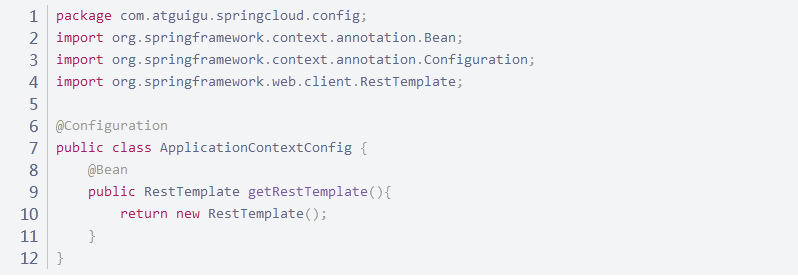
将RestTemplate对象注册到容器中
![]()
3.5启动80、8001服务,测试
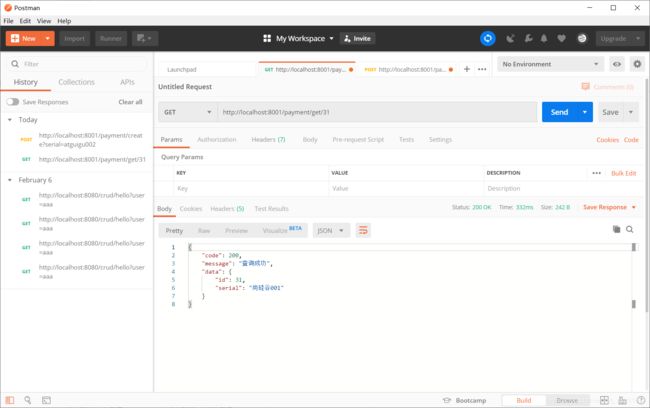
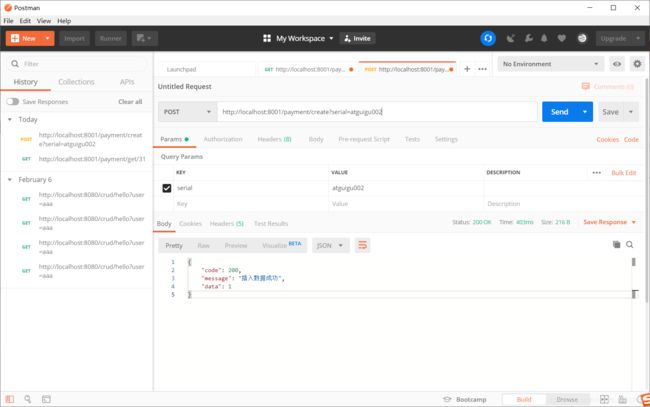
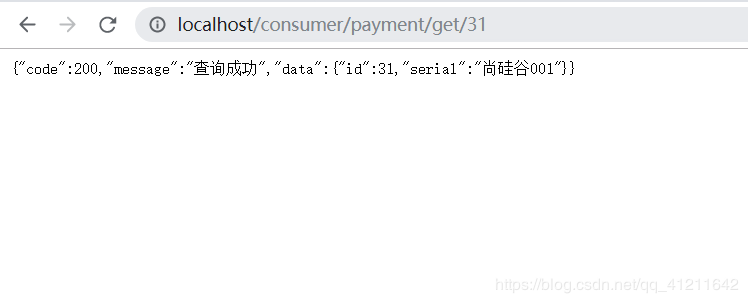
80服务调用8001服务,实现效果如下:
- 查询:
添加:
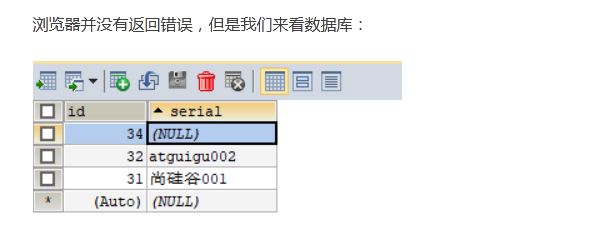
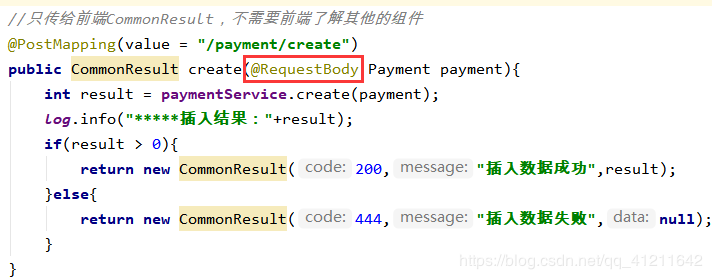
可以看到数据库只插入主键,并没有插入内容,要在8001的PaymentController加@RequestBody注解。
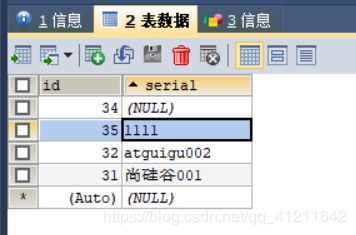
然后就可以插入了
4. 工程重构
项目中存在相同的代码(entities包下的Payment.class和CommonResult.class),造成代码冗余,可以进行重构。
通过Maven聚合父工程,把相同重复的代码移到公开公用的工程里面,还可以放第三方接口、工具类,统一调配使用。
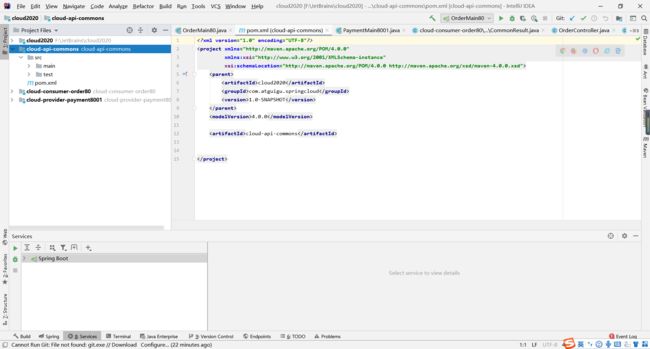
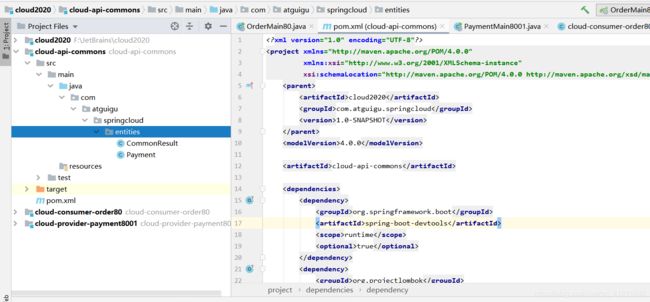
4.1 建立公共module
4.2 pom.xml
         xmlns:xsi="http://www.w3.org/2001/XMLSchema-instance"
         xsi:schemaLocation="http://maven.apache.org/POM/4.0.0 http://maven.apache.org/xsd/maven-4.0.0.xsd">

        cloud2020
        com.atguigu.springcloud
        1.0-SNAPSHOT

    4.0.0

    cloud-api-commons


            org.springframework.boot
            spring-boot-devtools
            runtime
            true


            org.projectlombok
            lombok
            true


            cn.hutool
            hutool-all
            5.1.0
4.3 将entities包复制到cloud-api-commons
4.4 使用Maven打包发布上传到公用本地库里
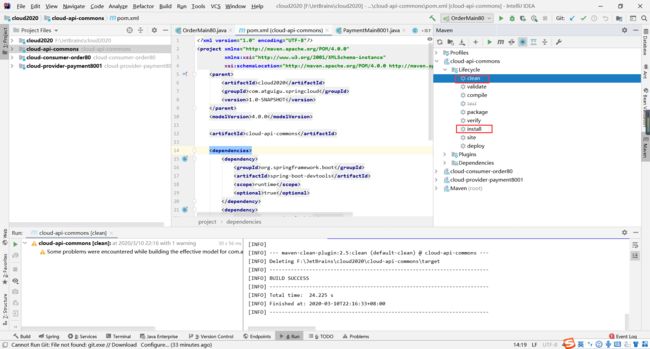
打开Maven窗口,执行clean测试一下,无误后出现BUILD SUCCESS,然后执行install
4.5 删除重复entities,引入maven install的jar包坐标即可使用。
4.5 删除重复entities,引入maven install的jar包坐标即可使用。
5.EurekaServer服务端安装
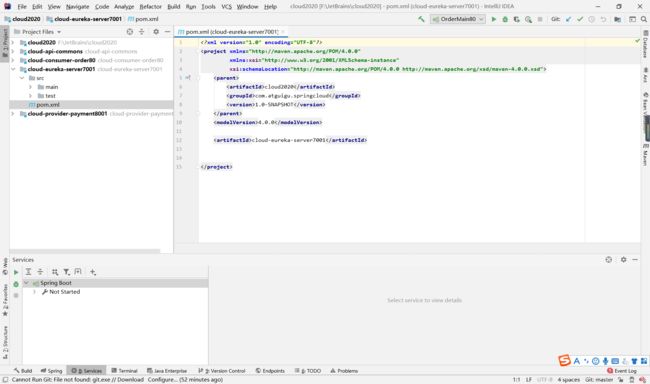
5.1建module cloud-eureka-server7001
5.2 pom.xml
"1.0" encoding="UTF-8"?>"http://maven.apache.org/POM/4.0.0" xmlns:xsi="http://www.w3.org/2001/XMLSchema-instance" xsi:schemaLocation="http://maven.apache.org/POM/4.0.0 http://maven.apache.org/xsd/maven-4.0.0.xsd"> cloud2020 com.atguigu.springcloud 1.0-SNAPSHOT 4.0.0 cloud-eureka-server7001 org.springframework.cloud spring-cloud-starter-netflix-eureka-server com.atguigu.springcloud cloud-api-commons ${project.version} org.springframework.boot spring-boot-starter-web org.springframework.boot spring-boot-starter-actuator org.springframework.boot spring-boot-devtools runtime true org.projectlombok lombok org.springframework.boot spring-boot-starter-test test junit junit
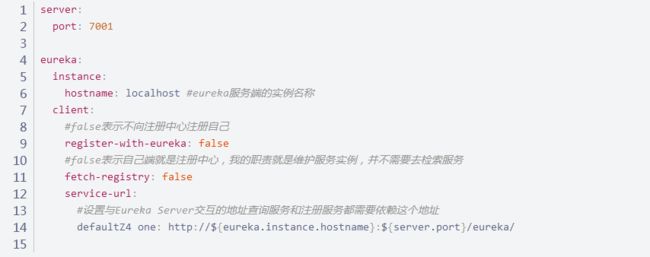
5.3 application.yml
5.5测试
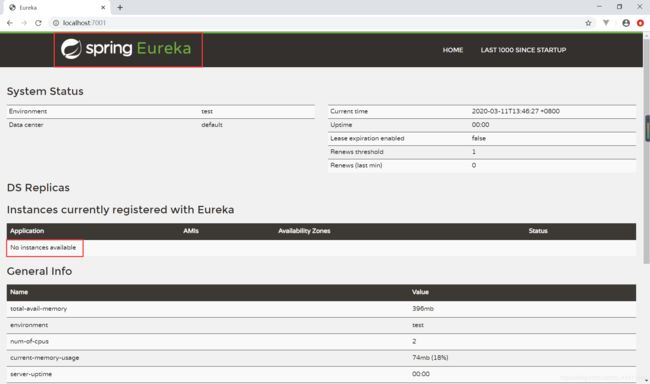
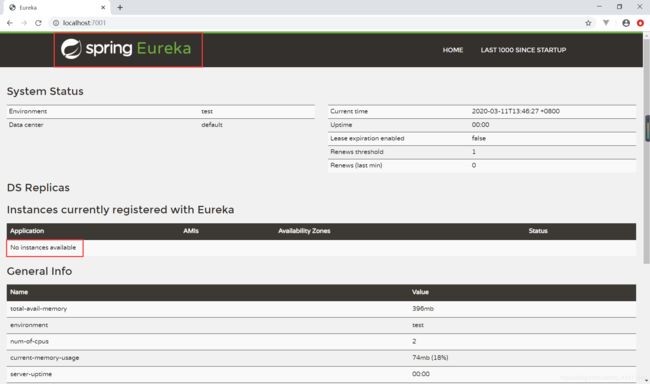
出现上面图标,表示Eureka 服务端安装成功。No instances available表示当前没有服务注册进来
6. 单机Eureka构建:支付微服务8001入驻进eurekaServer
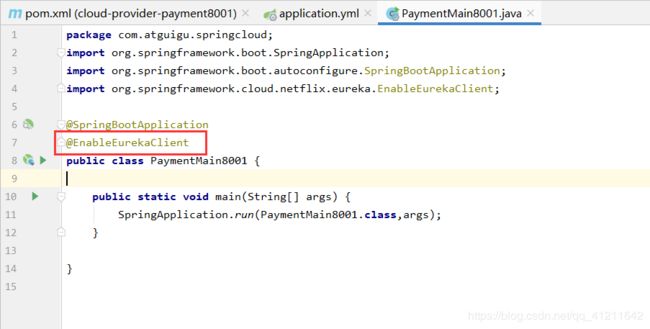
6.1将 Eureka-client 依赖引入,便于使用注解@EnableEurekaClient标注这是个Eureka Client端
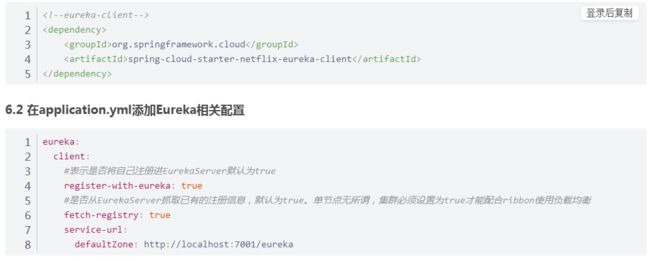
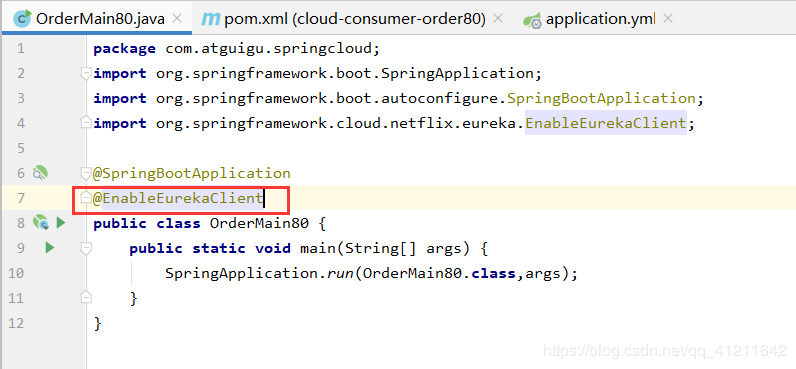
6.3 主启动类添加注解@EnableEurekaClient
6.4 测试
注意: 要先启动EurekaServer
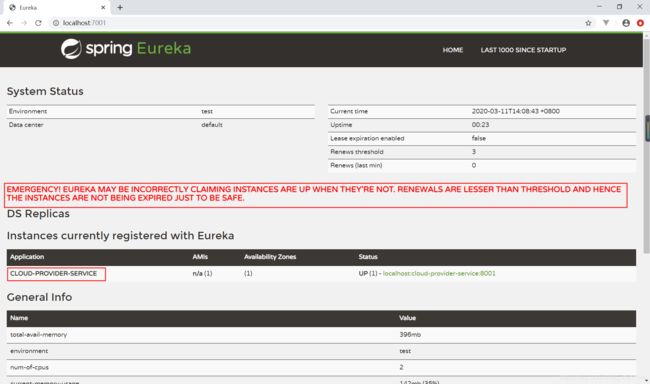
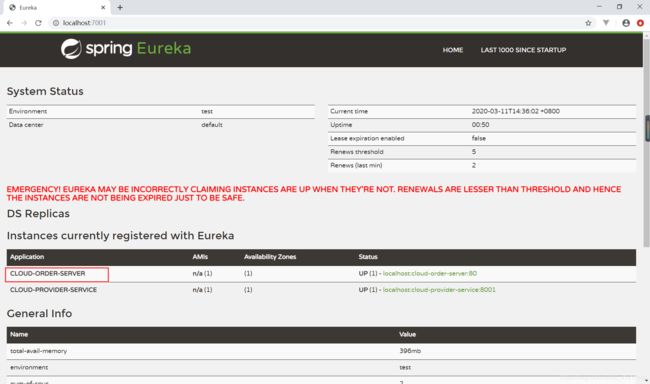
这样就注册进来了,入住进Eureka服务器的名称就是8001yml中配置的spring.application.name。红色警告是Eureka的自我保护机制,后面会详细说。
7. 单机Eureka构建:订单微服务入驻进eurekaServer
7.1 在pom添加 Eureka-client依赖
    org.springframework.cloud
    spring-cloud-starter-netflix-eureka-client
7.2 在application.yml添加相关配置
spring:
  application:
    name: cloud-order-server

eureka:
  client:
    #表示是否将自己注册进EurekaServer默认为true
    register-with-eureka: true
    fetch-registry: true
    service-url:
      defaultZone: http://localhost:7001/eureka
7.3 主启动类添加注解@EnableEurekaClient
7.4 测试
PS: 先启动EurekaServer,7001服务,再启动服务提供者provider,8001服务
cloud-order-server服务以入住,查询功能也可以正常执行
8. EurekaServer集群环境构建
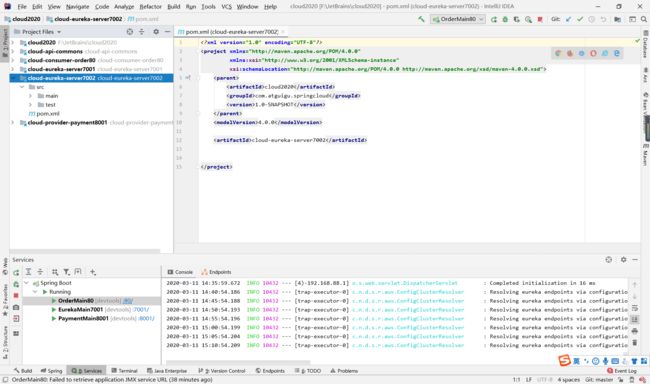
8.1 创建module cloud-eureka-server7002
8.2 pom.xml
         xmlns:xsi="http://www.w3.org/2001/XMLSchema-instance"
         xsi:schemaLocation="http://maven.apache.org/POM/4.0.0 http://maven.apache.org/xsd/maven-4.0.0.xsd">

        cloud2020
        com.atguigu.springcloud
        1.0-SNAPSHOT

    4.0.0

    cloud-eureka-server7002


            org.springframework.cloud
            spring-cloud-starter-netflix-eureka-server


            com.atguigu.springcloud
            cloud-api-commons
            ${project.version}


            org.springframework.boot
            spring-boot-starter-web


            org.springframework.boot
            spring-boot-starter-actuator


            org.springframework.boot
            spring-boot-devtools
            runtime
            true


            org.projectlombok
            lombok


            org.springframework.boot
            spring-boot-starter-test
            test


            junit
            junit
8.3 写yml之前修改映射文件
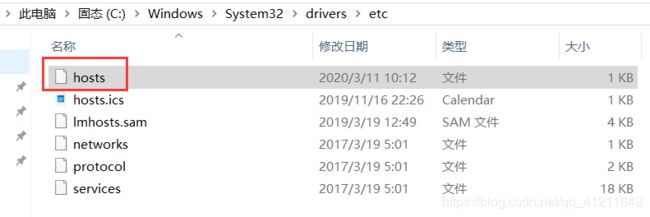
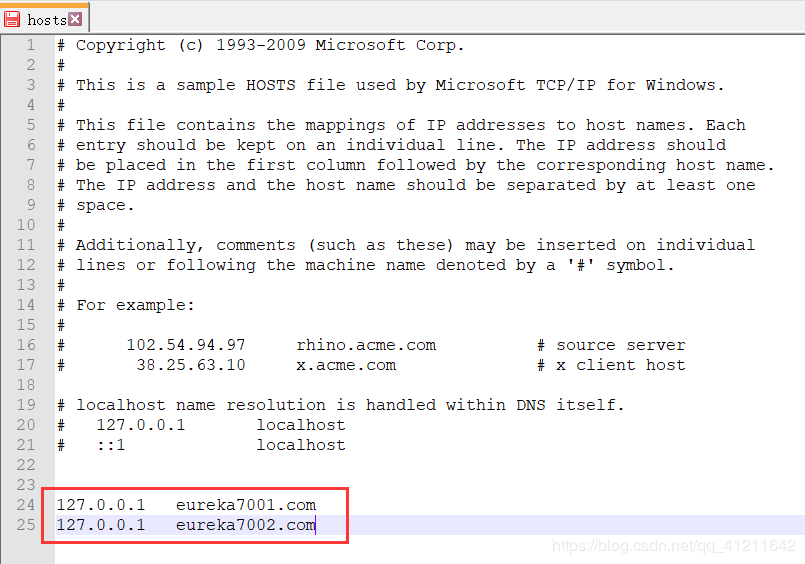
找到 C:\Windows\System32\drivers\etc路径下的hosts文件
修改映射配置添加进hosts文件
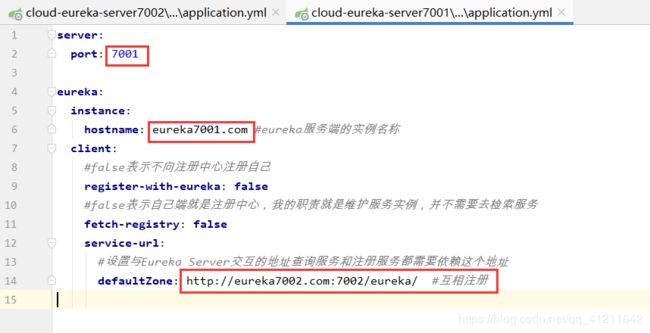
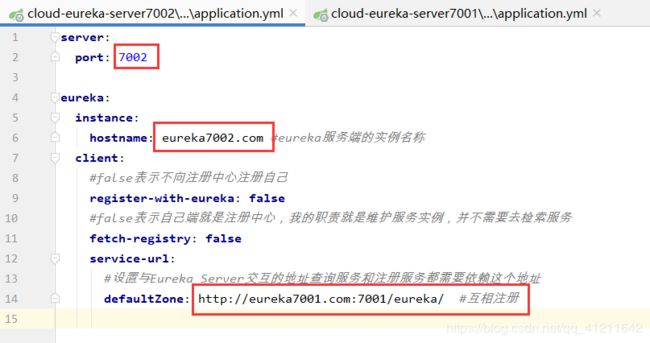
8.4 修改7001和7002的application.yml
8.5 主启动类
package com.atguigu.springcloud;
import org.springframework.boot.SpringApplication;
import org.springframework.boot.autoconfigure.SpringBootApplication;
import org.springframework.cloud.netflix.eureka.EnableEurekaClient;

@SpringBootApplication
@EnableEurekaServer
public class EurekaMain7002 {
    public static void main(String[] args) {
        SpringApplication.run(EurekaMain7002.class,args);
    }
}
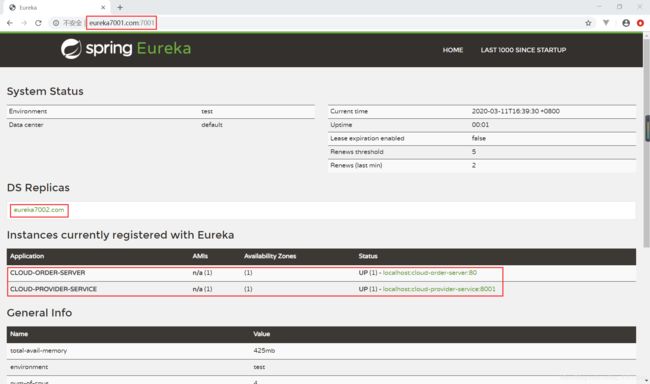
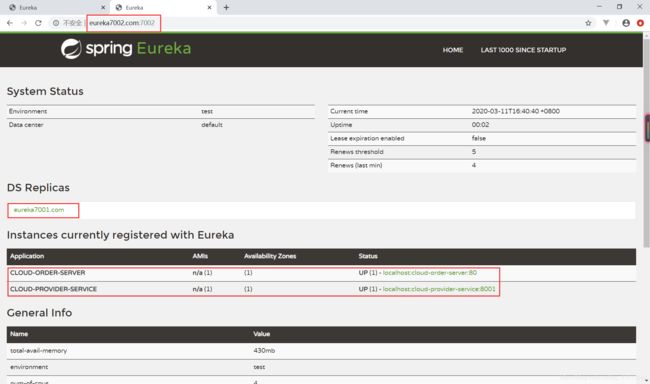
8.6测试
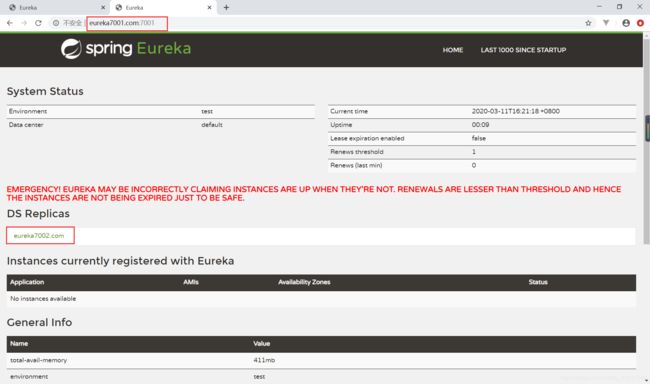
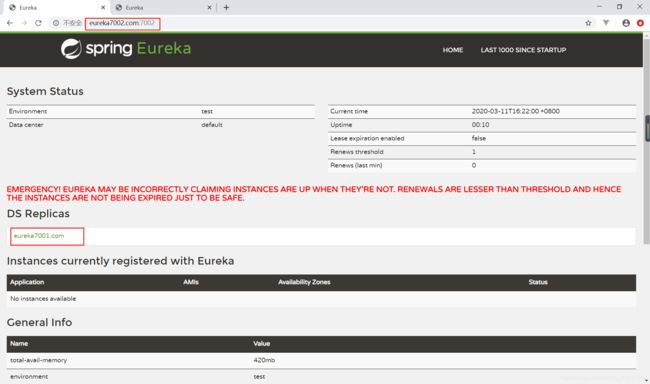
启动7001、7002
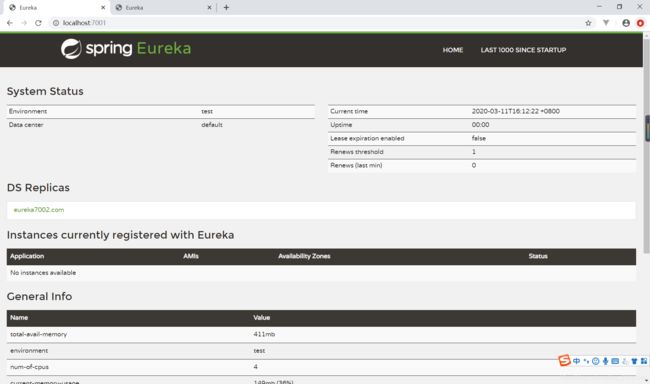
使用域名映射:
同时看到Eureka图标,且7001指着7002,7002指着7001,说明Eureka集群搭建成功。
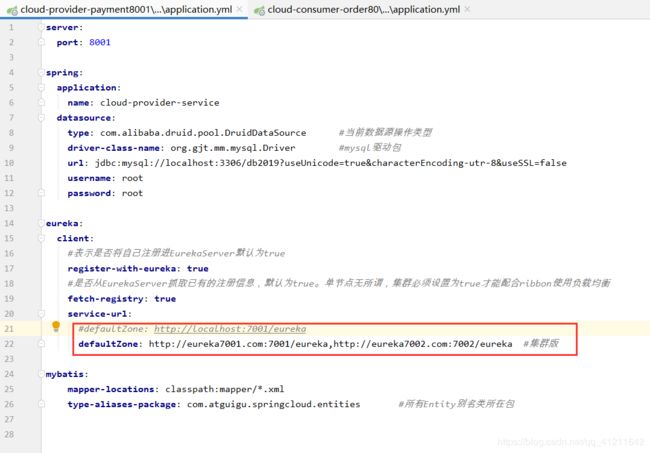
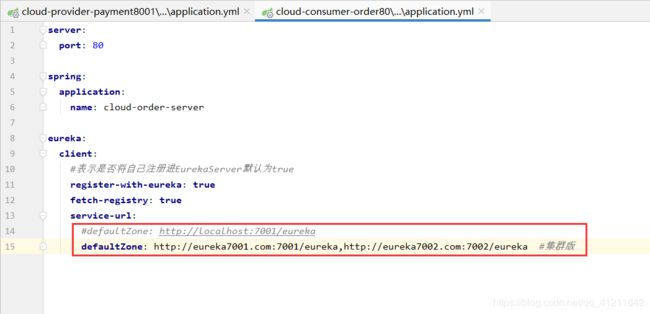
9. 将两个微服务发布到Eureka集群配置中
只需修改application.yml
测试
PS: 先启动EurekaServer,7001/7002服务;再启动服务提供者provider,8001;再启动消费者,80
现在,就已经把支付服务8001、订单服务80注册进Eureka集群环境,调用也OK。
10. 支付提供者8001集群环境搭建
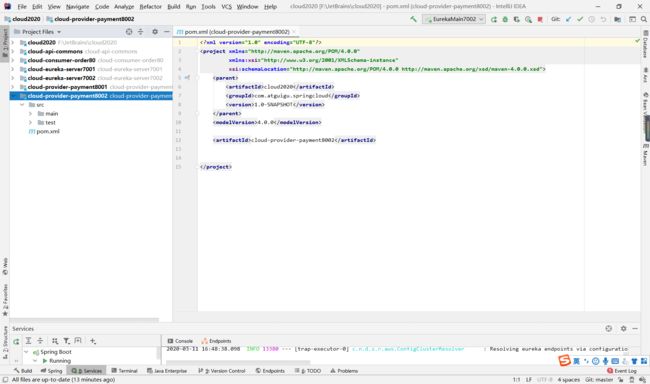
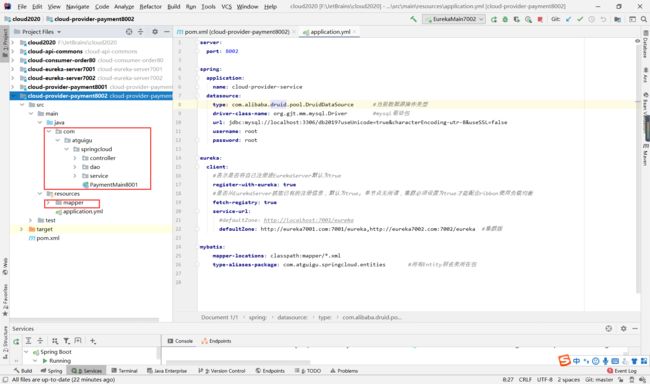
10.1 创建module cloud-provider-payment8002
10.2 pom.xml 同8001的 pom.xml 一样
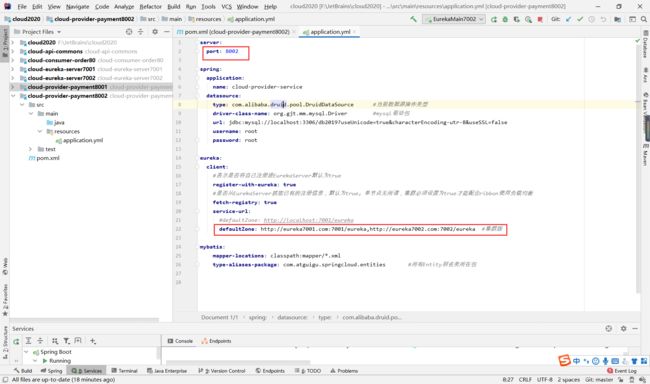
10.3 写application.yml,注意改端口
10.4 主启动类和业务类直接从8001拷贝
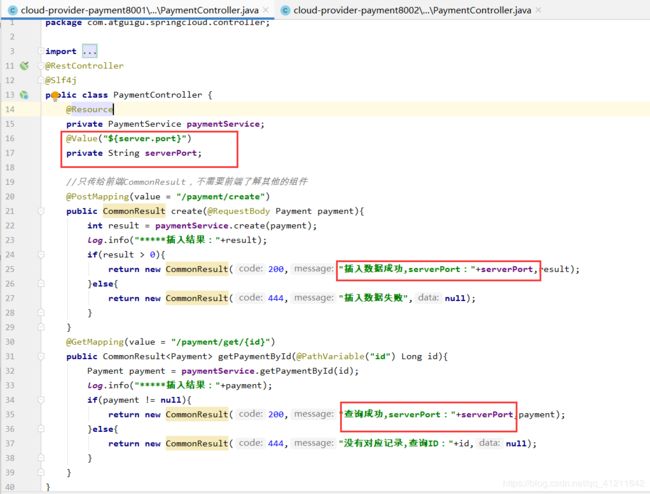
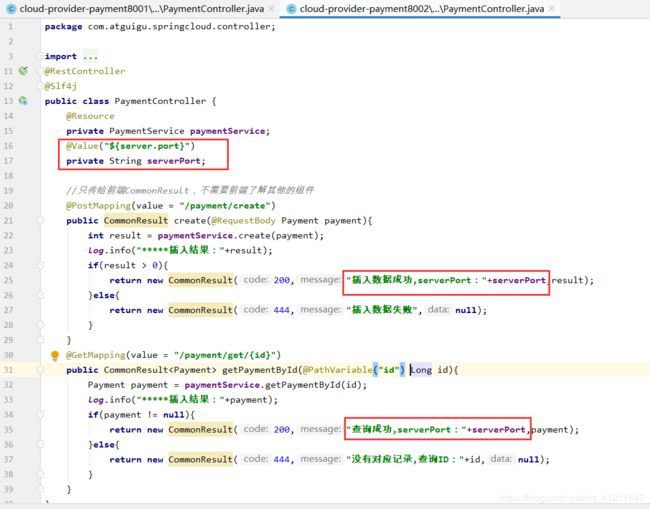
10.5 修改8001和8002的controller,默认的负载均衡方式是轮询,看执行查询具体调用那台provider
10.6 测试
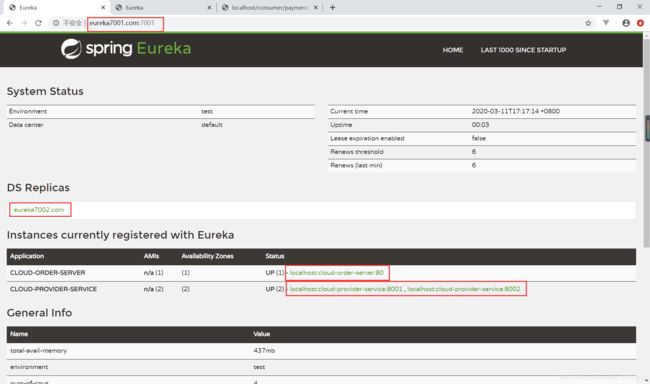
PS: 启动顺序:7001、7002、8001、8002、80
这样Ribbon和Eureka整合后Consumer可以直接调用服务而不用再关心地址和端口号,且该服务还有负载均衡功能了。O(∩_∩)O
这个架构是初级篇里面的重点,务必要学会,难的是后面的Alibaba的Nacos,也有服务注册和配置中心,Alibaba Nacos集群就比这个复杂了
