爬虫进阶:验证码突破--6、机器学习识别简单图片字母验证码
一、生成验证码图片作为测试样本:
#coding:utf-8
from PIL import Image,ImageDraw,ImageFont
import random
class ValidCodeImg:
    def __init__(self, width=150, height=30, code_count=5, font_size=32, point_count=20, line_count=3,
                 img_format='png'):
        '''
        可以生成一个经过降噪后的随机验证码的图片
        :param width: 图片宽度 单位px
        :param height: 图片高度 单位px
        :param code_count: 验证码个数
        :param font_size: 字体大小
        :param point_count: 噪点个数
        :param line_count: 划线个数
        :param img_format: 图片格式
        :return 生成的图片的bytes类型的data
        '''
        self.width = width
        self.height = height
        self.code_count = code_count
        self.font_size = font_size
        self.point_count = point_count
        self.line_count = line_count
        self.img_format = img_format

    @staticmethod
    def getRandomColor():
        '''获取一个随机颜色(r,g,b)格式的'''
        c1 = random.randint(0, 255)
        c2 = random.randint(0, 255)
        c3 = random.randint(0, 255)
        return (c1, c2, c3)

    @staticmethod
    def getRandomStr():
        '''获取一个随机字符串,每个字符的颜色也是随机的'''
        random_num = str(random.randint(0, 9))
        random_low_alpha = chr(random.randint(97, 122))
        random_upper_alpha = chr(random.randint(65, 90))
        random_char = random.choice([random_num, random_low_alpha, random_upper_alpha])
        return random_char

    def getValidCodeImg(self):
        # 获取一个Image对象,参数分别是RGB模式。宽150,高30,随机颜色
        image = Image.new('RGB', (self.width, self.height), self.getRandomColor())

        # 获取一个画笔对象,将图片对象传过去
        draw = ImageDraw.Draw(image)

        # 获取一个font字体对象参数是ttf的字体文件的目录,以及字体的大小
        font = ImageFont.truetype("londrina-solid.ttf", size=self.font_size)

        temp = []
        for i in range(self.code_count):
            # 循环5次,获取5个随机字符串
            random_char = self.getRandomStr()

            # 在图片上一次写入得到的随机字符串,参数是:定位,字符串,颜色,字体
            draw.text((10 + i * 30, -2), random_char, self.getRandomColor(), font=font)

            # 保存随机字符,以供验证用户输入的验证码是否正确时使用
            temp.append(random_char)
        valid_str = "".join(temp)

        # 噪点噪线
        # 划线
        for i in range(self.line_count):
            x1 = random.randint(0, self.width)
            x2 = random.randint(0, self.width)
            y1 = random.randint(0, self.height)
            y2 = random.randint(0, self.height)
            draw.line((x1, y1, x2, y2), fill=self.getRandomColor())

        # 画点
        for i in range(self.point_count):
            draw.point([random.randint(0, self.width), random.randint(0, self.height)], fill=self.getRandomColor())
            x = random.randint(0, self.width)
            y = random.randint(0, self.height)
            draw.arc((x, y, x + 4, y + 4), 0, 90, fill=self.getRandomColor())

        # 在内存生成图片
        from io import BytesIO
        f = BytesIO()
        image.save(f, self.img_format)
        data = f.getvalue()
        f.close()

        return data, valid_str


if __name__ == '__main__':
    filePath = r"D:/CapCha/Test/"
    n=0
    m = 1500 #生成1500个验证码
    while n<1500:
        img = ValidCodeImg()
        data, valid_str = img.getValidCodeImg()
        f = open(filePath+valid_str+'.png', 'wb')
        print(filePath+valid_str+'.png'+" Generated")
        f.write(data)
        f.close()
        n+=1
本段代码主要是使用PIL模块,来进行识别,生成的样本数据,见如下截图:

在实际的运用中,验证码往往是从要爬取的网站上通过验证码页面获取的图片,一般是不可能有验证码的值的,只能人工标识。这一操作消耗大量人工。本人是基于学习机器学习的兴趣,才从网络中找到这一块的代码段。
参考网址:https://www.cnblogs.com/6324TV/p/8811249.html
二:图片处理,包含转化为灰度图,二值化处理,去除噪点,图片分割等
#coding:utf-8
import numpy as np
from PIL import Image,ImageDraw,ImageFile
import cv2
import imagehash
import time
import os
import pytesseract

from collections import defaultdict
from sklearn.neural_network import MLPClassifier
from sklearn.externals import joblib

# tesseract.exe所在的文件路径
pytesseract.pytesseract.tesseract_cmd = 'C://Program Files (x86)/Tesseract-OCR/tesseract.exe'
def ReadFileList(rootdir):
    #尝试直接识别
    list = os.listdir(rootdir)
    for i in range(0,len(list))[0:10]:
        path = os.path.join(rootdir,list[i])
        print(path)
        if os.path.isfile(path):
            print(os.path.basename(path))
            image = Image.open(path)
            code = pytesseract.image_to_string(image)
            print(code)

def splitimage(rownum, colnum, dstpath,img_name,outpath):
    '''
        图片分割
        :param rownum: 切割行数
        :param colnum: 切割列数
        :param dstpath: 图片文件路径
        :param img_name: 要切割的图片文件
        :param outpath: 输出文件路径
        :return:
        '''
    img = Image.open(img_name)
    w, h = img.size
    if rownum <= h and colnum <= w:
        print('Original image info: %sx%s, %s, %s' % (w, h, img.format, img.mode))
        print('开始处理图片切割, 请稍候...')
        s = os.path.split(img_name)
        if dstpath == '':
            dstpath = s[0]
        fn = s[1].split('.')
        basename = fn[0]
        ext = fn[-1]
        num = 1
        rowheight = h // rownum
        colwidth = w // colnum
        file_list = []
        for r in range(rownum):
            index = 0
            for c in range(colnum):
                # (left, upper, right, lower)
                # box = (c * colwidth, r * rowheight, (c + 1) * colwidth, (r + 1) * rowheight)
                if index < 1:
                    colwid = colwidth + 6
                elif index < 2:
                    colwid = colwidth + 1
                elif index < 3:
                    colwid = colwidth
                box = (c * colwid, r * rowheight, (c + 1) * colwid, (r + 1) * rowheight)
                newfile = os.path.join(dstpath, basename[num - 1] + '_' + basename + "_" + str(num - 1) + '.' + ext)
                file_list.append(newfile)
                img.crop(box).save(
                    os.path.join(outpath, basename[num - 1] + '_' + basename + "_" + str(num - 1) + '.' + ext), ext)
                num = num + 1
                index += 1
        for f in file_list:
            print(f)
        print('图片切割完毕,共生成 %s 张小图片。' % (num - 1))

def get_threshold(image):
    # 获取图片中像素点数量最多的像素
    pixel_dict = defaultdict(int)
    # 像素及该像素出现次数的字典
    rows, cols = image.size
    for i in range(rows):
        for j in range(cols):
            pixel = image.getpixel((i, j))
            pixel_dict[pixel] += 1
    count_max = max(pixel_dict.values()) # 获取像素出现出多的次数
    pixel_dict_reverse = {v:k for k,v in pixel_dict.items()}
    threshold = pixel_dict_reverse[count_max] # 获取出现次数最多的像素点
    return threshold

def get_bin_table(threshold):
    # 按照阈值进行二值化处理
    # threshold: 像素阈值
    # 获取灰度转二值的映射table
    table = []
    for i in range(256):
        #rate = 0.01 # 在threshold的适当范围内进行处理,由于rate设置为0.1时,有一个字母灰度太接近这个阈值,导致映射为0
        #if threshold*(1-rate)<= i <= threshold*(1+rate):
        if i == threshold:
            table.append(1)
        else:
            table.append(0)
    return table

def cut_noise(image):
    # 去掉二值化处理后的图片中的噪声点
    rows, cols = image.size # 图片的宽度和高度
    change_pos = [] # 记录噪声点位置

    # 遍历图片中的每个点,除掉边缘
    for i in range(1, rows-1):
        for j in range(1, cols-1):
            # pixel_set用来记录该店附近的黑色像素的数量
            pixel_set = []
            # 取该点的邻域为以该点为中心的九宫格
            for m in range(i-1, i+2):
                for n in range(j-1, j+2):
                    if image.getpixel((m, n)) != 1: # 1为白色,0位黑色
                        pixel_set.append(image.getpixel((m, n)))

            # 如果该位置的九宫内的黑色数量小于等于4,则判断为噪声
            if len(pixel_set) <= 4:
                change_pos.append((i,j))

    # 对相应位置进行像素修改,将噪声处的像素置为1(白色)
    for pos in change_pos:
        image.putpixel(pos, 1)

    return image # 返回修改后的图片

def OCR_lmj(img_path):
    # 识别图片中的数字加字母
    # 传入参数为图片路径,返回结果为:识别结果
    image = Image.open(img_path) # 打开图片文件
    imgry = image.convert('L')  # 转化为灰度图
    # 获取图片中的出现次数最多的像素,即为该图片的背景
    max_pixel = get_threshold(imgry)
    # 将图片进行二值化处理
    table = get_bin_table(threshold=max_pixel)
    out = imgry.point(table, '1')
    # 去掉图片中的噪声(孤立点)
    out = cut_noise(out)
    #保存图片
    # out.save('E://figures/img_gray.jpg')
    # 仅识别图片中的数字
    #text = pytesseract.image_to_string(out, config='digits')
    # 识别图片中的数字和字母
    text = pytesseract.image_to_string(out)
    # 去掉识别结果中的特殊字符
    exclude_char_list = ' .:\\|\'\"?![],()~@#$%^&*_+-={};<>/¥'
    text = ''.join([x for x in text if x not in exclude_char_list])
    return text

def main():
    # pytesseract识别指定文件目录下的图片
    # 图片存放目录figures
    dir = 'E://figures'
    correct_count = 0  # 图片总数
    total_count = 0    # 识别正确的图片数量
    # 遍历figures下的png,jpg文件
    for file in os.listdir(dir):
        if file.endswith('.png') or file.endswith('.jpg'):
            # print(file)
            image_path = '%s/%s'%(dir,file) # 图片路径
            answer = file.split('.')[0]  # 图片名称,即图片中的正确文字
            recognizition = OCR_lmj(image_path) # 图片识别的文字结果
            print((answer, recognizition))
            if recognizition == answer: # 如果识别结果正确,则total_count加1
                correct_count += 1
            total_count += 1
    print('Total count: %d, correct: %d.'%(total_count, correct_count))

def GenPngByCap(img_name):
    rownum = 1
    colnum = 5
    dstpath = "D:/CapCha/Test/"
    outpath = "D:/CapCha/outdir"
    grypath = "D:/CapCha/grydir/"
    fileName = dstpath + img_name
    image = Image.open(fileName)  # 打开图片文件
    imgry = image.convert('L')  # 转化为灰度图L
    # 获取图片中的出现次数最多的像素,即为该图片的背景
    max_pixel = get_threshold(imgry)
    # 将图片进行二值化处理
    table = get_bin_table(threshold=max_pixel)
    out = imgry.point(table, '1')
    # 去掉图片中的噪声(孤立点)
    out = cut_noise(out)
    out.save(grypath + img_name)
    splitimage(rownum, colnum, dstpath, grypath + img_name, outpath)

def genby_pytesseract():
    dstpath = "D:/CapCha/grydir"
    correct_count = 0  # 图片总数
    total_count = 0  # 识别正确的图片数量
    list = os.listdir(dstpath)
    for i in range(0, len(list)):
        path = os.path.join(dstpath, list[i])
        if os.path.isfile(path):
            # GenPngByCap(os.path.basename(path))
            answer = os.path.basename(path).split('.')[0]
            text = pytesseract.image_to_string(path)
            # 去掉识别结果中的特殊字符
            exclude_char_list = ' .:\\|\'\"?![],()~@#$%^&*_+-={};<>/¥'
            recognizition = ''.join([x for x in text if x not in exclude_char_list])
            print(path, recognizition, answer)
            if recognizition == answer:  # 如果识别结果正确,则total_count加1
                correct_count += 1
            total_count += 1
    print('Total count: %d, correct: %d.' % (total_count, correct_count))
    # 二值化的图片,识别通过率Total count: 1000, correct: 59.

def GenPngByCap2(img_name):
    rownum = 1
    colnum = 5
    dstpath = "D:/test/Test/"
    outpath = "D:/test/outdir"
    grypath = "D:/test/grydir/"
    fileName = dstpath + img_name
    image = Image.open(fileName)  # 打开图片文件
    imgry = image.convert('L')  # 转化为灰度图L
    # 获取图片中的出现次数最多的像素,即为该图片的背景
    max_pixel = get_threshold(imgry)
    # 将图片进行二值化处理
    table = get_bin_table(threshold=max_pixel)
    out = imgry.point(table, '1')
    # 去掉图片中的噪声(孤立点)
    out = cut_noise(out)
    out.save(grypath + img_name)
    splitimage(rownum, colnum, dstpath, grypath + img_name, outpath)

if __name__ == '__main__':
    list = os.listdir(r"D:\CapCha\Test")
    for i in range(0, len(list)):
        path = os.path.join(r"D:\CapCha\Test", list[i])
        if os.path.isfile(path):
            GenPngByCap2(list[i])
在这个处理的过程中,由于尝试了使用OCR直接识别,或者图片转化后在OCR识别,依然成功率太低,所以尝试从深度学习上进行训练。
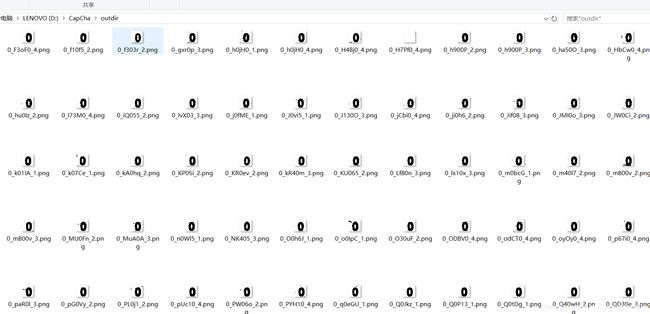
分割后的图片示例:
由于我本身生成的验证码是有标识的,所以在作为数据集时,可以直接作为Y值使用,而X值则需要进行转化
图片处理参考网址:
https://blog.csdn.net/icamera0/article/details/50843172
https://blog.csdn.net/weixin_38641983/article/details/80899354
三:模型训练:
#coding:utf-8
import numpy as np
from PIL import Image,ImageDraw,ImageFile
import cv2
import imagehash
import time
import os
import pytesseract
from collections import defaultdict
from sklearn.neural_network import MLPClassifier
from sklearn.externals import joblib
train_data_path = "D:/CapCha/outdir"
def read_train_data(train_data_path):
    """
    读取训练集文件夹下的单字母/数字图像文件
    :return:image_array, image_label:图像list、图像label list    """
    files = os.listdir(train_data_path)
    image_array = []
    image_label = []
    for capt_per_char_file in files:
        image_label += list(capt_per_char_file.split("_")[0])
    for capt_per_char_file in files:
        path = os.path.join(train_data_path, capt_per_char_file)
        image = Image.open(path)
        image_array.append(image)
        print(capt_per_char_file + " 读取成功")
    return image_array, image_label

#feature generated
def feature_transfer(image):
    """
    生成特征矩阵
    计算每副图像的行和、列和,共image_width + image_height个特征
    :param image:图像list
    :return:
    """
    image_width, image_height=(30,30)
    image = image.resize((image_width, image_height)) #标准化图像格式
    feature = []#计算特征
    for x in range(image_width):#计算行特征
        feature_width = 0
        for y in range(image_height):
            if image.getpixel((x, y)) == 0:
                feature_width += 1
        feature.append(feature_width)
    for y in range(image_height): #计算列特征
        feature_height = 0
        for x in range(image_width):
            if image.getpixel((x, y)) == 0:
                feature_height += 1
        feature.append(feature_height)
    # print('feature length :',len(feature))
    return feature

def main():
    image_array, image_label = read_train_data(train_data_path)
    image_feature = []
    for num, image in enumerate(image_array):
        feature = feature_transfer(image)
        image_feature.append(feature)
    return image_feature, image_label

if __name__ == '__main__':
    '''
    train_table, train_labels = main()
    from sklearn.ensemble import RandomForestClassifier
    clf =  RandomForestClassifier(n_estimators=100, max_depth=None,min_samples_split=2, random_state=0)
    clf.fit(train_table, train_labels)
    joblib.dump(clf, 'rf.model')
    print("训练完成")
    '''
    clf = joblib.load("rf.model")
    test_labels=[]
    CAPT_PATH = r"D:/test/outdir"
    capt_per_char_list = os.listdir(CAPT_PATH)
    image_array, image_label = read_train_data(CAPT_PATH)
    image_feature = []
    for num, image in enumerate(image_array):
        feature = feature_transfer(image)
        image_feature.append(feature)
    print(capt_per_char_list)
    print(clf.predict(image_feature))
如下代码段是训练模型的逻辑,使用joblib保存训练好的模型,之后就可以通过 joblib.load重新拿出来使用了
		train_table, train_labels = main()
        from sklearn.ensemble import RandomForestClassifier
        clf =  RandomForestClassifier(n_estimators=100, max_depth=None,min_samples_split=2, random_state=0)
        clf.fit(train_table, train_labels)
        joblib.dump(clf, 'rf.model')
        print("训练完成")
测试结果:
…
T_2B5Td_3.png 读取成功
U_hxUzm_2.png 读取成功
x_hxUzm_1.png 读取成功
z_hxUzm_3.png 读取成功
[‘1_3q1fo_2.png’, ‘2_2B5Td_0.png’, ‘3_3q1fo_0.png’, ‘5_2B5Td_2.png’, ‘B_2B5Td_1.png’, ‘d_2B5Td_4.png’, ‘f_3q1fo_3.png’, ‘h_hxUzm_0.png’, ‘m_hxUzm_4.png’, ‘o_3q1fo_4.png’, ‘q_3q1fo_1.png’, ‘T_2B5Td_3.png’, ‘U_hxUzm_2.png’, ‘x_hxUzm_1.png’, ‘z_hxUzm_3.png’]
[‘1’ ‘2’ ‘3’ ‘5’ ‘B’ ‘d’ ‘f’ ‘h’ ‘m’ ‘o’ ‘q’ ‘T’ ‘U’ ‘x’ ‘z’]
显然成功率达到使用的要求啦。
本文中使用的机器学习是随机森林模型
clf = RandomForestClassifier(n_estimators=100, max_depth=None,min_samples_split=2, random_state=0)
其他分类模型也是可以使用的,比如KNN,SVM,CNN等