《JMX in action》学习笔记(一)——简单的JMX agent编写
书是从这里下载的https://download.csdn.net/download/fangzhilong/1594446
本文是《JMX in action》Chapter 2的学习笔记,原书是英文版,且本人水平有限,如有错误请指教
1 MBean的编写
每一个MBean都需要实现接口,因为JMX 通过接口来描述MBean需要暴露的属性和操作。
package com.tuan.JMXLearn.hello;

public interface helloWorldMBean {
    void setGreeting(String greeting);
    String getGreeting();
    void printGreeting();
}
再写一个实现
package com.tuan.JMXLearn.hello;

public class helloWorld implements helloWorldMBean{
    private String greeting = null;

    public helloWorld() {
        this.greeting = "Hello World! I am a Standard MBean";
    }

    public helloWorld(String greeting ) {
        this.greeting = greeting;
    }

    public void setGreeting(String greeting) {
        this.greeting = greeting;
    }

    public String getGreeting() {
        return greeting;
    }

    public void printGreeting() {
        System.out.println( greeting );
    }
}
2 JMX Agent编写
接下来编写JMX agent,一共需要完成以下三个目标:
-
创建MBean Server
-
创建HTML适配器与HTML客户端连接
-
注册helloWorld这个MBean
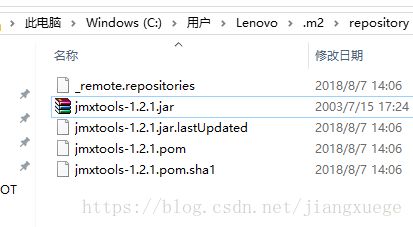
注意这里需要引用jmxtools和jmxri两个jar包,这两个jar包直接通过maven添加dependency,仍然找不到类,打开本地maven库查看对应的文件夹里面,发现根本没有jar包
后来查了一下因为某些原因这两个包要去oracle的网站下载
http://www.oracle.com/technetwork/java/javasebusiness/downloads/java-archive-downloads-java-plat-419418.html#7657-jmx-1.2.1-oth-JPR
下载后把jar包分别放进对应的文件夹里面,改一下名字,在Idea里面Reimport一下即可
Agent类主要就是创建MBean Server,以及MBean的注册
package com.tuan.JMXLearn.hello;

import com.sun.jdmk.comm.HtmlAdaptorServer;

import javax.management.*;

public class helloAgent {
    public helloAgent() {
        MBeanServer mbs = MBeanServerFactory.createMBeanServer("helloAgent");  //工厂模式创建MBean Server,通过domain属性区分不同Server
        helloWorld hw = new helloWorld();
        HtmlAdaptorServer adapter = new HtmlAdaptorServer();
        ObjectName adapterName = null;
        ObjectName helloWorldName = null;
        try {
            adapterName = new ObjectName("helloAgent:name=htmladapter,port=9092");  //字符串前缀为domain值,一般与Server的domain相同
            helloWorldName = new ObjectName("helloAgent:name=helloWorld1");
            mbs.registerMBean(hw, helloWorldName);  //注册MBean
            mbs.registerMBean(adapter, adapterName);
        } catch (Exception e) {
            e.printStackTrace();
        }
        adapter.setPort(9092);
        adapter.start();
    }

    public static void main(String[] args) {
        System.out.println("HelloAgent is running");
        helloAgent agent = new helloAgent();
    }
}
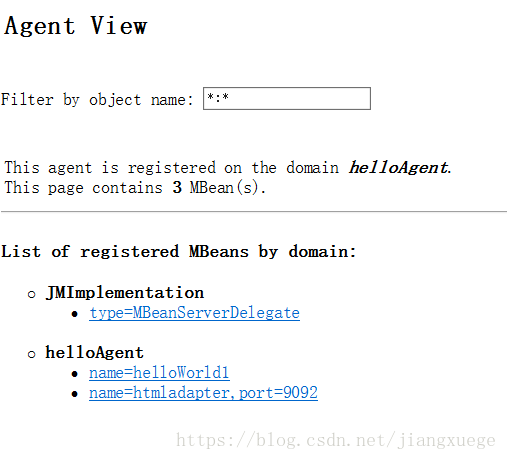
运行后,在浏览器访问http://你的IP:9092/
点开helloWorld1,可以在这里修改Greeting字符串的值,也可以执行方法printGreeting()
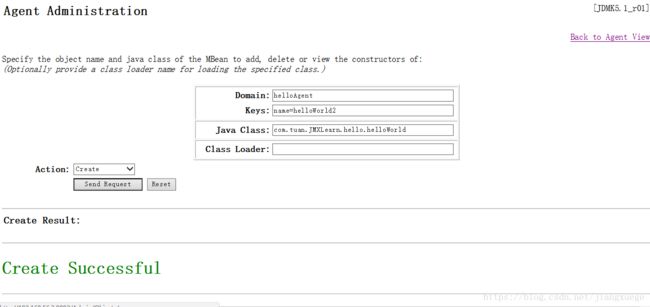
在Agent界面还可以通过网页,创建一个MBean并注册
3 MBean Notification的使用
Notification需要和一个Listener类配合使用,为了简单这里用Agent类作为Listener类,需要修改helloWorld和helloAgent两个类,代码如下
package com.tuan.JMXLearn.hello;

import javax.management.Notification;
import javax.management.NotificationBroadcasterSupport;

public class helloWorld extends NotificationBroadcasterSupport implements  helloWorldMBean{
    private String greeting = null;

    public helloWorld() {
        this.greeting = "Hello World! I am a Standard MBean";
    }

    public helloWorld(String greeting ) {
        this.greeting = greeting;
    }

    public void setGreeting(String greeting) {
        this.greeting = greeting;
    }

    public String getGreeting() {
        return greeting;
    }

    public void printGreeting() {
        System.out.println( greeting );
        Notification notification = new Notification("com.tuan.JMXlearn.hello.test", this, 0, greeting);  //新建Notification
        sendNotification(notification);
    }
}
package com.tuan.JMXLearn.hello;

import com.sun.jdmk.comm.HtmlAdaptorServer;

import javax.management.*;

public class helloAgent implements NotificationListener{
    public helloAgent() {
        MBeanServer mbs = MBeanServerFactory.createMBeanServer("helloAgent");
        helloWorld hw = new helloWorld();
        HtmlAdaptorServer adapter = new HtmlAdaptorServer();
        ObjectName adapterName = null;
        ObjectName helloWorldName = null;
        try {
            adapterName = new ObjectName("helloAgent:name=htmladapter,port=9092");
            helloWorldName = new ObjectName("helloAgent:name=helloWorld1");
            hw.addNotificationListener(this, null, null); //把Agent类设置为hw对象的Notification Listener
            mbs.registerMBean(hw, helloWorldName);
            mbs.registerMBean(adapter, adapterName);
        } catch (Exception e) {
            e.printStackTrace();
        }
        adapter.setPort(9092);
        adapter.start();
    }

    public static void main(String[] args) {
        System.out.println("HelloAgent is running");
        helloAgent agent = new helloAgent();
    }

    @Override
    public void handleNotification(Notification notification, Object handback) {  //Notification处理
        System.out.println("Receiving notification");
        System.out.println(notification.getType());
        System.out.println(notification.getMessage());
    }
}
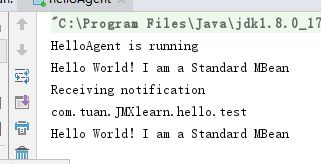
run起来之后,执行一下printGreeting(),控制台打印了Notification的相关信息
简单剖析一下Notification是如何做的
首先看一下Listener类,每个Listener类需要实现接口NotificationListener,这个接口只有一个方法,在每次接收到Notification的时候自动执行,notification对象包含MBean赋予的一些信息,例如type、message等,handback是一个回调对象
public void handleNotification(Notification notification, Object handback);其次看一下MBean,本例中的MBean继承NotificationBroadcasterSupport这个类,这个类是接口NotificationEmitter的一个实现,接口NotificationEmitter继承了NotificationBroadcaster,这个接口一共有三个方法,很显然一个是添加Listener一个是移除Listener,另外一个是获得所有的Notification信息
public void addNotificationListener(NotificationListener listener,
                                        NotificationFilter filter,
                                        Object handback)
            throws java.lang.IllegalArgumentException;
public void removeNotificationListener(NotificationListener listener)
            throws ListenerNotFoundException;
public MBeanNotificationInfo[] getNotificationInfo();
接口NotificationEmitter的removeNotificationListener方法升级了一下,参数变得和addNotificationListener一样多
public void removeNotificationListener(NotificationListener listener,
                                           NotificationFilter filter,
                                           Object handback)
            throws ListenerNotFoundException;
重点来看一下NotificationBroadcasterSupport这个类,添加、移除Listener其实就是在维护一个并发容器ListlistenerList,sendNotification()调用后,对每个存放在List中的Listener都执行发送(还有一些过滤等操作,现在先不管)
private List listenerList = new CopyOnWriteArrayList();

public void addNotificationListener(NotificationListener listener,
                                        NotificationFilter filter,
                                        Object handback) {

    if (listener == null) {
        throw new IllegalArgumentException ("Listener can't be null") ;
    }

    listenerList.add(new ListenerInfo(listener, filter, handback));
}

public void removeNotificationListener(NotificationListener listener,
                                           NotificationFilter filter,
                                           Object handback)
            throws ListenerNotFoundException {

    ListenerInfo li = new ListenerInfo(listener, filter, handback);
    boolean removed = listenerList.remove(li);
    if (!removed) {
        throw new ListenerNotFoundException("Listener not registered " +
                                                "(with this filter and " +
                                                "handback)");
    }
}

public void sendNotification(Notification notification) {

        if (notification == null) {
            return;
        }

        boolean enabled;

        for (ListenerInfo li : listenerList) {
            try {
                enabled = li.filter == null ||
                    li.filter.isNotificationEnabled(notification);
            } catch (Exception e) {
                if (logger.debugOn()) {
                    logger.debug("sendNotification", e);
                }

                continue;
            }

            if (enabled) {
                executor.execute(new SendNotifJob(notification, li));
            }
        }
    }


