使用 RDVTabBarController 制作底部凸起的 TabBar 笔记
欢迎访问我的个人博客http://mmoaay.photo/
本文主要针对底部凸起的 TabBar 这种特殊需求,不感兴趣的可以直接绕过~
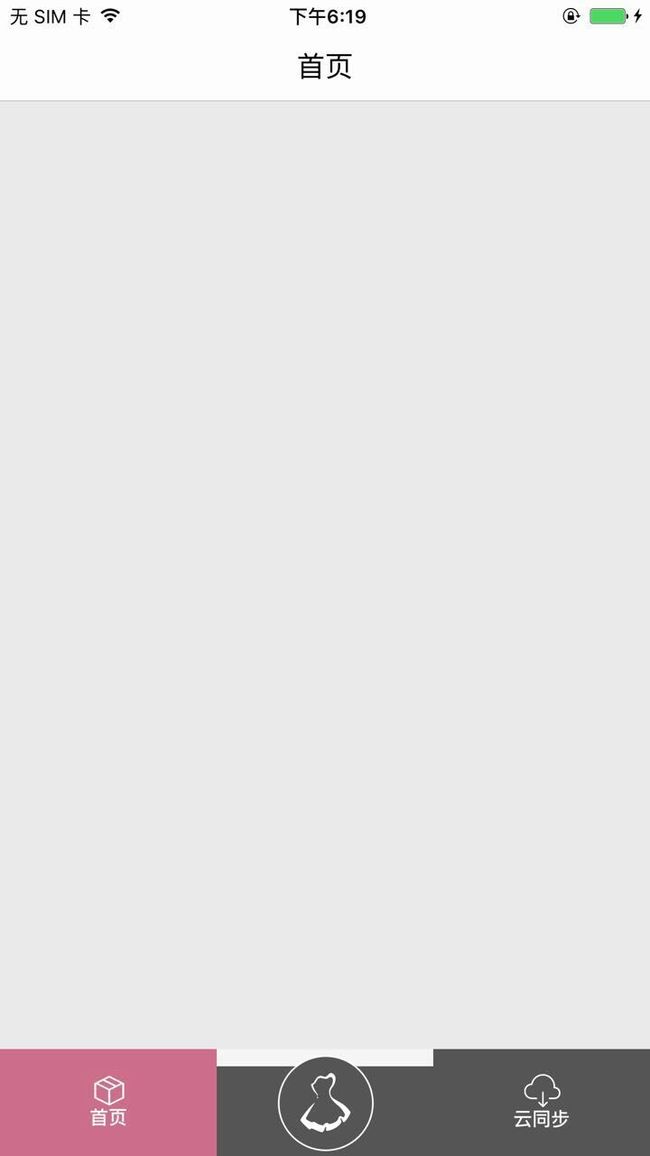
最近做的一个项目需要底部凸起的 TabBar,效果如下:
考虑到 iOS 原生 UITableBar 的定制比较麻烦,所以决定先找一下第三方的解决方案,经过调研发现 RDVTabBarController 比较符合需求。而且经过实践发现它有如下几个优势:
- 实现方式与 iOS 原生
UITableBarController基本一致,方便上手。 RDVTabBar可以比较简单滴实现底部某个 tab 凸起的效果。- 支持自定义 badge。
切图
因为 RDVTabBarItem 本身提供如下支持:
- 设置选中和未选中的背景
- 设置选中和未选中的 Image
- 设置选中和未选中的文本属性
而且考虑到屏幕的自适应,所以我们在切图的时候把 tab 的 icon 和背景(背景如果是纯色可以不切图)单独切图。
撸代码
首先,我们新建一个继承 RDVTabBarController 的类,然后通过代码或者SB的方式将其设置为根视图。
巨坑
这里有我之前踩过的一个坑,因为一般 App 都会有 UINavigationController 用来做视图导航,所以当 App 底部有 TabBar 的时候,我们有两种选择:
- 用一个
UITabBarController包含多个UINavigationController。 - 用一个
UINavigationController包含一个UITabBarController。
曾经我很天真(sha bi)的选了第一种,理由是从逻辑上理解更自然,但是结果是被坑惨了,因为业务需求往往是底部 UITabBar 只在几个 Tab 的首页显示,进入下一个页面之后就要隐藏起来,如果采用了第一种方案,你就需要使用 self.hidesBottomBarWhenPushed = YES 或者自定义动画的方式来隐藏底部 UITabBar,然后坑就出现了——当你需要从某个 Tab 的首页渐变到下一个页面的时候。
如果使用 self.hidesBottomBarWhenPushed = YES, UITabBar 仍然会按照原来动画方式隐藏和出现,也就是你会看到 Push 的时候它从右往左消失,Pop 的时候从左往右出现,OMG!!!这 tmd 能看么?你的切换动画是渐变的,但是竟然有个 UITabBar 在下面跑来跑去,不能忍好么?
这个时候是不是想自定义动画了?呵呵~不敢告诉你我试了好久,也没有得到一种可以让 UITabBar 渐变消失出现,然后 Tab 里面的页面还能平滑滴配合 UITabBar 做变化的动画效果。
所以!为什么不选第二种!在也不需要 self.hidesBottomBarWhenPushed = YES!再也不需要为隐藏和显示 UITabBar 头疼!再也不需要搞各种动画来处理这个巨坑,你所需要做的只是:在 Tab 页面切换的时候把导航栏的标题换一下而已。So easy!
言归正传
好了,骂完以前天真(sha bi)的日子,感觉爽多了~现在继续定制 TabBar。
首先,和 UITableBarController 一样,先设置 TabBarController 管理的 viewControllers:
    UIStoryboard *homeStoryboard = [UIStoryboard storyboardWithName:WDHOMESTORYBOARD bundle:nil];
    UIViewController *firstViewController=[homeStoryboard instantiateViewControllerWithIdentifier:WDHOMEVIEWCONTROLLER];

    UIStoryboard *clothStoryboard = [UIStoryboard storyboardWithName:WDCLOTHSTORYBOARD bundle:nil];
    UIViewController *secondViewController=[clothStoryboard instantiateViewControllerWithIdentifier:WDCLOTHVIEWCONTROLLER];

    UIStoryboard *userStoryboard = [UIStoryboard storyboardWithName:WDUSERSTORYBOARD bundle:nil];
    UIViewController *thirdViewController=[userStoryboard instantiateViewControllerWithIdentifier:WDLOGINVIEWCONTROLLER];

    [self setViewControllers:@[firstViewController, secondViewController,
                               thirdViewController]];
代码很简单,就是从 SB 中加载 3 个 ViewController 然后放到 viewControllers 里面去。
然后是关键部分,对 TabBar 做定制:
    self.tabBar.frame = CGRectMake(0, 0, SCREEN_SIZE.width, 68);
    self.tabBar.backgroundColor = [UIColor clearColor];

    // tab 图片
    NSArray *tabBarItemImages = @[@"home_icon", @"cloth_icon", @"cloud_icon"];
    // tab 标题
    NSArray *tabBarItemTitles = @[@"首页", @"", @"云同步"];
    NSInteger index = 0;
    for (RDVTabBarItem *item in [[self tabBar] items])
    {
        if (index == 1) {
            [item setBackgroundSelectedImage:[UIImage imageNamed:@"tabbar_bg_image"] withUnselectedImage:[UIImage imageNamed:@"tabbar_bg_image"]];
        } else {
            [item setBackgroundSelectedImage:[WDImageUtil createImageWithColor:TINT_COLOR] withUnselectedImage:[WDImageUtil createImageWithColor:DARK_COLOR]];
            item.itemHeight = 57.0f;
        }

        UIImage *selectedimage = [UIImage imageNamed:[NSString stringWithFormat:@"%@_selected",[tabBarItemImages objectAtIndex:index]]];
        UIImage *unselectedimage = [UIImage imageNamed:[NSString stringWithFormat:@"%@",[tabBarItemImages objectAtIndex:index]]];

        [item setFinishedSelectedImage:selectedimage withFinishedUnselectedImage:unselectedimage];

        [item setTitle:[tabBarItemTitles objectAtIndex:index]];
        item.selectedTitleAttributes = @{
                                         NSFontAttributeName: [UIFont boldSystemFontOfSize:12],
                                         NSForegroundColorAttributeName:[UIColor whiteColor],
                                         };
        item.unselectedTitleAttributes = @{
                                           NSFontAttributeName: [UIFont boldSystemFontOfSize:12],
                                           NSForegroundColorAttributeName:[UIColor whiteColor],
                                           };
        index++;
    }
这里我做了几件事情:
设置
tabBar的frame,设置其高度为凸出 Tab 按钮的高度,如果不设置的话,凸出 Tab 按钮会被裁剪掉,如下图:设置
tabBar的backgroundColor为透明色。然后遍历
tabBar的items,对每个item进行设置。这里比较关键的点在于判断是正中间的item时,我们需要设置它的背景图片为事先切好的比较特殊的图片,这张图片的分辨率为 1*68(68即为tabBar的高度),然后它的上面一部分是透明的,下面一部分填充颜色,下面一部分的高度为 57,这个高度和另外item的itemHeight是一致的。这个itemHeight的作用有两个:
这样设置好之后就可以达到文章开始时的效果了。
唯一不足就是中间凸起按钮的背景图片用了一个比较猥琐的办法。如果大家有更科学的办法可以通过下面的评论告诉我~


