无法删除Hyper-V虚拟机快照,右键没有删除选项--Veritas Backup Exec错误:V-79-40960-38686解决方法
最近使用Veritas Backup Exec备份一个hyper-v虚拟机,最后报错:V-79-40960-38686 - 由于 Backup Exec在虚拟机器「******」中侦测到其他复原检查点,因此无法建立复原检查点。如果没有其他正在执行的备份工作,请手动删除复原检查点「BE_Snapshot_****** - (2020/*/** - 下午 11:51:32)」并重试备份工作。
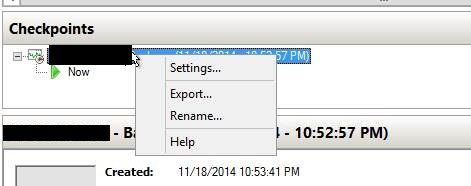
想手动删除由BE产生的Hyper-V虚拟机快照,发现右键没有删除选项,无法删除。随后查找资料,找到以下文章。最后手动合并虚拟机文件,重建虚拟机解决了此问题。以此谨记,并分享给有需要的人。
#####################################################################################################
参考文章链接如下:
https://support.microsoft.com/zh-cn/help/3059372/you-can-t-delete-a-recovery-checkpoint-for-a-virtual-machine-in-data-
您不能删除虚拟机在 Data Protection Manager 恢复检查点
适用于: Windows Server 2012 R2 StandardWindows Server 2012 R2 DatacenterSystem Center 2012 Data Protection Manager 详细
重要提示:本文章是 Microsoft 软件自动翻译的结果,而非专业译者翻译的结果。 Microsoft 提供专业人员翻译的文章、由自动翻译生成的文章以及来自 Microsoft 社区的文章翻译,因此你能够以自己的语言阅读所有知识库文章。 需要注意的是,由自动翻译生成的文章(包括 Microsoft 社区审阅的文章)可能包含词汇、句法或语法错误。 对于因不正确的内容翻译或使用不正确的内容翻译而造成的不准确或错误或任何损害,Microsoft 概不负责。
查看原始英文文章:3059372
症状
Data Protection Manager (DPM) 备份失败后,不能删除中断的恢复检查点创建的 Hyper-V 虚拟机。当您尝试执行此操作时,您会发现没有 Hyper-V 管理器控制台 GUI 中的虚拟机为列出的选项。
下面的命令为 VM 及其类型返回快照的列表︰
获得 VMSnapshot — VMName <虚拟机名称>
Hyper-V 通常会创建快照是标准类型。然而,DPM 创建快照的恢复的类型。在列表中,则返回,您需要删除恢复快照,因为这些都是实际的中断的检查点。
原因
DPM 是如何工作的?
通常情况下,DPM 请求 Hyper-V 虚拟机备份过程中创建虚拟机检查点。DPM 备份完成后,它将发送一个备份的完成通知,,然后 Hyper-V 合并回主.vhd 文件检查点并删除.avhd 文件。
导致中断的检查点什么?
没有一个已知的问题,甚至在完成备份后 Windows 服务器处于锁定或备份状态虚拟机保留在其中。若要解决此问题,请应用在Hyper-V 虚拟机备份不会改变处于锁定状态的 VM中介绍的修复程序。
但是,即使您执行此操作后,断开的恢复检查点保留。
解决方案
不会删除通过 GUI 的中断的恢复检查点。相反,您必须手动将它们合并。有关如何将.avhd 文件合并到.vhd 文件的信息,请参阅手动合并到 Hyper-V 中.vhd.avhd。
此资源也意味着更好的解决方案 (如果有 2008 R2 或更高版本) 是创建虚拟机的快照。然后,选择该快照并将其导出。这在单个 VHD 文件创建您的虚拟机的副本。然后可以删除旧的 VM,并导入新。
上次更新时间:2020年3月27日
#####################################################################################################
参考文章链接如下:
phttps://social.technet.microsoft.com/wiki/contents/articles/6257.manually-merge-avhd-to-vhd-in-hyper-v.aspx
Manually Merge .avhd to .vhd in Hyper-V
Hyper-V brings to life several additional disaster recovery scenarios that can be leveraged to our advantage when the need arises. One of the features that really comes into play are VM snapshots. A Snapshot is basically a spot in time where the current running configuration of the Virtual Machines is saved to a Snapshot Differencing Disk file (AVHD), from which you can return to from the future. This tip will show you how to manually merge hyper-v snapshots into a single VM for point in time restores.
When you create a differencing disk the original VHD is no longer modified and the snapshots are merged with the original vhd only when it is powered off. In disaster recovery scenarios, There may be cases where we want to manually merge snapshots ( avhd )
In order to do this, You must first change the extension of the Newest AVHD file to VHD.
Any VHD differencing disk(avhd) will always go to its parent, not the root parent.
So if you have a bunch of AVHDs, Each depends on the one before it - like the rungs of a ladder - they are sequential. Most folks have a very simple linear chain of snapshots. Example : VHD - AVHD1 - AVHD2 - AVHD3 - AVHD4. ( Here AVHD4 is the Newest and AVHD1 is the Oldest)
The parent of AVHD4 is AVHD3. The parent of AVHD3 is AVHD2 The parent of AVHDn would simply be the one before it.
You need to Start Merge From New AVHD to Old AVHD to complete the Merge Operation.
To Start Merge follow the below steps
- First Identify the Newest AVHD ( In Our Ex : AVHD4)
- Rename the Newest AVHD (AVHD4) to VHD ( Should not rename all the AVHDs at a time, Need to Rename only Newest Avhd First)
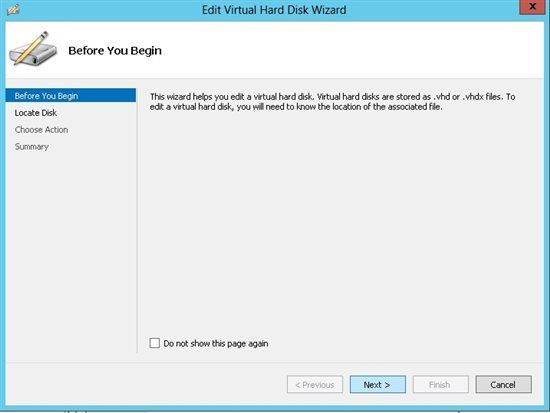
- You can choose the Edit Disk option from the Actions menu in the Hyper-V Management Console.

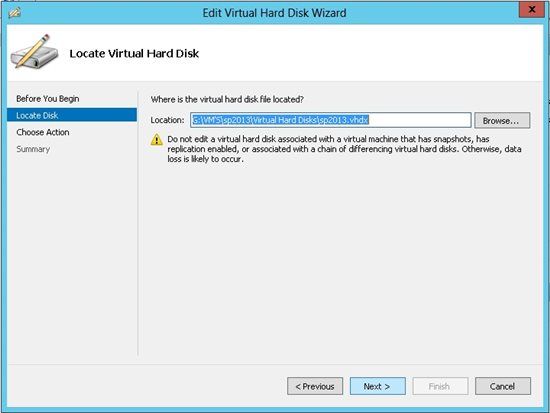
- Click Next through the first screen and select the snapshot file on the following screen.


- Select Merge on the next screen and choose the To parent virtual disk option and click Finish.
- After Successfully Completing Merge, Now Automatically AVHD4 will be deleted.
- Now Rename the Second Newest Avhd (AVHD3) to Vhd. and Repeats the Steps from 1 to 4 until Oldest AVHD ( AVHD1) Get Merge with Parent VHD.
Once this has completed you should create a new virtual machine with the default options you would normally use, selecting to use an existing virtual disk on the hard disk screen. You should select the newly merged VHD file.
Now you have Successfully Completed Manually Merge avhd to vhd in Hyper-V.
This Guide works with all Hyper-V Versions including Windows Server 2012 R2 with Hyper-V.
#####################################################################################################