OpenCV——轮廓检测
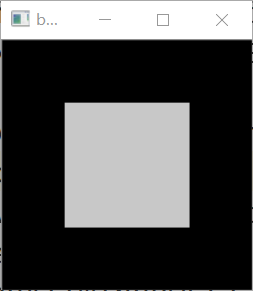
首先创建一个测试图像:创建一个200x200的黑色空白图像,在图像的中央放置一个灰色方块。
-
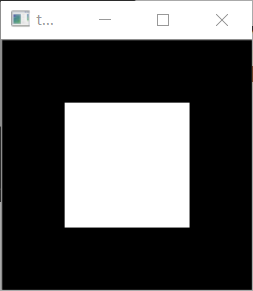
使用cv2.threshold()函数对图像进行二值化处理。
-
使用cv2.findContours()函数获取图像边界
-
将灰度图像转化为BGR并使用cv2.drawContours()函数绘制图像边界
-
源代码
# 轮廓检测

import cv2
import numpy as np

img = np.zeros((200, 200), dtype=np.uint8)
img[50:150, 50:150] = 200
cv2.imshow("before", img)

ret, thresh = cv2.threshold(img, 127, 255, cv2.THRESH_BINARY)
cv2.imshow("thresh", thresh)

image, contours, hierarchy = cv2.findContours(thresh, cv2.RETR_TREE, cv2.CHAIN_APPROX_SIMPLE)

color = cv2.cvtColor(thresh, cv2.COLOR_GRAY2BGR)
cv2.drawContours(color, contours, -1, (0, 255, 0), 2)
cv2.imshow("contours", color)
cv2.waitKey()
cv2.destroyAllWindows()
- before
- thresh
- contours
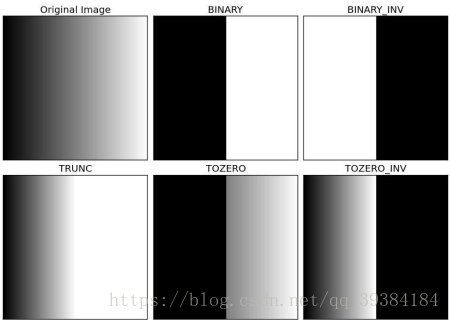
cv2.threshold()函数的最后一个参数指定了二值化操作的类型,包含以下5种类型: cv2.THRESH_BINARY; cv2.THRESH_BINARY_INV; cv2.THRESH_TRUNC; cv2.THRESH_TOZERO;cv2.THRESH_TOZERO_INV
- 示例
cv2.findContours()函数的第二个参数表示轮廓的检索模式:
- cv2.RETR_EXTERNAL表示只检测外轮廓。
- cv2.RETR_LIST检测的轮廓不建立等级关系。
- cv2.RETR_CCOMP建立两个等级的轮廓,上面的一层为外边界,里面的一层为内孔的边界信息。如果内孔内还有一个连通物体,这个物体的边界也在顶层。
- cv2.RETR_TREE建立一个等级树结构的轮廓。
cv2.findContours()函数的第三个参数表示轮廓的近似办法:
- cv2.CHAIN_APPROX_NONE存储所有的轮廓点,相邻的两个点的像素位置差不超过1,即max(abs(x1-x2),abs(y2-y1)) == 1。
- cv2.CHAIN_APPROX_SIMPLE压缩水平方向,垂直方向,对角线方向的元素,只保留该方向的终点坐标,例如一个矩形轮廓只需4个点来保存轮廓信息。
- cv2.CHAIN_APPROX_TC89_L1,CV_CHAIN_APPROX_TC89_KCOS使用teh-Chinl chain 近似算法。
cv2.drawContours()函数的第三个参数指定绘制轮廓list中的哪条轮廓,如果是-1,则绘制其中的所有轮廓。第五个参数表明轮廓线的宽度,如果是-1(cv2.FILLED),则为填充模式
想了解更多关于数字图像处理:数字图像处理专栏


