关于UIScrollView和UITableview,相信做IOS开发的你并不陌生,这篇文章整理了基础资料加上一些实际开发的使用,希望对小白能有帮助。
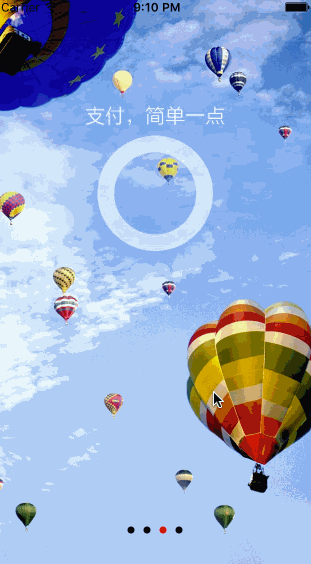
效果图
以上图片是最常见的ScrollView做的欢迎界面。后面有代码。
基础概念:
UIScorllView:
滚动视图继承自UIView ,除了可以做容器,可以设置超出它的尺寸的区域。
- 属性:
常用属性:
-- CGPoint contentOffSet :contentView的偏移值(正常contentOffSet.x/y值都为正数,但有时(bounces = YES)拽出边界了或者 contentInset 设置了,还是会出现负数,伴随着contentView滑动,总在改变);

--CGSize contentSize :contentView的大小;

--UIEdgeInsets contentInset :contentView四周的扩展大小,相当改变ContentView的大小,但不是改变contentSize(UIEdgeInsets是个结构体,里面的数值可能是负数,所以扩展的结果可能是contentView被蚕食了一部分。但不管contentView变大了还是变小了,contentOffSet的值还是相比原来大小的偏移);

--id delegate :它的代理;

--BOOL directionalLockEnabled :默认是NO,可以在垂直和水平方向同时运动。当值是YES时,假如一开始是垂直或者是水平运动,那么接下来会锁定另外一个方向的滚动。假如一开始是对角方向滚动,则不会禁止某个方向(测试锁定不了,难道是contentsize跟frame高度或宽度一样时用的)

- -BOOL bounces :默认是 yes,就是滚动超过边界会反弹有反弹回来的效果。假如是 NO,那么滚动到达边界会立刻停止

--UIScrollViewIndicatorStyle  indicatorStyle :设定滚动条的样式;

--BOOL alwaysBounceVertical: 默认no,控制垂直方向遇到边框是否反弹(但bounces为NO时,它为yes,也不反弹。/if YES and bounces is YES, even if content is smaller than bounds, allow drag vertically,测试不好使);

--BOOL alwaysBounceHorizontal: 默认no,控制水平方向遇到边框是否反弹(但bounces为NO时,它为yes,也不反弹);

--BOOL pagingEnabled: default NO,contentView是否整页翻动;

--BOOL scrollEnabled :default YES,contentView是否能滚动;

--BOOL showsHorizontalScrollIndicator :default YES,是否显示水平方向的滚动条;

--BOOL showsVerticalScrollIndicator :default YES  是否显示垂直方向的滚动条;

--UIEdgeInsets scrollIndicatorInsets :滚动条在scrollerView中的位置的扩展;

--float  decelerationRate :手指放开后的减速率(测试发现设定这个值没用);
交互相关:
--Scrolling with no scroll bars is a bit complex. on touch down, we don't know if the user will want to scroll or track a subview like a control.
on touch down, we start a timer and also look at any movement. if the time elapses without sufficient change in position, we start sending events to  the hit view in the content subview. if the user then drags far enough, we switch back to dragging and cancel any tracking in the subview.
 the methods below are called by the scroll view and give subclasses override points to add in custom behavior.
you can remove the delay in delivery of touchesBegan:withEvent: to subviews by setting delaysContentTouches to NO.

--UIScrollView的事件响应顺序跟一般的不同,一般的见参考文档, UIScrollView 的工作原理,当手指 touch 的时候, UIScrollView 会拦截 Event, 会等待一段时间,在这段时间内,如果没有手指没有移动,当时间结束时, UIScrollView 会发送 tracking events 到子视图上。在时间结束前,手指发生了移动,那么 UIScrollView 就会进行移动,从而取笑发送 tracking 顺序说明: 当手指 touch 的时候,如果 scrollView 上面有可交互的视图, track, ->或滑动或点击

--BOOL tracking : (readonly)returns YES if user has touched. may not yet have started dragging, 即用户按上了,不管滑没滑

--BOOL dragging : (readonly)returns YES if user has started scrolling. this may require some time and or distance to move to initiate dragging, 用户在手指在 scrolll 时,松开了即为 no 了

--BOOL decelerating : (readonly) returns YES if user isn't dragging (touch up) but scroll view is still moving

 --BOOL delaysContentTouches :就是手指点击到类的时候,如果它为 yes ,则按之前讲的处理,如果为 no ,并且点在了 “ 可交互的视图 ” ,立马调用 touchesShouldBegin

  -- BOOL  canCancelContentTouches: 是 if touches have already been delivered to a subview of the scroll view 之后发生的事,如果 no ,即使 touch move ,也不 scroll 了,反之 如果是 yes , tracking 后,手指移动,会调用 touchesShouldCancelInContentView 方法;

-- 备注:注意顺序,所以当 delaysContentTouches 为 no , canCancelContentTouches 为 no 的时候, touchesShouldBegin 方法的返回值不同,滑动在 “ 可交互的视图 ” 的效果也不同,一个滑的动,一个滑不动 ( 注意是 touch move 了之后的事情 )

------------ 相关方法 ------------

 // override points for subclasses to control delivery of touch events to subviews of the scroll view
 // called before touches are delivered to a subview of the scroll view. if it returns NO the touches will not be delivered to the subview

- (BOOL)touchesShouldBegin:(NSSet *)touches withEvent:(UIEvent *)event inContentView:(UIView *)view; // default returns YES

-- 调用地方:方法在 UIScrollView 的子类中被重写,被调用,

--调用时候:如果delaysContentTouches为yes,则手指点击的时候,会捕获到Event,等待一段时间,在这段时间内,如果没有手指没有移动,并且手指点击在了一个“可交互的视图”则调用touchesShouldBegin,否则类scroll。如果delaysContentTouches为no,只要手指点击了,并且点在一个“可交互的视图”,立刻调用touchesShouldBegin方法。

--备注:当点击子类中的“可交互的视图”上时,如果返回值为no,点击事件不会传递给子视图了。( 例如上面加了一个 button ,如果它返回 no ,点击 button ,没有效果 ) 。 yes 反之 ;

 // called before scrolling begins if touches have already been delivered to a subview of the scroll view. if it returns NO the touches will continue to be delivered to the subview and scrolling will not occur
// not called if canCancelContentTouches is NO. default returns YES if view isn't a UIControl

- (BOOL)touchesShouldCancelInContentView:(UIView *)view;

-- 调用时候,上面已讲, -- 返回值说明: yes ,发生滚动, touch 不在传递给子视图, no ,不滚动, touch 传递给子视图

总结: 用户 touch --》 tracking 真--》 如果点击一个可交互视图上,发生后面的事,如果没有,一般情况--》

步骤 1 :根据 delaysContentTouches 的值,判断什么时候 步骤 2 (立刻还是判断一定条件);

步骤 2 :调用 touchesShouldBegin 方法,如果返回值为 yes , touch 事件传给子视图;如果为 no , touch 事件不传给子视图,进入状态 n 。(跳转)

步骤 3 : touch move 的,如果 canCancelContentTouches 为 no ,不调用 touchesShouldCancelInContentView 方法,类也不 scroll ,进入状态 m ,如果 canCancelContentTouches 为 yes ,调用 touchesShouldCancelInContentView ,根据 touchesShouldCancelInContentView 方法的返回值,如果是 yes, 进入状态 m 。如果是 no, 进入状态 s 。

状态 n : tracking 为真,如果 touch move 的就 scroll , touch 松开,进入状态 e

状态 s : touch move 中,类 scroll , 如果 touch 松开,进入状态 e

状态 m : touch move 中,类不 scroll , 如果 touch 松开,进入状态 e

状态 e :结束

============ 缩放相关 ============

--float minimumZoomScale : 缩放的最小比例;

--float maximumZoomScale :缩放的最大比例;

-- float zoomScale : 缩放的比例 ( 在 minimumZoomScale 和 maximumZoomScale 之间变化 ); 如果设置的话,写在 [self.view addSubview:_scrollView]; 之后才能好使

 --BOOL bouncesZoom : 控制缩放到边界的时是否会反弹 ;

--BOOL zooming(readonly) :判断控件的大小是否正在缩放 ;

--BOOL zoomBouncing(readonly) :判断控件是否 缩放到了最大/最小 ;

-- 备注:如果 scollView 设置了缩放,但又设置 contentszie 等,刚开始没缩放的时候能 scroll ,但一但缩放过,就只能缩放,不能 scroll 了

// When the user taps the status bar, the scroll view beneath the touch which is closest to the status bar will be scrolled to top, but only if its `scrollsToTop` property is YES, its delegate does not return NO from `shouldScrollViewScrollToTop`, and it is not already at the top.
// On iPhone, we execute this gesture only if there's one on-screen scroll view with `scrollsToTop` == YES. If more than one is found, none will be scrolled.
设置单击状态栏控件是否滚动到顶部

--BOOL scrollsToTop :
通过上下左右滑动手势来查看使用要点:
- 基础:
1.需要向滚动视图内添加子视图
2.一定要设置滚动视图的frame
3.一定要设置滚动视图的内容尺寸contentSize - 深入要点:
从你的手指touch屏幕开始,scrollView开始一个timer,如果:
 1. 150ms内如果你的手指没有任何动作,消息就会传给subView。
 2. 150ms内手指有明显的滑动(一个swipe动作),scrollView就会滚动,消息不会传给subView,这里就是产生问题二的原因。
 3. 150ms内手指没有滑动,scrollView将消息传给subView,但是之后手指开始滑动,scrollView传送touchesCancelled消息给subView,然后开始滚动。
观察下tableView的情况,你先按住一个cell,cell开始高亮,手不要放开,开始滑动,tableView开始滚动,高亮取消。
delaysContentTouches的作用:
这个标志默认是YES,使用上面的150ms的timer,如果设置为NO,touch事件立即传递给subView,不会有150ms的等待。
cancelsTouches的作用:
这个标准默认为YES,如果设置为NO,这消息一旦传递给subView,这scroll事件不会再发生。
了解完基础,上个demo:
今时今日的app更新层出不穷,scrollview其实用的最多的还是在欢迎页和广告轮播这块(= =#好吧,其实俩者是一个东西),还有就是用在ScrollView和tableview混合界面,这里讲个简单的欢迎页吧。
#import "WelcomeViewController.h"
#import "MainViewController.h"
@interface WelcomeViewController ()
@property(nonatomic,strong)UIPageControl *pageControl;
@end

@implementation WelcomeViewController

- (void)viewDidLoad {
    [super viewDidLoad];

    [self setupScrollView];
    [self setupPageControl];
}

// 定制滚动视图
-(void)setupScrollView
{
    // 创建滚动视图
    UIScrollView *sv = [[UIScrollView alloc]init];


    //为了捕获滚动视图与用户的交互,需要设置代理
    sv.delegate = self;

    // 设置边缘不能弹跳
    sv.bounces = NO;

    // 设置滚动视图整页滚动
    sv.pagingEnabled = YES;

    // 设置水平滚动条不可见
    sv.showsHorizontalScrollIndicator = NO;

    // 设置滚动视图的可见区域
    sv.frame = self.view.bounds;

    // 设置contentSize
    sv.contentSize = CGSizeMake(sv.bounds.size.width*4, sv.bounds.size.height);

    // 添加子视图
    for (NSInteger i=0; i<4; i++)
    {
        UIImageView *imageView = [[UIImageView alloc]init];
        imageView.frame = CGRectMake(sv.bounds.size.width*i, 0, sv.bounds.size.width, sv.bounds.size.height);

        NSString *fileName = [NSString stringWithFormat:@"welcome%ld.png",i+1];
        imageView.image = [UIImage imageNamed:fileName];
        [sv addSubview:imageView];

        if (i==3) {
            [self setupEnterButton:imageView];
        }
    }
    // 添加滚动视图到控制器的view中
    [self.view addSubview:sv];
}
//定制屏幕下方的圆点
-(void)setupPageControl{
    //创建pageControl
    UIPageControl *pageControl = [[UIPageControl alloc]init];
     self.pageControl = pageControl;
    //设置frame
    pageControl.frame = CGRectMake(0,  self.view.bounds.size.height-50, self.view.bounds.size.width, 30);
    //设置圆点的个数
    pageControl.numberOfPages = 4;
    //设置圆点的颜色
    pageControl.pageIndicatorTintColor = [UIColor blackColor];
    //设置选中圆点的颜色
    pageControl.currentPageIndicatorTintColor = [UIColor redColor];
    //设置起始页面在第个小圆点
//    pageControl.currentPage = 3;

    pageControl.userInteractionEnabled = NO;


     //添加到控制器中
    [self.view addSubview:pageControl];
}
-(void)scrollViewDidScroll:(UIScrollView *)scrollView{
    CGPoint point = scrollView.contentOffset;

    self.pageControl.currentPage = round(point.x/scrollView.bounds.size.width);

    NSLog(@"%@",NSStringFromCGPoint(point));

}
-(void)setupEnterButton:(UIImageView*)iv{
    //打开用户交互功能
    iv.userInteractionEnabled = YES;

    UIButton * button = [[UIButton alloc]initWithFrame:CGRectMake((iv.bounds.size.width-100)/2, iv.bounds.size.height*0.6, 100, 40)];
//    button.backgroundColor = [UIColor lightGrayColor];
    [button setTitle:@"进入应用" forState:(UIControlStateNormal)];
    //配置按钮的边缘
    button.layer.borderWidth = 2;
    button.layer.borderColor = [UIColor whiteColor].CGColor;
    button.layer.cornerRadius = 10;


    //点击事件
    [button addTarget:self action:@selector(clickEnterAppButton:) forControlEvents:(UIControlEventTouchUpInside)];
    [iv addSubview:button];
}
//点击进入按钮,推出主界面
-(void)clickEnterAppButton:(UIButton *)btn{
    MainViewController * mainVC = [[MainViewController alloc]init];
   //跟换window的根式图为mainvc
    //欢迎界面不在是根视图以后,就会被系统回收

    //获取在main函数中创建过的那个唯一的应用程序对象
    UIApplication *application = [UIApplication sharedApplication];
    UIWindow * window = application.keyWindow;
    //更换根vc
    window.rootViewController = mainVC;
}
相信聪明的你看代码一看就懂,其实ScrollView还有很多方面的应用,后期会补充,本人博文大概1-2天会更新不定数篇幅,适合小白还有基础记不住的同学(其实说的我自己哈哈)喜欢的小伙伴可以关注一下。