TensorFlow2.0——数据的读取与展示(fashion_mnist)
数据的读取与展示
首先介绍一下Fashion_MNIST数据集,它是7万张灰度图像组成,可以分成10个类别.每个灰度图像都是28*28像素的图像.我们将使用其中的6万张进行训练网络,另外的1万张来评估准确率.
1.引用一些函数库便于结果展示
import matplotlib as mpl
import matplotlib.pyplot as plt
%matplotlib inline
#为了能在notebook中显示图像
import numpy as np
import sklearn
import pandas as pd
import os
import sys
import time
import tensorflow as tf

from tensorflow import keras

print(tf.__version__)
print(sys.version_info)
for module in mpl, np, pd, sklearn, tf, keras:
    print(module.__name__, module.__version__)
结果:
2.0.0
sys.version_info(major=3, minor=7, micro=4, releaselevel=‘final’, serial=0)
matplotlib 3.1.1
numpy 1.16.5
pandas 0.25.1
sklearn 0.21.3
tensorflow 2.0.0
tensorflow_core.keras 2.2.4-tf
2.加载TensorFlow的数据集,并拆分数据
fashion_mnist = keras.datasets.fashion_mnist  #加载TensorFlow中自带的数据集

#拆分数据集,加载数据集后返回训练集以及测试集
(x_train_all, y_train_all), (x_test, y_test) = fashion_mnist.load_data()

#将训练集进行一次拆分为验证集和训练集
x_valid, x_train = x_train_all[:5000], x_train_all[5000:]
y_valid, y_train = y_train_all[:5000], y_train_all[5000:]

print(x_valid.shape, y_valid.shape)
print(x_train.shape, y_train.shape)
print(x_test.shape, y_test.shape)
(5000, 28, 28) (5000,)
(55000, 28, 28) (55000,)
(10000, 28, 28) (10000,)
3.编写函数展示一张图片
def show_single_image(img_arr):
    plt.imshow(img_arr, cmap="binary")  #cmap颜色通道
    plt.show()
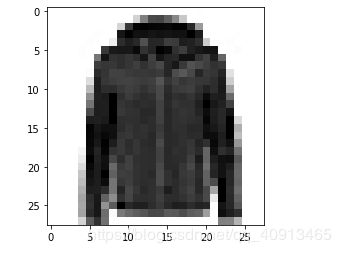
show_single_image(x_train[0])
def show_imgs(n_rows, n_cols, x_data, y_data, class_names):
    assert len(x_data) == len(y_data)
    assert n_rows * n_cols < len(x_data)
    plt.figure(figsize = (n_cols * 1.4, n_rows * 1.6))   #设置图片大小
    #循环显示图片
    for row in range(n_rows):
        for col in range(n_cols):
            index = n_cols * row + col
            plt.subplot(n_rows, n_cols, index+1)     #subplot绘制子图
            plt.imshow(x_data[index], cmap="binary", interpolation="nearest")
            plt.axis('off')             #坐标轴不可见
            plt.title(class_names[y_data[index]])
    plt.show()

class_names = ['T-shirt', 'Trouser', 'Pullover', 'Dress', 'Coat', 'Sandal', 'Shirt', 'Sneaker', 'Bag', 'Ankele boot']
show_imgs(3, 5, x_train, y_train, class_names)

