简介
spring-boot是由Pivotal团队提供的全新框架,其设计目的是用来简化新Spring应用的初始搭建以及开发过程。该框架使用了特定的方式来进行配置,从而使开发人员不再需要定义样板化的配置。通过这种方式,Boot致力于在蓬勃发展的快速应用开发领域(rapid application development)成为领导者。
参考项目:https://github.com/bigbeef/cppba-spring-boot
开源地址:https://github.com/bigbeef
个人博客:http://blog.cppba.com
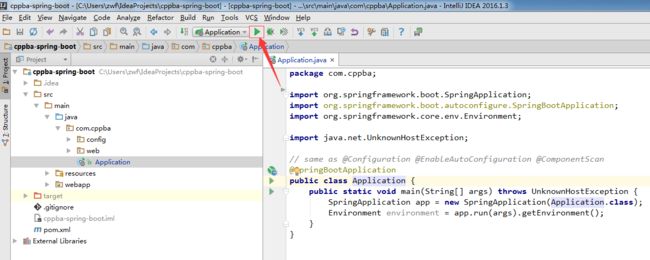
文件结构
1.maven的pom.xml配置
    4.0.0

    com.cppbba
    cppba-spring-boot
    war
    1.0.0

    cppba-spring-boot Maven Webapp
    http://maven.apache.org


        org.springframework.boot
        spring-boot-starter-parent
        1.3.6.RELEASE


        UTF-8
        1.7
        4.3.0.RELEASE
        4.3.11.Final


            org.springframework.boot
            spring-boot-starter-web


            org.springframework.boot
            spring-boot-starter-test


            org.springframework.boot
            spring-boot-starter-jdbc


            org.springframework
            spring-orm


            mysql
            mysql-connector-java


            org.hibernate
            hibernate-entitymanager
            ${hibernate.version}


            com.alibaba
            druid
            1.0.20


        cppba-spring-boot


                org.springframework.boot
                spring-boot-maven-plugin
2.创建Application.java
package com.cppba;

import org.springframework.boot.SpringApplication;
import org.springframework.boot.autoconfigure.SpringBootApplication;
import org.springframework.core.env.Environment;

import java.net.UnknownHostException;

// same as @Configuration @EnableAutoConfiguration @ComponentScan
@SpringBootApplication
public class Application {
    public static void main(String[] args) throws UnknownHostException {
        SpringApplication app = new SpringApplication(Application.class);
        Environment environment = app.run(args).getEnvironment();
    }
}
3.创建DatabaseConfiguration.java
package com.cppba.config;

import com.alibaba.druid.pool.DruidDataSource;
import org.springframework.boot.bind.RelaxedPropertyResolver;
import org.springframework.context.ApplicationContextException;
import org.springframework.context.EnvironmentAware;
import org.springframework.context.annotation.Bean;
import org.springframework.context.annotation.Configuration;
import org.springframework.core.env.Environment;
import org.springframework.orm.hibernate4.HibernateTransactionManager;
import org.springframework.orm.hibernate4.LocalSessionFactoryBean;
import org.springframework.transaction.annotation.EnableTransactionManagement;
import org.springframework.util.StringUtils;

import javax.sql.DataSource;
import java.sql.SQLException;
import java.util.Arrays;
import java.util.Properties;

@Configuration
@EnableTransactionManagement
public class DatabaseConfiguration implements EnvironmentAware {

    private Environment environment;
    private RelaxedPropertyResolver datasourcePropertyResolver;

    //从application.yml中读取资源
    @Override
    public void setEnvironment(Environment environment) {
        this.environment = environment;
        this.datasourcePropertyResolver = new RelaxedPropertyResolver(environment,
                "spring.datasource.");
    }

    //datasource
    @Bean(initMethod = "init", destroyMethod = "close")
    public DataSource dataSource() throws SQLException {
        if (StringUtils.isEmpty(datasourcePropertyResolver.getProperty("url"))) {
            System.out.println("Your database connection pool configuration is incorrect!" +
                    " Please check your Spring profile, current profiles are:"+
            Arrays.toString(environment.getActiveProfiles()));
            throw new ApplicationContextException(
                    "Database connection pool is not configured correctly");
        }
        DruidDataSource druidDataSource = new DruidDataSource();
        druidDataSource.setUrl(datasourcePropertyResolver.getProperty("url"));
        druidDataSource.setUsername(datasourcePropertyResolver
                .getProperty("username"));
        druidDataSource.setPassword(datasourcePropertyResolver
                .getProperty("password"));
        druidDataSource.setInitialSize(1);
        druidDataSource.setMinIdle(1);
        druidDataSource.setMaxActive(20);
        druidDataSource.setMaxWait(60000);
        druidDataSource.setTimeBetweenEvictionRunsMillis(60000);
        druidDataSource.setMinEvictableIdleTimeMillis(300000);
        druidDataSource.setValidationQuery("SELECT 'x'");
        druidDataSource.setTestWhileIdle(true);
        druidDataSource.setTestOnBorrow(false);
        druidDataSource.setTestOnReturn(false);
        return druidDataSource;
    }

    //sessionFactory
    @Bean
    public LocalSessionFactoryBean sessionFactory() throws SQLException{
        LocalSessionFactoryBean localSessionFactoryBean = new LocalSessionFactoryBean();
        localSessionFactoryBean.setDataSource(this.dataSource());
        Properties properties1 = new Properties();
        properties1.setProperty("hibernate.dialect","org.hibernate.dialect.MySQL5Dialect");
        properties1.setProperty("hibernate.show_sql","false");
        localSessionFactoryBean.setHibernateProperties(properties1);
        localSessionFactoryBean.setPackagesToScan("*");
        return localSessionFactoryBean;
    }

    //txManager事务开启
    @Bean
    public HibernateTransactionManager txManager() throws SQLException {
        HibernateTransactionManager hibernateTransactionManager = new HibernateTransactionManager();
        hibernateTransactionManager.setSessionFactory(sessionFactory().getObject());
        return hibernateTransactionManager;
    }
}
4.创建CommonAction.java(这是一个测试类)
package com.cppba.web;

import org.hibernate.SQLQuery;
import org.hibernate.Session;
import org.hibernate.SessionFactory;
import org.springframework.transaction.annotation.Transactional;
import org.springframework.web.bind.annotation.RequestMapping;
import org.springframework.web.bind.annotation.RestController;

import javax.annotation.Resource;
import javax.servlet.http.HttpServletResponse;
import java.io.IOException;
import java.util.List;

@RestController
@Transactional
public class CommonAction {

    @Resource
    private SessionFactory sessionFactory;

    @RequestMapping("test")
    public void test(HttpServletResponse response){
        Session session = sessionFactory.getCurrentSession();
        SQLQuery sqlQuery = session.createSQLQuery("select * from user");
        List list = sqlQuery.list();
        System.out.printf(list.size()+"");
        try {
            response.setContentType("application/json");
            response.setHeader("Cache-Control", "no-cache");
            response.setCharacterEncoding("UTF-8");
            response.getWriter().write("{\"msg\":\"调用成功\"}");
        } catch (IOException e) {
            e.printStackTrace();
        }
    }
}
5.创建application.yml
server:
    port: 8080
    address: localhost

spring:
    datasource:
        url: jdbc:mysql://localhost:3306/cppba
        username: root
        password: root
6.启动项目
我们点击启动按钮
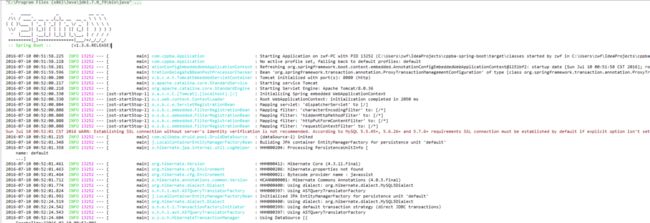
控制台会打印如下内容:
启动成功
接下来我们访问http://127.0.0.1:8080/test
(我的CommonAction中RequestMapping("test"),所以访问路径是test)
到此spring-boot配置成功!


