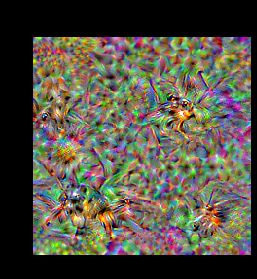
NetworkVisualization-PyTorch
从上次RNN之后的三次作业就会有PyTorch和TensorFlow两个版本,我选择了PyTorch,因为好上手,代码简洁易懂。
这次作业名字虽然叫做“网络可视化”,但是感觉更像是生成伪图片,还挺有意思的!而且这次代码量不多,只需在NetworkVisualization-PyTorch.ipynb中敲一敲就行了。
引用原文来说明:在此次作业中,主要要完成3个有关图像生成的技巧:
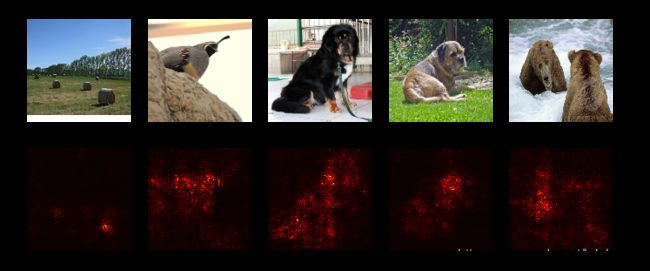
- Saliency Maps:显著性图能很快告诉我们图像的哪一部分影响了网络做出的分类决定;
- Fooling Images:扰动一张输入图像,使之对人眼似乎一模一样,却能让预训练模型误分类;
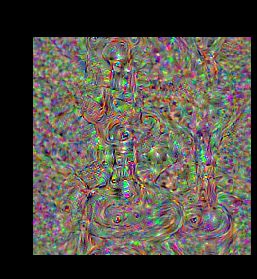
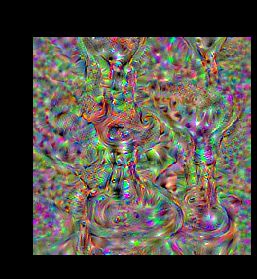
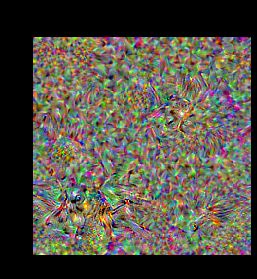
- Class Visualization:我们可以合成一张图像使特定类别的分类分值最大化,这能给我们一些感觉:网络模型在分类时到底在寻找什么。
Saliency Maps
根据代码上方的提示,可以比较好的理解要编写的代码。我们之前都是对模型参数作梯度下降(gradient descent)从而来更新参数,减小loss。那我们也可以固定参数,对输入图像的每一个pixel作梯度上升(gradient ascent),不断更新后来增大正确分类的得分。
从这里代码可以有几点收获:
- 因为 PyTorch学得不深,以前运用backward()只是用在标量的loss上,其实后来想一想在计算图上的节点都可以backward()。
- 但是这里的得分是一个向量,直接使用会报错:RuntimeError: grad can be implicitly created only for scalar outputs。只有shape是torch.Size([N])的tensor才可以直接使用.backward(),否则还得在里面加上和要反向传播维度一样的tensor,也就是一个权重向量,一般就是值为1的(我看了很多,还是就这样简单使用和理解吧),以后用的时候就是A.backward(torch.ones_like(A))[A是一个非标量tensor]
- 既然有梯度下降也就有梯度上升。其实是下降还是上升,就是看我们的最后的目标是要减小还是增大,根据梯度本身的规律,要减小目标就用梯度下降,要增大目标就用梯度上升。我们这里要最大化正确类别分值,则要用梯度上升。
关于上面的第2点,可以参考以下链接:
Pytorch中backward函数
PyTorch的学习笔记02 - backward( )函数
英文官方教程AUTOGRAD: AUTOMATIC DIFFERENTIATION
中文官方教程Autograd:自动求导
英文官方文档torch.autograd
中文官方文档Autograd:自动求导
看code:
def compute_saliency_maps(X, y, model):
    """
    Compute a class saliency map using the model for images X and labels y.

    Input:
    - X: Input images; Tensor of shape (N, 3, H, W)
    - y: Labels for X; LongTensor of shape (N,)
    - model: A pretrained CNN that will be used to compute the saliency map.

    Returns:
    - saliency: A Tensor of shape (N, H, W) giving the saliency maps for the input
    images.
    """
    # Make sure the model is in "test" mode
    model.eval()

    # Make input tensor require gradient
    X.requires_grad_()

    saliency = None
    ##############################################################################
    # TODO: Implement this function. Perform a forward and backward pass through #
    # the model to compute the gradient of the correct class score with respect  #
    # to each input image. You first want to compute the loss over the correct   #
    # scores (we'll combine losses across a batch by summing), and then compute  #
    # the gradients with a backward pass.                                        #
    ##############################################################################
    # *****START OF YOUR CODE (DO NOT DELETE/MODIFY THIS LINE)*****

    s = model(X) # torch.Size([5, 1000])因为是ImageNet,每一个最后都会出来1000类
    correct_class_scores = s.gather(1, y.view(-1, 1)).squeeze() # torch.Size([5])
    # backward里面也是可以传参数的,而且也不非要是loss才能backward
    # 我感觉只要是计算图中的节点都可以backward()
    # 关于backward()参数可以看:https://blog.csdn.net/shiheyingzhe/article/details/83054238
    correct_class_scores.backward(torch.ones_like(correct_class_scores))
    # correct_class_scores.backward() # 报错:grad can be implicitly created only for scalar outputs

    saliency, indice2 = torch.max(torch.abs(X.grad), dim=1)

    # *****END OF YOUR CODE (DO NOT DELETE/MODIFY THIS LINE)*****
    ##############################################################################
    #                             END OF YOUR CODE                               #
    ##############################################################################
    return saliency
Fooling Images
和上面的思想类似,我们既然可以最大化特定类别的分值,那我们就可以定向“愚弄”,不断用梯度上升来更新图像像素,直到网络将图像分类为我们指定的“类别”,梯度更新的时候不要忘记清零,因为tensor.grad是会累加的。看code:
def make_fooling_image(X, target_y, model):
    """
    Generate a fooling image that is close to X, but that the model classifies
    as target_y.

    Inputs:
    - X: Input image; Tensor of shape (1, 3, 224, 224)
    - target_y: An integer in the range [0, 1000)
    - model: A pretrained CNN

    Returns:
    - X_fooling: An image that is close to X, but that is classifed as target_y
    by the model.
    """
    # Initialize our fooling image to the input image, and make it require gradient
    X_fooling = X.clone()
    X_fooling = X_fooling.requires_grad_()

    learning_rate = 1
    ##############################################################################
    # TODO: Generate a fooling image X_fooling that the model will classify as   #
    # the class target_y. You should perform gradient ascent on the score of the #
    # target class, stopping when the model is fooled.                           #
    # When computing an update step, first normalize the gradient:               #
    #   dX = learning_rate * g / ||g||_2                                         #
    #                                                                            #
    # You should write a training loop.                                          #
    #                                                                            #
    # HINT: For most examples, you should be able to generate a fooling image    #
    # in fewer than 100 iterations of gradient ascent.                           #
    # You can print your progress over iterations to check your algorithm.       #
    ##############################################################################
    # *****START OF YOUR CODE (DO NOT DELETE/MODIFY THIS LINE)*****
    # target_y is just a index

    for itera in range(100):
        scores = model(X_fooling) # torch.Size([1, 1000]) 注意不是torch.Size([1000])
        # max返回最大值和它的索引
        if scores.data.max(1)[1].item() == target_y:
            break
        else:
            target_scores = scores[:, target_y]
            # 一般的步骤就是:grad.zero_()-->backward()-->step()
            # 你想优化A,就求A.backward()
            target_scores.backward()
            g = X_fooling.grad.data
            dX = learning_rate * g / torch.norm(g)
            X_fooling.data += dX
            X_fooling.grad.zero_()


    # *****END OF YOUR CODE (DO NOT DELETE/MODIFY THIS LINE)*****
    ##############################################################################
    #                             END OF YOUR CODE                               #
    ##############################################################################
    return X_fooling
Class visualization
这次比上两次更加原始,直接从随机噪声合成一张图片,再加上一些正则化手段,可以使生成的图片更加平滑(包括显性的L2正则化和隐形的jitter/blur),基本思路和上面没什么两样。看code:
def create_class_visualization(target_y, model, dtype, **kwargs):
    """
    Generate an image to maximize the score of target_y under a pretrained model.

    Inputs:
    - target_y: Integer in the range [0, 1000) giving the index of the class
    - model: A pretrained CNN that will be used to generate the image
    - dtype: Torch datatype to use for computations

    Keyword arguments:
    - l2_reg: Strength of L2 regularization on the image
    - learning_rate: How big of a step to take
    - num_iterations: How many iterations to use
    - blur_every: How often to blur the image as an implicit regularizer
    - max_jitter: How much to jitter the image as an implicit regularizer
    - show_every: How often to show the intermediate result
    """
    model.type(dtype)
    l2_reg = kwargs.pop('l2_reg', 1e-3)
    learning_rate = kwargs.pop('learning_rate', 25)
    num_iterations = kwargs.pop('num_iterations', 100)
    blur_every = kwargs.pop('blur_every', 10)
    max_jitter = kwargs.pop('max_jitter', 16)
    show_every = kwargs.pop('show_every', 25)

    # Randomly initialize the image as a PyTorch Tensor, and make it requires gradient.
    img = torch.randn(1, 3, 224, 224).mul_(1.0).type(dtype).requires_grad_()

    for t in range(num_iterations):
        # Randomly jitter the image a bit; this gives slightly nicer results
        ox, oy = random.randint(0, max_jitter), random.randint(0, max_jitter)
        img.data.copy_(jitter(img.data, ox, oy))

        ########################################################################
        # TODO: Use the model to compute the gradient of the score for the     #
        # class target_y with respect to the pixels of the image, and make a   #
        # gradient step on the image using the learning rate. Don't forget the #
        # L2 regularization term!                                              #
        # Be very careful about the signs of elements in your code.            #
        ########################################################################
        # *****START OF YOUR CODE (DO NOT DELETE/MODIFY THIS LINE)*****

        scores = model(img)
        target_scores = scores[:, target_y]
        target_scores.backward()
        dX = img.grad.data + 2 *l2_reg * img.data
        img.data += learning_rate * dX / torch.norm(dX) # 比之前就多了个正则项
        img.grad.zero_()

        # *****END OF YOUR CODE (DO NOT DELETE/MODIFY THIS LINE)*****
        ########################################################################
        #                             END OF YOUR CODE                         #
        ########################################################################

        # Undo the random jitter
        img.data.copy_(jitter(img.data, -ox, -oy))

        # As regularizer, clamp and periodically blur the image
        for c in range(3):
            lo = float(-SQUEEZENET_MEAN[c] / SQUEEZENET_STD[c])
            hi = float((1.0 - SQUEEZENET_MEAN[c]) / SQUEEZENET_STD[c])
            img.data[:, c].clamp_(min=lo, max=hi)
        if t % blur_every == 0:
            blur_image(img.data, sigma=0.5)

        # Periodically show the image
        if t == 0 or (t + 1) % show_every == 0 or t == num_iterations - 1:
            plt.imshow(deprocess(img.data.clone().cpu()))
            class_name = class_names[target_y]
            plt.title('%s\nIteration %d / %d' % (class_name, t + 1, num_iterations))
            plt.gcf().set_size_inches(4, 4)
            plt.axis('off')
            plt.show()

    return deprocess(img.data.cpu())
结果
这是我的saliency maps:
可以看到每张图里面的显著部分,跟我们预想的差不多,都是图像的主要分类内容。
这是我的fooling images:
图像的真实标签是Tibetan mastiff,愚弄后网络误认为成stingray。
这是我的class visualization:
链接
前后面的作业博文请见:
- 上一次的博文:vanilla RNN/LSTM for image captioning
- 下一次的博文:StyleTransfer-PyTorch
