通过wsdl与xsd编写webservice服务端,并通过服务端的wsdl地址生产客户端
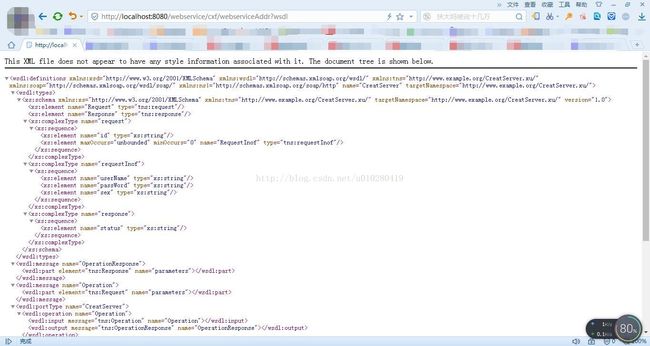
写下平时开发webservice接口的过程,是cxf+spring整合的框架,这里用的是apache-cxf-2.7.18版本的cxf,对于webservice各个标签的作用就不进行描述了。本文接口编写的思路是这样:1.服务端是通过编写wsdl和xsd文件,用命令生产服务端代码并且发布服务 2. 客户端是通过eclipse自带的客户端生产方式生成代码 3.接口调用测试
一、服务端接口编写
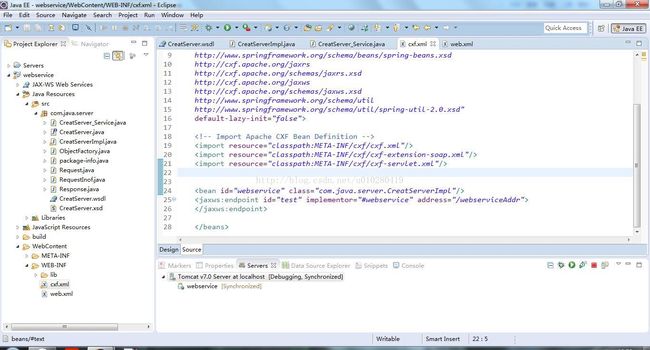
web.xml和cxf.xml配置文件
web.xml文件
  webservice

    index.jsp


    contextConfigLocation
    /WEB-INF/cxf.xml


    org.springframework.web.context.ContextLoaderListener


    CXF
    org.apache.cxf.transport.servlet.CXFServlet


    CXF
    /cxf/*
编写接口服务端wsdl和xsd文件
CreatServer.wsdl 文件
CreatServer.xsd文件
通过命令生产服务端代码
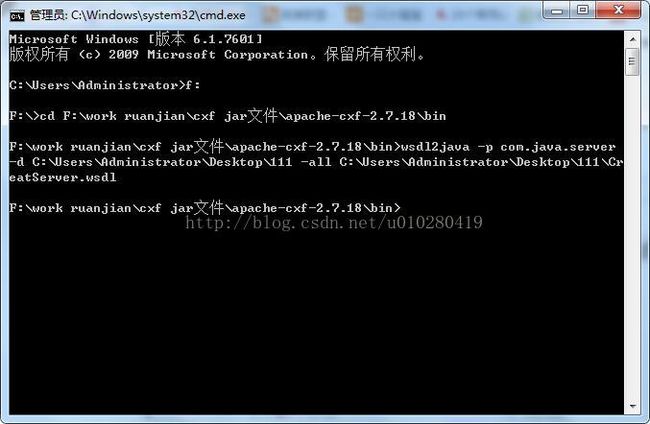
---编写WSDL文档通过Apache-cxf框架自动生成服务端代码包含Impl   :wsdl2java   -p(包路径)   -d(代码生产路径)  -all (wsdl所在路径)
 1、进入cxf框架的bin路径,
 2、执行wsdl2java用法: wsdl2java -p  -d  –all
    -p  指定其wsdl的命名空间,也就是要生成代码的包名:
	-d  指定要产生代码所在目录
	-client 生成客户端测试web service的代码
	-server 生成服务器启动web  service的代码
	-impl 生成web service的实现代码
	-ant  生成build.xml文件
	-all 生成所有开始端点代码:types,service proxy,,service interface, server mainline, client mainline, implementation object, and an Ant build.xml file.
生成服务端代码如下:
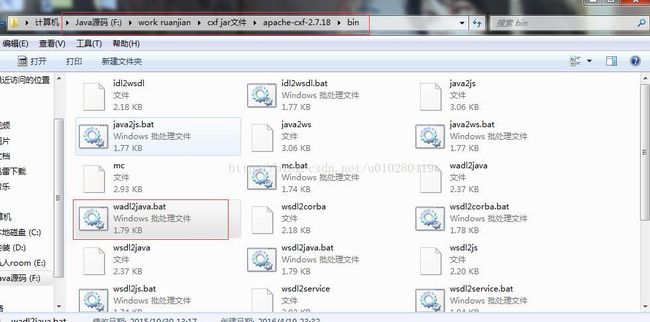
1、先把wsdl和xsd复制到本地的新建文件夹中,找到cxf的脚本执行文件wadl2java.bat
2、执行cmd中的命令(本人一直使用-all生产服务端,感兴趣的可以试一下server生产服务端,client生产客户端 )
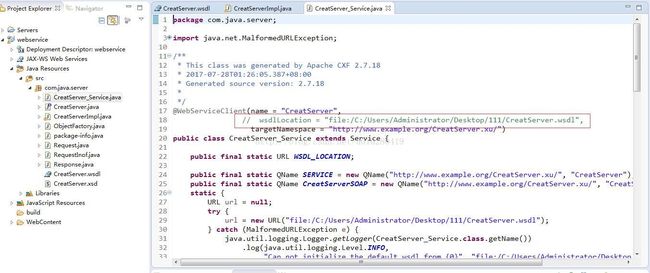
3、服务端代码生产,copy到项目中(_client.java和_server.java是测试类可以删去或者不使用)
4、CreatServer_Service.java 和CreatServerImpl.java的文件需要注释本地wsd地址路径wsdlLocation
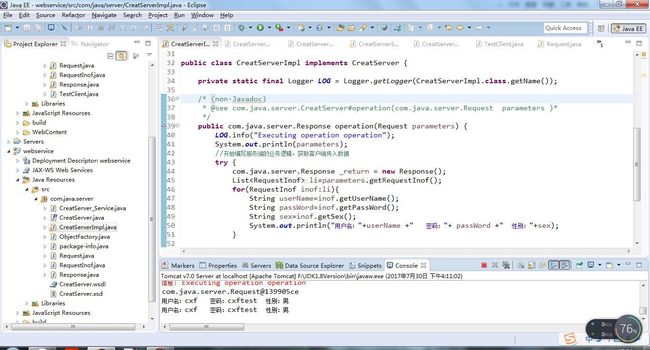
5、编写服务端代码业务逻辑CreatServerImpl.java
/**
 * Please modify this class to meet your needs
 * This class is not complete
 */

package com.java.server;

import java.util.List;
import java.util.logging.Logger;
import javax.jws.WebMethod;
import javax.jws.WebParam;
import javax.jws.WebResult;
import javax.jws.WebService;
import javax.jws.soap.SOAPBinding;
import javax.xml.bind.annotation.XmlSeeAlso;

/**
 * This class was generated by Apache CXF 2.7.18
 * 2017-07-28T01:26:05.358+08:00
 * Generated source version: 2.7.18
 *
 */

@javax.jws.WebService(
                      serviceName = "CreatServer",
                      portName = "CreatServerSOAP",
                      targetNamespace = "http://www.example.org/CreatServer.xu/",
                    //  wsdlLocation = "file:/C:/Users/Administrator/Desktop/111/CreatServer.wsdl",
                      endpointInterface = "com.java.server.CreatServer")

public class CreatServerImpl implements CreatServer {

    private static final Logger LOG = Logger.getLogger(CreatServerImpl.class.getName());

    /* (non-Javadoc)
     * @see com.java.server.CreatServer#operation(com.java.server.Request  parameters )*
     */
    public com.java.server.Response operation(Request parameters) {
        LOG.info("Executing operation operation");
        System.out.println(parameters);
        //开始编写服务端的业务逻辑,获取客户端传入数据
        try {
            com.java.server.Response _return = new Response();
            List li=parameters.getRequestInof();
            for(RequestInof inof:li){
            	String userName=inof.getUserName();
            	String passWord=inof.getPassWord();
            	String sex=inof.getSex();
            	System.out.println("用户名:"+userName +"   密码:"+ passWord +"  性别:"+sex);
            }

            //返回给客户端的状态
            _return.setStatus("ok");
            return _return;
        } catch (java.lang.Exception ex) {
            ex.printStackTrace();
            throw new RuntimeException(ex);
        }
    }

}
整体的项目文件
再发布面板看到接口已经发布的状态
到这里服务端的接口已经编写完成,可以用soapui等测试工具进行接口测试。
二、客户端接口编写
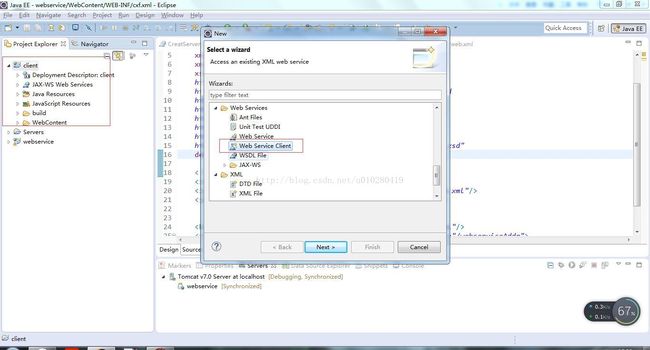
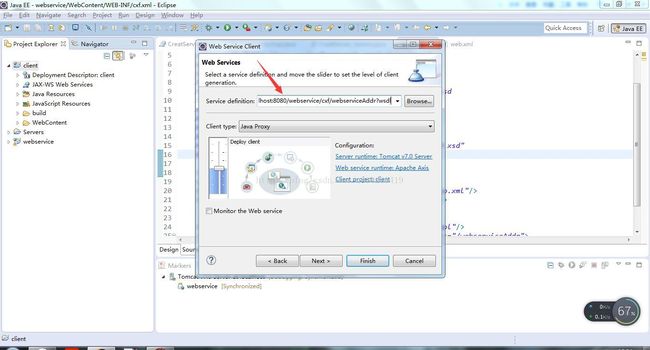
这里用的是eclipse自带的生成客户端方式,如下:
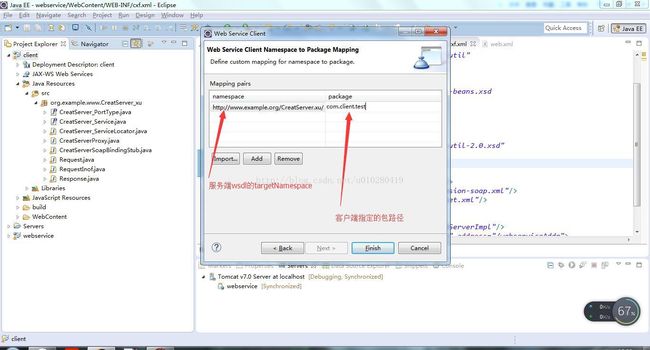
如果需要生产客户端代码到指定的pack包下面,可以Next-->Add
客户端 代码已经完成接下来就是测试接口数据传输了。
三、接口测试
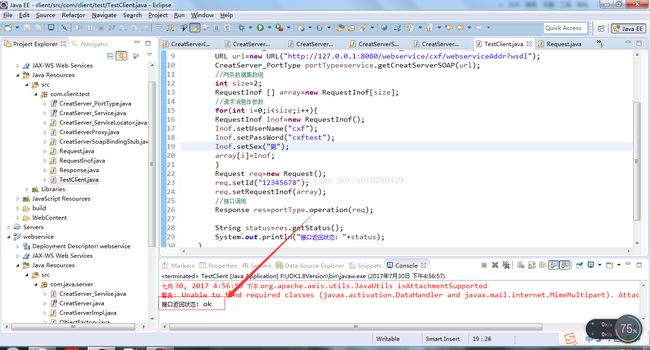
添加测试类TestClient.java
package com.client.test;

import java.net.URL;

public class TestClient {
	public static void main(String[] args) throws Exception {

		CreatServer_Service service=new CreatServer_ServiceLocator();
		URL url=new URL("http://127.0.0.1:8080/webservice/cxf/webserviceAddr?wsdl");
		CreatServer_PortType portType=service.getCreatServerSOAP(url);
		//两条数据集数组
		int size=2;
		RequestInof [] array=new RequestInof[size];
		//请求消息体参数
		for(int i=0;i
四、结果查看
客户端调用结果
服务端调用结果
有什么地方有误的欢迎指正,谢谢!
