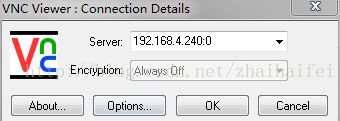
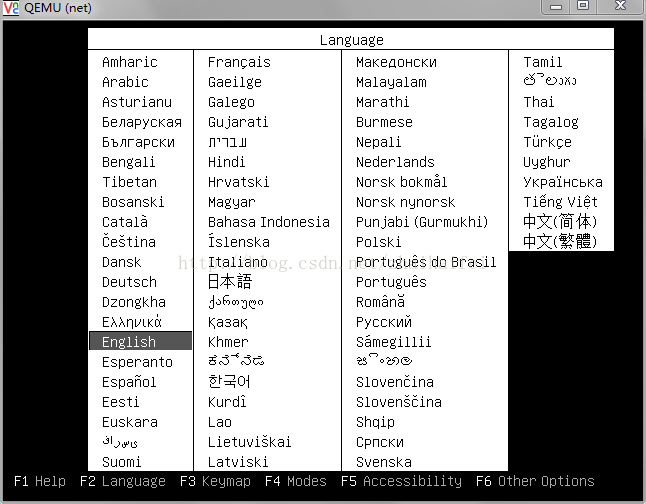
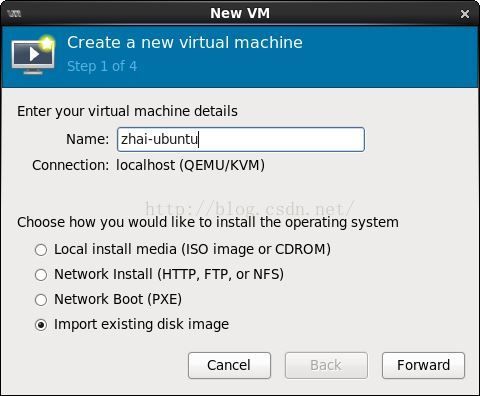
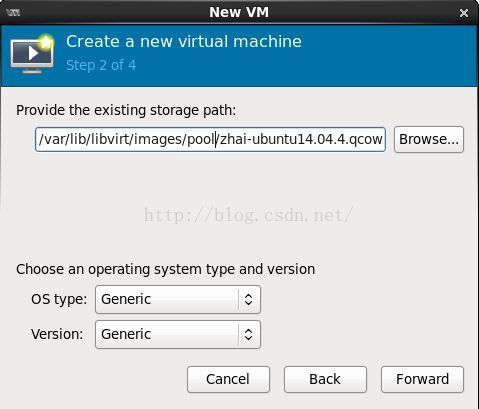
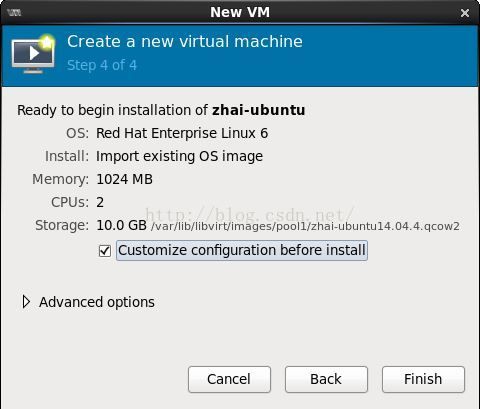
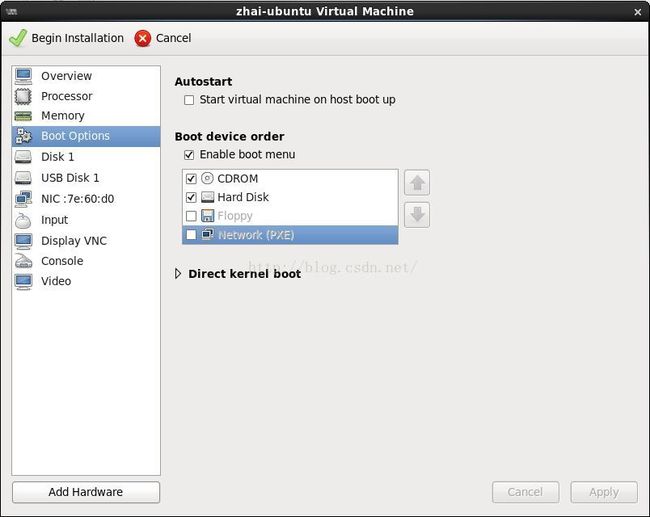
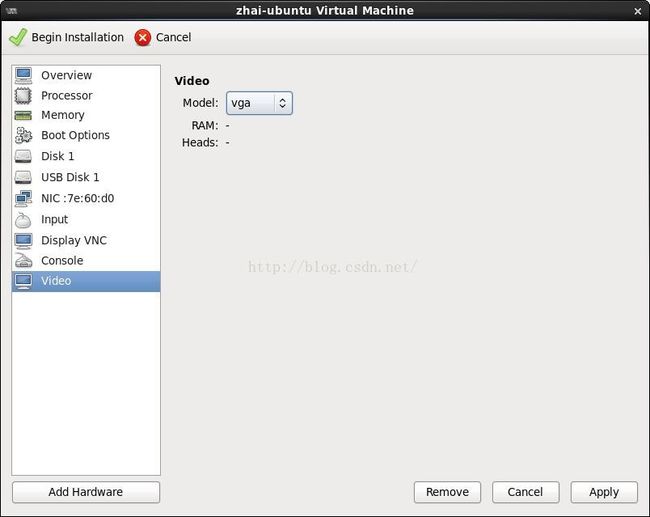
Use the virt-installtool to boot the virtual machine through libvirt and connect to the graphical console from a VNC client installed on your local machine.
3.1 查看default网络
# virsh net-list
 Name                 State      Autostart     Persistent
----------------------------------------------------------
 default              active     yes           yes
If the network is not active, start it by doing:
# virsh net-start default
Starting this network will create a Linux bridge (usually called virbr0), iptables rules, and a dnsmasq process that will serve as a DHCP server.
查看default网络的配置
root@zhaicompute# brctl show
bridge name bridge id STP enabled interfaces
virbr0 8000.5254000f5c96 yes virbr0-nic
root@zhaicompute# ifconfig virbr0
virbr0 Link encap:Ethernet HWaddr 52:54:00:0f:5c:96
inet addr:192.168.22.1 Bcast:192.168.22.255 Mask:255.255.255.0
UP BROADCAST RUNNING MULTICAST MTU:1500 Metric:1
RX packets:0 errors:0 dropped:0 overruns:0 frame:0
TX packets:0 errors:0 dropped:0 overruns:0 carrier:0
collisions:0 txqueuelen:0
RX bytes:0 (0.0 B) TX bytes:0 (0.0 B)
root@zhaicompute# cat /etc/libvirt/qemu/networks/default.xml
default6acb-ed0a-4ad1-b8dc-527168a2
root@ctler:~# virsh list --all
 Id    Name                           State
----------------------------------------------------
 -     net                            shut off

root@ctler:~# virsh start net
Domain net started

root@ctler:~# virsh list --all
 Id    Name                           State
----------------------------------------------------
 5     net                            running
To eject a disk using virsh, libvirt requires that you attach an empty disk at the same target that the CDROM was previously attached, which should be hdc. You can confirm the appropriate target using the dom dumpxml vm-image command.
# virsh dumpxml trusty

trusty
...


...
Run the following commands in the host as root to start up the machine again as paused, eject the disk and resume. If you are using virt-manager, you may use the GUI instead. # virsh start trusty --paused # virsh attach-disk --type cdrom --mode readonly trusty "" hdc # virsh resume trusty
7 cloud-init及其它安装
Log in to newly created image
When you boot for the first time after install, it may ask you about authentication tools, you can just choose Exit. Then, log in as root using the root password you specified.
Install cloud-init
The cloud-init script starts on instance boot and will search for a metadata provider to fetch a public key from. The public key will be placed in the default user account for the image.
Install the cloud-init package:
# apt-get install cloud-init
When building Ubuntu images cloud-init must be explicitly configured for the metadata source in use. The OpenStack metadata server emulates the EC2 metadata service used by images in Amazon EC2.
To set the metadata source to be used by the image run the dpkg-reconfigure command against the cloud-init package. When prompted select the EC2 data source:
# dpkg-reconfigure cloud-init
The account varies by distribution. On Ubuntu-based virtual machines, the account is called ubuntu. On Fedora-based virtual machines, the account is called ec2-user.
You can change the name of the account used by cloud-init by editing the /etc/cloud/cloud.cfg file and adding a line with a different user. For example, to configure cloud-init to put the key in an account named admin, use the following syntax in the configuration file:
users:
  - name: admin
    (...)
Shut down the instance
From inside the instance, as root:
# /sbin/shutdown -h now
Clean up (remove MAC address details)
The operating system records the MAC address of the virtual Ethernet card in locations such as /etc/udev/rules.d/70-persistent-net.rules during the installation process. However, each time the image boots up, the virtual Ethernet card will have a different MAC address, so this information must be deleted from the configuration file.
There is a utility called virt-sysprep, that performs various cleanup tasks such as removing the MAC address references. It will clean up a virtual machine image in place:
# virt-sysprep -d trusty
Undefine the libvirt domain
Now that the image is ready to be uploaded to the Image service, you no longer need to have this virtual machine image managed by libvirt. Use the virsh undefine vm-image command to inform libvirt:
# virsh undefine trusty
Image is complete
The underlying image file that you created with the qemu-img create command, such as /tmp/trusty.qcow2, is now ready for uploading to the Image service by using the openstack image create command. For more information, see the Glance User Guide.
8 压缩镜像
convert [-c] [-p] [-n] [-f fmt] [-t cache] [-T src_cache] [-O output_fmt] [-o options] [-s snapshot_id_or_name] [-l snapshot_param] [-S sparse_size] filename
       [filename2 [...]] output_filename
           Convert the disk image filename or a snapshot snapshot_param(snapshot_id_or_name is deprecated) to disk image output_filename using format output_fmt. It can be
           optionally compressed ("-c" option) or use any format specific options like encryption ("-o" option).

           Only the formats "qcow" and "qcow2" support compression. The compression is read-only. It means that if a compressed sector is rewritten, then it is rewritten
           as uncompressed data.

           Image conversion is also useful to get smaller image when using a growable format such as "qcow": the empty sectors are detected and suppressed from the
           destination image.

           sparse_size indicates the consecutive number of bytes (defaults to 4k) that must contain only zeros for qemu-img to create a sparse image during conversion. If
           sparse_size is 0, the source will not be scanned for unallocated or zero sectors, and the destination image will always be fully allocated.

           You can use the backing_file option to force the output image to be created as a copy on write image of the specified base image; the backing_file should have
           the same content as the input's base image, however the path, image format, etc may differ.

           If the "-n" option is specified, the target volume creation will be skipped. This is useful for formats such as "rbd" if the target volume has already been
           created with site specific options that cannot be supplied through qemu-img.
原文地址:http://www.open-open.com/lib/view/open1346857871615.html
使用Java Mail API来发送邮件也很容易实现,但是最近公司一个同事封装的邮件API实在让我无法接受,于是便打算改用Spring Mail API来发送邮件,顺便记录下这篇文章。 【Spring Mail API】
Spring Mail API都在org.spri