从零学ELK系列(八):SpringBoot项目接入ELK(超详细图文教程)
【前言】
在前几篇博文中将ELK+Filebeat日志收集系统搭建完毕,本次我们将展示如何将SpringBoot接入我们搭建的日志系统,把步骤记录下来,一是方便自己以后安装,二是可以为大家做参考共享。
【一句总结一张架构图】
一、一句话总结学完本篇博文,你将学到什么?
SpringBoot项目接入ELK+Filebeat收集系统,Kibana设置展示日志
二、架构图
【SpringBoot接入ELK】
一、环境:
1、Windows系统(本人是win10环境)
2、VMware10.0.1
3、Centos 7.4
4、Xshell5
5、Docker 19.03
6、Elasticsearch 7.2.0
7、Kibana 7.2.0
8、Logstash 7.2.0
9、Filebeat 7.2.0
10、SpringBoot项目 (项目地址:https://github.com/dangnianchuntian/springboot 版本号1.7.0-Release)
二、项目接入主要代码展示:
1、通过拦截请求,记录请求日志
/*
 * Copyright (c) 2019. [email protected] All Rights Reserved.
 * 项目名称:实战SpringBoot
 * 类名称:ControllerLogAspectConf.java
 * 创建人:张晗
 * 联系方式:[email protected]
 * 开源地址: https://github.com/dangnianchuntian/springboot
 * 博客地址: https://zhanghan.blog.csdn.net
 */

package com.zhanghan.zhboot.aop;

import com.zhanghan.zhboot.util.FileBeatLogUtil;
import com.zhanghan.zhboot.util.HttpTypeUtil;
import org.aspectj.lang.JoinPoint;
import org.aspectj.lang.annotation.Aspect;
import org.aspectj.lang.annotation.Before;
import org.aspectj.lang.annotation.Pointcut;
import org.slf4j.Logger;
import org.slf4j.LoggerFactory;
import org.springframework.beans.factory.annotation.Autowired;
import org.springframework.core.annotation.Order;
import org.springframework.core.env.Environment;
import org.springframework.stereotype.Component;

@Aspect
@Order(0)
@Component
public class RequestLogAspectConf {


    @Autowired
    private Environment env;

    /**
     * 范围切点方法
     */
    @Pointcut("execution(* com.zhanghan.zhboot.controller..*.*(..))")
    public void methodPointCut() {
    }

    @Before("methodPointCut()")
    void doBefore(JoinPoint joinPoint) {
        authLogic(joinPoint);
    }

    private void authLogic(JoinPoint joinPoint) {

        try {
            Logger log = LoggerFactory.getLogger("logstashInfo");

            String applicationName = env.getProperty("spring.application.name");

            //获取当前http请求
            String reqName = joinPoint.getSignature().getDeclaringTypeName() + "." + joinPoint.getSignature().getName();

            String requestParams = FileBeatLogUtil.getParams(joinPoint);

            FileBeatLogUtil.writeLog(log, applicationName, HttpTypeUtil.REQUEST, reqName, requestParams);
        } catch (Exception e) {
            System.out.println(e.getMessage());
        }

    }

}
2、通过拦截响应,记录响应日志
/*
 * Copyright (c) 2019. [email protected] All Rights Reserved.
 * 项目名称:实战SpringBoot
 * 类名称:ResponseLogAdvice.java
 * 创建人:张晗
 * 联系方式:[email protected]
 * 开源地址: https://github.com/dangnianchuntian/springboot
 * 博客地址: https://zhanghan.blog.csdn.net
 */

package com.zhanghan.zhboot.aop;

import com.zhanghan.zhboot.util.FileBeatLogUtil;
import com.zhanghan.zhboot.util.HttpTypeUtil;
import com.zhanghan.zhboot.util.JsonUtil;
import org.slf4j.Logger;
import org.slf4j.LoggerFactory;
import org.springframework.beans.factory.annotation.Autowired;
import org.springframework.core.MethodParameter;
import org.springframework.core.env.Environment;
import org.springframework.http.MediaType;
import org.springframework.http.server.ServerHttpRequest;
import org.springframework.http.server.ServerHttpResponse;
import org.springframework.web.bind.annotation.ControllerAdvice;
import org.springframework.web.servlet.mvc.method.annotation.ResponseBodyAdvice;


@ControllerAdvice
public class ResponseLogAdvice implements ResponseBodyAdvice {

    @Autowired
    private Environment env;

    @Override
    public boolean supports(MethodParameter methodParameter, Class aClass) {
        return true;
    }

    @Override
    public Object beforeBodyWrite(Object o, MethodParameter methodParameter, MediaType mediaType, Class aClass, ServerHttpRequest serverHttpRequest, ServerHttpResponse serverHttpResponse) {
        try {
            if (o != null) {

                Logger log = LoggerFactory.getLogger("logstashInfo");

                String applicationName = env.getProperty("spring.application.name");

                String responseParams = JsonUtil.objtoJson(o);

                String reqName = methodParameter.getDeclaringClass().getName() + "." + methodParameter.getMember().getName();

                FileBeatLogUtil.writeLog(log, applicationName, HttpTypeUtil.RESPONSE, reqName, responseParams.toString());

            }
        } catch (Exception e) {
            System.out.println(e.getMessage());
        }
        return o;
    }
}
3、日志记录工具类
/*
 * Copyright (c) 2019. [email protected] All Rights Reserved.
 * 项目名称:实战SpringBoot
 * 类名称:FileBeatLogUtil.java
 * 创建人:张晗
 * 联系方式:[email protected]
 * 开源地址: https://github.com/dangnianchuntian/springboot
 * 博客地址: https://zhanghan.blog.csdn.net
 */

package com.zhanghan.zhboot.util;

import com.alibaba.fastjson.JSON;
import org.aspectj.lang.JoinPoint;
import org.aspectj.lang.reflect.MethodSignature;
import org.slf4j.Logger;
import org.slf4j.MDC;
import org.springframework.util.ObjectUtils;
import org.springframework.util.StringUtils;
import org.springframework.web.context.request.RequestContextHolder;
import org.springframework.web.context.request.ServletRequestAttributes;

import javax.servlet.http.HttpServletRequest;
import java.text.SimpleDateFormat;
import java.util.Date;
import java.util.LinkedHashMap;
import java.util.UUID;

public class FileBeatLogUtil {

    public static void writeLog(Logger log, String applicationName, String type, String reqName, String params) {

        ServletRequestAttributes attributes = (ServletRequestAttributes) RequestContextHolder.getRequestAttributes();
        HttpServletRequest request = attributes.getRequest();
        String requestURI = request.getRequestURI();

        String httpUUID = "";

        if (type.equals(HttpTypeUtil.REQUEST)) {
            httpUUID = UUID.randomUUID().toString();
            request.setAttribute("uuid", httpUUID);
        } else {
            if (!ObjectUtils.isEmpty( request.getAttribute("uuid"))) {
                httpUUID = request.getAttribute("uuid").toString();
            }
        }

        //请求时间
        String actionTime = getStringTodayTime();

        /**
         * 防止MDC值空指针,所有入参不为null
         */
        applicationName = StringUtils.isEmpty(applicationName) ? "" : applicationName;
        requestURI = StringUtils.isEmpty(requestURI) ? "" : requestURI;
        reqName = StringUtils.isEmpty(reqName) ? "" : reqName;
        params = "null".equals(params) ? "" : params;
        actionTime = StringUtils.isEmpty(actionTime) ? "" : actionTime;
        /**
         * map值为ES备份字符串信息(此字符串不会被ES解析为JSON字符串)
         */
        LinkedHashMap reqInfo = new LinkedHashMap<>();
        reqInfo.put("applicationName", applicationName);
        reqInfo.put("requestURI", requestURI);
        reqInfo.put("sourceName", reqName);
        reqInfo.put("httpUUID", httpUUID);
        reqInfo.put("httpType", type);
        reqInfo.put("httpParams", params);
        reqInfo.put("httpTime", actionTime);
        /**
         * MDC值为ES键值对JSON信息
         */
        MDC.put("applicationName", applicationName);
        MDC.put("requestURI", requestURI);
        MDC.put("sourceName", reqName);
        MDC.put("httpUUID", httpUUID);
        MDC.put("httpType", type);
        MDC.put("httpParams", params);
        MDC.put("httpTime", actionTime);
        String reqInfoJsonStr = JSON.toJSONString(reqInfo);
        log.info(reqInfoJsonStr);

    }

    /**
     * 获取请求参数,处理为json字符串
     *
     * @param joinPoint
     * @return
     */
    public static String getParams(JoinPoint joinPoint) {
        Object[] argValues = joinPoint.getArgs();
        String[] argNames = ((MethodSignature) joinPoint.getSignature()).getParameterNames();
        LinkedHashMap linkedHashMap = new LinkedHashMap<>();
        if (argNames != null && argNames.length > 0) {
            for (int i = 0; i < argNames.length; i++) {
                String thisArgName = argNames[i];
                String thisArgValue = argValues[i].toString();
                linkedHashMap.put(thisArgName, thisArgValue);
            }
        }
        return JSON.toJSONString(linkedHashMap);
    }

    public static String getStringTodayTime() {
        Date todat_date = new Date();
        //将日期格式化
        SimpleDateFormat simpleDateFormat = new SimpleDateFormat("yyyy-MM-dd HH:mm:ss.SSS");
        //转换成字符串格式
        return simpleDateFormat.format(todat_date);
    }
}
4、logback配置xml文件
            %d{yyyy-MM-dd HH:mm:ss} %highlight(%-5level) %green([${LOG_HOME},%X{X-B3-TraceId:-},%X{X-B3-SpanId:-},%X{X-Span-Export:-}]) %magenta(${PID:-}) %white(---) %-20(%yellow([%20.20thread])) %-55(%cyan(%.32logger{30}:%L)) %highlight(- %msg%n)
            UTF-8


            ${LOG_PATH}/${appName}-log-console-%d{yyyy-MM-dd}.%i.log.zip
            ${maxSaveDays}

                ${maxFileSize}


            %d{yyyy-MM-dd HH:mm:ss} %highlight(%-5level) %green([${LOG_HOME},%X{X-B3-TraceId:-},%X{X-B3-SpanId:-},%X{X-Span-Export:-}]) %magenta(${PID:-}) %white(---) %-20(%yellow([%20.20thread])) %-55(%cyan(%.32logger{30}:%L)) %highlight(- %msg%n)
            UTF-8


            ${LOG_PATH}/${appName}-log-info-%d{yyyy-MM-dd}.%i.log.zip
            ${maxSaveDays}

                ${maxFileSize}


            %d{"yyyy-MM-dd HH:mm:ss,SSS"}[%X{userId}|%X{sessionId}][%p][%c{0}-%M]-%m%n
            UTF-8


            ERROR
            DENY
            ACCEPT


            ${LOG_PATH}/${appName}-log-error-%d{yyyy-MM-dd}.%i.log.zip
            ${maxSaveDays}

                ${maxFileSize}


            %d{"yyyy-MM-dd HH:mm:ss,SSS"}[%X{userId}|%X{sessionId}][%p][%c{0}-%M]-%m%n
            UTF-8


            ERROR
            ACCEPT
            DENY


            INFO
            ACCEPT
            DENY


        ${LOGSTASH_LOG_FILE}

            ${LOGSTASH_LOG_FILE}.%d{yyyy-MM-dd}.gz


                    UTC


                        {
                        "esindex":"zh-boot-allrequest-log",
                        "severity": "%level",
                        "service": "${springAppName:-}",
                        "trace": "%X{X-B3-TraceId:-}",
                        "span": "%X{X-B3-SpanId:-}",
                        "parent": "%X{X-B3-ParentSpanId:-}",
                        "exportable": "%X{X-Span-Export:-}",
                        "pid": "${PID:-}",
                        "thread": "%thread",
                        "class": "%logger{40}",
                        "message": "%message",
                        "applicationName" : "%X{applicationName}",
                        "requestURI" : "%X{requestURI}",
                        "sourceName" : "%X{sourceName}",
                        "httpUUID" : "%X{httpUUID}",
                        "httpType" : "%X{httpType}",
                        "httpParams" : "%X{httpParams}",
                        "httpTime" : "%X{httpTime}"
                        }
5、配置文件中增加日志目录配置
logstash.path=/elklogs/zh-boot-allrequest-log三、项目部署到虚拟机中:
1、创建项目的目录
mkdir /data/elk/project –p2、将项目打成zh-boot.jar并通过Xshell拖到刚才创建的目录中
3、启动zh-boot.jar
java -jar zh-boot.jar四、访问项目并在Kibina中进行查看:
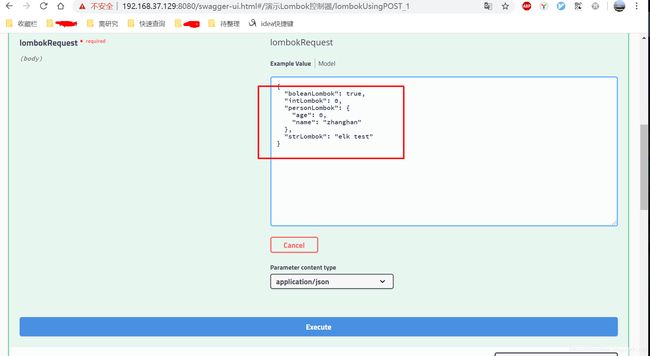
1、在本地浏览器中访问刚刚部署项目 http://192.168.37.129:8080/swagger-ui.html
2、在Kibana中创建索引
(1)Create index pattern
(2)Define index pattern
(3)Configure settings
3、在Discover中查看项目日志
4、Kibana提供了丰富的搜索,下面以httpUUID等于某个值进行查找
(1)设置查找条件
(2)查看检索结果
【总结】
惊不惊喜,意不意外,有没有感觉到日志收集系统的强大,以后线上排查问题再也不用在Linux下用繁杂的命令看,只需在界面上点几下就可以;大大提高了排错效率。


