Spring Security 4 整合Hibernate Bcrypt密码加密(带源码)
【相关已翻译的本系列其他文章,点击分类里面的spring security 4】
【 翻译by 明明如月 QQ 605283073】
上一篇文章:
Spring Security 4 Hibernate整合 注解和xml例子(带源码)
下一篇文章:Spring Security 4 整合Hibernate 实现持久化登录验证(带源码)
原文地址:http://websystique.com/spring-security/spring-security-4-password-encoder-bcrypt-example-with-hibernate/
本教程演示 使用 Spring Security 4中的BCryptPasswordEncoder对密码进行加密。
整合Spring MVC 4, Hibernate 4 & Spring Security 4,包含登录的权限验证和用户创建。
提供 注解和XML两种配置方式。依赖的项目源码在文章末尾提供。
-------
关于密码加密
任何应用考虑到安全,绝不能明文的方式保存密码。密码应该通过哈希算法进行加密。有很多标准的算法比如SHA或者MD5,结合salt(盐)是一个不错的选择。 Spring Security 提供了BCryptPasswordEncoder类,实现Spring的PasswordEncoder接口使用BCrypt强哈希方法来加密密码。
在应用中哪里可能用到密码加密?
1 在密码比对时。在和数据库存储的密码(已经加密过)进行进行比对前对输入的密码进行加密。
2 在创建新用户或者已经存在的用户密码修改时。在保存或者更新时,首先需要对输入的密码进行加密。
和前面文章的不同在哪里?
1. 创建和注入
PasswordEncoder到
AuthenticationProvider
。在
AuthenticationManagerBuilder中将其设置为验证提供者。
package com.websystique.springsecurity.configuration;

import org.springframework.beans.factory.annotation.Autowired;
import org.springframework.beans.factory.annotation.Qualifier;
import org.springframework.context.annotation.Bean;
import org.springframework.context.annotation.Configuration;
import org.springframework.security.authentication.dao.DaoAuthenticationProvider;
import org.springframework.security.config.annotation.authentication.builders.AuthenticationManagerBuilder;
import org.springframework.security.config.annotation.web.builders.HttpSecurity;
import org.springframework.security.config.annotation.web.configuration.EnableWebSecurity;
import org.springframework.security.config.annotation.web.configuration.WebSecurityConfigurerAdapter;
import org.springframework.security.core.userdetails.UserDetailsService;
import org.springframework.security.crypto.bcrypt.BCryptPasswordEncoder;
import org.springframework.security.crypto.password.PasswordEncoder;

@Configuration
@EnableWebSecurity
public class SecurityConfiguration extends WebSecurityConfigurerAdapter {

    @Autowired
    @Qualifier("customUserDetailsService")
    UserDetailsService userDetailsService;


    @Autowired
    public void configureGlobalSecurity(AuthenticationManagerBuilder auth) throws Exception {
        auth.userDetailsService(userDetailsService);
        auth.authenticationProvider(authenticationProvider());
    }


    @Bean
    public PasswordEncoder passwordEncoder() {
        return new BCryptPasswordEncoder();
    }


    @Bean
    public DaoAuthenticationProvider authenticationProvider() {
        DaoAuthenticationProvider authenticationProvider = new DaoAuthenticationProvider();
        authenticationProvider.setUserDetailsService(userDetailsService);
        authenticationProvider.setPasswordEncoder(passwordEncoder());
        return authenticationProvider;
    }

    @Override
    protected void configure(HttpSecurity http) throws Exception {
      http.authorizeRequests()
        .antMatchers("/", "/home").permitAll()
        .antMatchers("/admin/**","/newuser").access("hasRole('ADMIN')")
        .antMatchers("/db/**").access("hasRole('ADMIN') and hasRole('DBA')")
        .and().formLogin().loginPage("/login")
        .usernameParameter("ssoId").passwordParameter("password")
        .and().csrf()
        .and().exceptionHandling().accessDeniedPage("/Access_Denied");
    }
}
上面配置对应的XML配置如下:
@Service("userService")
@Transactional
public class UserServiceImpl implements UserService{

    @Autowired
    private UserDao dao;

    @Autowired
    private PasswordEncoder passwordEncoder;


    public void save(User user){
        user.setPassword(passwordEncoder.encode(user.getPassword()));
        dao.save(user);
    }

    public User findById(int id) {
        return dao.findById(id);
    }

    public User findBySso(String sso) {
        return dao.findBySSO(sso);
    }

}
这就是通过Spring Security’s BCrypt实现密码加密的流程。
下面是完整的代码:
使用以下技术或者软件
- Spring 4.1.6.RELEASE
- Spring Security 4.0.1.RELEASE
- Hibernate 4.3.6.Final
- MySQL Server 5.6
- Maven 3
- JDK 1.7
- Tomcat 8.0.21
- Eclipse JUNO Service Release 2
让我们开始吧。
第1步: 项目文件目录结构
下面是最终的项目目录结构

现在让我为你展示上面目录结构里面的内容和每个的详细介绍。
第2步: 更新 pom.xml 包含所需的依赖
    4.0.0

    com.websystique.springsecurity
    SpringSecurityPasswordEncodingWithBcryptExample
    1.0.0
    war

    SpringSecurityPasswordEncodingWithBcryptExample


        4.1.6.RELEASE
        4.0.1.RELEASE
        4.3.6.Final
        5.1.31


            org.springframework
            spring-core
            ${springframework.version}


            org.springframework
            spring-web
            ${springframework.version}


            org.springframework
            spring-webmvc
            ${springframework.version}


            org.springframework
            spring-tx
            ${springframework.version}


            org.springframework
            spring-orm
            ${springframework.version}


            org.springframework.security
            spring-security-web
            ${springsecurity.version}


            org.springframework.security
            spring-security-config
            ${springsecurity.version}


            org.hibernate
            hibernate-core
            ${hibernate.version}


            javax.validation
            validation-api
            1.1.0.Final


            org.hibernate
            hibernate-validator
            5.1.3.Final


            mysql
            mysql-connector-java
            ${mysql.connector.version}


            javax.servlet
            javax.servlet-api
            3.1.0


            javax.servlet.jsp
            javax.servlet.jsp-api
            2.3.1


            javax.servlet
            jstl
            1.2


                    org.apache.maven.plugins
                    maven-compiler-plugin
                    3.2

                        1.7
                        1.7


                    org.apache.maven.plugins
                    maven-war-plugin
                    2.4

                        src/main/webapp
                        SpringSecurityPasswordEncodingWithBcryptExample
                        false


        SpringSecurityPasswordEncodingWithBcryptExample
数据库模式部分
---------------------------------------
第3步:创建数据库模式和填充模拟数据
/*All User's gets stored in APP_USER table*/
create table APP_USER (
id BIGINT NOT NULL AUTO_INCREMENT,
sso_id VARCHAR(30) NOT NULL,
password VARCHAR(100) NOT NULL,
first_name VARCHAR(30) NOT NULL,
last_name VARCHAR(30) NOT NULL,
email VARCHAR(30) NOT NULL,
state VARCHAR(30) NOT NULL,
PRIMARY KEY (id),
UNIQUE (sso_id)
);
/* USER_PROFILE table contains all possible roles */
create table USER_PROFILE(
id BIGINT NOT NULL AUTO_INCREMENT,
type VARCHAR(30) NOT NULL,
PRIMARY KEY (id),
UNIQUE (type)
);
/* JOIN TABLE for MANY-TO-MANY relationship*/
CREATE TABLE APP_USER_USER_PROFILE (
user_id BIGINT NOT NULL,
user_profile_id BIGINT NOT NULL,
PRIMARY KEY (user_id, user_profile_id),
CONSTRAINT FK_APP_USER FOREIGN KEY (user_id) REFERENCES APP_USER (id),
CONSTRAINT FK_USER_PROFILE FOREIGN KEY (user_profile_id) REFERENCES USER_PROFILE (id)
);
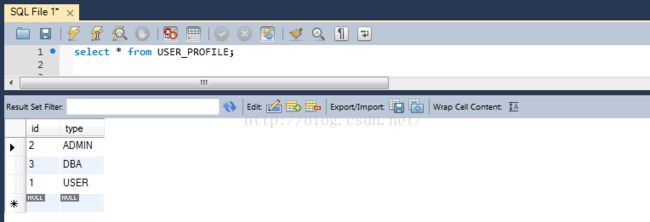
/* Populate USER_PROFILE Table */
INSERT INTO USER_PROFILE(type)
VALUES ('USER');
INSERT INTO USER_PROFILE(type)
VALUES ('ADMIN');
INSERT INTO USER_PROFILE(type)
VALUES ('DBA');
/* Populate one Admin User which will further create other users for the application using GUI */
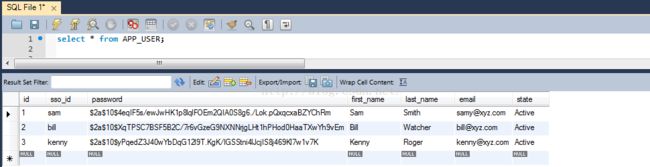
INSERT INTO APP_USER(sso_id, password, first_name, last_name, email, state)
VALUES ('sam','$2a$10$4eqIF5s/ewJwHK1p8lqlFOEm2QIA0S8g6./Lok.pQxqcxaBZYChRm', 'Sam','Smith','[email protected]', 'Active');
/* Populate JOIN Table */
INSERT INTO APP_USER_USER_PROFILE (user_id, user_profile_id)
SELECT user.id, profile.id FROM app_user user, user_profile profile
where user.sso_id='sam' and profile.type='ADMIN';
注意:我们已经手动的插入了一个用户(我们需要一个Admin用户用来登录和创建应用中的其他用户)。
这是真实的场景。请关注密码部分。
这是使用下面提到的工具类
(它甚至可能只是一个脚本)生成的,生成了一个管理员用户密码。
package com.websystique.springsecurity.util;

import org.springframework.security.crypto.bcrypt.BCryptPasswordEncoder;

public class QuickPasswordEncodingGenerator {

    /**
     * @param args
     */
    public static void main(String[] args) {
            String password = "abc125";
            BCryptPasswordEncoder passwordEncoder = new BCryptPasswordEncoder();
            System.out.println(passwordEncoder.encode(password));
    }

}
上面程序产生了在上面数据库中使用的编码过的密码。
注意:同一个密码你运行时获取也会产生不同的值。因为
BCrypt 哈希算法每次调用都产生不同的60位哈希值。
Security部分
-------------------------
第4步: 添加 Spring Security 配置类
package com.websystique.springsecurity.configuration;

import org.springframework.beans.factory.annotation.Autowired;
import org.springframework.beans.factory.annotation.Qualifier;
import org.springframework.context.annotation.Bean;
import org.springframework.context.annotation.Configuration;
import org.springframework.security.authentication.dao.DaoAuthenticationProvider;
import org.springframework.security.config.annotation.authentication.builders.AuthenticationManagerBuilder;
import org.springframework.security.config.annotation.web.builders.HttpSecurity;
import org.springframework.security.config.annotation.web.configuration.EnableWebSecurity;
import org.springframework.security.config.annotation.web.configuration.WebSecurityConfigurerAdapter;
import org.springframework.security.core.userdetails.UserDetailsService;
import org.springframework.security.crypto.bcrypt.BCryptPasswordEncoder;
import org.springframework.security.crypto.password.PasswordEncoder;

@Configuration
@EnableWebSecurity
public class SecurityConfiguration extends WebSecurityConfigurerAdapter {

    @Autowired
    @Qualifier("customUserDetailsService")
    UserDetailsService userDetailsService;


    @Autowired
    public void configureGlobalSecurity(AuthenticationManagerBuilder auth) throws Exception {
        auth.userDetailsService(userDetailsService);
        auth.authenticationProvider(authenticationProvider());
    }


    @Bean
    public PasswordEncoder passwordEncoder() {
        return new BCryptPasswordEncoder();
    }


    @Bean
    public DaoAuthenticationProvider authenticationProvider() {
        DaoAuthenticationProvider authenticationProvider = new DaoAuthenticationProvider();
        authenticationProvider.setUserDetailsService(userDetailsService);
        authenticationProvider.setPasswordEncoder(passwordEncoder());
        return authenticationProvider;
    }

    @Override
    protected void configure(HttpSecurity http) throws Exception {
      http.authorizeRequests()
        .antMatchers("/", "/home").permitAll()
        .antMatchers("/admin/**","/newuser").access("hasRole('ADMIN')")
        .antMatchers("/db/**").access("hasRole('ADMIN') and hasRole('DBA')")
        .and().formLogin().loginPage("/login")
        .usernameParameter("ssoId").passwordParameter("password")
        .and().csrf()
        .and().exceptionHandling().accessDeniedPage("/Access_Denied");
    }
}
第5步: 注册springSecurityFilter
下面是定制初始化war包中的 springSecurityFilter(第三步中的) 注册类package com.websystique.springsecurity.configuration;
import org.springframework.security.web.context.AbstractSecurityWebApplicationInitializer;
public class SecurityWebApplicationInitializer extends AbstractSecurityWebApplicationInitializer {
}
    springSecurityFilterChain
    org.springframework.web.filter.DelegatingFilterProxy


    springSecurityFilterChain
    /*
第 5步:定义 UserDetailsService 的实现
此service为 Authentication Manager(验证管理器)提供验证详情。
package com.websystique.springsecurity.service;

import java.util.ArrayList;
import java.util.List;

import org.springframework.beans.factory.annotation.Autowired;
import org.springframework.security.core.GrantedAuthority;
import org.springframework.security.core.authority.SimpleGrantedAuthority;
import org.springframework.security.core.userdetails.UserDetails;
import org.springframework.security.core.userdetails.UserDetailsService;
import org.springframework.security.core.userdetails.UsernameNotFoundException;
import org.springframework.stereotype.Service;
import org.springframework.transaction.annotation.Transactional;

import com.websystique.springsecurity.model.User;
import com.websystique.springsecurity.model.UserProfile;

@Service("customUserDetailsService")
public class CustomUserDetailsService implements UserDetailsService{

    @Autowired
    private UserService userService;

    @Transactional(readOnly=true)
    public UserDetails loadUserByUsername(String ssoId)
            throws UsernameNotFoundException {
        User user = userService.findBySso(ssoId);
        System.out.println("User : "+user);
        if(user==null){
            System.out.println("User not found");
            throw new UsernameNotFoundException("Username not found");
        }
            return new org.springframework.security.core.userdetails.User(user.getSsoId(), user.getPassword(),
                 user.getState().equals("Active"), true, true, true, getGrantedAuthorities(user));
    }


    private List getGrantedAuthorities(User user){
        List authorities = new ArrayList();

        for(UserProfile userProfile : user.getUserProfiles()){
            System.out.println("UserProfile : "+userProfile);
            authorities.add(new SimpleGrantedAuthority("ROLE_"+userProfile.getType()));
        }
        System.out.print("authorities :"+authorities);
        return authorities;
    }

}
SpringMVC 部分
------------------------------------------------------
第7步: 添加 Controller(控制器)
package com.websystique.springsecurity.controller;
import java.util.List;
import javax.servlet.http.HttpServletRequest;
import javax.servlet.http.HttpServletResponse;
import javax.validation.Valid;
import org.springframework.beans.factory.annotation.Autowired;
import org.springframework.security.core.Authentication;
import org.springframework.security.core.context.SecurityContextHolder;
import org.springframework.security.core.userdetails.UserDetails;
import org.springframework.security.web.authentication.logout.SecurityContextLogoutHandler;
import org.springframework.stereotype.Controller;
import org.springframework.ui.ModelMap;
import org.springframework.validation.BindingResult;
import org.springframework.web.bind.annotation.ModelAttribute;
import org.springframework.web.bind.annotation.RequestMapping;
import org.springframework.web.bind.annotation.RequestMethod;
import com.websystique.springsecurity.model.User;
import com.websystique.springsecurity.model.UserProfile;
import com.websystique.springsecurity.service.UserProfileService;
import com.websystique.springsecurity.service.UserService;
@Controller
public class HelloWorldController {
@Autowired
UserProfileService userProfileService;
@Autowired
UserService userService;
@RequestMapping(value = { "/", "/home" }, method = RequestMethod.GET)
public String homePage(ModelMap model) {
model.addAttribute("greeting", "Hi, Welcome to mysite");
return "welcome";
}
@RequestMapping(value = "/admin", method = RequestMethod.GET)
public String adminPage(ModelMap model) {
model.addAttribute("user", getPrincipal());
return "admin";
}
@RequestMapping(value = "/db", method = RequestMethod.GET)
public String dbaPage(ModelMap model) {
model.addAttribute("user", getPrincipal());
return "dba";
}
@RequestMapping(value = "/Access_Denied", method = RequestMethod.GET)
public String accessDeniedPage(ModelMap model) {
model.addAttribute("user", getPrincipal());
return "accessDenied";
}
@RequestMapping(value = "/login", method = RequestMethod.GET)
public String loginPage() {
return "login";
}
@RequestMapping(value="/logout", method = RequestMethod.GET)
public String logoutPage (HttpServletRequest request, HttpServletResponse response) {
Authentication auth = SecurityContextHolder.getContext().getAuthentication();
if (auth != null){
new SecurityContextLogoutHandler().logout(request, response, auth);
}
return "redirect:/login?logout";
}
@RequestMapping(value = "/newUser", method = RequestMethod.GET)
public String newRegistration(ModelMap model) {
User user = new User();
model.addAttribute("user", user);
return "newuser";
}
/*
* This method will be called on form submission, handling POST request It
* also validates the user input
*/
@RequestMapping(value = "/newUser", method = RequestMethod.POST)
public String saveRegistration(@Valid User user,
BindingResult result, ModelMap model) {
if (result.hasErrors()) {
System.out.println("There are errors");
return "newuser";
}
userService.save(user);
System.out.println("First Name : "+user.getFirstName());
System.out.println("Last Name : "+user.getLastName());
System.out.println("SSO ID : "+user.getSsoId());
System.out.println("Password : "+user.getPassword());
System.out.println("Email : "+user.getEmail());
System.out.println("Checking UsrProfiles....");
if(user.getUserProfiles()!=null){
for(UserProfile profile : user.getUserProfiles()){
System.out.println("Profile : "+ profile.getType());
}
}
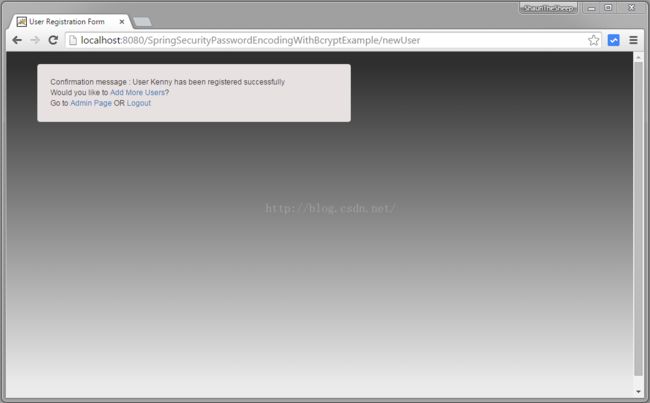
model.addAttribute("success", "User " + user.getFirstName() + " has been registered successfully");
return "registrationsuccess";
}
private String getPrincipal(){
String userName = null;
Object principal = SecurityContextHolder.getContext().getAuthentication().getPrincipal();
if (principal instanceof UserDetails) {
userName = ((UserDetails)principal).getUsername();
} else {
userName = principal.toString();
}
return userName;
}
@ModelAttribute("roles")
public List initializeProfiles() {
return userProfileService.findAll();
}
} 第8步: 添加 SpringMVC 配置类
package com.websystique.springsecurity.configuration;

import org.springframework.beans.factory.annotation.Autowired;
import org.springframework.context.annotation.ComponentScan;
import org.springframework.context.annotation.Configuration;
import org.springframework.format.FormatterRegistry;
import org.springframework.web.servlet.config.annotation.EnableWebMvc;
import org.springframework.web.servlet.config.annotation.ResourceHandlerRegistry;
import org.springframework.web.servlet.config.annotation.ViewResolverRegistry;
import org.springframework.web.servlet.config.annotation.WebMvcConfigurerAdapter;
import org.springframework.web.servlet.view.InternalResourceViewResolver;
import org.springframework.web.servlet.view.JstlView;

@Configuration
@EnableWebMvc
@ComponentScan(basePackages = "com.websystique.springsecurity")
public class HelloWorldConfiguration extends WebMvcConfigurerAdapter {

    @Autowired
    RoleToUserProfileConverter roleToUserProfileConverter;


    @Override
    public void configureViewResolvers(ViewResolverRegistry registry) {
        InternalResourceViewResolver viewResolver = new InternalResourceViewResolver();
        viewResolver.setViewClass(JstlView.class);
        viewResolver.setPrefix("/WEB-INF/views/");
        viewResolver.setSuffix(".jsp");
        registry.viewResolver(viewResolver);
    }

    /*
     * Configure ResourceHandlers to serve static resources like CSS/ Javascript etc...
     *
     */
    @Override
    public void addResourceHandlers(ResourceHandlerRegistry registry) {
        registry.addResourceHandler("/static/**").addResourceLocations("/static/");
    }

    /*
     * Configure Converter to be used.
     * In our example, we need a converter to convert string values[Roles] to UserProfiles in newUser.jsp
     */
    @Override
    public void addFormatters(FormatterRegistry registry) {
        registry.addConverter(roleToUserProfileConverter);
    }


}
在此类中唯一有兴趣的是注册可以负责通过id转换为对象的转换器。
这需要在jsp中处理1对多的关系。
在用户创建时,一个用户可以分配多个角色或者用户配置文件(roles/userProfiles),因此我们需要一个转换器,它能够根据id来建立特定的角色和用户配置之间的map。下面提供的就是这个转换类。
---------译者增加 start---明明如月--------
以上配置对应的xml配置如下
/static/**" location="/static/" />
第9步: 添加Initializer(初始化器)类
package com.websystique.springsecurity.configuration;

import org.springframework.beans.factory.annotation.Autowired;
import org.springframework.core.convert.converter.Converter;
import org.springframework.stereotype.Component;

import com.websystique.springsecurity.model.UserProfile;
import com.websystique.springsecurity.service.UserProfileService;

@Component
public class RoleToUserProfileConverter implements Converter{

    @Autowired
    UserProfileService userProfileService;

    /*
     * Gets UserProfile by Id
     * @see org.springframework.core.convert.converter.Converter#convert(java.lang.Object)
     */
    public UserProfile convert(Object element) {
        Integer id = Integer.parseInt((String)element);
        UserProfile profile= userProfileService.findById(id);
        System.out.println("Profile : "+profile);
        return profile;
    }

    /*
     * Gets UserProfile by type
     * @see org.springframework.core.convert.converter.Converter#convert(java.lang.Object)
     */
    /*
    public UserProfile convert(Object element) {
        String type = (String)element;
        UserProfile profile= userProfileService.findByType(type);
        System.out.println("Profile ... : "+profile);
        return profile;
    }
    */

}
第10步: 添加Initializer(初始化器)类
package com.websystique.springsecurity.configuration;

import org.springframework.web.servlet.support.AbstractAnnotationConfigDispatcherServletInitializer;

public class SpringMvcInitializer extends AbstractAnnotationConfigDispatcherServletInitializer {

    @Override
    protected Class[] getRootConfigClasses() {
        return new Class[] { HelloWorldConfiguration.class };
    }

    @Override
    protected Class[] getServletConfigClasses() {
        return null;
    }

    @Override
    protected String[] getServletMappings() {
        return new String[] { "/" };
    }

}
Hibernate 配置部分
----------------------
第11步: 添加 Controller(控制器)
hibernate配置类添加 @Bean对DataSource配置的方法以及SessionFactory & Transaction Manager上。
数据源属性从application.properties文件获取,其中也包含连接MySQL 数据库的链接等。
package com.websystique.springsecurity.configuration;

import java.util.Properties;

import javax.sql.DataSource;

import org.hibernate.SessionFactory;
import org.springframework.beans.factory.annotation.Autowired;
import org.springframework.context.annotation.Bean;
import org.springframework.context.annotation.ComponentScan;
import org.springframework.context.annotation.Configuration;
import org.springframework.context.annotation.PropertySource;
import org.springframework.core.env.Environment;
import org.springframework.jdbc.datasource.DriverManagerDataSource;
import org.springframework.orm.hibernate4.HibernateTransactionManager;
import org.springframework.orm.hibernate4.LocalSessionFactoryBean;
import org.springframework.transaction.annotation.EnableTransactionManagement;

@Configuration
@EnableTransactionManagement
@ComponentScan({ "com.websystique.springsecurity.configuration" })
@PropertySource(value = { "classpath:application.properties" })
public class HibernateConfiguration {

    @Autowired
    private Environment environment;

    @Bean
    public LocalSessionFactoryBean sessionFactory() {
        LocalSessionFactoryBean sessionFactory = new LocalSessionFactoryBean();
        sessionFactory.setDataSource(dataSource());
        sessionFactory.setPackagesToScan(new String[] { "com.websystique.springsecurity.model" });
        sessionFactory.setHibernateProperties(hibernateProperties());
        return sessionFactory;
     }

    @Bean
    public DataSource dataSource() {
        DriverManagerDataSource dataSource = new DriverManagerDataSource();
        dataSource.setDriverClassName(environment.getRequiredProperty("jdbc.driverClassName"));
        dataSource.setUrl(environment.getRequiredProperty("jdbc.url"));
        dataSource.setUsername(environment.getRequiredProperty("jdbc.username"));
        dataSource.setPassword(environment.getRequiredProperty("jdbc.password"));
        return dataSource;
    }

    private Properties hibernateProperties() {
        Properties properties = new Properties();
        properties.put("hibernate.dialect", environment.getRequiredProperty("hibernate.dialect"));
        properties.put("hibernate.show_sql", environment.getRequiredProperty("hibernate.show_sql"));
        properties.put("hibernate.format_sql", environment.getRequiredProperty("hibernate.format_sql"));
        return properties;
    }

    @Bean
    @Autowired
    public HibernateTransactionManager transactionManager(SessionFactory s) {
       HibernateTransactionManager txManager = new HibernateTransactionManager();
       txManager.setSessionFactory(s);
       return txManager;
    }
}
application.properties
jdbc.driverClassName = com.mysql.jdbc.Driver
jdbc.url = jdbc:mysql://localhost:3306/websystique
jdbc.username = myuser
jdbc.password = mypassword
hibernate.dialect = org.hibernate.dialect.MySQLDialect
hibernate.show_sql = true
hibernate.format_sql = true
DAO, Model & Service部分
-------------------------------------------------------------------------
第12步:创建 Model(模型)类
一个用户可以有多种角色
[DBA,ADMIN,USER],一个角色也可以被分配给多个用户。
因此在UserProfile[role] 和User之间,这里有Many-To-Many 关系映射。
我们保持的是单向映射即[User 对UserProfile],
因为我们主要关心通过给定的用户查找角色。
package com.websystique.springsecurity.model;

import java.util.HashSet;
import java.util.Set;

import javax.persistence.Column;
import javax.persistence.Entity;
import javax.persistence.FetchType;
import javax.persistence.GeneratedValue;
import javax.persistence.GenerationType;
import javax.persistence.Id;
import javax.persistence.JoinColumn;
import javax.persistence.JoinTable;
import javax.persistence.ManyToMany;
import javax.persistence.Table;

import org.hibernate.validator.constraints.NotEmpty;

@Entity
@Table(name="APP_USER")
public class User {

    @Id @GeneratedValue(strategy=GenerationType.IDENTITY)
    private int id;

    @NotEmpty
    @Column(name="SSO_ID", unique=true, nullable=false)
    private String ssoId;

    @NotEmpty
    @Column(name="PASSWORD", nullable=false)
    private String password;

    @NotEmpty
    @Column(name="FIRST_NAME", nullable=false)
    private String firstName;

    @NotEmpty
    @Column(name="LAST_NAME", nullable=false)
    private String lastName;

    @NotEmpty
    @Column(name="EMAIL", nullable=false)
    private String email;

    @NotEmpty
    @Column(name="STATE", nullable=false)
    private String state=State.ACTIVE.getState();

    @ManyToMany(fetch = FetchType.EAGER)
    @JoinTable(name = "APP_USER_USER_PROFILE",
             joinColumns = { @JoinColumn(name = "USER_ID") },
             inverseJoinColumns = { @JoinColumn(name = "USER_PROFILE_ID") })
    private Set userProfiles = new HashSet();

    public int getId() {
        return id;
    }

    public void setId(int id) {
        this.id = id;
    }

    public String getSsoId() {
        return ssoId;
    }

    public void setSsoId(String ssoId) {
        this.ssoId = ssoId;
    }

    public String getPassword() {
        return password;
    }

    public void setPassword(String password) {
        this.password = password;
    }

    public String getFirstName() {
        return firstName;
    }

    public void setFirstName(String firstName) {
        this.firstName = firstName;
    }

    public String getLastName() {
        return lastName;
    }

    public void setLastName(String lastName) {
        this.lastName = lastName;
    }

    public String getEmail() {
        return email;
    }

    public void setEmail(String email) {
        this.email = email;
    }

    public String getState() {
        return state;
    }

    public void setState(String state) {
        this.state = state;
    }

    public Set getUserProfiles() {
        return userProfiles;
    }

    public void setUserProfiles(Set userProfiles) {
        this.userProfiles = userProfiles;
    }

    @Override
    public int hashCode() {
        final int prime = 31;
        int result = 1;
        result = prime * result + id;
        result = prime * result + ((ssoId == null) ? 0 : ssoId.hashCode());
        return result;
    }

    @Override
    public boolean equals(Object obj) {
        if (this == obj)
            return true;
        if (obj == null)
            return false;
        if (!(obj instanceof User))
            return false;
        User other = (User) obj;
        if (id != other.id)
            return false;
        if (ssoId == null) {
            if (other.ssoId != null)
                return false;
        } else if (!ssoId.equals(other.ssoId))
            return false;
        return true;
    }

    @Override
    public String toString() {
        return "User [id=" + id + ", ssoId=" + ssoId + ", password=" + password
                + ", firstName=" + firstName + ", lastName=" + lastName
                + ", email=" + email + ", state=" + state + ", userProfiles=" + userProfiles +"]";
    }


}
package com.websystique.springsecurity.model;
import javax.persistence.Column;
import javax.persistence.Entity;
import javax.persistence.GeneratedValue;
import javax.persistence.GenerationType;
import javax.persistence.Id;
import javax.persistence.Table;
@Entity
@Table(name="USER_PROFILE")
public class UserProfile {
@Id @GeneratedValue(strategy=GenerationType.IDENTITY)
private int id;
@Column(name="TYPE", length=15, unique=true, nullable=false)
private String type = UserProfileType.USER.getUserProfileType();
public int getId() {
return id;
}
public void setId(int id) {
this.id = id;
}
public String getType() {
return type;
}
public void setType(String type) {
this.type = type;
}
@Override
public int hashCode() {
final int prime = 31;
int result = 1;
result = prime * result + id;
result = prime * result + ((type == null) ? 0 : type.hashCode());
return result;
}
@Override
public boolean equals(Object obj) {
if (this == obj)
return true;
if (obj == null)
return false;
if (!(obj instanceof UserProfile))
return false;
UserProfile other = (UserProfile) obj;
if (id != other.id)
return false;
if (type == null) {
if (other.type != null)
return false;
} else if (!type.equals(other.type))
return false;
return true;
}
@Override
public String toString() {
return "UserProfile [id=" + id + ", type=" + type + "]";
}
}package com.websystique.springsecurity.model;
public enum UserProfileType {
USER("USER"),
DBA("DBA"),
ADMIN("ADMIN");
String userProfileType;
private UserProfileType(String userProfileType){
this.userProfileType = userProfileType;
}
public String getUserProfileType(){
return userProfileType;
}
}package com.websystique.springsecurity.model;
public enum State {
ACTIVE("Active"),
INACTIVE("Inactive"),
DELETED("Deleted"),
LOCKED("Locked");
private String state;
private State(final String state){
this.state = state;
}
public String getState(){
return this.state;
}
@Override
public String toString(){
return this.state;
}
public String getName(){
return this.name();
}
}第13步:创建Dao层
package com.websystique.springsecurity.dao;

import java.io.Serializable;

import java.lang.reflect.ParameterizedType;

import org.hibernate.Criteria;
import org.hibernate.Session;
import org.hibernate.SessionFactory;
import org.springframework.beans.factory.annotation.Autowired;

public abstract class AbstractDao {

    private final Class persistentClass;

    @SuppressWarnings("unchecked")
    public AbstractDao(){
        this.persistentClass =(Class) ((ParameterizedType) this.getClass().getGenericSuperclass()).getActualTypeArguments()[1];
    }

    @Autowired
    private SessionFactory sessionFactory;

    protected Session getSession(){
        return sessionFactory.getCurrentSession();
    }

    @SuppressWarnings("unchecked")
    public T getByKey(PK key) {
        return (T) getSession().get(persistentClass, key);
    }

    public void persist(T entity) {
        getSession().persist(entity);
    }

    public void delete(T entity) {
        getSession().delete(entity);
    }

    protected Criteria createEntityCriteria(){
        return getSession().createCriteria(persistentClass);
    }


}
package com.websystique.springsecurity.dao;
import com.websystique.springsecurity.model.User;
public interface UserDao {
void save(User user);
User findById(int id);
User findBySSO(String sso);
}package com.websystique.springsecurity.dao;
import org.hibernate.Criteria;
import org.hibernate.criterion.Restrictions;
import org.springframework.stereotype.Repository;
import com.websystique.springsecurity.model.User;
@Repository("userDao")
public class UserDaoImpl extends AbstractDao implements UserDao {
public void save(User user) {
persist(user);
}
public User findById(int id) {
return getByKey(id);
}
public User findBySSO(String sso) {
Criteria crit = createEntityCriteria();
crit.add(Restrictions.eq("ssoId", sso));
return (User) crit.uniqueResult();
}
} package com.websystique.springsecurity.dao;
import java.util.List;
import com.websystique.springsecurity.model.UserProfile;
public interface UserProfileDao {
List findAll();
UserProfile findByType(String type);
UserProfile findById(int id);
} package com.websystique.springsecurity.dao;
import java.util.List;
import org.hibernate.Criteria;
import org.hibernate.criterion.Order;
import org.hibernate.criterion.Restrictions;
import org.springframework.stereotype.Repository;
import com.websystique.springsecurity.model.UserProfile;
@Repository("userProfileDao")
public class UserProfileDaoImpl extends AbstractDaoimplements UserProfileDao{
@SuppressWarnings("unchecked")
public List findAll(){
Criteria crit = createEntityCriteria();
crit.addOrder(Order.asc("type"));
return (List)crit.list();
}
public UserProfile findById(int id) {
return getByKey(id);
}
public UserProfile findByType(String type) {
Criteria crit = createEntityCriteria();
crit.add(Restrictions.eq("type", type));
return (UserProfile) crit.uniqueResult();
}
} 第14步: 创建 Service层
package com.websystique.springsecurity.service;

import java.util.List;

import com.websystique.springsecurity.model.UserProfile;

public interface UserProfileService {

    List findAll();

    UserProfile findByType(String type);

    UserProfile findById(int id);
}
package com.websystique.springsecurity.service;
import java.util.List;
import org.springframework.beans.factory.annotation.Autowired;
import org.springframework.stereotype.Service;
import org.springframework.transaction.annotation.Transactional;
import com.websystique.springsecurity.dao.UserProfileDao;
import com.websystique.springsecurity.model.UserProfile;
@Service("userProfileService")
@Transactional
public class UserProfileServiceImpl implements UserProfileService{
@Autowired
UserProfileDao dao;
public List findAll() {
return dao.findAll();
}
public UserProfile findByType(String type){
return dao.findByType(type);
}
public UserProfile findById(int id) {
return dao.findById(id);
}
} package com.websystique.springsecurity.service;
import com.websystique.springsecurity.model.User;
public interface UserService {
void save(User user);
User findById(int id);
User findBySso(String sso);
}package com.websystique.springsecurity.service;
import org.springframework.beans.factory.annotation.Autowired;
import org.springframework.security.crypto.password.PasswordEncoder;
import org.springframework.stereotype.Service;
import org.springframework.transaction.annotation.Transactional;
import com.websystique.springsecurity.dao.UserDao;
import com.websystique.springsecurity.model.User;
@Service("userService")
@Transactional
public class UserServiceImpl implements UserService{
@Autowired
private UserDao dao;
@Autowired
private PasswordEncoder passwordEncoder;
public void save(User user){
user.setPassword(passwordEncoder.encode(user.getPassword()));
dao.save(user);
}
public User findById(int id) {
return dao.findById(id);
}
public User findBySso(String sso) {
return dao.findBySSO(sso);
}
}Views(视图) 部分
--------------------------------
第15步: 添加Views
login.jsp
<%@ page language="java" contentType="text/html; charset=ISO-8859-1" pageEncoding="ISO-8859-1"%>
<%@ taglib prefix="c" uri="http://java.sun.com/jsp/jstl/core"%>
HelloWorld Login page
注意:和 CSRF 相关的是
这一行的目的是防止CSRF攻击。正如你所见jsp中CSRF参数使用EL表达式获取的。因此需要允许el表达式:
需要在jsp头添加如下一行:
<%@ page isELIgnored="false"%><%@ page language="java" contentType="text/html; charset=ISO-8859-1" pageEncoding="ISO-8859-1"%>
<%@ taglib prefix="c" uri="http://java.sun.com/jsp/jstl/core"%>
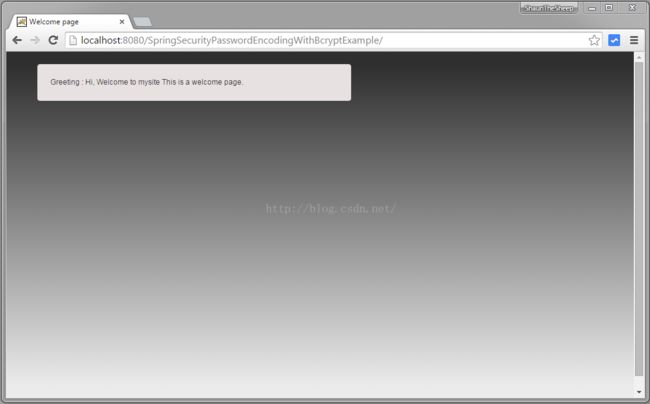
Welcome page
Greeting : ${greeting}
This is a welcome page.
admin.jsp
<%@ page language="java" contentType="text/html; charset=ISO-8859-1" pageEncoding="ISO-8859-1"%>
<%@ taglib prefix="c" uri="http://java.sun.com/jsp/jstl/core"%>


    Admin page


        Dear ${user}, Welcome to Admin Page.


        Would you like to Add Some Users to keep yourself busy?


        ">Logout
<%@ page language="java" contentType="text/html; charset=ISO-8859-1" pageEncoding="ISO-8859-1"%>
<%@ taglib prefix="c" uri="http://java.sun.com/jsp/jstl/core"%>
DBA page
newuser.jsp
<%@ page language="java" contentType="text/html; charset=ISO-8859-1" pageEncoding="ISO-8859-1"%>
<%@ taglib prefix="form" uri="http://www.springframework.org/tags/form"%>
<%@ taglib prefix="c" uri="http://java.sun.com/jsp/jstl/core" %>
User Registration Form
New User Registration Form
<%@ page language="java" contentType="text/html; charset=ISO-8859-1" pageEncoding="ISO-8859-1"%>
<%@ taglib prefix="c" uri="http://java.sun.com/jsp/jstl/core" %>
User Registration Form
accessDenied.jsp
<%@ page language="java" contentType="text/html; charset=ISO-8859-1" pageEncoding="ISO-8859-1"%>
<%@ taglib prefix="c" uri="http://java.sun.com/jsp/jstl/core"%>


    AccessDenied page


    Dear ${user}, You are not authorized to access this page.


    ">Go to home OR ">Logout
第16步:构建和部署应用
现在构建 war 包(通过eclipse或者myeclipse)或者通过maven 命令行(
启动应用
mvn clean install). 在一个 Servlet 3.0 容器中发布本应用. 在这里我使用的是tomcat, 我将 war 文件放到
tomcat webapps 文件夹然后点击 tomcat安装目录的bin文件夹下的
start.bat .
打开浏览器 在地址栏输入localhost:8080/SpringSecurityPasswordEncodingWithBcryptExample/并回车
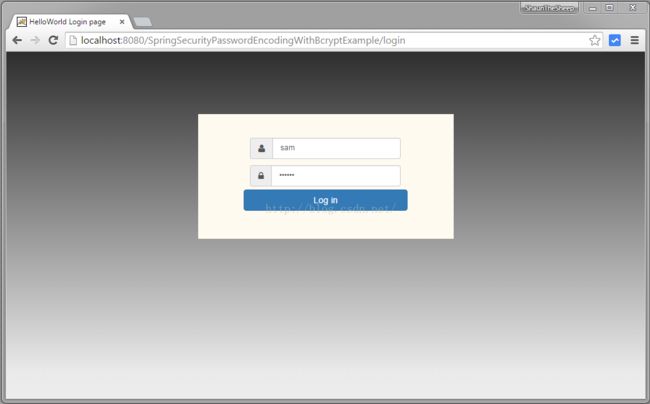
现在访问localhost:8080/SpringSecurityPasswordEncodingWithBcryptExample/admin ,
你将被转到登录界面,提供Admin权限的证书 (sam,abc125)(此时系统中的唯一用户)
提交

点击 添加用户(Add Some Users )链接
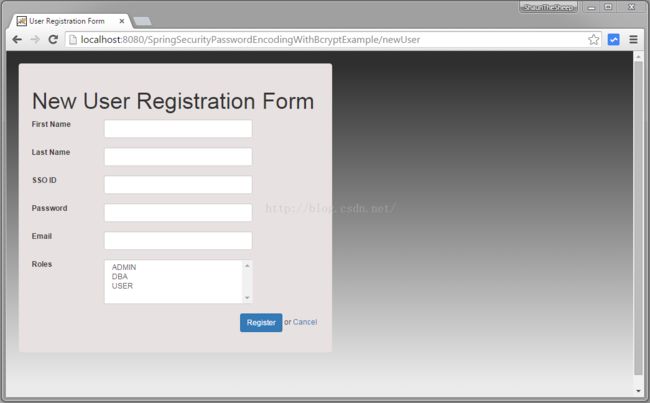
填写用户名密码等 并选择USER权限
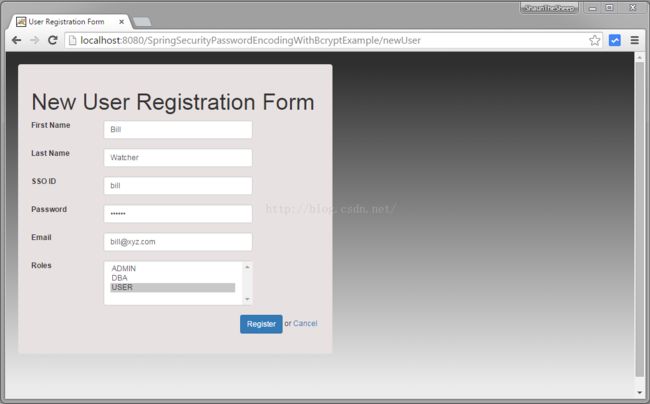
提交表单

再次添加用户 选择 ADMIN DBA两个角色

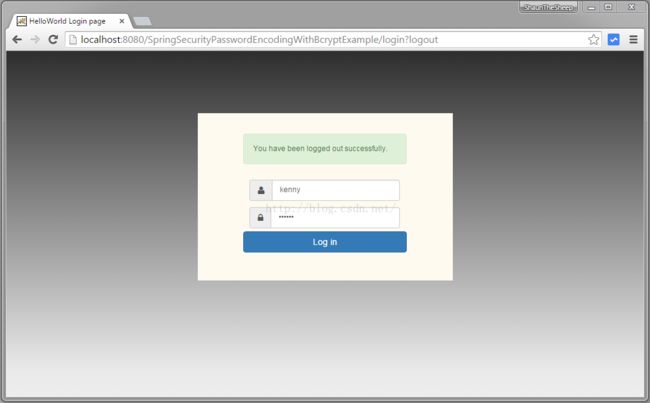
提交
退出后登陆 DBA证书 (kenny,abc127) (在上面步骤中创建的账户)
提交
然后访问
localhost:8080/SpringSecurityPasswordEncodingWithBcryptExample/db

然后验证一下数据库的数据:

本文结束,下一篇文章将展示
Spring Security 4 整合Hibernate的持久登登录校验。
基于注解的项目代码:http://websystique.com/?smd_process_download=1&download_id=1446
基于XML的项目代码:http://websystique.com/?smd_process_download=1&download_id=1859
SpringMVC 部分
------------------------------------------------------