MPC5748G笔记 CAN can_pal
文章目录
- 前言
- CAN简介
- 新建工程
- PE配置
- 补全代码
- 代码分析
- 调试运行
- 代码下载
- 微信公众号
前言
MPC5748G开发环境搭建
MPC5748G S32_SDK_PA_RTM_3.0.0 GPIO 调试仿真设置
MPC5748G SDK 定时器 timing_pal
MPC5748G UART uart_pal
前四篇讲了开发环境的搭建, GPIO的读写操作, 调试仿真的设置, 定时器的使用, 串口的使用等, 本篇介绍下CAN.
CAN简介
上篇说道 MPC5748G并没有专门的叫UART的东西, 使用INFlexD这个组件兼任的, 多达18个, 很是生猛, MPC5748G在CAN这个通信组件上也很厚道, 嗯, 霸道, MPC5748GRM.pdf中介绍了FlexCAN, 多达8个, 且均支持CANFD:

官方的DEVKIT-MPC5748G板子上引出了一路接收发器的CAN0(PB0 PB1):

这个TJA1044GT的片子也很给力, AEC-Q100, 支持CANFD:

下面的例子中暂时不用CANFD, 只用标准的CAN. 板子和CAN分析仪的连接方式如下图, 注意CAN分析仪的120Ω电阻要接上:
新建工程
步骤如下:
- 打开S32, File -> New -> S32DS Application Project
- 选择MCU: MPC5748G, 填入工程名
- 默认3个核都勾上了, 这里去掉Z4_1和Z2_2的勾选, 只保留Z4_0, 选择SDK: MPC5748G_SDK_Z4_0 3.0.0, 点击Finish结束.
PE配置
CAN配置:

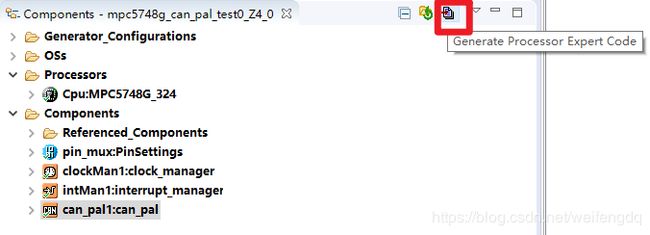
Components Library中双击添加can_pal组件:

点击can_pal1进行配置, 可以保持默认:

默认选的就是CAN_0, 不使能CAN FD, 位速率500 kbit/s. 这里不作改动.
如果要接收的CAN报文数量在16个以上时, 需要改动Number of Rx buffers的值, 但也要注意Tx+Rx buffers数量和不超过96, 否则会报错如下:

补全代码
/* Including necessary module. Cpu.h contains other modules needed for compiling.*/
#include "Cpu.h"

  volatile int exit_code = 0;
/* User includes (#include below this line is not maintained by Processor Expert) */

#define TX_STD_MAILBOX (0UL)
#define TX_EXT_MAILBOX (1UL)

can_buff_config_t stdBuffCfg =  {
    .enableFD = false,
    .enableBRS = false,
    .fdPadding = 0U,
    .idType = CAN_MSG_ID_STD,
    .isRemote = false
};

can_buff_config_t extBuffCfg =  {
    .enableFD = false,
    .enableBRS = false,
    .fdPadding = 0U,
    .idType = CAN_MSG_ID_EXT,
    .isRemote = false
};

can_message_t recvMsg;


//refer to can_callback_t
void canRxCallback(uint32_t instance,
                   can_event_t eventType,
                   uint32_t objIdx,
                   void *driverState)
{
  if(eventType == CAN_EVENT_RX_COMPLETE) {
    if(instance == can_pal1_instance.instIdx) {
    	if(recvMsg.id < 0x800) {	//not sure
    		if(recvMsg.data[0] == 0x01) {
    			CAN_Send(&can_pal1_instance, TX_STD_MAILBOX, &recvMsg);	//echo
    		} else {
    			can_message_t message = {
    			    .cs = 0U,
    			    .id = 0x111,
    			    .data[0] = 0x01,
					.data[1] = 0x01,
					.data[2] = 0x01,
					.data[3] = 0x01,
					.data[4] = 0x01,
					.data[5] = 0x01,
					.data[6] = 0x01,
					.data[7] = 0x01,
    			    .length = 8U
    			};
    			CAN_Send(&can_pal1_instance, TX_STD_MAILBOX, &message);
    		}
    	} else {
    		CAN_Send(&can_pal1_instance, TX_EXT_MAILBOX, &recvMsg);
    	}
        CAN_Receive(&can_pal1_instance, objIdx, &recvMsg);
    }
  }
}

/*!
  \brief The main function for the project.
  \details The startup initialization sequence is the following:
 * - startup asm routine
 * - main()
*/
int main(void)
{
  /* Write your local variable definition here */

  /*** Processor Expert internal initialization. DON'T REMOVE THIS CODE!!! ***/
  #ifdef PEX_RTOS_INIT
    PEX_RTOS_INIT();                   /* Initialization of the selected RTOS. Macro is defined by the RTOS component. */
  #endif
  /*** End of Processor Expert internal initialization.                    ***/

  /* Write your code here */
  /* For example: for(;;) { } */
    CLOCK_SYS_Init(g_clockManConfigsArr, CLOCK_MANAGER_CONFIG_CNT,
                        g_clockManCallbacksArr, CLOCK_MANAGER_CALLBACK_CNT);
    CLOCK_SYS_UpdateConfiguration(0U, CLOCK_MANAGER_POLICY_FORCIBLE);
    PINS_DRV_Init(NUM_OF_CONFIGURED_PINS, g_pin_mux_InitConfigArr);

    CAN_Init(&can_pal1_instance, &can_pal1_Config0);

    /* Configure TX buffer with index TX_MAILBOX*/
    CAN_ConfigTxBuff(&can_pal1_instance, TX_STD_MAILBOX, &stdBuffCfg);
    CAN_ConfigTxBuff(&can_pal1_instance, TX_EXT_MAILBOX, &extBuffCfg);

    /* Configure RX buffer with index RX_MAILBOX */
    CAN_ConfigRxBuff(&can_pal1_instance, 2, &stdBuffCfg, 0x123);
    CAN_ConfigRxBuff(&can_pal1_instance, 3, &stdBuffCfg, 0x456);
    CAN_ConfigRxBuff(&can_pal1_instance, 4, &extBuffCfg, 0x1234567);
    CAN_ConfigRxBuff(&can_pal1_instance, 5, &extBuffCfg, 0x1234568);

    CAN_InstallEventCallback(&can_pal1_instance, canRxCallback, NULL);
    CAN_Receive(&can_pal1_instance, 2, &recvMsg);
    CAN_Receive(&can_pal1_instance, 3, &recvMsg);
    CAN_Receive(&can_pal1_instance, 4, &recvMsg);
    CAN_Receive(&can_pal1_instance, 5, &recvMsg);

    while(1) {

    }


  /*** Don't write any code pass this line, or it will be deleted during code generation. ***/
  /*** RTOS startup code. Macro PEX_RTOS_START is defined by the RTOS component. DON'T MODIFY THIS CODE!!! ***/
  #ifdef PEX_RTOS_START
    PEX_RTOS_START();                  /* Startup of the selected RTOS. Macro is defined by the RTOS component. */
  #endif
  /*** End of RTOS startup code.  ***/
  /*** Processor Expert end of main routine. DON'T MODIFY THIS CODE!!! ***/
  for(;;) {
    if(exit_code != 0) {
      break;
    }
  }
  return exit_code;
  /*** Processor Expert end of main routine. DON'T WRITE CODE BELOW!!! ***/
} /*** End of main routine. DO NOT MODIFY THIS TEXT!!! ***/

/* END main */
代码分析
代码中:
- 先是初始化CAN:
CAN_Init(&can_pal1_instance, &can_pal1_Config0); - 配置发送的标准帧和扩展帧的Buffer
- 配置明确接收的ID(
0x123, 0x456, 0x1234567, 0x1234568)和邮箱(2, 3, 4, 5), ID要和标准帧(stdBuffCfg)和扩展帧(extBuffCfg)对应, 邮箱的个数和PE配置中的Number of Rx buffers有关, 默认16, 如果要接收的CAN报文数量在16个以上时, 需要改大Number of Rx buffers的值. - 安装CAN的事件回调函数:
CAN_InstallEventCallback(&can_pal1_instance, canRxCallback, NULL);, 只有上面配置过Rx Buffer的ID才能触发这个回调函数 - 开始接收
- CAN回调函数中把接收到的报文原封不动的传回去, 然后开始接收下一个报文, 当时接收到的是标准帧且首字节为
0x01时, 不回传, 改为发送ID为0x111, 数据为8个0x01的报文.
调试运行
调试设置, 这里用RAM, 会快一点, 掉电会消失:

调试运行, 打开CAN分析仪, 500kbit/s, 发送相应报文, 如图所示, 符号预期:

代码下载
https://download.csdn.net/download/weifengdq/12105129
微信公众号
欢迎扫描关注我的微信公众号, 及时获取最新文章:
![]()
